Table of Contents
Advertisement
Advertisement
Table of Contents

Subscribe to Our Youtube Channel
Related Manuals for Digital Foci Photo Book


Summary of Contents for Digital Foci Photo Book
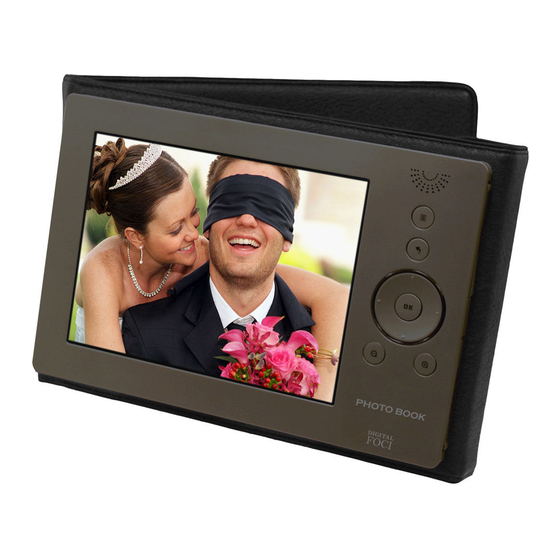
- Page 1 Photo Book 8” Portable Digital Photo Album User’s Guide...
- Page 2 Trademarks Photo Book and Digital Foci are trademarks of Digital Foci, Inc. All names and products mentioned within this document are registered trademarks of their respective companies. ©2009 Digital Foci, Inc. All rights reserved. This publication is intended for sole use by the owner of the associated device.
- Page 3 As the original purchaser of this product, you receive these warranties from Digital Foci, Inc. Your Photo Book (hereafter referred to as “Device”) will be free from defects in material and workmanship and will perform in substantial compliance with your user documentation accompanying Device for one year from the purchase date providing proper use of Device.
- Page 4 • Do not operate or store Photo Book in dusty environments. • Do not leave Photo Book under direct sunlight, in a parked car, or in other situations where the temperature may be above 140°F (60°C). • To prevent risk of heat buildup, place Photo Book in a well ventilated location.
-
Page 5: Table Of Contents
Copying Files from Computer to Photo Book Internal Memory ...... 11 2.6. Accessing Memory Card and USB Flash Drive on Photo Book ......12 Enjoying Photos and Videos on Photo Book ..........16 3.1. ... -
Page 6: Welcome
• Supported video formats – MJPEG, MPEG-1, MPEG-4 SP • Built-in 1 channel, 1.4W speaker • Runs on rechargeable Lithium-polymer battery with 2.5 hours of battery life • Comes with soft leather-like case that protects Photo Book and makes an attractive presentation Page 1... -
Page 7: Package Contents
• USB OTG cable (to USB flash drive) • Quick Start Guide 1.3. Latest Firmware New versions of the Photo Book firmware are periodically released with new features and format support to enhance your user experience. Check the Digital Foci website (http://www.digitalfoci.com/support ) for the latest available firmware updates and instructions. -
Page 8: Getting Started
Photo Book Overview There are 3 ways to view photos and videos on Photo Book: • Copy photos and videos from your computer to the Photo Book Internal Memory. You can also copy any music files you want to play as the background music. - Page 9 Photo Book (PBK-080) User’s Guide Page 4 Version 1.1-R0...
-
Page 10: Device Layout
Photo Book (PBK-080) User’s Guide 2.2. Device Layout Page 5 Version 1.1-R0... -
Page 11: Powering Photo Book
Powering Photo Book 2.3.1. Charging Photo Book Battery Photo Book has a battery life of approximately 2.5 hours on a full charge. You can charge the battery either by the included AC power adapter or by USB power from your computer. - Page 12 2. Auto-off Timer: You can set the Auto-off Timer so that if no button has been pressed and there is no activity for a certain amount of time, Photo Book will automatically turn off. This Auto Off feature will be temporarily disabled when the device is connected to the computer by USB.
-
Page 13: Setting Up Photo Book
Photo Book (PBK-080) User’s Guide 2.4. Setting Up Photo Book From the Home Screen, press MENU to display the Menu Options. Next, select Setup Icon to access the Setup screen. 2.4.1. Setup Options The following screen shows the main Setup screen. - Page 14 Photo Book (PBK-080) User’s Guide 2.4.3. Setup Option – Screen Brightness 1. Select Brightness Icon to adjust the brightness of the LCD screen. 2. Press LEFT / RIGHT to adjust the value between 0 and 10. The brightness of the screen will be adjusted real-time.
- Page 15 1. Select Auto Shutdown Timer Icon to adjust the amount of idle time allowed before Photo Book automatically shuts down to conserve battery life. 2. You can set the timer to a value between 5 minutes and 55 minutes. You can also select Off to disable this feature.
-
Page 16: Copying Files From Computer To Photo Book Internal Memory
Copying Files from Computer to Photo Book Internal Memory 2.5.1. Connecting Photo Book to Your Computer 1. Open the bottom door on the right side of Photo Book to access the USB port of Photo Book. 2. Connect Photo Book to your computer using the included USB mini-B cable. -
Page 17: Accessing Memory Card And Usb Flash Drive On Photo Book
2. Connect the mini end of the USB OTG cable into the USB port. Once a memory card is inserted or a USB flash drive is connected, Photo Book will automatically recognize the device. The Menu options will pop up on the upper left corner of the screen. - Page 18 6. A confirmation window will pop up, showing (1) the location on the Photo Book that the files will be copied to, and (2) free space on the Photo Book Internal Memory. Select Yes and press OK to start the copy.
- Page 19 10. From the Backup Summary screen, you can select one of the following: • Compare: Select Compare to verify that each file on the card matches each file copied to Photo Book. This ensures that there are no copy errors during the copy process.
- Page 20 Photo Book (PBK-080) User’s Guide • On the main Photo Album view on Photo Book, each folder or sub-folder will be displayed as a separate album and be displayed with its original folder name. If the photos are in the root directory of the memory card or...
-
Page 21: Enjoying Photos And Videos On Photo Book
The main Photo Album screen displays all your available photo albums on the Photo Book Internal Memory. On Photo Book, each folder and sub-folder inside the default PHOTO folder with supported photos and videos will be displayed as a separate album. In other words, if a folder has folders inside it, each unique folder (regardless of the directly structure level) will be listed as a separate album. -
Page 22: Viewing Photos In Photo Thumbnail View
Delete the highlighted album Go to Setup See Section 2.6 Accessing Memory Card and USB Flash Drive on Photo Book. 3.2. Viewing Photos in Photo Thumbnail View Selecting an album from the main Photo Album View takes you to Photo Thumbnail View of the selected album. -
Page 23: Viewing Photos In Full Screen Mode
• Press ESC to return to main Photo Album View. • Press MENU to access the following Menu options: Menu Option Choose this option to… Start a Photo Book Slideshow Start a Full-Screen Slideshow Delete the highlighted photo 3.3. Viewing Photos in Full Screen Mode From Photo Thumbnail View, move the cursor to the photo you want to view and press OK to display the photo full screen. - Page 24 Press OK to rotate the photo 90 degrees counter-clockwise. Note: Rotating the photo will only change the display on the Photo Book screen and will not alter your original photo file. The rotated photo will return to its original orientation the next time it is displayed.
-
Page 25: Playing Automatic Photo Slideshow
User’s Guide 3.4. Playing Automatic Photo Slideshow From Photo Thumbnail View, you can start an automatic Photo Book slideshow or Full-Screen slideshow with adjustable time intervals. 1. From Photo Thumbnail View, press MENU to access the MENU option. 2. Select Photo Book Slideshow Icon to start a Photo Book slideshow. -
Page 26: Viewing Videos On Photo Book
• Press ESC to return to Photo Thumbnail View. 3.7. Deleting Photos or Albums You can delete a photo or a video, or an entire album on Photo Book. Deleting a photo or video: 1. From Photo Thumbnail View, navigate to the photo/video you want to delete. - Page 27 Photo Book (PBK-080) User’s Guide 1. From main Photo Album View, navigate to the album you want to delete. 2. Press MENU to access the Menu options. 3. Browse to and press OK to select Delete Icon 4. At the confirmation message, ‘Delete?’ select Yes and press OK to confirm the deletion.
-
Page 28: Frequently Asked Questions & Troubleshooting
The aspect ratio on Photo Book is 4:3. If you have photos in a 3:2 or 16:9 aspect ratio, the photo will be displayed in a letterbox with black bars on top and bottom of the screen in the default view mode. - Page 29 Music files not copied into the MUSIC folder will not be played. Can I specify which music files to play with a specific photo album? No, all music files in the MUSIC folder on the Photo Book Internal Memory will play in the background in random order.
- Page 30 You will be notified about any important updates on your Photo Book. Technical Support If you have any questions about using your Photo Book, please contact Digital Foci, Inc. technical support at support@digitalfoci.com or call (888) NOW-FOCI / (888-669-3624).
-
Page 31: Digital Foci Lcd Display Pixel Policy
‘off’. The dark pixel anomaly will always be dark and will not show any color. Standard Pixel Policy Digital Foci warrants that any LCD display with an unacceptable number of pixel anomalies will be repaired or replaced. To qualify for repair or replacement under warranty, the number of pixel anomalies on the TFT LCD panel must exceed these industry standards. -
Page 32: Appendix - Technical Specifications
Photo Book (PBK-080) User’s Guide Appendix – Technical Specifications Model no. PBK-080 Display 8” digital TFT LCD screen (6.4” x 4.8”) Screen resolution 800 x 600 pixels 4 : 3 Picture aspect ratio Internal memory 4 GB CF, SD Card, SDHC Card, MMC, Memory Stick, MS PRO, xD... - Page 33 Photo Book (PBK-080) User’s Guide *RAW image formats supported: .CR2: 1Ds Mark2, 1IDs, 1Ds Mark3, 1D Mark3, 1D Mark2N, 1D Mark2, 1D, 5D, 5D Mark2, 10D, 20D, 30D, 40D, D30, D60, D400, 300D(Rebel), 350D(Rebel XT), Canon 400D(Rebel Xti), 450D (rebel XSi) .CRW: G1, G2, G3, G5, G6, G9, S30, S40, S45, S50, S60, S70, Pro1...
-
Page 34: Regulatory Compliance
TV. However, we do not guarantee the absence of interference. If you modify the device in any way, without approval from Digital Foci, Inc., your device may violate FCC regulations. Violation of FCC regulations may cause the FCC to void your rights to use the modified device. - Page 35 3111 Via Mondo, E. Rancho Dominguez, California, 90221 USA Copyright 2009 Digital Foci, Inc. All rights reserved.
Need help?
Do you have a question about the Photo Book and is the answer not in the manual?
Questions and answers