Table of Contents
Advertisement
Quick Links
Advertisement
Table of Contents

Related Manuals for Digital Foci Picture Porter 35


Summary of Contents for Digital Foci Picture Porter 35
- Page 1 Picture Porter 35 3.5” DIGITAL PHOTO MANAGER User’s Guide...
- Page 2 Guide. Nor does Digital Foci, Inc. make any commitment to update the information contained herein. Trademarks Picture Porter 35, PhotoMemo, and Digital Foci are trademarks of Digital Foci, Inc. All names and products mentioned within this document are registered trademarks of their respective companies.
- Page 3 As the original owner of this product, you receive these warranties from Digital Foci. Your Picture Porter 35 (hereafter referred to as “Device”) will be free from defects in material and workmanship and will perform in substantial compliance with your user documentation accompanying the Device for 1 year from the purchase date providing proper use of the Device.
- Page 4 To keep Picture Porter 35 in good condition and working properly, follow these basic guidelines: • Keep Picture Porter 35 in its carrying case for safe transport and storage. • When cleaning Picture Porter 35, do not use abrasive cloths or harsh chemicals.
-
Page 5: Table Of Contents
Copying Memory Card to Picture Porter 35 ..............21 4.1. Connecting Memory Cards or USB Flash Drive ............. 21 4.2. Copying from Memory Card or USB Flash Drive to Picture Porter 35 ..... 22 4.3. Understanding Default Backup Folder Name Assignments ........ 25 4.4. - Page 6 Picture Porter 35 User’s Guide 5.2. Selecting Items ........................ 28 5.3. Sorting in Folder View or Index View ................ 29 5.4. Using the On-screen Keyboard ................... 29 Commonly Used Functions Step-by-step ............... 30 6.1. Navigating Most Frequently Used Screen Modes ............30 6.2.
- Page 7 12.1. Copying Files to the Export Folder ................70 12.2. Understanding Default Export Folder Name Assignments ........72 12.3. Access Files in Export Folder on Picture Porter 35 ..........72 13. Managing Playlists ......................73 13.1. Playlist Manager Screen ....................74 13.2.
- Page 8 15. Using Picture Porter 35 with Other Devices ..............85 15.1. Using Picture Porter 35 with A/V Devices ..............85 15.2. Using Picture Porter 35 with Another Picture Porter 35 ........86 15.3. Using Picture Porter 35 with an USB Flash Drive ..........87 15.4.
-
Page 9: Welcome
Congratulations on purchasing your Picture Porter 35 – 3.5” Digital Photo Manager. 1.1. Ways to Use Picture Porter 35 Bring Picture Porter 35 with you anywhere you go to enjoy, share, back up, and manage your photos, videos, music, and other data in many different ways. - Page 10 PhotoMemo on cue. • Back up, transport, and archive data: o Use Picture Porter 35 as a portable hard drive for backing up important files from your computer. o Move data between computers with different operating systems (Windows, Mac, Linux) by using the USB connection on Picture Porter 35 as a common bridge.
-
Page 11: System Requirements
Macintosh – OS 10.6, 10.5, 10.4 o Linux – OS kernel versions 2.4.x & later 2) One available USB Port 1.3. Supported Memory Card Formats Picture Porter 35 has been tested to support the following memory card formats: Directly without adapter CompactFlash (CF) ... -
Page 12: Supported File Formats
* Refer to Section 20. Appendix – RAW Formats Supported details. 1.5. Package Contents Before using your Picture Porter 35, check that your package contains the following items: Picture Porter 35 Rechargeable Polymer Li-Ion battery AC power adapter ... -
Page 13: Understanding The Basics
Picture Porter 35 User’s Guide 2. Understanding the Basics 2.1. Picture Porter 35 Data Flow Overview Here is an overview of the Picture Porter 35 data flow: Input Source Picture Porter 35 Connection Memory card Memory card slots Computer USB port... -
Page 14: Device Layout
Picture Porter 35 User’s Guide 2.2. Device Layout Power Button Audio/Video Out Jack Memory Card Power LED Slot Doors HDD LED MENU JOG DIAL VAL +/- Battery Door Left Front Right Speaker Power Jack Bottom Wrist Strap Anchor Page 6... -
Page 15: Battery And Power Management
Picture Porter 35 User’s Guide 2.3. Battery and Power Management On a full charge, Picture Porter 35 is capable of up to 4 hours of continuous video playback and up to 3 hours of non-stop memory card copy. 2.3.1. Installing the Battery 1. - Page 16 The power indicator LED (the left one) shows the power status. Green: Picture Porter 35 is turned on and using battery power. Red: Picture Porter 35 is turned off and the battery is charging. When the battery is fully charged, the LED will turn OFF.
- Page 17 AC power immediately. * In the event that you are in the middle of a copy task when the Picture Porter 35 shuts down, the Picture Porter 35 will safely stop your copy in the middle of the task before shutting down.
-
Page 18: Home Screen Layout
Picture Porter 35 User’s Guide 2.4. Home Screen Layout The Home Screen on Picture Porter 35 allows you to navigate the icons and select your desired function. The following diagram gives an overview of the available selections. Press ENTER on the JOG DIAL to select the desired icon. -
Page 19: Navigation Basics
User’s Guide 2.5. Navigation Basics Picture Porter 35 is operated by 7 inputs all located on the right side for easy operation. The JOG DIAL and VAL + / - buttons have different functions for different screens as described in the diagram below. -
Page 20: Screen Flow Diagram
Picture Porter 35 User’s Guide 2.6. Screen Flow Diagram The following diagram shows the screen flow scheme of Picture Porter 35. Note that the icons for Backup-Albums-Music-Export are shortcuts to dedicated folder locations on the HD1 hard drive. Folder View... -
Page 21: Hard Drive Default Folder Structure
Picture Porter 35 User’s Guide 2.7. Hard Drive Default Folder Structure The required folders on Picture Porter 35 are grouped by the following categories: • Backup: All your memory card Backup operations will create new folders located in this folder. -
Page 22: Setting Up Picture Porter 35
Picture Porter 35 User’s Guide 3. Setting Up Picture Porter 35 The Setup menu is used to adjust the device to fit your unique preferences. It is divided into 3 sections each with 4 sub-sections. PLAYBACK: Slideshow – Photo – Video – Music SYSTEM SETTINGS: Time –... -
Page 23: Setting Playback Options
Picture Porter 35 User’s Guide 3.1. Setting Playback Options From Setup Level 1, highlight PLAYBACK and press ENTER to enter PLAYBACK Options. 3.1.1. Slideshow Options The following chart shows the available Slideshow options: SETUP MENU – Slideshow – MENU ITEM... - Page 24 Most digital cameras will capture photos in a 4:3 aspect ratio. The aspect ratio determines the width and height of the photo. The screen on the Picture Porter 35 is 4:3 and will display 4:3 photos completely on the full screen. Other aspect ratios will show in a letterbox under Fit Screen.
- Page 25 Picture Porter 35 User’s Guide 3.1.3. Video Options The following chart shows the available Video options: SETUP MENU – Video – MENU ITEM SELECTION Description Stereo, Audio Mode Select audio mode. Left channel, Right channel Device will resize the video for best display with original aspect ratio.
-
Page 26: Setting System Settings
2. Roll the JOG DIAL up or down to set the hour. Press VAL +/- to change between the hour and minute fields. Note: Picture Porter 35 uses a 24-hour clock. The clock starts at 0:00 as 12:00 AM (midnight), 12:01 AM will display as 00:01, 12:30 PM will be 12:30, 1:25 PM will be 13:35, and 11:59 PM is 23:59. - Page 27 Picture Porter 35 User’s Guide • Date Set: Set the system date by month, day, and year. 1. Navigate to Date Set and press ENTER to set the date. 2. Roll the JOG DIAL to change the current value and the VAL +/- buttons to change between the date fields.
-
Page 28: Viewing Technical Information
Each of the Device options is explained below. • Auto Shutdown: Adjust the amount of idle time allowed before Picture Porter 35 automatically shuts down to conserve battery life. Choose a value between 1 minute and 30 minutes or Off. Select Off to disable this feature. -
Page 29: Copying Memory Card To Picture Porter 35
4. Copying Memory Card to Picture Porter 35 You can transfer photos and other data on memory cards directly to Picture Porter 35 and vice versa. Here are some situations where this can be useful: • While on vacation, you can copy pictures directly from your digital camera memory card to free up limited memory card space and keep taking pictures. -
Page 30: Copying From Memory Card Or Usb Flash Drive To Picture Porter 35
USB-OTG cable. 2. Connect the mini-USB (small) end of the USB-OTG cable into the USB port on the Picture Porter 35. Once a memory card is inserted or a USB flash drive is connected, Picture Porter 35 will automatically recognize the device and display a picture icon of the inserted device on the Home Screen. - Page 31 This function allows you to copy the entire contents of the memory card directly to the USB flash drive. 2. After BACKUP to HD1 is selected, Picture Porter 35 will show you: (1) Target Device, (2) Folder Path, (3) default Folder...
- Page 32 Picture Porter 35 User’s Guide Select one of the following options: • OK: Accept the default folder name and start the backup. • FOLDER: Select existing folder as target for back up to perform an incremental backup. Incremental folder selection: Select existing folder for the backup.
-
Page 33: Understanding Default Backup Folder Name Assignments
Folder View. • Confirm: Verify that each file on the memory device matches each file copied to the Picture Porter 35 bit for bit. This will ensure that there were no errors during the copy. • OK: Close the Backup Summary and go to Home Screen. -
Page 34: Backing Up Selected Folders Or Files
3. Press MENU and select File Management > Backup. 4. Select desired back up options as with a normal full backup. 4.5. Accessing Your Copied Photos on Picture Porter 35 Navigate to and select Backup from the Home Screen to access photos that have been backed up. -
Page 35: Basic Operations
Picture Porter 35 User’s Guide 5. Basic Operations 5.1. Navigating Folder View The Folder View will be the most used screen on your Picture Porter 35. Through the Folder View you will access and manage the contents of the hard drive and connected memory devices. -
Page 36: Selecting Items
Picture Porter 35 User’s Guide 5.2. Selecting Items In Folder View or Index View – List View, the selected photos are shown with a checkmark in the checkbox. In Index View – Thumbnail Views and Full Screen View, the selected photos are shown with a solid yellow box around the photo. -
Page 37: Sorting In Folder View Or Index View
Picture Porter 35 User’s Guide 5.3. Sorting in Folder View or Index View By default, when the contents of a folder are displayed, the files will be sorted by File Name in alphabetically order. You can choose to change to sort by Date (created date), by File Size (in ascending order), by File Type, and by Shuffle (random order). -
Page 38: Commonly Used Functions Step-By-Step
Picture Porter 35 User’s Guide 6. Commonly Used Functions Step-by-step 6.1. Navigating Most Frequently Used Screen Modes Home Screen ESC - <no action> Menu - Show/hide menu (for devices) Roll [] - Cursor up Enter - Select/deselect item Roll [] - Cursor down... -
Page 39: Finding Your Photos And Index View
Picture Porter 35 User’s Guide 6.2. Finding Your Photos and Index View The Index View provides different layouts for you to review, select, organize, and present your photos, music, and video files. 1) From the Home Screen select the memory location containing the photos to view. - Page 40 Picture Porter 35 User’s Guide Index View Layout Options List View This view is the same layout as the Folder View screen. You will be able to see longer file names, a thumbnail of the highlighted photo, and basic details of the highlighted photo.
-
Page 41: Backing Up Entire Memory Card To Hd1 - With Incremental Option
Picture Porter 35 User’s Guide 6.3. Backing Up Entire Memory Card to HD1 - with Incremental Option The Backup feature has a new option that allows you to perform an incremental backup to an existing folder. This will allow you to more easily manage your backups into new or dedicated folders. - Page 42 Picture Porter 35 User’s Guide RENAME: ESC - Cancel rename Menu - Delete previous character Roll [] - Move character selector Enter - Select character Roll [] - Move character selector [+] - Move cursor forward [-] - Move cursor back 4) During the backup, the Copy Progress screen will appear.
-
Page 43: Backing Up Selected Files From Memory Card To Hd1
Picture Porter 35 User’s Guide 6.4. Backing Up Selected Files from Memory Card to HD1 If you want to back up only a selection of files and/or folders from a memory card to HD1, you can avoid having to back up the entire card. -
Page 44: Backing Up Usb Device To Hd1
You can back up files from a USB Device directly to HD1 through the MENU options for the USB Device. 1) Connect your USB Device to the Picture Porter 35 with the provided USB-OTG cable. Note: Make sure that the Picture... -
Page 45: Playing Slideshow With Music Or Photomemo
Picture Porter 35 User’s Guide 6.6. Playing Slideshow with Music or PhotoMemo From either Folder View or Index View, you can choose to play selected photos, videos, and music in a slideshow. 1) From Folder View or Index View press [MENU] select 'Play Slideshow'. -
Page 46: Exporting Selection To Hd1 Or Usb Device
Picture Porter 35 User’s Guide 6.7. Exporting Selection to HD1 or USB Device Selections can be exported to HD1 or any connected memory device (memory card or USB storage device). Exported items will be copied to the Export folder on the target device. -
Page 47: Adding Photos, Music, Video To Playlist
Picture Porter 35 User’s Guide 6.8. Adding Photos, Music, Video to Playlist From Folder View and Index View you can add selected photos, music, and videos to existing playlists or create new playlists from your selection. 1) After making your selection, press [MENU] and select 'Add to Playlist' and the desired selection option. -
Page 48: Playing, Organizing, And Exporting Playlist
Playing, Organizing, and Exporting Playlist With the Playlist feature, you can create limitless combinations of your photos, music, and video files stored on the Picture Porter 35. You can arrange the photos and videos in the Playlist to play in a specified order. -
Page 49: Exporting (Folder And Device) Playlist Items
Export folder of HD1 or a connected memory device. The original files of the playlist items will be copied to the export location. When exporting to another Picture Porter 35 the playlist file will also be copied to the Playlist Manager of the target Picture Porter 35. -
Page 50: Making Photomemo Recording For Photos
Picture Porter 35 User’s Guide 6.11. Making PhotoMemo Recording for Photos The PhotoMemo recording feature allows you to record voice memos for each individual photo. This allows you to make notes to yourself while ideas are fresh in your mind or you can create a personal photo slideshow for family, friends, or business where each photo is introduced in your own voice. -
Page 51: Viewing Text (.Txt) Files
Picture Porter 35 User’s Guide 6.12. Viewing Text (.TXT) Files You can view text files that have the .TXT file extension on your Picture Porter 35. This will be useful when you want to keep any schedule, contact, or other pertinent information together with a certain set of photos. -
Page 52: Viewing Photo Iptc Metadata
Picture Porter 35 User’s Guide 6.13. Viewing Photo IPTC Metadata For photos that contain IPTC metadata, you can view the metadata on the screen to learn about the descriptions and copyright information for that photo. 1) From the Index View - Full Screen View, press [MENU] and select 'View IPTC'. -
Page 53: Enjoying Slideshow With Photos, Video, Music
User’s Guide 7. Enjoying Slideshow with Photos, Video, Music You can use Picture Porter 35 to view photos stored on Picture Porter 35 or on inserted memory cards or USB flash drive. As you view the photos, you can rotate, zoom, and pan the photos, view EXIF information, view histogram, view IPTC details, display IPTC comments with the photos, and play them as a slideshow. -
Page 54: User's Guide
Picture Porter 35 User’s Guide MENU – FOLDER VIEW Selection Submenu Description Start playing slideshow of selected photos. If no items are selected, all the photos in the folder will be included. Play – – – Slideshow Note: This will only works if there are individual photo, video, or music files in the selected folder. -
Page 55: Viewing Photos, Video, Music In Index View
Folder. The Backup and Export functions can be directed to the respective Backup and Export folders on the Picture Porter 35 or a connected memory device. 7.2. Viewing Photos, Video, Music in Index View The Index View is a convenient way to view the contents (photos, video, music) within a specific folder. -
Page 56: User's Guide
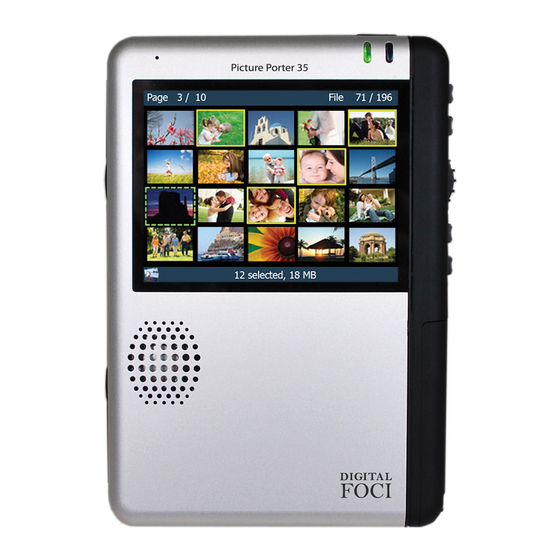
Picture Porter 35 User’s Guide Index View - Thumbnail Views The following screens show the different Index View thumbnail layouts. Page X of total # pages Photo X of total # photos Selected item: Shown with solid box Total number and size of files selected... -
Page 57: User's Guide
The Delete option is not available in Index View. Use Folder View for Delete. The Backup and Export functions can be directed to the respective Backup and Export folders on the Picture Porter 35 or a connected memory device. Page 49... -
Page 58: User's Guide
Picture Porter 35 User’s Guide Index View - Full Screen View The Index View Full Screen View controls vary slightly from the Index View Thumbnail views. In the Full Screen View, you can view the photos on the full screen to select or de-select while advancing the photos manually with the Jog Dial. -
Page 59: Playing Slideshow
Picture Porter 35 User’s Guide 7.3. Playing Slideshow You can start a slideshow from either Folder View or Index View. Press MENU and select Play Slideshow to start the slideshow. When you start the slideshow from Folder View, if none of the items are selected, the slideshow will play with all the items included. -
Page 60: Changing Slideshow Options
Picture Porter 35 User’s Guide 7.4. Changing Slideshow Options While the slideshow is playing, you can change the following slideshow options. Slideshow interval: You can adjust the slideshow interval among: 1, 5, 10, 30 seconds; 1, 3, 5, 10, 30 minutes; and 1, 2, 3, 4, 5, 6, 12, 24 hours. -
Page 61: User's Guide
Picture Porter 35 User’s Guide o Show EXIF/Histogram: Displays EXIF info and histogram. EXIF & Histogram o Show Comments: Displays the text from the IPTC comment field along with each photo in the slideshow. This can be used to create a slideshow with labels or descriptions. -
Page 62: Changing View Mode
Picture Porter 35 User’s Guide o Random: Play slideshow items continuously in random order. o Repeat Off: Play slideshow items in listed order once and stop. Background Audio: You can select to play the slideshow with music in the background or with recorded PhotoMemo files associated with each photo. -
Page 63: Pausing Slideshow, Scrolling Manually, Zooming & Panning
Picture Porter 35 User’s Guide Fill Screen: The image will be stretched horizontally and vertically to fill the screen while eliminating any black bars showing on top/bottom or sides of the screen. This will cause the image to be distorted if it is not a 4:3 aspect ratio. -
Page 64: User's Guide
Picture Porter 35 User’s Guide 7.6.2. Zooming and Panning Photos From Pause Mode, you can initiate the zoom by pressing VAL +/-. Pan the zoom area by rolling the JOG DIAL and pressing ENTER. When you are in Zoom Mode, a ‘zoom window’ will appear at the lower-right corner to show the current position and scope of your zoom relative to the entire photo. -
Page 65: Rotating Photos
Note: Rotating the photo will only change its display on the Picture Porter 35 screen and will not alter your original photo file. Page 57 Revision 1.2.2-2... -
Page 66: Viewing Iptc Metadata
Picture Porter 35 User’s Guide 7.8. Viewing IPTC Metadata If the displayed photo has information in the IPTC metadata fields, you can view this information by selecting View IPTC from the menu. IPTC is a metadata standard used by some photographers to include identifying and descriptive information with each photo. -
Page 67: Enjoying Video
Picture Porter 35 User’s Guide 8. Enjoying Video The following video file formats are supported by Picture Porter 35: Audio File Extension Video Codec Resolution Codec .mp4/.avi MPEG-4 SP MP3, AAC, 720x480@30fps (Simple Profile) .avi/.dat/.vob/.mpg MPEG-1 720x480@30fps .avi/.mov MJPEG MP3, PCM 720x480@30fps... -
Page 68: Playing Videos
Videos not recorded in a 4:3 aspect ratio will be distorted to fit the 4:3 aspect ratio. The screen resolution on Picture Porter 35 is 320x240. Videos with a resolution larger than 320x240 will be scaled down to fit 320x240. - Page 69 Picture Porter 35 User’s Guide Info Display: Press MENU and select Info Display to access these options. Scroll to the desired option and press ENTER to toggle between show (indicated by ‘Y’ for Yes) and hide (indicated by ‘N’ for No).
-
Page 70: Enjoying Music
Picture Porter 35 User’s Guide 9. Enjoying Music Picture Porter 35 can be used to playback music files that are stored on its hard drive or from memory cards. You can listen to music and PhotoMemo files through the built-in speaker, via connected earphones, or by connecting Picture Porter 35 to a stereo or pair of external speakers. - Page 71 Picture Porter 35 User’s Guide Playing Music During music playback, you can perform the following functions: Music Playback - Navigation Keys Return to previous view (Folder View or Index View) MENU Show/close menu Scan backward 5 seconds JOG DIAL UP Paused –...
-
Page 72: Folder View - File Management Options
Section 4 Copying Memory Card to Picture Porter The Backup and Export functions can be directed to the respective Backup and Export folders on the Picture Porter 35 or a connected memory device. The Export function is explained in Section 12 Exporting Selection to Export Folder. -
Page 73: Creating A New Folder
You can perform the Copy and Paste operation between different locations on Picture Porter 35, between inserted memory cards or USB flash drive, or between Picture Porter 35 and an inserted memory card or USB flash drive. 1. Navigate to and select the files and/or folders you want to copy. -
Page 74: Moving Files Or Folders
Copy in Step 2 10.5. Deleting Files and/or Folders You can delete files and/or folders from either Picture Porter 35 or an inserted memory card or USB flash drive. The Delete function is available in the Folder View menu only and does not appear in the Index View menu. -
Page 75: Recording And Playing Photomemo
User’s Guide 11. Recording and Playing PhotoMemo The PhotoMemo feature on Picture Porter 35 allows you to make audio memos for each photo you have stored on the device. This may be useful for you to make comments and notes about your photos while the details are fresh in your mind. -
Page 76: Memorec Menu Options
Folder View 11.2. Recording PhotoMemo The built-in microphone on Picture Porter 35 is located behind the pinhole in the upper-left corner on the front face of the device. For best results, try to direct your voice towards the microphone when making your PhotoMemo recordings. -
Page 77: Playing Back Photomemo
Picture Porter 35 User’s Guide 11.3. Playing Back PhotoMemo You can playback your PhotoMemo recording from either the MemoRec screen or during the slideshow playback. 11.3.1. Playing Back PhotoMemo from MemoRec View 1. Select MemoRec from the Home Screen. 2. Navigate to the target photo for PhotoMemo playback. -
Page 78: Exporting Selection To Export Folder
Picture Porter 35. When you get to computer after a photo session, you can archive the full set of original photos in the Picture Porter 35 Backup folder to your computer hard drive archive location. Then you can copy the pre-screened photos in the Picture Porter 35 Export folder to your working directory. - Page 79 Picture Porter 35 User’s Guide 4. The ‘Export’ window will pop up to show you: (1) Target Device, (2) Folder Path, (3) default Folder Name that will be created for the copy, (4) number of files to be copied, and (5) total size of the files to be copied.
-
Page 80: Understanding Default Export Folder Name Assignments
Navigate to the Export folder to access the copied files. 12.2. Understanding Default Export Folder Name Assignments Each time you use the Export function on Picture Porter 35, a new folder will be created on the Picture Porter 35 hard drive to store your copied files. -
Page 81: Managing Playlists
Make sure the actual file is available on the Picture Porter 35 hard drive or the inserted memory card for the Playlist to play. If Picture Porter 35 cannot find a specific file, it will skip over it and play the next available file. -
Page 82: Playlist Manager Screen
Access the Playlist Manager screen by selecting the Playlist icon from the Home Screen. The Playlist Manager will list all the Playlists that are available on Picture Porter 35. The following screen layout shows the Playlist Manager screen. Playlist name... -
Page 83: Playlist Manager Menu Options
Picture Porter 35 User’s Guide 13.2. Playlist Manager Menu Options From the Playlist Manager screen, the available Menu options are: MENU – PLAYLIST MANAGER Selection Description Create a new (empty) Playlist. New Playlist Duplicate Duplicate an existing Playlist. Rename Rename a Playlist. - Page 84 Export Folder. Note that only the contents of the Playlist will be exported and the Playlist file will not be included. Export to Device: This menu option will only be visible if a target Picture Porter 35 is connected and accessible. See Section 15.2 Using Picture Porter for details on using this function.
-
Page 85: Playlist (Contents) Screen
Picture Porter 35 User’s Guide 13.3. Playlist (contents) Screen The Playlist screen will display the photos, music, and videos contained in the Playlist selected from the Playlist Manager. If the original file are been deleted, moved, or renamed and cannot be located, it will not be included in the Playlist. -
Page 86: Playlist (Contents) Menu Options
Picture Porter 35 User’s Guide 13.4. Playlist (contents) Menu Options From the Playlist screen, the available Menu options are: MENU – PLAYLIST (Contents) Selection Description Change the display of the Playlist contents among List Playlist Layout View, 3x2 View, and 5x4 View. -
Page 87: Adding Entries To A Playlist
Picture Porter 35 User’s Guide 13.6. Adding Entries to a Playlist Entries can be added to a Playlist from Folder View or Index View. When adding entries to a Playlist, you will be able to choose between adding the selected items to an existing Playlist or to create a new Playlist containing the selected items. -
Page 88: Understanding The Playlist File
Playlist. All the Playlist files are located within the ‘SYSTEM’ folder in a folder called ‘PLAYLIST’. This folder location is not visible through the Picture Porter 35 screen, but can be accessed when Picture Porter 35 is connected to a computer. -
Page 89: Using Picture Porter 35 With Your Computer
14.1. Connecting Picture Porter 35 to Your Computer 1. Turn on Picture Porter 35. 2. Connect Picture Porter 35 to the USB port on your computer using the provided or a compatible USB cable. Note: It is recommended that you use the AC power adapter when Picture Porter 35 is connected to your computer. -
Page 90: Accessing Picture Porter 35 Data On Your Computer
Once Picture Porter 35 is connected to your computer, you can access the photos and other files you copied to it, as well as copy photos and other files from your computer to Picture Porter 35 for storage, transport, and viewing. -
Page 91: Disconnecting Picture Porter 35 From Your Computer
Remove Hardware’ window by clicking ‘Close’ and disconnect the USB cable between Picture Porter 35 and the computer. Note: In some cases, if the Picture Porter 35 hard drive is sleeping when you attempt to disconnect it, your computer may indicate that it cannot disconnect the Picture Porter 35. - Page 92 1. Make sure that there is no data being written to or from Picture Porter 35. 2. Manually turn off Picture Porter 35 by pressing and holding the Power Button for 3 seconds. This will safely shut down the Picture Porter 35 hard drive.
-
Page 93: Using Picture Porter 35 With Other Devices
3. Connect the RCA video connector (colored yellow) to the video input jack that corresponds to the selected video input of the 4. Turn on Picture Porter 35 and the TV. On the TV, select the proper video input mode for the input that Picture Porter 35 is using. -
Page 94: Using Picture Porter 35 With Another Picture Porter 35
Target Picture Porter 35 connected, the Main Picture Porter 35 will be able to view and access the hard drive of the Target Picture Porter 35 as a USB device. The Target Picture Porter 35 will be in USB mode and cannot be operated. -
Page 95: Using Picture Porter 35 With An Usb Flash Drive
Porter 35 will enable the Export to Device menu selection in the Playlist Manager screen. To export a Playlist from the Main Picture Porter 35 to the Target Picture Porter 35: 1. On the Main Picture Porter 35, navigate to the Playlist you would like to export to the Target Picture Porter 35. -
Page 96: Using Picture Porter 35 With An External Hard Drive
You can also connect an external hard drive* to Picture Porter 35 with the USB-OTG cable and USB cable. This function allows you to make a complete backup of all your data on Picture Porter 35 or copy selections of files and folders to the external hard drive. -
Page 97: Using Additional Features
Any new updates will be available for download from the Digital Foci website support page. Please make sure to register your Picture Porter 35 so that you will receive product support emails regarding new firmware releases and other important product information. -
Page 98: Resetting Picture Porter 35
Reset Button. This button is located in the pinhole at the bottom-right side on the back of Picture Porter 35. Press the Reset Button by using a paper clip or similar pointy object. -
Page 99: Creating Multiple Partitions Picture Porter 35
When you insert a memory card or USB device and have 2 partitions on your Picture Porter 35, the menu will include options to back up to either HD1 or HD2. The BACKUP to HD2 will use the same Backup folder structure and naming convention as the regular backup to HD1. - Page 100 For Windows users, the Windows operating system will not allow you to format the Picture Porter 35 hard drive in the required file system. You will need to use a ‘disk management utility’ to make the partitions and format each partition in the FAT32 file system.
-
Page 101: Frequently Asked Questions
Video capacity based on videos at 500 kbps encoding. What types of memory cards can Picture Porter 35 support? You can use the following memory cards with Picture Porter 35 directly without an adapter: CompactFlash (Type I), SD card, SDHC card, Multi-Media Card, mini SD, RS-MMC, Memory Stick, MS PRO, MS Duo, MS PRO Duo, and xD-Picture card. - Page 102 It is strongly recommended that you do not do this. How long is the battery life of Picture Porter 35 on a full charge? A full battery charge is capable of up to 4 hours of continuous video playback and up to 3 hours of photo backup.
- Page 103 16:9 aspect ratios, how will they be displayed on the device? The aspect ratio on Picture Porter 35 is 4:3. If you have photos in a 3:2 or 16:9 aspect ratio, the photo will be displayed in a letterbox with black bars on top and bottom of the screen in the default view mode.
- Page 104 Can I rotate photos on Picture Porter 35? How does Picture Porter 35 handle photos shot in portrait? Photos on Picture Porter 35 will be displayed according to the photo orientation information available in the EXIF data captured with the photo. Most digital SLR cameras will have this photo orientation information.
- Page 105 Picture Porter 35. Can Picture Porter run on AC power instead of battery? Yes, Picture Porter 35 runs on either battery or AC power. It is recommended that you use the AC power whenever possible so that you can make sure that your battery is fully charged when you need it.
- Page 106 User’s Guide Can Picture Porter 35 receive power from the USB port? Picture Porter 35 is able to use the power from the USB port to charge the battery when turned off. The red LED will turn on to indicate that the battery is charging.
-
Page 107: Troubleshooting And Technical Support
The data transfer between my computer and Picture Porter 35 is slow. • Picture Porter 35 might be connected to a USB 1.1 port instead of a USB 2.0 port. The device can work on both USB 1.1 and USB 2.0 ports. - Page 108 4) The external hard drive is formatted in the FAT32 file system. Turn on your Picture Porter 35 and wait for the HD1 to be recognized with icon loaded onto the HOME screen. Connect the USB cable to the external hard drive after the HD1 icon appears.
- Page 109 Simple Profile MPEG-4 videos. It does not support playback for high definition (HD) videos. • To resolve this, use video conversion software to convert your video file to one of the formats supported by Picture Porter 35. for recommended video specs. Section 8 Enjoying Video I see no images or only distorted images on my TV after connecting Picture Porter 35.
- Page 110 Picture Porter 35 gets a sufficient and stable power supply. My photos are displayed with black bars on the screen. The aspect ratio on Picture Porter 35 is 4:3. If you have photos in a 3:2, 16:9, or other aspect ratio, the photo will be displayed in a letterbox with black bars on top and bottom of the screen in the default view mode.
-
Page 111: Appendix: Technical Specifications
Picture Porter 35 User’s Guide 19. Appendix: Technical Specifications Model no. PPR-350 Direct (without adapter): CompactFlash, MultiMedia Card, RS-MMC, SD Card, SDHC card, miniSD, Memory Stick, MS PRO, MS Duo, MS PRO Duo, Memory cards supported xD-Picture card With appropriate adapter:... - Page 112 5.4” (L) x 3.8” (W) x 1.2” (H) Weight 14 oz. (with hard drive and battery) Picture Porter 35, AC power adapter, User-replaceable rechargeable Polymer Li-Ion battery, USB cable (to computer), Package contents USB-OTG cable (to USB Mass Storage Device), Earphones, RCA cable for audio/video output, Custom carrying case, Wrist strap, User’s Guide, Quick Start Guide...
-
Page 113: Appendix: Raw Formats Supported
Picture Porter 35 User’s Guide 20. Appendix: RAW Formats Supported RAW image formats supported Canon .CR2: 1D Mark4, 1Ds, 1Ds Mark2, 1Ds Mark3, 1D Mark3, 1D Mark2N, 1D Mark2, 1D, 5D, 5D Mark2, 7D, 10D, 20D, 30D, 40D, 50D,1000D, D30, D60, D400, 300D(Rebel), 350D(Rebel XT), 400D(Rebel Xti), 450D(Rebel XSi), 550D, G9, G10, G11, S90 .CRW: G1, G2, G3, G5, G6, S30, S40, S45, S50, S60, S70, Pro1... - Page 114 3111 E. Via Mondo, E. Rancho Dominguez, California, 90221 USA Copyright 2010 Digital Foci, Inc. All rights reserved.
Need help?
Do you have a question about the Picture Porter 35 and is the answer not in the manual?
Questions and answers