
Related Manuals for C. Crane Super USB WiFI 3


Summary of Contents for C. Crane Super USB WiFI 3
- Page 1 Super USB WiFi Antenna 3 QUICK START GUIDE PLEASE READ ALL INSTRUCTIONS COMPLETELY BEFORE USE AND SAVE THIS MANUAL FOR FUTURE REFERENCE...
-
Page 2: Table Of Contents
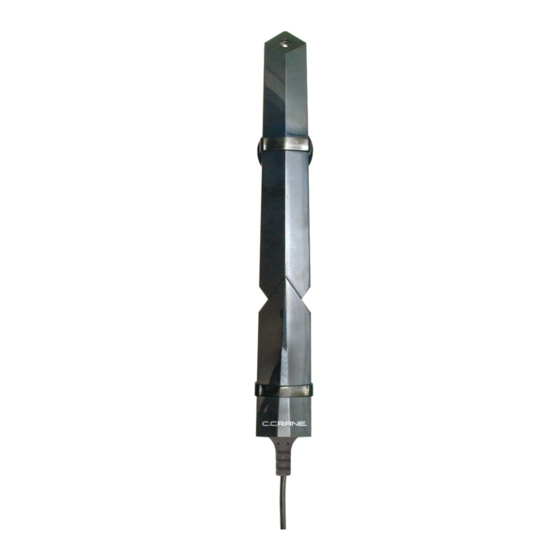
Suction Cups (2) Hook and Loop Mounting Strip Cable Tie Rubber Grommets (2) Lanyard Copyright © 2011 by C. Crane Company, Inc., Fortuna, CA 95540 Phone: 1-800-522-8863 Web: ccrane.com All rights reserved. No part of this booklet may be reproduced, in any form or means whatsoever, without permission in writing from C. -
Page 3: Specifications
Specifications Compatability • Windows 2000 through Windows 7 ™ ™ • Mac OS 10.3 (Tiger) through 10.6 (Snow Leopard) ® • Linux operating systems • USB 1.1 - 2.0 interface • 802.11b, 802.11g, and 802.11n • WEP, WPA, and WPA2 encryption Features •... -
Page 4: Windows 2000 - 7 Installation
Windows 2000 – 7 Installation Installation NOTE: Please install the software on the CD according to the instructions in this Quick Start Guide, BEFORE the antenna is plugged in. 1. Insert the supplied CD into your computerʼs disk drive. The setup software should start automatically after a few seconds. - Page 5 Windows 2000 – 7 Installation 5. Click “Install” to continue the installation. 6. When the computer has finished installing the driver, click “Finish” to exit the setup and begin using your antenna. Page 5 Super USB WiFi Antenna 3...
- Page 6 Windows 2000 – 7 Installation 7. Connect the USB cable between the Super USB WiFi Antenna 3 and your computerʼs USB port. If you have two USB ports available, both connectors can be plugged in for better performance. If you only have one USB port available, the antenna will still work well.
- Page 7 Windows 2000 – 7 Installation Windows Vista 1. Left click the icon below. A small window will appear titled "Wireless Network Connection Status". 2. Left click "Connect to a Network". 3. Left click the network of your choice from the list, then left click "Connect".
-
Page 8: Mac Os 10.3 - 10.5 Installation
Mac OS 10.3 – 10.6 Installation Installation NOTE: Please install the software on the CD according to the instructions in this Quick Start Guide, BEFORE the antenna is plugged in. 1. Insert the supplied CD into your computerʼs disk drive. 2. - Page 9 Mac OS 10.3 – 10.6 Installation 8. When prompted, enter your “Name” and “Password”. 9. When prompted, click “Continue Installation”. 10. When the “Summary” screen appears, click “Restart”. Page 9 Super USB WiFi Antenna 3...
- Page 10 Mac OS 10.3 – 10.6 Installation Note: During Restart, a “Updating Boot Caches” screen will appear. Click “OK” and the restart will continue. 11. When the computer is fully powered on, plug in the Super WiFi USB Antenna into your computerʼs USB port.
- Page 11 Mac OS 10.3 – 10.6 Installation Connecting to a WiFi Site 1. From the dock, click the “Ralink” icon to activate the “WLan” utility, or find it in the “Applications”/ “Utilities” menu. 2. Select your desired WiFi network from the “Site Survey”...
- Page 12 Mac OS 10.3 – 10.6 Installation Creating a Profile We recommend that you create a profile for your wireless connection so that you will not need to re-enter your net- work information every time your computer is turned on. To get started, click your desired SSID from the “Site Survey”...
-
Page 13: Wifi Tips
WiFi Tips For more WiFi Tips, see the C. Crane web site at: www.ccrane.com/US3 1. Receiving an outside signal while inside a Place the Super USB WiFi Antenna oriented vertically building: in the center of a window. It is best to place it in a win- dow that is facing the WiFi source. -
Page 14: Faqs And Wifi Troubleshooting
Usually there is a button, switch, or key on a laptop that dis- ables the built-in WiFi device. For more troubleshooting and FAQs, see the C. Crane web site at: www.ccrane.com/US3 Page 14... -
Page 15: Fcc Interference Statement And Safety Instructions
FCC Interference Statement and Safety Federal Communication Commission Interference Statement This equipment has been tested and found to comply with the limits for a Class B digital device, pursuant to Part 15 of FCC Rules. These limits are designed to pro- vide reasonable protection against harmful interference in a residential installation. -
Page 16: Warranty Information
Should service be necessary for any reason due to a manufacturing defect or malfunction during the warranty period, C. Crane Company Inc., at its sole discretion, will repair or re- place the defective merchandise at no charge, upon receipt of this item at its service cen- ter with a copy of proof of date of purchase.
Need help?
Do you have a question about the Super USB WiFI 3 and is the answer not in the manual?
Questions and answers