Table of Contents
Advertisement
Advertisement
Table of Contents

Subscribe to Our Youtube Channel
Related Manuals for Genee Vision 6100

Summary of Contents for Genee Vision 6100
- Page 1 ® 6100 User manual...
- Page 2 PRECAUTIONS Please follow these precautions: To prevent fire or shock hazard, do not expose the unit to rain or moisture. To prevent electrical shock, do not open the cabinet. Refer to qualified personnel for service only. Do not use the unit continuously for more than 24 hours with camera auto focus on.
-
Page 3: Rear Panel
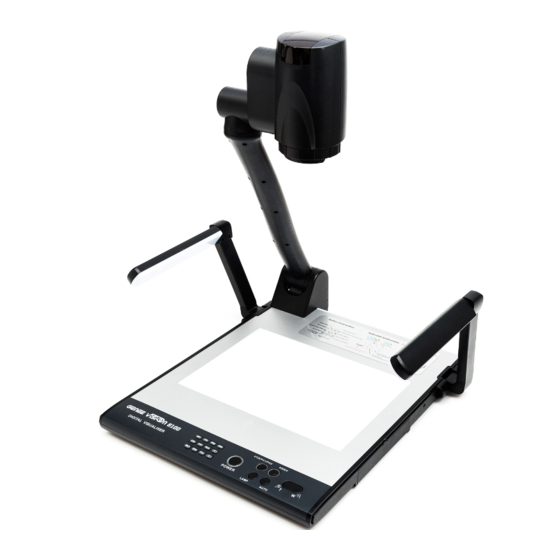
REMOTE CONTROL & CONNECTIONS POWER (Control the visualiser On/Off) SAVE (Save captured images) RECALL (Display saved images) EXIT (Exit RECALL mode) LAMP (Control the arm lights and back light) FREEZE (Freeze the image) (Display film negatives) MIRROR (V-Reverse the image) SPLIT (Image split function) D./S. - Page 4 PARTS IDENTIFICATION...
- Page 6 : Connect to the projector. Rear Panel S-VIDEO AUDIO VIDEO S-VIDEO AUDIO VIDEO PROJECTOR OUT -COMPUTER- IN OUT-12V- IN AUDIO AUDIO IN RGB Input RS232 Cable Screen Projector Side Panel PROJECTOR RGB IN AUDIO IN RS232 Connect visualiser’s PROJECTOR port to the RGB IN port of the projector port with the RGB cable provided together the visualiser.
- Page 7 Connect to the first video equipment with S-Video input. S-Video Cable S-Video out Audio out Video equipment Rear Panel AUDIO VIDEO S-VIDEO AUDIO VIDEO AUDIO S-VIDEO -COMPUTER- OUT-12V- IN AUDIO IN PROJECTOR Projector (or amplifier/speaker equipment) Audio input Output of the S-Video signal from the visualiser to the projector is already done in the step 2, where the RGB cable comes out from the visualiser and goes to the projector.
- Page 8 Use the computer RS232 cable (9-pin to 9-pin) to make the connections shown below to control the visualiser from an external computer. USB connection enables capturing still images / video streams from the visualiser to the computer. Special software is required for this operation. 8.
- Page 9 SETUP GUIDE Plug in here Plug monitor/pc in here...
- Page 10 CCD/PC1/PC2 button (no input on PC2). Any Visualiser still-image can be captured to the desktop using the ‘VideoCap’ software (on the Genee Vision disk), or moving image using programs such as ‘Movie Maker’ which comes with Windows XP.
- Page 11 INSTALLING VISUALISER SOFTWARE This function is to snap and display images with the USB interface, which includes displaying static and dynamic pictures, snapping dynamic images and playback the dynamic images with the Windows Media Player or its own player. 1. Insert the CD-ROM that comes with your visualiser into the CD-ROM drive. If Autorun is enabled on your system, then the Software Setup window will be displayed automatically as below.
- Page 12 USB CAPTURE FOR MAC COMPUTER Copy the folder “Mac Driver” into Mac hard disk, open the folder and double-click Empia 1.0.0b2. zip, the “setup” file appears. Follow dialog-box messages, click “next” and finish installation. Note: 1. Please connect Mac computer and visualiser when installing 2.
- Page 13 PROJECTOR INPUTS SELECTION When the projector is connected to several input sources, use the “Pin” button to switch signal inputs of the projector. (On the remote control, press the “PROJECTOR INPUT” button) Note: Please connect the projector RS232 cable between the projector and the visualiser first. If you cannot switch projector inputs by pressing this button, you need to manually program the RS232 code into the visualiser.
- Page 15 FOCUSING When the visualiser is turned on the focus automatically adjusts to the stage, it is not necessary to readjust the focus if you are only working with flat materials (text, photos, etc.). Only 3D object require a focus adjustment. Press the “AUTO” button to auto focus. Press the “FAR”...
- Page 17 The code writing software is used to inputting projector’s control code, then can control various projector with the visualiser. 1. Connect the visualiser to the projector with the RGB, VIDEO, S-VIDEO cables. 2. Connect the RS232 cable to the computer’s connector. The visualiser’s RS232 port is located on its right side.
- Page 18 For example: the “POWER ON” code in Hitachi projector manual is : BE EF 03 06 00 BA D2 01 00 00 60 01 00 In the POWER ON box, Input : be, ef, 03, 06, 00, ba, d2, 01, 00, 00, 60, 01, 00.
- Page 19 6. If you can not use buttons on the operation panel to control the projector, please use Code-Writing software’s projector control code testing function to check if the control code is correct. Click “Projector” button, the following dialog box appears as below: Connect the visualiser to a computer with a RS232 cable (Please disconnect the projector from the RS232 port first) and select the Baud Rate and Parity based on the projector’s Baud Rate, then click the “TEST”...
- Page 20 FOLDING THE UNIT 1. Fold the right arm light down first onto the base, then the left arm down. Rotate the camera head clockwise until the camera head is parallel to the camera stand. 2. Carefully fold the camera stand down to the front panel. Cautions: a.
- Page 21 SPECIFICATION Color system PAL system Pickup device 1/4″professional CCD Resolution XGA (1024 x 768), SVGA (800 x 600) Total Pixels 470,000 RGB Output Pixels 780,000 Lens 22 x optical zoom, 10 x digital zoom F=1.6~3.7mm / f=3.9~85.8 mm Focus/Iris Auto/manual selectable White balance Auto Image split...
- Page 22 Religious Education • Share resources easily by placing underneath visualiser and projecting. • Grab lesson objective and hold at the top of the screen. • Use to share good examples of pupil’s work • Use to instantly capture examples of pupil’s’ work for assessment. • Use to display images of artefacts. Design & Technology • Share resources easily by placing underneath visualiser and projecting. • Grab lesson objective and hold at the top of the screen. • Use to share good examples of pupil’s work • Use to instantly capture examples of pupil’s’ work for assessment. • Use zoom facility to view objects in more detail i.e. PCB. Combine with split screen and freeze frame to view both sides of an object then remove object from underneath camera. • Work live underneath camera to demonstrate a technique or process – capture using Windows Movie maker for use as a teaching resource. Science • Share resources easily by placing underneath visualiser and projecting. • Grab lesson objective and hold at the top of the screen. • Use to share good examples of pupil’s work. • Demonstrate practical investigations underneath camera so that whole class can view on screen. • Capture demonstration using Windows Movie maker and play back as part of plenary or post on VLE as a learning resource for pupils to access after the lesson.
- Page 23 Literacy • Share teaching resources easily by placing underneath visualiser and projecting. • Easily grab parts of text and place into whiteboard software or Word for further discussion and annotation. • Pupils use ‘Windows Photo Story’ with captured images to create stories - could also add spoken dialogue to create a speaking and listening task. • Instantly share good examples of pupil’s work as part of plenary. • Use split screen facility to easily compare 2 texts. • Use negative facility to reverse text i.e. white on black for ease of reading. • Place text underneath visualiser then freeze frame so that whole class can view text after book is removed. • Place book being read underneath camera and use pointer or finger to allow pupils to follow text being read. • Grab lesson objective and hold at the top of the screen. • Use a live example as a stimulus for writing i.e. show a text message for a task to write a set of instructions. Capture in Windows Movie Maker and play back as many times as needed, pausing to discuss language and vocabulary to be used. • Share resources easily by placing underneath visualiser and projecting. • Grab lesson objective and hold at the top of the screen. • Use to share good examples of pupil’s work • Use to instantly capture examples of pupil’s’ work for assessment. • Lower arm and capture modelled scenes then use story board software to produce short film to include music and spoken voice. Numeracy • Share resources easily by placing underneath visualiser and projecting. • Grab lesson objective and hold at the top of the screen.
- Page 24 For technical assistance please call or email Tel: +44 (0)870 386 1900 • Fax: +44 (0)870 405 0188 Email: technical@geneeworld.com • Website: www.geneeworld.com Post: PO Box 3256, Wolverhampton, WV3 0LA...
Need help?
Do you have a question about the Vision 6100 and is the answer not in the manual?
Questions and answers