Panasonic CQ-VD5505W Operating Instructions Manual
Dual din in-dash 7" widescreen color lcd monitor/dvd receiver
Hide thumbs
Also See for CQ-VD5505W:
- Operating instructions manual (62 pages) ,
- Service manual (51 pages) ,
- Service manual (50 pages)
Table of Contents
Advertisement
Advertisement
Table of Contents

Related Manuals for Panasonic CQ-VD5505W


Summary of Contents for Panasonic CQ-VD5505W
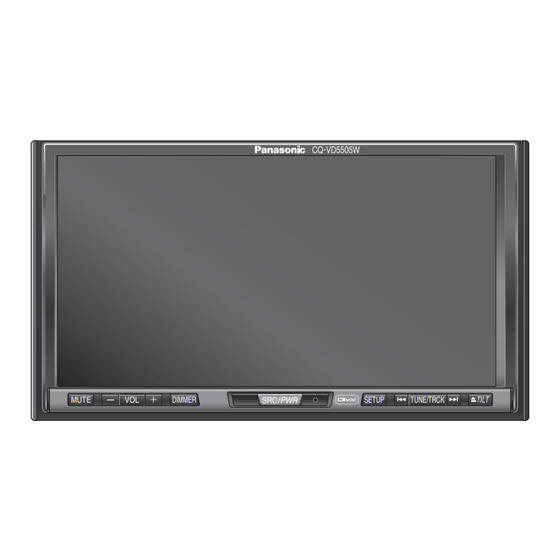
- Page 1 CQ-VD5505W Model: MUTE DIMMER SRC / PWR SETUP TUNE/TRCK TILT TEXT...
-
Page 2: Safety Information
They contain instructions about how to use the from improper connections and operations. The meanings of system in a safe and effective manner. Panasonic assumes the pictographs are explained below. It is important that you no responsibility for any problems resulting from failure to fully understand the meanings of the pictographs in order to observe the instructions given in this manual. - Page 3 Installation of this unit requires special skills and experi- ence. For maximum safety, have it installed by your dealer. Panasonic is not liable for any problems resulting from your own installation of the unit. ❑ Follow the instructions to install and wire the prod- uct.
- Page 4 ¡Park your car in a safe place and pull the side brake (parking brake) lever before watching the monitor. ¡A rear monitor (option) displays moving pic- tures while driving. Note: Be sure to connect the side brake (parking ¡ brake) connection lead. Installation Instructions) CQ-VD5505W...
-
Page 5: Notes On Use
¡Accessories and their parts numbers are subject to 2. Operating Instructions XXXXXXXXXXXXXXXXX XXXXXXXXXXXXXXX XXXXXXXXXXXXXX XXXXXXXXXXXXXXXX OO-OOOOO modification without prior notice due to improvements. <YFM284C686ZA> Qty.: 1 XXXXXXXXXXXXXXX 3. Installation Instructions XXXXXXXXXXXXXXXXX XXXXXXXXXXXXXX XXXXXXXXXXXXXXXX OO-OOOOO <YFM294C106ZA> Qty.: 1 4. Installation Hardware (screws, cords, etc.) Installation Instructions) CQ-VD5505W... -
Page 6: Features
Features Panasonic welcomes you to our constantly growing family of electronic products owners. We endeavor to give you the advantages of precise electronic and mechanical engineering, manufactured with carefully selected components, and assembled by people who are proud of the reputation their work has built for our company. -
Page 7: Table Of Contents
User, screen, audio, DVD, radio ¢ About DivX VOD Content ......38 ¢ Troubleshooting ......39 ¢ Maintenance ..........43 ¢ Notes on Discs ..........44 ¢ Language Code List........45 ¢ Definition of Terms ........46 ¢ Specifications..........47 CQ-VD5505W... -
Page 8: Preparation
You may need to set the following depending on the devices to be connected. AV1/AV2 (Camcorder, VCR, etc.) ¡Adjust page 33) Input Select Warning ¡ When you connect external devices to AV1 IN/ AV2 IN (AV1/AV2), be sure to connect the side brake connection lead (aInstallation Instructions). CQ-VD5505W... -
Page 9: Symbols Used In This Manual
Discs Operation on the Main Unit You can use the Main Unit to perform the targeted opera- tion. If the operation is not executable with the Main Unit, Compatible Discs “––” is displayed. Compatible Discs Discos compatibles Compatible Discs CQ-VD5505W... -
Page 10: Name Of Controls And Functions
¡Switches on/off the power. [SRC/PWR] ¡Changes the modes such as sound and picture. t [SETUP] ¡Shows the setup screen. [ s ] [ d ] ¡Selects or searches for a track, file, station. (TUNE/TRCK) ¡Fast forward/fast reverse. ¡Slow playback ([d]). CQ-VD5505W... - Page 11 (Panel Open) Disc slot CQ-VD5505W...
-
Page 12: Touch Panel Operation Overview
Touch desired source button. Setup menu, page 30) Touch to quit. Press [SRC/PWR] to change to Press [SETUP] to let Setup desired source. Screen appear. Note : ¡The screen above appears when no external device is connected to AV1, AV2. CQ-VD5505W... -
Page 13: Switching The Display
¡ If no operation takes place for more than 10 seconds when Operation Screen is ON, Operation Screen is turned off. ❒ DVD Touch Touch Touch Touch Operation Screen 1 Operation Screen 2 Operation Screen 3 ❒ DivX Touch Touch Touch Operation Screen 1 Operation Screen 2 List Screen Touch CQ-VD5505W... -
Page 14: General
¡The sound level for each source is Setting range: 0 to 40, default: 13 stored in memory. Note: ¡ The volume level can be set independently for each source and each disc format. …… Touch/Press and hold for more than 2 seconds CQ-VD5505W... - Page 15 Note: ¡ After adjusting its angle, also adjust the brightness as well. ( page 34) ¡ The car model and installation conditions may impose some restrictions on the adjustment of the monitor's angle. CQ-VD5505W...
-
Page 16: Before Disc Playback
CD-EXTRA (audio-only playback possible) ¡ DVDs with a region number other than “2”, “3”, “4”, ¡ “5” or “ALL”* ¡ Playing back a photo CD disc with this unit could damage the data that is recorded on the disc. CQ-VD5505W... - Page 17 When a disc is in the player, change to disc player mode (CD, MP3, DivX, DVD or VCD (Video CD)) and playback starts. DVD VCD VCD CD MP3 DivX CH-C ¡The sound may be interrupted for a few moments while the audio format is being identified. CQ-VD5505W...
-
Page 18: Disc Player
1 page, respectively, too. ¡ It is not possible to display the whole tree and file list in a folder. Current track Source Button Playing time ¡The displayed contents on the touch panel vary with circumstances. Operation Buttons Title/text scroll CQ-VD5505W... -
Page 19: Basic Operations
To cancel, touch again. DivX DivX DivX Random Play within the – To cancel, touch and hold again. DivX DivX DivX Current Folder …… Touch/Press and hold * Touch panel symbols will change to indicate these current mode. = folder) CQ-VD5505W... - Page 20 Some DVDs allow you to operate the DVD menu by appear. touching the screen. Source Button page 12) Setup Button page 12) Moving operation buttons (Only for DVD) When the operation buttons interfere with operations, press . The buttons are transferred as shown below. CQ-VD5505W...
- Page 21 ¡The language on the DVD settings takes priority when the power is turned on or the disc is loaded. ¡The number of languages and angles depend on the disc. Some discs have only one language/angle or have no lan- guage/angle. CQ-VD5505W...
-
Page 22: Notes On Mp3/Divx
¡ GMC (Global Motion Compensation) is not supported. Caution ¡ Never put “.mp3” to other than MP3-formatted data or “.DIVX”, “.divx”, “.AVI”, and “.avi” to other than DivX-formatted data. This may not only produce noise from the speaker damage, but also damage your hearing. CQ-VD5505W... - Page 23 It is prohibited by copyright laws to copy, distribute and The above description complies with our investigations as of deliver copyrighted materials such as music without the December 2006. It has no warranty for reproducibility and approval of copyright holder except enjoying yourself displayability of MP3/DivX. personally. CQ-VD5505W...
-
Page 24: Radio
There are 6 stations in each list. You can call up next 6 stations by switching from one list to another. Station – Selection Down Seek Tuning – Down Press and hold for more than 0.5 second then release. Seeking starts. …… Press and hold CQ-VD5505W... -
Page 25: Preset Memory
Select the list and hold down the preset number that contains the targeted channel for more than 2 seconds. The preset station selected in the step q is interchanged with the targeted preset chan- – nel selected in the step w (Preset Swap). …… Touch and hold CQ-VD5505W... -
Page 26: Tv Tuner Control
TV 1 TV 2 Channel Selection Down Channel Seeking Down Displaying TV Calls up the menu of the tuner. Menu – To cancel, touch again. Selecting an Item Left/right on the TV Menu – Up/down …… Touch/Press and hold CQ-VD5505W... - Page 27 ¡ Preset channel deleting mode display appears. Select a preset number that you want to – delete. Determine. – – ¡ Exit from the preset channel deletion. …… Touch and hold for more than 2 seconds CQ-VD5505W...
-
Page 28: Av1/Av2
Note: ¡You can set up the system so that the AV mode is not selected (source skip). ( page 33) Input Select ¡If no operation is performed for 10 seconds or is touched, the operation buttons disappear. CQ-VD5505W... - Page 29 CQ-VD5505W...
-
Page 30: Settings
Appearance of DVD image page 36) Selection of type of down mix page 37) Down Mix DR COMP Selection of compression style page 37) DivX Registration DivX Registration page 37) Radio Radio FM Setup Setting for FM stations page 37) CQ-VD5505W... -
Page 31: Setup Operation
SRC / PWR SRC / PWR SETUP SETUP TUNE/TRCK TILT [DIMMER] [SRC/PWR] [SETUP] (The screen brightness (Exit from the menu) (Shows the menu display/ is toggled between the Goes back to the previous menu) set level and maximum luminance.) CQ-VD5505W... - Page 32 ¡Record your registered ID code and keep it in a secure location. (Fill in the ID code memo page 42).) If you forget it, you will be unable to use the unit. In case you forget the ID code, please consult your nearest Panasonic Service Center. CQ-VD5505W...
-
Page 33: Input Select
: sets to ON if your car has ACC position. Note: ¡If a non-Panasonic navigation system is connected to : sets to OFF if your car has no ACC posi- this unit, we do not guarantee the operations of the tion. - Page 34 “Just”, “Zoom” or “Full” aspect to the full of the screen, you might not see the periphery of the pic- ture, or you might see a distorted picture. Therefore, use the “Normal” mode to see the origi- nal picture as the author intended it. CQ-VD5505W...
- Page 35 ¡For resuming the factory settings, touch and hold for more than 2 seconds . Default Bass/Treble Bass/treble adjustment Bass (Bass adjustment) : more : less Treble (Treble adjustment) : more : less Setting range: –12 dB to +12 dB default: ±0 dB CQ-VD5505W...
- Page 36 Other : other language. Input the language code. page 45) Angle Mark (Angle mark setting) default: The angle mark is displayed to indicate the parts where multi-angle data is recorded. : activates angle mark. : inactivates angle mark. default: CQ-VD5505W...
-
Page 37: Down Mix
Maintaining the ambience even while listening at a low volume level Compression style selecting : DR COMP ON : made with the greatest compression, roughly equivalent to a TV broadcast. : DR COMP OFF default: DivX Registration Show the DivX Registration Code page 38) CQ-VD5505W... -
Page 38: About Divx Vod Content
¡ If you purchase DivX VOD content using a registration code different from this unit’s code, you will not be able to play this content. (“Authorization Error” is dis- played.) CQ-VD5505W... -
Page 39: Troubleshooting
Please refer checking and repair to professionals. ¡Never try to repair the unit by yourself Panasonic shall not be liable for any accidents arising out of neg- because it is dangerous to do so. lect of checking the unit or your own repair after your checking. -
Page 40: Display Settings
Disc unejectable The microcontroller in the unit operates abnormally due to noise or other factors. aUnplug the power cord and plug it again. In case the unit is still out of order, consult your dealer. CQ-VD5505W... - Page 41 44) for other cases. The audio format is output disabled for this unit such as dts. aUse output enabled discs. Sound is not generated. Refer to “Before Disc Playback” ( page 16) or “Notes on Discs” page 44) for other cases. CQ-VD5505W...
- Page 42 Model No. CQ-VD5505W code... ID CODE In case you forget the ID code, please consult your nearest Panasonic Service Center. ID code memo Copy the memo at right, fill in the ID code, and keep it in a secure location.
-
Page 43: Maintenance
If the suggestions in the charts do not solve the problem, we recommend that you take it to your nearest authorized Reset switch Panasonic Service Center. The product should be serviced Insert a hard, slender stick into the hole and push the only by a qualified technician. -
Page 44: Notes On Discs
Discs with burrs ¡Be sure to observe the handling instructions of CD- Please remove the burrs R/RW, DVD–R/RW discs. before use. ¡This player does not play CD-R/RW, DVD-R/RW discs which contain other than CD-DA or MP3/DivX data. CQ-VD5505W... -
Page 45: Language Code List
Scots Gaelic 7876 Dutch 8979 Yoruba 7176 Galician 7879 Norwegian 9072 Chinese 7178 Guarani 7982 Oriya 9085 Zulu 7185 Gujarati 8065 Panjabi 7265 Hausa 8076 Polish 7273 Hindi 8083 Pashto, Pushto 7282 Croatian 8084 Portuguese 7285 Hungarian 8185 Quechua CQ-VD5505W... -
Page 46: Definition Of Terms
Plays all versions of DivX video (including DivX ® ® with standard playback of DivX ® media files DivX,DivX Certified, and associated logos are trade- marks of DivX, Inc. and are used under license. CQ-VD5505W... -
Page 47: Specifications
Playable region number This operating instruction manual is for 4 models CQ-VD5505W2/CQ-VD5505W3/CQ-VD5505W4 and CQ-VD5505W5. The following table shows the playable region number for each model. Model Playable region number CQ-VD5505W2 2 (ALL) CQ-VD5505W3 3 (ALL) CQ-VD5505W4 4 (ALL) CQ-VD5505W5 5 (ALL) CQ-VD5505W... - Page 48 CQ-VD5505W Matsushita Electric Industrial Co., Ltd. Web Site : http://panasonic.net YFM284C686CA PTW1206-2037 Printed in China...
-
Page 49: Installation Instructions
Installation Instructions àÌÒÚÛ͈Ëfl ÔÓ ÏÓÌÚ‡ÊÛ CQ-VD5505W Model: TEXT... - Page 50 PLEASE FOLLOW THE LAWS AND REGULATIONS OF YOUR STATE, PROVINCE OR COUNTRY FOR INSTALLATION OF THE UNIT. • TO REDUCE THE RISK OF FIRE OR ELECTRIC SHOCK OR PRODUCT DAMAGE, DO NOT EXPOSE THIS APPLIANCE TO RAIN, SPLASHING, DRIP- PING OR MOISTURE. CQ-VD5505W...
- Page 51 Upgrade Options TV Tuner (CY-TUP133W, Rear Monitor CQ-VD5505W CY-TUN133W option) Contents Safety Information..........2 Upgrade Options ..........3 Contents..............3 Installation ............4 Electrical Connections ........8 CQ-VD5505W...
-
Page 52: Installation Precautions
30°. In case of difficulty, please consult your nearest author- ized Panasonic Service Center. 1. This system is to be used only in a 12 V DC battery system (car) with negative ground. - Page 53 ¡Accessories and their parts numbers are subject to modification without prior notice due to improvements. ¡Mounting Collar w is mounted on the main unit at shipment. ¡Use the supplied screws for installation exclusively. In case of losing any of them, please order the specific screw. CQ-VD5505W...
- Page 54 (option, YEFG044C002) Rear Support Bracket Tapping Screw (Provided on To the unit (5 mmø x 16 mm) the Car) (option, XTT5+16AFN) r Mounting Bolt Hex. Nut (5 mmø) (5 mmø) (option, YEJN99023) To the unit r Mounting Bolt (5 mmø) CQ-VD5505W...
- Page 55 Round Head Screw (5 mmø x 8 mm) Note: ¡Recycle the Round Head Screws that fixed the Pull the unit out with both hands. transportation brackets for two more positions. page 5) y Flat-Head Screw (5 mmø x 8 mm) CQ-VD5505W...
-
Page 56: Electrical Connections
¡Run the cords avoiding the spots where the temperature can be extremely high. CQ-VD5505W (Rear) Radio Antenna Connector (RADIO ANT IN) Fuse (15 A) Refer fuse replacement to your nearest authorized Panasonic Service Center. Do not try fuse replacement by yourself. (Red) (White) (R)(Red) - Page 57 To the car battery, continuous +12 V DC. or damage of the speakers. BATTERY 15A ¡ Do not use a 3-wire type speaker system hav- ing a common earth lead. Ground Lead (Black) To a clean, bare metallic part of the car chassis CQ-VD5505W...
- Page 58 The Clip Connector is connected to the power (parking brake) connection lead. source side lead of the side brake (parking brake) lever. Comes up to this point. Side Brake (Parking Brake) Connection Lead Power source side lead (Bright green) CQ-VD5505W...
- Page 59 ¡ Refer to the operating instructions for the connected devices, in addition. Power Connector (supplied with CY-TUP133W/ CY-TUN133W) RCA Cord (supplied with CY-TUP133W/CY-TUN133W) PWR-CONT Power Control Lead (Video) (Video) (Yellow) (Yellow) CQ-VD5505W (Rear) TV Tuner CY-TUP133W/ CY-TUN133W (option) Clip Connector (L) (White) (R) (Red) (Black) (Black) u Power Connector RCA Cord...
- Page 60 Connection with Rear View Camera Note: ¡ Refer to the operating instructions for the connected devices, in addition. Camera Input Terminal Rear View Camera (Yellow) Control Unit CQ-VD5505W (Rear) Camera Input (Video) Rear View Camera (Yellow) CY-RC50KW u Power Connector...
- Page 61 Audio Right Panasonic VM1500 Audio Left Example: Video Input (Video) (Yellow) CQ-VD5505W (Rear) (Video) (Yellow) RCA Cord Connection with VCR or Camcorder Note: ¡ Refer to the operating instructions for the connected devices, in addition. ¡ Please observe what shapes the connectors of the connecting devices are and where each of them is connected to in order to establish a proper connection.
- Page 62 Matsushita Electric Industrial Co., Ltd. Web Site : http://panasonic.net YFM294C106CA PTW1206-2037 Printed in China...
Need help?
Do you have a question about the CQ-VD5505W and is the answer not in the manual?
Questions and answers