Getac PS336 User Manual
Handheld pc
Hide thumbs
Also See for PS336:
- Quick start manual (2 pages) ,
- User manual (133 pages) ,
- Quick start manual (6 pages)
Table of Contents
Advertisement
Quick Links
Advertisement
Table of Contents
Troubleshooting

Related Manuals for Getac PS336


Summary of Contents for Getac PS336
- Page 1 PS336 USER MANUAL Rugged Mobile Computing Solutions...
- Page 2 Your device uses Windows Embedded Handheld 6.5 operating system. For further information on using Windows Embedded Handheld 6.5, check the online help. For the latest version of the manual, please visit the Getac website at www.getac.com.
-
Page 3: Table Of Contents
Table of Contents Chapter 1 Getting Started ............. 1-1 Identifying Hardware Components ........1-1 Front Components .............. 1-1 Back Components ............... 1-6 Top Components ..............1-7 Bottom Components ............1-8 Getting Your Device Ready for Use ........1-9 Installing the SIM Card and Battery ........1-9 Connecting to AC Power and Charging the Battery .. - Page 4 Entering Information .............. 2-7 Entering Text Using the Input Panel ......... 2-7 Entering Text Using the Physical Keypad ......2-10 Writing or Drawing on the Screen ........2-13 Recording a Message ............2-13 Securing Your Device ............2-15 Locking the Screen ............2-15 Locking Your SIM Card (Select Models Only) ....
- Page 5 Chapter 4 Managing Your Device ..........4-1 Managing Power ..............4-1 Low Battery Signals and Actions ........4-1 Power-Saving Tips ............... 4-2 Battery Hot Swapping ............4-3 Customizing Your Device ............4-4 Working with Programs and Folders ........4-7 Adding and Removing Programs ........4-7 Searching and Organizing Information ......
- Page 6 RFID Demo (Select Models Only) ......... 6-13 Reading Tags ..............6-13 Writing Data to 15693 Tags ..........6-14 Writing Data to Mifare Tags ..........6-14 Chapter 7 Getting Connected ............7-1 Types of Connections .............. 7-1 Using Cellular Connection (Select Models Only) ....7-2 Setting up a Cellular (GPRS) Connection ......
-
Page 7: Chapter 1 Getting Started
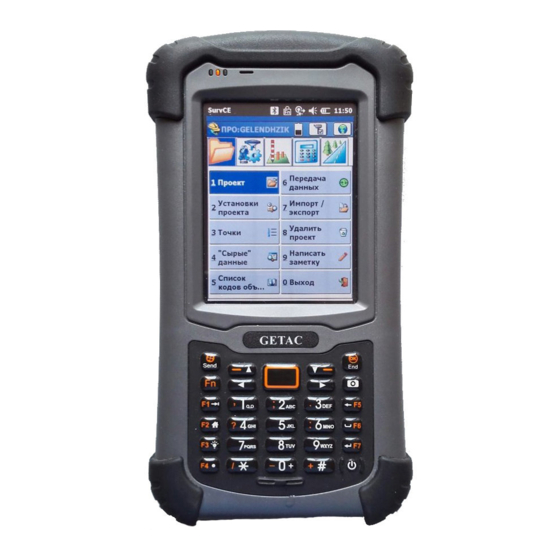
Chapter 1 Getting Started This chapter introduces you to the external components of your device and guides you through the process of setting up your device for use. Identifying Hardware Components Front Components Getting Started... - Page 8 Component Description Mobile Phone Flashes in blue to indicate that the phone function is Indicator switched on (select models only). RF (Radio Flashes in blue to indicate that the Bluetooth radio is Frequency) Indicator Flashes in amber to indicate that the WLAN (wireless network) radio is on.
- Page 9 Component Description Touchscreen Displays the output of your device and responds to your tapping. Keypad Includes keys for numbers and specific functions. It lights up when a key is pressed. (See the next section for details.) Power Button Turns on or off your device.
- Page 10 Fn lock is off by default. When it is switched on, the icon shows in the navigation bar. Default Alternative (with Fn Lock) Description Description Send Key Dials or answers a call Opens the Start menu (select models only). Start Key ...
- Page 11 Default Alternative (with Fn Lock) Description Description Starts the Camera – – program and serves as Camera the shutter release button. Backspaces over one Starts Search. Backspace character when in a text input field. Enters a space. Starts File Explorer. Spacebar Confirms your Starts Calculator.
-
Page 12: Back Components
Back Components Component Description Stylus Serves as the input device by tapping on the touchscreen to make selections and enter information. RFID Antenna Inside is the RFID antenna that reads RFID (Radio- (select models frequency identification) tags. only) ... -
Page 13: Top Components
Top Components Component Description Expansion Port Inside is the FlexiConn™ Expansion Port (Mini-PCIE Cover type) that allows you to use a Getac proprietary accessory for additional functions. (Contact your sales representative for technical information of FlexiConn™ if needed.) Getting Started... -
Page 14: Bottom Components
Bottom Components Component Description Power Connector Connects to the AC adapter. USB OTG (Host & Connects to the USB cable. Client) Connector Serial Port Provides D-sub 9 pins RS232 function. Docking Connects to the office dock (an option). Connector Getting Started... -
Page 15: Getting Your Device Ready For Use
Getting Your Device Ready for Use Installing the SIM Card and Battery 1. Lift the latch handle of the battery cover and turn it counterclockwise to the unlock (vertical) position. Then, detach the cover from the device. Unlock position 2. Select models only: Remove the dummy card from the SIM card slot. - Page 16 NOTE: To remove the SIM card, slightly push in the card to release it and then pull the card out of the slot. 3. If you have a microSD card to insert, insert it into the slot. (See “Using an MicroSD”...
-
Page 17: Connecting To Ac Power And Charging The Battery
NOTE: The battery cover must be locked for normal operation. Your device supports battery hot swap. (See “Battery Hot Swap” in Chapter 4 for information.) Connecting to AC Power and Charging the Battery Be sure to fully charge the battery before using your device for the first time. 1. -
Page 18: Performing The Initial Startup
CAUTION: For optimal performance of the lithium battery, take note of the following: Use the included AC adapter only. There is no need to fully discharge the battery before charging. You can charge the battery before it is discharged. Do not charge the battery where the temperature is high (e.g. -
Page 19: Quick Help
Quick Help The Home screen provides a getting started item. You can quickly access most-needed settings from here. Tap getting started on the Home screen. Brush left or right to see available items such as ringtone, e-mail, Bluetooth headset, and others. Tap the item you want to set up. - Page 20 NOTE: Before installation, make sure that you have Microsoft Outlook installed on your computer. Connect your device to the computer AFTER Windows Mobile Device Center or ActiveSync is installed. ActiveSync connection problems may occur in some specific cases. They ...
-
Page 21: Using Options
Using Options Using the Tether NOTE: Attach the tether for the stylus to the device before attaching the hand strap. A tether is provided for attaching the stylus to your device. 1. Insert one of the tether’s loop ends through the hole of the stylus (as indicated by ... -
Page 22: Using The Hand Strap
Using the Hand Strap NOTE: Attach the tether for the stylus to the device before attaching the hand strap. You can attach the hand strap to your device. 1-16 Getting Started... -
Page 23: Using An Microsd Card
Using an MicroSD Card Your device has a microSD card slot where you can insert a microSD card for removable extra storage. To insert a microSD card: 1. Remove the battery. (Refer to “Installing the SIM Card and Battery” earlier in this chapter.) 2. -
Page 25: Chapter 2 Basic Skills
Chapter 2 Basic Skills This chapter familiarizes you with the basic operations of your device. CAUTION: The device can get uncomfortably warm when you use it in high temperatures. In such a circumstance, please take safety measures (such as wearing gloves) to protect yourself. Prolonged body contact can cause discomfort and potentially a burn. -
Page 26: Turning Off
Turning Off Press and hold the power button for at least 3 seconds to open the Power Options menu. Then tap Turn Off. Another way to turn off the device (bypassing the menu): Press and hold the power button for at least 6 seconds until the device plays a notification sound and turns off. -
Page 27: Using The Keypad
Touch the screen once with the stylus to open items and select options. Drag Hold the stylus on the screen and drag across the screen to select text and images. Drag in a list to select multiple items. Tap and hold ... -
Page 28: Home Screen
Home Screen The Home screen appears whenever you turn on your device after shutting it down or resume the operation after 4 hours of inactivity. The Home screen provides shortcuts to frequently-used features. It shows information such as your appointments, missed calls, and unread messages, and provides quick access to your music, pictures, and other applications. -
Page 29: Navigation Bar And Toolbar
Navigation Bar and Toolbar The Navigation bar is located at the top of the screen. It displays the active program name and indicators for connectivity, volume, power, time, and others. You can tap this bar to set up related items. An example of the Navigation bar: Tap to zoom Tap to set time zone,... -
Page 30: Running Programs
Running Programs You can switch from one program to another without closing any program. In addition to running a frequently-used program from the Home screen, you can access any program from the Start menu. To open the Start menu, tap at the left- bottom corner of the screen or press Fn + Start key on your device. -
Page 31: Notifications
Notifications Your device reminds you in a variety of ways when you have something to do. For example, if you have set up an appointment in Calendar, a task with a due date in Tasks or an alarm in Clock, you will be notified in any of the following ways: A message appears on the screen. - Page 32 This appears only if you have installed the input method. Input panel button. Microsoft Keyboard When you use the Microsoft Input panel, your device anticipates the word you are typing or writing and displays it above the Input panel. When you tap the displayed word, it is inserted into your text at the insertion point.
- Page 33 XT9 Keyboard Your device offers XT9 Text Input Software that features large keys and allows you to enter text faster and more easily. You have to install the software before you can use the XP9 input method. XT9 Setup to install it. There are two input modes available: XT9 mode and ABC mode.
-
Page 34: Entering Text Using The Physical Keypad
Tap one of the arrow keys to cycle to the previous or next set of Tap to switch to number/symbol keys. letter keys. For detailed information on using and customizing XT9 features, tap and hold the @123 or ABC key (at the lower left corner) to display the menu and then tap Options ... - Page 35 Keypad Operation in XT9 Mode XT9 is a smart input mode that allows you to enter words with only one keystroke per letter. Though a key is shared by three to four letters, the XT9 mode can judge from your keystroke combination to predict the word you want to enter.
- Page 36 Function in ABC Mode Press to enter a space. Press once to enter + and twice to enter 0. Keypad Operation in 12# Mode 12# mode allows you to enter numbers. Function in 12# Mode 0 ~ 9 Press to enter the number. Press to return to the previous text input mode.
-
Page 37: Writing Or Drawing On The Screen
Writing or Drawing on the Screen In certain programs, such as Notes, you can write or draw on the screen as you do on paper. NOTE: Not all programs support the drawing mode. 1. Tap Draw to enable drawing mode. A check (√) appears before the command. - Page 38 Indicates an embedded recording. Recording toolbar 2-14 Basic Skills...
-
Page 39: Securing Your Device
Securing Your Device Locking the Screen You can lock the screen at any time by tapping in the toolbar of the Start menu. This will not affect the notification messages and incoming calls. To unlock the screen, drag left or right. Drag left or right to unlock. -
Page 40: Locking Your Sim Card (Select Models Only)
Locking Your SIM Card (Select Models Only) You can set a PIN (Personal Identification Number) code to protect your SIM card against unauthorized use. (Your mobile phone network operator may have already set a PIN for the SIM card.) By default, your device does not enable PIN security. To enable the security or change the PIN, tap ... -
Page 41: Using The Phone (Select Models Only)
Chapter 3 Using the Phone (Select Models Only) This chapter tells you how to use the mobile phone function of your device. About Your Phone Select models are equipped with the HSPA+ (High-Speed Packet Access) module. HSPA+ is an enhanced 3G (third generation) mobile telephony communications protocol. -
Page 42: Starting The Phone Program
2. The Wireless Manager screen appears. Tap Phone to switch it from on to off or the other way around. 3. Tap Starting the Phone Program Start the Phone program by any of the three methods: Press the Send key on the device. ... -
Page 43: Making A Call
Making a Call There are several ways you can make a call. Dialing a Call 1. When on the Home screen: Press the numeric keys on your device to start entering the phone number. Your device will automatically switch to the Phone program. While in the Phone program: Enter the phone number using the physical or onscreen keypad. -
Page 44: Making A Call From The Onscreen List
Making a Call from the Onscreen List Whenever you start the Phone program, the screen lists all recent calls, speed dials, and contacts. If the list contains the number you want to call, you can conveniently select from the list and press the Send key on your device. -
Page 45: Making A Call From The Call History List
Making a Call from the Call History List The Call History list displays the calls you made, received or missed. 1. Tap Call History on the onscreen keypad of the Phone program. 2. Do one of the followings to call a person in the Call History list: Select the number to call and then tap ... -
Page 46: Responding To A Call
Responding to a Call When an incoming call is received, your device rings or vibrates according to the options you have set for the phone. The name and number of the caller are displayed on the pop-up window. If the name of the caller is not in your contact list, only the caller’s phone number is displayed. -
Page 47: Operations During A Call
Operations during a Call Adjusting the Phone Volume CAUTION: Never raise the sound volume level too high when using earphones. An excessive sound volume level could cause damage to your hearing. To adjust the volume during a call, tap the navigation bar and tap Select a volume level before the window disappears. -
Page 48: Using Call History
Using Call History Call History provides the time and duration of all incoming, outgoing, and missed calls, and a summary of total calls. To access Call History while in the Phone program, tap Call History. You can tap Filter to change the Call History view (All Calls by default). -
Page 49: Using Speed Dial
Using Speed Dial You can create Speed Dials for frequently-called phone numbers so you can dial a number with a single key press. Speed dials can only be created for numbers stored in Contacts. 1. While in the Phone program, tap Speed Dial. 2. -
Page 50: Checking Your Voice Mail
Checking Your Voice Mail The first position in your speed dial list defaults as your voice mailbox. When you insert your SIM card, your device automatically detects your voice mailbox number and sets it to the first position in your speed dial list. Making an Emergency Call You can use your device to dial the international emergency number 112. -
Page 51: Customizing Your Phone
Customizing Your Phone To access the Phone settings, use one of the methods: Switch to the Phone program and tap Options. Settings Personal Phone. Changing Sounds Settings Scroll left or right to the Sounds page. You can customize phone settings, such as the ring type and ringtone to be used for incoming calls, and the keypad tone to be used when... -
Page 52: Changing Security Settings
Changing Security Settings Scroll left or right to the Security page. You can protect your phone from unauthorized use. You might be prompted to enter the PIN2 code for specific functions (such as the pre-paid card’s charging counters). Consult your mobile phone network service to check if your SIM card supports PIN2-related functions and services. -
Page 53: Changing Network Settings
Changing Network Settings Scroll left or right to the Network page. You can view available wireless networks, determine the order in which your phone accesses another network if the current one is unavailable, and specify whether you want to change networks manually or automatically. Changing Band Settings Scroll left or right to the Band page. -
Page 54: Changing Advanced Settings
Changing Advanced Settings Scroll left or right to the Advanced page. The authentication protocol type is set to “PAP+CHAP” by default. You can manually change the settings if needed. 3-14 Using the Phone... -
Page 55: Managing Your Device
Chapter 4 Managing Your Device This chapter tells you how to effectively manage power, settings, data and programs of your device. Managing Power A fully charged battery should provide power for up to 6 hours of use. The operating time of a fully charged battery depends on how you are using the device. -
Page 56: Power-Saving Tips
Power-Saving Tips Follow these suggestions to maximize the battery’s operating time, particularly when you are relying solely on the battery power for extended time periods. Suspend frequently. By default, the screen backlight will automatically dim out and the device will also suspend when it has been idle for a period of time. You can shorten the length of the idle time using ... -
Page 57: Battery Hot Swapping
Battery Hot Swapping Your device supports battery hot swapping. You can swap the battery without turning off the power Follow this procedure to perform hot battery swapping. 1. Press and hold the power button for at least 3 seconds to open the Power Options menu. Then tap Battery Swap. -
Page 58: Customizing Your Device
Customizing Your Device NOTE: Incorrect settings may cause your system to malfunction. Make sure that you fully understand the function of a certain item before any adjustment. You can customize the settings of the device to your own preferences. Tap ... - Page 59 Item Description Connections Wi-Fi To search for wireless networks and configure the wireless network module. (See “Using WLAN (Wireless Local Area Network)” in Chapter 7 for detailed information.) Wireless To change the WLAN, Bluetooth, and Phone Manager radio status. Personal Buttons To assign programs to hardware buttons (F1 to F7 and Extra).
- Page 60 Item Description System External To configure the GPS hardware settings and manage GPS. Managed To manage the programs you installed. Programs Memory To display the allocation between storage and program memory, to view the memory on the storage card (if installed) and to manually stop a program if it becomes unstable or program memory is low.
-
Page 61: Working With Programs And Folders
Working with Programs and Folders Adding and Removing Programs You can add programs compatible with Windows Embedded Handheld 6.5 to your device by downloading or copying. To manage programs you have installed, tap Settings System Managed Programs . To remove programs you have installed, tap ... -
Page 63: Microsoft Pocket Outlook
Chapter 5 Microsoft Pocket Outlook Microsoft Pocket Outlook includes Calendar, Contacts, Tasks, Notes, and E-mail. You can use these programs individually or together. For example, e-mail addresses stored in Contacts can be used to address e-mail messages in Messaging. Calendar Use Calendar to schedule appointments, including meetings and other events. -
Page 64: Contacts
To create an appointment: 1. Tap calendar and New Appointment on the Home screen. – or – Calendar New Appointment. 2. Enter appointment information. 3. Tap OK to save and return to Calendar. Contacts Use Contacts to maintain a list of people you know. This icon indicates a contact stored in the SIM card. -
Page 65: Tasks
Use the Input panel to enter the information and tap OK to complete. 5. Tap another field to enter other information such as phone number and e-mail address. NOTE: You can only set the contact’s name and phone number for a SIM contact. -
Page 66: Notes
Notes Quickly capture thoughts, reminders, ideas, drawings and phone numbers with Notes. You can create a written note or an audio recording. You can also include a recording in a note. To create a note. 1. Tap Notes. 2. Tap 3. -
Page 67: E-Mail And Text Messages
E-mail and Text Messages About Accounts E-mail. The account selection screen appears. You can use multiple services to send and receive messages. For different ways of accessing messages, there are different types of account: Text Messages (select models only): This ... -
Page 68: Reading And Sending E-Mails
Reading and Sending E-mails Reading E-mails When you connect to your email server or synchronize with your desktop computer or server, by default, you will receive messages from the last three days only and the first 2 KB of each new message, and not to sync file attachments. -
Page 69: Reading And Sending Text Messages (Select Models Only)
Reading and Sending Text Messages (Select Models Only) Reading Text Messages The Home screen shows if there are new text messages. You can tap the item to view the message. You can also tap Text to open the message list. Sending Text Messages 1. -
Page 71: Chapter 6 More Programs
Chapter 6 More Programs In addition to Microsoft Pocket Outlook, there are other programs built into your device. This chapter tells you how to use these programs. ActiveSync ActiveSync on your device works with ActiveSync on a Windows XP computer and with Windows Mobile Device Center on a Windows Vista/Windows 7/Windows 8 computer. -
Page 72: Synchronizing Directly With Exchange Server
NOTE: In addition to the USB cable, you can also synchronize by using Bluetooth. (See the ActiveSync or Windows Mobile Device Center help on your computer.) Synchronizing Directly with Exchange Server You can increase your productivity when you are away from the office by setting up an account to access e-mail, voice mail, calendar, and contact information from a Microsoft Exchange Server. -
Page 73: Internet Explorer
PowerPoint Mobile 2010 SharePoint WorkSpace Mobile 2010 Word Mobile 2010 Internet Explorer Tap favorites Internet Explorer on the Home screen or tap Internet Explorer to switch to the program. The IE Mobile Home page appears. to display the Favorites list. Tap the page that you want to view. -
Page 74: Pictures & Videos
Pictures & Videos With Pictures & Videos, you can: View pictures and video clips. Send pictures and videos to others. Set a picture as the background on the Home screen. Play slide show. Edit your pictures. ... -
Page 75: Camera
Camera The Camera program allows you to take pictures and record video clips. Taking Pictures 1. To start the program, press the key on your device or tap Pictures & Videos Camera. The Camera screen appears. Below the display area are indicators of the current status. - Page 76 Menu Items Descriptions Resolution Nine choices from 160x120 to 2592x1944 (1600x1200 by default) Zoom Available choices depend on the resolution. White Five choices from which you can select one that matches Balance the current light source. Flash Flash on or off. Options Overall settings to the Camera program.
-
Page 77: Recording Video Clips
Recording Video Clips 1. To start the program, press the key on your device or tap Pictures & Videos Camera. 2. Tap Menu Video to switch to the video mode. Below the display area are indicators of the current status. 3. -
Page 78: Camera Controls And Options
5. To stop, press the key or tap Stop. Or, the recording will automatically stop when the length reaches the pre-defined maximum value (30 seconds by default). 6. The video clip is saved to the predefined storage location. To view the video clip, tap Thumbnails. -
Page 79: E-Compass
E-Compass The E-Compass program shows directions of movement including heading, pitch angle, roll angle, and altitude. Reading and Calibrating the Compass To run the program, tap E-Compass. Each time you start the program, you’ll be requested to calibrate the compass. -
Page 80: Compass Settings
Avoid playing the MP3 music with the internal speaker or connecting the AC adapter. This will cause the magnetic interference to the compass. Regularly set the reference altitude for an accurate output. (See the next section.) Compass Settings The value of altitude is adjusted according to the change in the ambient pressure. -
Page 81: Taclink
TacLink The TacLink program receives GPS satellite signals to calculate the location of your device. You can also record a NMEA log file for the use of other applications. NOTE: TacLink only supports NMEA format. TacLink will not start if you have set the GPS output format to Binary Mode in ... -
Page 82: Nmea Log
NMEA Log To start logging, tap Setting Log Start. To stop, tap Setting Log Stop. For each logging section, new data is added to the end of the existing data in the same file. By default, the log file is named “GeTACGPSLog” and saved to “My Documents”... -
Page 83: Rfid Demo (Select Models Only)
RFID tags. The tag types supported are ISO15693, ISO14443A, ISO14443B and Mifare S50/S70. NOTE: For enhanced applications and customization of the RFID module, contact your authorized Getac dealer. To run the program, press the Extra key on your device or tap RFID Demo. -
Page 84: Writing Data To 15693 Tags
Writing Data to 15693 Tags 1. Start RFID Demo. Tap the 15693 tab. 2. Tap SetProtocol to specify 15693 as the target. 3. Bring the tag near the RFID antenna. Tap CheckUID to obtain the UID of the tag. 4. Enter the block number you want to read data from. -
Page 85: Chapter 7 Getting Connected
Chapter 7 Getting Connected This chapter tells you how you can get your device connected through a variety of ways. Types of Connections Your device can connect to the Internet, to your computer, and to other devices and services. Your device has two groups of connection settings: My ISP and My Work Network. -
Page 86: Using Cellular Connection (Select Models Only)
Using Cellular Connection (Select Models Only) Models supporting mobile phone functions allow you to access the Internet using the mobile network. Setting up a Cellular (GPRS) Connection NOTE: You must subscribe to GPRS service with your mobile operator. In most cases, your cellular (GPRS) connection will be preconfigured by your cellular service provider. -
Page 87: Setting Up A Dial-Up Connection
Setting up a Dial-up Connection NOTE: Depending on your wireless service provider, dial-up connections may not be supported on your device. With dial-up, your service provider gives you a phone number that you dial in order to connect your device to the Internet. 1. -
Page 88: Using Wlan (Wireless Local Area Network)
Using WLAN (Wireless Local Area Network) Switching On or Off the WLAN Radio By default, the WLAN radio is switched off. To switch on or off the WLAN radio: 1. Tap Settings Connections Wireless Manager. 2. In the Wireless Manager screen, tap WLAN to change the WLAN radio status. -
Page 89: Using The Bluetooth Function
4. Select to connect to the Internet or the private network, and then tap Connect. 5. If the selected network requires a network key, enter the key and tap Connect. icon appears on the navigation bar and the RF indicator on your device flashes in amber. -
Page 90: Sending Files Via The Bluetooth Function
3. For other devices to detect your device, tap Menu Bluetooth Settings Mode Make this device visible to other devices. 4. Tap OK. NOTE: When not using the Bluetooth function, switch off the Bluetooth radio. Leaving the radio on will consume more power. -
Page 91: Creating A Bluetooth Partnership
Creating a Bluetooth Partnership NOTE: Getac does not guarantee the product’s compatibilities with the Bluetooth headsets/devices from all manufacturers. To know the Bluetooth profiles that your device supports, tap Settings Bluetooth About Profiles. A partnership is a relationship that you create between your device and another device with Bluetooth capabilities to help exchange information in a secure manner. -
Page 93: Troubleshooting And Maintenance
Chapter 8 Troubleshooting and Maintenance This chapter gives solutions to common device problems you may encounter. It also provides guidelines on taking care of your device. Resetting Your Device Occasionally, you may need to reset your device. For example, you should reset your device when it stops responding;... -
Page 94: Restoring Factory Default State
Restoring Factory Default State In some cases, you may need to restore your device to the factory default state by clearing the memory from your device. For example, you should clear the memory: When your device does not respond after being restarted. ... -
Page 95: Troubleshooting
Troubleshooting NOTE: If you encounter a problem you cannot solve, contact your dealer for assistance. Problem Solution Power does not switch on The remaining battery power may be too when using battery power. low to run your device. Charge the battery. Screen responds slowly. -
Page 96: Caring For Your Device
Problem Solution A warning message of not Delete files you no longer need. enough memory appears. Remove programs you no longer need. Delete all files and clear history in Internet Explorer. Stop programs you are not currently using. To check the state of your active programs, tap ... - Page 97 Never clean your device with it powered on. Use a soft, lint-free cloth to wipe the screen and the exterior of your device. Do not use paper towels to clean the screen. Never attempt to disassemble, repair or make any modifications to your ...
-
Page 99: Chapter 9 Regulatory Information
Chapter 9 Regulatory Information This chapter provides regulatory statements and safety notices on your device. NOTE: Marking labels located on the exterior of your device indicate the regulations that your model complies with. Please check the marking labels on your device and refer to the corresponding statements in this chapter. Some notices apply to specific models only. -
Page 100: Fcc Regulations
ElectroMagnetic Compatibility (EMC) standard for radio equipment and services; Part 17: Specific conditions for 2.4 GHz wideband transmission systems and 5 GHz high performance RLAN equipment EN55022: Radio disturbance characteristics EN55024: Immunity characteristics EN6100-3-2: Limits for harmonic current emissions EN6100-3-3: Limitation of voltage fluctuation and flicker in low-voltage supply system EN60950 / IEC 60950: Product Safety The manufacturer cannot be held responsible for modifications made by the... -
Page 101: Safety Precautions
Changes or modifications not expressly approved by the party responsible for compliance could void the user‘s authority to operate the equipment. The antenna(s) used for this transmitter must not be co-located or operating in conjunction with any other antenna or transmitter. Safety Precautions Prolonged listening of music in maximum volume can damage the ears. -
Page 102: About The Battery
Connect the charger to a proper power source. The voltage and grounding requirements are found on the product case and/or packaging. Do not use the charger if the cord becomes damaged. Do not attempt to service the unit. There are no serviceable parts inside. ... - Page 103 required to reach the network. In general, the closer you are to a wireless base station antenna, the lower the power output. The highest SAR value for the device as reported to the FCC is 0.374 W/kg (for the 3G model) or 0.116 W/kg (for the non-3G model). While there may be differences between the SAR levels of various devices and at various positions, they all meet the government requirement.
Need help?
Do you have a question about the PS336 and is the answer not in the manual?
Questions and answers