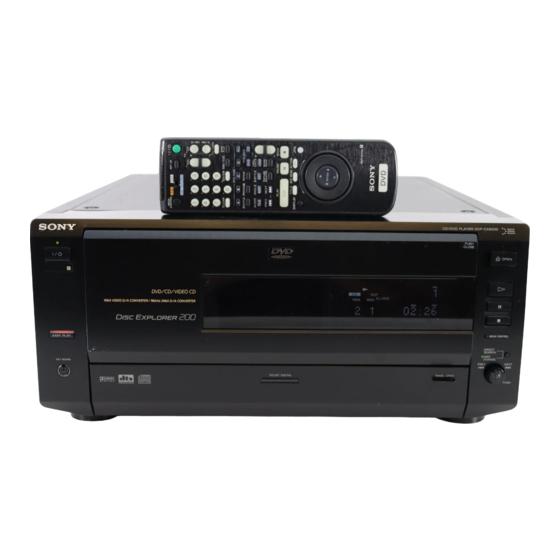
Sony DVP-CX850D Service Manual
Sony dvp-cx850d cd/dvd player service manual
Hide thumbs
Also See for DVP-CX850D:
- Operating instructions manual (88 pages) ,
- Service manual (23 pages) ,
- Operating instructions manual (84 pages)

Related Manuals for Sony DVP-CX850D


Summary of Contents for Sony DVP-CX850D
- Page 1 DVP-CX850D RMT-D113A SERVICE MANUAL US Model Canadian Model SPECIFICATIONS CD/DVD PLAYER MICROFILM...
- Page 2 MARK ! ON THE SCHEMATIC DIAGRAMS AND IN THE PARTS CRITIQUES POUR LA SÉCURITÉ DE FONCTIONNEMENT. NE LIST ARE CRITICAL TO SAFE OPERATION. REPLACE THESE REMPLACER CES COMPOSANTS QUE PAR DES PIÈSES SONY COMPONENTS WITH SONY PARTS WHOSE PART NUMBERS DONT LES NUMÉROS SONT DONNÉS DANS CE MANUEL OU APPEAR AS SHOWN IN THIS MANUAL OR IN SUPPLEMENTS DANS LES SUPPÉMENTS PUBLIÉS PAR SONY.
-
Page 3: Table Of Contents
Settings for Display (SCREEN SETUP) ····························· 1-14 ILLUMINATION CHECK ················································· 7 Custom Settings (CUSTOM SETUP) ································· 1-15 5-1. FL Display Tube for DVP-CX850D ··································· 8 Setting for Sound (AUDIO SETUP) ···································· 1-15 5-2. Grid Check ········································································· 9 Speaker Set Up ···································································· 1-16 5-3. -
Page 4: Ic Pin Function Description
• MB-85 (ARP) TEST MODE SCHEMATIC DIAGRAM ···························· 4-19 6-1. GENERAL DESCRIPTION ··········································· 6-1 • MB-85 (AV DECODER) 6-2. STARTING TEST MODE ··············································· 6-1 SCHEMATIC DIAGRAM ···························· 4-21 6-3. SYSCON DIAGNOSIS ··················································· 6-1 • MB-85 (AUDIO DSP, V EQ/NR) 6-4. DRIVE AUTO ADJUSTMENT ······································ 6-5 SCHEMATIC DIAGRAM ····························... -
Page 5: Service Note
SERVICE NOTE • The two flat type wires that connect the TK-51 board with the MB-85 board are not equipped with the mis-insertion preventive measures. If the two wires are incorrectly inserted each other by mistake, it can damage the MB-85 board as the secondary failure. Flat type wire (18 core) (from CN002 to CN003) -
Page 6: Self-Diagnosis Function
2. HOW TO ENTER THE TEST MODE While pressing the [RETURN] and [STOP] or the [TIME/TEXT] and [EDIT] buttons of the DVP-CX850D at the same time in the standby mode, press the [SET UP] button of the remote commander to enter the test mode. -
Page 7: Detailed Description Of The Front Board Test
The FL display tube can be simply checked by the automatic display mode, but can be checked more precisely by this mode. All segments of the FL display tube are turned on when the [STOP] and [PLAY] buttons of the DVP-CX850D are pressed at the same time. -
Page 8: Fl Display Tube For Dvp-Cx850D
5-1. FL Display Tube for DVP-CX850D NEXT DISC VIDEO CD Digital DTS ANGLE MPEG NTSC REPEAT 1 A - B PGM SHUFFLE TEXT DISC DVD CD A B C D ALL DISCS TRACK INDEX TITLE CHAPTER HOUR 1-1 2-1 3-1 4-1 5-1... -
Page 9: Grid Check
Any desired grid of the FL display tube can be turned on one after another by this mode. (All anodes of the corresponding grid are turned on.) Move the click shuttle control of the DVP-CX850D to select the desired grid to test. -
Page 10: Fld Auto Test Operation
9. FLD AUTO TEST OPERATION The AUTO TEST operation starts by STOP + RETURN of the machine while power-off or SET UP key of remote commander. * The segments of the FL display tubes shown in half-tone in the illustration, turn on. 1 FLD All segments turn on display (5 seconds). - Page 11 5 Grid TEST Start display (1 second). NEXT DISC VIDEO CD Digital DTS ANGLE MPEG NTSC REPEAT 1 A - B TEXT DISC PGM SHUFFLE DVD CD A B C D ALL DISCS TRACK INDEX TITLE CHAPTER HOUR G R I D T E S T 6 FLD odd number Grid turn on (0.7 second).
- Page 12 9 FLD even number Anode turn on (0.7 second). NEXT DISC VIDEO CD Digital DTS ANGLE MPEG NTSC REPEAT 1 A - B TEXT DISC PGM SHUFFLE DVD CD A B C D ALL DISCS TRACK INDEX TITLE CHAPTER q; FLD odd number Anode turn on (0.7 second). NEXT DISC VIDEO CD...
-
Page 13: General
DVP-CX850D SECTION 1 This section is extracted from GENERAL instruction manual. - Page 22 1-10...
- Page 23 1-11...
- Page 24 1-12...
- Page 25 1-13...
- Page 26 1-14...
- Page 27 1-15...
- Page 28 1-16...
- Page 29 1-17...
- Page 30 1-18...
- Page 31 1-19...
- Page 32 1-20E...
-
Page 33: Disassembly
DVP-CX850D SECTION 2 DISASSEMBLY NOTE: Follow the disassembly procedure in the numerical order given. 2-1. FRONT PANEL 3 Remove the claw 1 Two screws (BVTP 3 1 Two screws (BVTP 3 5 Front panel assembly 4 Remove the claw 2 Five screws (BVTP 3 2-2. - Page 34 2-3. TABLE 200 ASSEMBLY 2 Three screws (BVTT 3 1 Connector (CN654) 4 Screws (+PSW 3 CK-82 board 3 Screws (BVTP 3 2 Three screws (BVTP 3 1 Stop ring (E type) 3 Three holder assemblies 6 Table 200 assembly 7 Washer 4 Two screws (BVTP 3...
-
Page 35: Mechanism Deck
2-4. MECHANISM DECK MB-85 board 2 Flat type wire (18 core)(CN003) 1 Flat type wire (18 core)(CN002) 6 Mechanism deck 3 Connector (CN653) CK-82 board CK-82 board 4 Connector (CN657) 5 Nine screws (BVTT 3 2-5. BASE UNIT 1 Screw (BVTT 3 2 Fulcrum plate (BU UPPER) assy 3 Base unit... -
Page 36: Internal Views
2-6. INTERNAL VIEWS FRONT PANEL SIDE OPTICAL PICK-UP (KHM-220AAA/J1RP) 8-820-081-03 TABLE MOTOR ASSY A-6062-234-A MOTOR ASSY, LOADING A-6062-239-A... -
Page 37: Circuit Boards Location
2-7. CIRCUIT BOARDS LOCATION MB-85 (SIGNAL PROCESS/SERVO) SO-11 CO-25 (SO LED) (CONTROL JACK) FR-155 (IR/POWER SWITCH) TS-150 (TABLE SENSOR) LT-34 SI-24 (TABLE LED) (SI SENSOR) AU-216 (AUDIO) POWER BLOCK KB-36 (HS-030SU) (KEY BOARD JACK) (SWITCHING REGULATOR) LE-25 CK-82 (MULTI LED) (MOTOR DRIVE) SW-322 TM-126... -
Page 38: Block Diagrams
DVP-CX850D SECTION 3 BLOCK DIAGRAMS 3-1. OVERALL BLOCK DIAGRAM... -
Page 39: Rf/Servo Block Diagram
DVP-CX850D 3-2. RF/SERVO BLOCK DIAGRAM (1/7) (DVD play) (DVD play) (DVD play) (DVD play) (DVD play) 520 mVp-p 0.1 V/div 300 mp-p 1.4 Vp-p 1.3 Vp-p 100 mV/div 500 mV/div 220 mVp-p 50 sec/div 50 msec/div 10 msec/div 50 msec/div... -
Page 40: Signal Process Block Diagram
DVP-CX850D 3-3. SIGNAL PROCESS BLOCK DIAGRAM (DVD play) 1.4 Vp-p 50 nsec/div 0.5 V/div 1.0 Vp-p 620 mVp-p (CD play) 1.4 Vp-p 0.2 sec/div 620 mVp-p 0.5 V/div 1.2 Vp-p 1.0 Vp-p 720 mVp-p... -
Page 41: Video Block Diagram
DVP-CX850D 3-4. VIDEO BLOCK DIAGRAM (1/3) 1.2 Vp-p 2.4 Vp-p 1.0 Vp-p 2.0 Vp-p 750 mVp-p 1.7 Vp-p... -
Page 42: System Control Block Diagram
DVP-CX850D 3-5. SYSTEM CONTROL BLOCK DIAGRAM 3.0 Vp-p 24.884 MHz 3.9 Vp-p 36.8634 MHz 2.1 Vp-p 12.416 MHz 3.6 Vp-p 24.5756 MHz 3.4 Vp-p 27 MHz 3.2 Vp-p 33.8682 MHz 3-10... -
Page 43: Audio Block Diagram-1
DVP-CX850D 3-6. AUDIO BLOCK DIAGRAM-1 3-11 3-12... -
Page 44: Audio Block Diagram-2
DVP-CX850D 3-7. AUDIO BLOCK DIAGRAM-2 3-13 3-14... -
Page 45: Interface Control Block Diagram
DVP-CX850D 3-8. INTERFACE CONTROL BLOCK DIAGRAM 3.9 Vp-p 4 MHz 3-15 3-16... -
Page 46: Power Block Diagram
DVP-CX850D 3-9. POWER BLOCK DIAGRAM 3-17 3-18E... -
Page 47: Printed Wiring Boards And Schematic Diagrams
DVP-CX850D DVP-CX850D SECTION 4 PRINTED WIRING BOARDS AND SCHEMATIC DIAGRAMS THIS NOTE IS COMMON FOR WIRING BOARDS AND SCHEMATIC DIAGRAMS (In addition to this, the necessary note is printed in each block) (For printed wiring boards) (For schematic diagrams) • X : indicates a lead wire mounted on the component side. -
Page 48: Frame Schematic Diagram
DVP-CX850D 4-1. FRAME SCHEMATIC DIAGRAM FRAME SCHEMATIC DIAGRAM... - Page 49 DVP-CX850D AC IN 120V 60Hz CN201 CN202 FRAME SCHEMATIC DIAGRAM...
-
Page 50: Printed Wiring Board
DVP-CX850D 4-2. PRINTED WIRING BOARDS AND SCHEMATIC DIAGRAMS TK-51 (RF/SERVO) PRINTED WIRING BOARD — Ref. No. TK-51 Board; 5,000 Series — TK-51 BOARD IC001 1 (DVD play) IC001 el (CD play) 1.3 Vp-p 520 mVp-p 0.1 V/div 500 mV/div 50 sec/div... -
Page 51: Schematic Diagram
DVP-CX850D TK-51 (RF/SERVO) SCHEMATIC DIAGRAM — Ref. No. TK-51 Board; 5,000 Series — (SEE PAGE 4-15) (SEE PAGE 4-15) RF/SERVO 4-10 TK-51... -
Page 52: Signal Process/Servo
DVP-CX850D MB-85 (SIGNAL PROCESS/SERVO) PRINTED WIRING BOARD (SIDE A) — Ref. No. MB-85 Board; 4,000 Series — 15 16 17 18 For printed wiring boards MB-85 (SIGNAL PROCESS/SERVO) There are few cases that the part printed on this SO-11 CO-25 (SO LED) diagram isn’t mounted in this model. - Page 53 DVP-CX850D MB-85 (SIGNAL PROCESS/SERVO) PRINTED WIRING BOARD (SIDE B) — Ref. No. MB-85 Board; 4,000 Series — For printed wiring boards MB-85 (SIGNAL PROCESS/SERVO) There are few cases that the part printed on this SO-11 CO-25 (SO LED) diagram isn’t mounted in this model.
-
Page 54: Inter Face
DVP-CX850D For schematic diagram MB-85 (INTER FACE) SCHEMATIC DIAGRAM • Refer to page 4-11 for printed wiring board. — Ref. No. MB-85 Board; 4,000 Series — (SEE PAGE 4-45) (SEE PAGE 4-33) (SEE PAGE 4-33) (SEE PAGE 4-33) (SEE PAGE... -
Page 55: System Control
DVP-CX850D For schematic diagram MB-85 (SYSTEM CONTROL) SCHEMATIC DIAGRAM • Refer to page 4-11 for printed wiring board. — Ref. No. MB-85 Board; 4,000 Series — MB-85 BOARD (2/9) IC202 os 2.1 Vp-p 12.416 MHz IC202 5 3.0 Vp-p 24.884 MHz... -
Page 56: Arp
DVP-CX850D For schematic diagram MB-85 (ARP) SCHEMATIC DIAGRAM • Refer to page 4-11 for printed wiring board. — Ref. No. MB-85 Board; 4,000 Series — MB-85 BOARD (3/9) IC303 qj (DVD play) 1.4 Vp-p 50 nsec/div 0.5 V/div IC303 ql (CD play) 1.4 Vp-p... -
Page 57: Av Decoder
DVP-CX850D For schematic diagram MB-85 (AV DECODER) SCHEMATIC DIAGRAM • Refer to page 4-11 for printed wiring board. • Refer to page 4-23 for waveforms. — Ref. No. MB-85 Board; 4,000 Series — AV DECODER 4-21 4-22 MB-85 (4/9) -
Page 58: Audio Dsp, V Eq/Nr
DVP-CX850D For schematic diagram MB-85 (AUDIO DSP, V EQ/NR) SCHEMATIC DIAGRAM • Refer to page 4-11 for printed wiring board. — Ref. No. MB-85 Board; 4,000 Series — MB-85 BOARD (4/9) IC401 tf IC401 ya 1.0 Vp-p 620 mVp-p IC401 tj... -
Page 59: Schematic Diagram
DVP-CX850D For schematic diagram MB-85 (HGA) SCHEMATIC DIAGRAM • Refer to page 4-11 for printed wiring board. — Ref. No. MB-85 Board; 4,000 Series — 4-25 4-26 MB-85 (6/9) -
Page 60: Servo Dsp
DVP-CX850D For schematic diagram MB-85 (SERVO DSP) SCHEMATIC DIAGRAM • Refer to page 4-11 for printed wiring board. — Ref. No. MB-85 Board; 4,000 Series — MB-85 BOARD (7/9) IC701 yl (DVD play) 1.3 Vp-p 50 msec/div 500 msec/div IC701 yl (CD play) 1.3 Vp-p... -
Page 61: Drive
DVP-CX850D For schematic diagram MB-85 (DRIVE) SCHEMATIC DIAGRAM • Refer to page 4-11 for printed wiring board. — Ref. No. MB-85 Board; 4,000 Series — DRIVE 4-29 4-30 MB-85 (8/9) -
Page 62: Dac
DVP-CX850D MB-85 (DAC) SCHEMATIC DIAGRAM For schematic diagram • Refer to page 4-11 for printed wiring board. — Ref. No. MB-85 Board; 4,000 Series — 4-31 4-32 MB-85 (9/9) -
Page 63: Lpf Amp
DVP-CX850D For schematic diagram AU-216 (LPF AMP) SCHEMATIC DIAGRAM • Refer to page 4-37 for printed wiring board. — Ref. No. AU-216 Board; 1,000 Series — (SEE PAGE 4-16) (SEE PAGE 4-15) (SEE PAGE 4-15) HS-030SU (SEE PAGE 4-74) LPF AMP... -
Page 64: Video Amp
DVP-CX850D AU-216 (VIDEO AMP) SCHEMATIC DIAGRAM — Ref. No. AU-216 Board; 1,000 Series — AU-216 BOARD (2/2) IC321 2 1.0 Vp-p IC321 4 (SEE PAGE 4-41) 1.2 Vp-p IC321 7 750 mVp-p IC321 0 1.7 Vp-p IC321 qd 2.4 Vp-p IC321 qg 2.0 Vp-p... -
Page 65: Audio
DVP-CX850D AU-216 (AUDIO) PRINTED WIRING BOARD — Ref. No. AU-216 Board; 1,000 Series — For printed wiring boards MB-85 (SIGNAL PROCESS/SERVO) There are few cases that the part printed on this SO-11 (SO LED) CO-25 diagram isn’t mounted in this model. - Page 66 DVP-CX850D CO-25 (CONTROL JACK) PRINTED WIRING BOARD — Ref. No. CO-25 Board; 1,000 Series — For printed wiring boards MB-85 (SIGNAL PROCESS/SERVO) There are few cases that the part printed on this SO-11 (SO LED) CO-25 diagram isn’t mounted in this model.
- Page 67 DVP-CX850D CO-25 (CONTROL JACK) SCHEMATIC DIAGRAM — Ref. No. CO-25 Board; 1,000 Series — (SEE PAGE 4-36) CONTROL JACK 4-41 4-42 CO-25...
-
Page 68: Printed Wiring Board
DVP-CX850D CK-82 (MOTOR DRIVE) PRINTED WIRING BOARD — Ref. No. CK-82 Board; 2,000 Series — For printed wiring boards MB-85 (SIGNAL PROCESS/SERVO) There are few cases that the part printed on this SO-11 (SO LED) CO-25 diagram isn’t mounted in this model. -
Page 69: Schematic Diagram
DVP-CX850D CK-82 (MOTOR DRIVE) SCHEMATIC DIAGRAM — Ref. No. CK-82 Board; 2,000 Series — (SEE PAGE 4-53) (SEE PAGE 4-16) (SEE PAGE 4-53) (SEE PAGE 4-53) TS-150 (SEE (SEE PAGE PAGE 4-54) 4-49) (SEE PAGE 4-54) (SEE PAGE 4-61) (SEE... - Page 70 DVP-CX850D TS-150 (TABLE SENSOR), SI-24 (SI SENSOR), SO-11 (SO LED) PRINTED WIRING BOARDS — Ref. No. TS-150, 6,000 SI-24, SO-11 Board; 1,000 Series — For printed wiring boards There are few cases that the part printed on this diagram isn’t mounted in this model.
- Page 71 DVP-CX850D TS-150 (TABLE SENSOR), SI-24 (SI SENSOR), SO-11 (SO LED) SCHEMATIC DIAGRAMS — Ref. No. TS-150, 6,000 SI-24, SO-11 Board; 1,000 Series — (SEE PAGE 4-45) TABLE SENSOR SI SENSOR SO LED 4-49 4-50 TS-150 SI-24 SO-11...
-
Page 72: Loading Motor
DVP-CX850D LT-34 (TABLE LED), TM-126 (TABLE MOTOR), DS-87 (DOOR SWITCH), LS-52 (CHACK SENSOR), LM-58 (LOADING MOTOR) PRINTED WIRING BOARDS — Ref. No. LT-34, TM-126, DS-87, LS-52, LM-58 Board; 1,000 Series — For printed wiring boards MB-85 (SIGNAL PROCESS/SERVO) There are few cases that the part printed on this... - Page 73 DVP-CX850D LT-34 (TABLE LED), TM-126 (TABLE MOTOR), DS-87 (DOOR SWITCH), LS-52 (CHACK SENSOR), LM-58 (LOADING MOTOR) SCHEMATIC DIAGRAMS — Ref. No. LT-34, TM-126, DS-87, LS-52, LM-58 Board; 1,000 Series — (SEE PAGE 4-45) (SEE PAGE 4-46) (SEE PAGE (SEE PAGE...
-
Page 74: Function Switch
DVP-CX850D FL-105 (FUNCTION SWITCH) PRINTED WIRING BOARD (SIDE A) — Ref. No. FL-105 Board; 3,000 Series — For printed wiring boards MB-85 (SIGNAL PROCESS/SERVO) SO-11 There are few cases that the part printed on this (SO LED) CO-25 diagram isn’t mounted in this model. - Page 75 DVP-CX850D FL-105 (FUNCTION SWITCH) PRINTED WIRING BOARD (SIDE B) — Ref. No. FL-105 Board; 3,000 Series — For printed wiring boards There are few cases that the part printed on this diagram isn’t mounted in this model. MB-85 (SIGNAL PROCESS/SERVO)
-
Page 76: Dc-Dc Converter
DVP-CX850D For schematic diagram FL-105 (DC-DC CONVERTER) SCHEMATIC DIAGRAM • Refer to page 4-55 for printed wiring board. — Ref. No. FL-105 Board; 3,000 Series — HS-030SU (SEE PAGE 4-74) (SEE PAGE 4-70) DC-DC CONVERTER 4-59 4-60 FL-105 (1/2) -
Page 77: Display Contorl)
DVP-CX850D For schematic diagram FL-105 (DISPLAY CONTORL) SCHEMATIC DIAGRAM • Refer to page 4-55 for printed wiring board. — Ref. No. FL-105 Board; 3,000 Series — (SEE PAGE 4-45) (SEE PAGE 4-66) (SEE PAGE 4-70) FL-105 BOARD (2/2) IC201 qf IC201 wj EXP_CLK 3.9 Vp-p... - Page 78 DVP-CX850D SW-322 (SURROUND SWITCH), LE-25 (MULTI LED) PRINTED WIRING BOARDS — Ref. No. SW-322, LE-25 Board; 1,000 Series — For printed wiring boards MB-85 (SIGNAL PROCESS/SERVO) There are few cases that the part printed on this SO-11 CO-25 (SO LED) diagram isn’t mounted in this model.
- Page 79 DVP-CX850D SW-322 (SURROUND SWITCH), LE-25 (MULTI LED) SCHEMATIC DIAGRAMS — Ref. No. SW-322, LE-25 Board; 1,000 Series — (SEE PAGE 4-62) SURROUND SWITCH MULTI LED 4-65 4-66 SW-322 LE-25...
-
Page 80: Ir/Power Switch
DVP-CX850D FR-155 (IR/POWER SWITCH), KB-36 (KEY BOARD JACK) PRINTED WIRING BOARDS — Ref. No. FR-155, KB-36 Board; 1,000 Series — For printed wiring boards MB-85 (SIGNAL PROCESS/SERVO) There are few cases that the part printed on this SO-11 CO-25 (SO LED) diagram isn’t mounted in this model. - Page 81 DVP-CX850D FR-155 (IR/POWER SWITCH), KB-36 (KEY BOARD JACK) SCHEMATIC DIAGRAMS — Ref. No. FR-155, KB-36 Board; 1,000 Series — (SEE PAGE 4-59) (SEE PAGE 4-61) IR/POWER SWITCH KEY BOARD JACK 4-69 4-70 FR-155 KB-36...
- Page 82 DVP-CX850D HS-030SU (SWITCHING REGULATOR) PRINTED WIRING BOARD — Ref. No. HS-030SU Board; 7,000 Series — For printed wiring boards MB-85 (SIGNAL PROCESS/SERVO) There are few cases that the part printed on this SO-11 CO-25 (SO LED) diagram isn’t mounted in this model.
- Page 83 DVP-CX850D HS-030SU (SWITCHING REGULATOR) SCHEMATIC DIAGRAM — Ref. No. HS-030SU Board; 7,000 Series — HS-030SU BOARD T101 L211 P211 D211 10uH CN201 8P 500mA 60V S2L20U +3.3V C112 0.047uF 630V Q103 C211 C213 2SK2178 47uF 330uF R152 +12V L150 AU-216 BOARD SWITCH 0.22...
- Page 84 DVP-CX850D SECTION 5 IC PIN FUNCTION DESCRIPTION 5-1E...
-
Page 85: Test Mode
DVP-CX850D SECTION 6 TEST MODE 6-1. GENERAL DESCRIPTION ### Syscon Diagnosis ### The Test Mode allows you to make diagnosis and adjustment easily Diag All Check using the remote commander and monitor TV. The instructions, No.2 Version diagnostic results, etc. are given on the on-screen display (OSD). - Page 86 Selecting 2 and subsequent items executes respective menus and (3-4) NAND Flash Check outputs the results. Data clear write read, and accord check For the contents of each submenu, see “Check Items List”. Error 04: Clear error 05: Write error General Description of Checking Method 06: Read data discord 2.
- Page 87 6. AV Decoder (5-3) ARP to RAM Data Bus Data write read, and accord check Error 09: ARP RAM data bus error (6-2) 1930 RAM Data 0x0001 to 0x8000 where one bit each is set to 1 are Data write read, and accord check written to the address 0 of RAM (IC304) connected to the Error 13: AVD RAM read data discord...
- Page 88 8. Audio 6) AV Decoder (6-2) 1930 RAM (6-3) 1930 SP (8-2) ARP -> 1930 Error 14 : ARP 1930 video NG 7) Video 15 : ARP 1930 audio NG (7-2) Color Bar (8-3) Test Tone 8) Audio A pink noise signal is output from the AVD (IC401) through (8-2) ARP 1930 optical coaxial digital terminal and analog audio terminal.
-
Page 89: Drive Auto Adjustment
1. DVD-SL (single layer) 6-4. DRIVE AUTO ADJUSTMENT Select 1, insert DVD single layer disc, and press ENTER key, On the Test Mode Menu screen, press 1 key on the remote and the adjustment will be made through the following steps, then commander, and the drive auto adjustment menu will be displayed. - Page 90 2. CD 3. DVD-DL (dual layer) Select 3, insert DVD dual layer disc, and press ENTER key, and Select 2, insert CD disc, and press ENTER key, and the adjustment the adjustment will be made through the following steps, then will be made through the following steps, then adjusted values will adjusted values will be written to the EEPROM.
-
Page 91: Drive Manual Operation
4. SACD 6-5. DRIVE MANUAL OPERATION Select 4, insert SACD disc, and press ENTER key, and the On the Test Mode Menu screen, select 2, and the manual operation adjustment will be made through the following steps, then adjusted menu will be displayed. For the manual operation, each servo on/ values will be written to the EEPROM. - Page 92 0. Disc Check Memory Disc Type 1. Disc Type Auto Check 2. DVD SL 12cm Disc Check 3. DVD DL 12cm 4. CD 12cm 5. SACD 12cm 1. SL Disc Check 6. DVD SL 2. CD Disc Check 7. DVD DL 3.
-
Page 93: Mecha Aging
- Reset SLED TILT Reset the Sled and Tilt to initial position. ## 200CHG MechaCon Menu1 ## 1 LD Turn ON/OFF the laser. ENTER : Table initial PLAY : Disc1 Move (Chuck) 2 SP Turn ON/OFF the spindle. STOP : UnChuck disc1 Door PAUSE : SPDL On/Off 3 Focus Search the focus and turn on the focus. -
Page 94: Emergency History
### Mecha Aging ### ### Mecha Aging ### Press ENTER : Table Move Count : Press PLAY : Start Press ENTER : Table Move Abort: STOP Key Press RETURN : Exit Pressing the ENTER key again starts moving the disc table and the Pressing the ENTER key at this moment moves the disc table to following display appears. -
Page 95: Version Information
How to see Emergency History 6-8. VERSION INFORMATION ## Version Information ## IF con. Ver.x.xxx (xxxx) Group SYScon. Ver.x.xxx (xxxx) Model Region Servo DSP Ver.x.xxx 1: Emergency Code 2: Don’t Care Exit : RETURN These codes are used for verification of software designing. 3: Historical order 1 to 9 On the Test Mode Menu screen, selecting 5 displays the ROM Emergency Codes List... -
Page 96: Mechanical Adjustments
DVP-CX850D SECTION 7 MECHANICAL ADJUSTMENTS Adjust the sensor block in the numerical order given. 7-2. SO-11 BOARD POSITION 7-1. TS-150 Board Position Adjustment ADJUSTMENT 7-2. SO-11 Board Position Adjustment 7-3. Disc Sensor Level Adjustment Adjustment Procedure: 7-4. Disc/Table Sensor Check Enter the test mode. -
Page 97: Disc Sensor Level Adjustment
Adjust the position (angle) of the TS-150 board until the top peak of the SI-E signal (pin-2 of CN704 on TS-150 board) is positioned at the center of the period when both the T. SENS2 signal and T. SENS3 signal are High. (Clockwise direction when viewed from the top: turning to the right) T.SENS2 T.SENS3... -
Page 98: Electrical Adjustment
DVP-CX850D SECTION 8 ELECTRICAL ADJUSTMENT 8-1. POWER SUPPLY ADJUSTMENT In making adjustment, refer to 8-3. Adjustment Related Parts Arrangement. 1. HS-030SU Board This section describes procedures and instructions necessary for adjusting electrical circuits in this set. Mode Instruments required: Instrument... -
Page 99: Adjustment Of Video System
3. Checking Component Video Output B-Y 8-2. ADJUSTMENT OF VIDEO SYSTEM (MB-85 BOARD) <Purpose> 1. Video Level Adjustment (MB-85 BOARD) This checks component video output B-Y. If it is incorrect, cor-rect <Purpose> colors will not be displayed when connected to, for instance, This adjustment is made to satisfy the NTSC standard, and if not projector. -
Page 100: Checking Component Video Output Y
5. Checking Component Video Output Y 8-3. ADJUSTMENT RELATED PARTS ARRANGEMENT (MB-85 BOARD) <Purpose> MB-85 BOARD (SIDE A) This checks component video output Y. If it is incorrect, correct brightness will not be attained when connected to, for instance, projector. CN005 Mode Video level adjustment in test mode... -
Page 101: Repair Parts List
DVP-CX850D SECTION 9 REPAIR PARTS LIST 9-1. EXPLODED VIEWS NOTE: • -XX, -X mean standardized parts, so they may • The mechanical parts with no reference number The components identified by mark ! or have some differences from the original one. -
Page 102: Disc Table Section
9-1-2. DISC TABLE SECTION not supplied 75 75 not supplied not supplied not supplied supplied not supplied not supplied supplied supplied supplied supplied M881 Ref. No. Part No. Description Remarks Ref. No. Part No. Description Remarks * 51 A-6065-372-A TM-126 BOARD, COMPLETE 4-982-805-01 INDICATOR (INTERNAL) X-4947-230-1 BRACKET (TABLE) ASSY * 69... -
Page 103: Front Panel Section-1
Ref. No. Part No. Description Remarks 3-057-009-01 KNOB (ACS) * 105 A-6065-368-A FL-105 BOARD, COMPLETE * 102 A-6065-364-A KB-36 BOARD, COMPLETE 3-531-576-11 RIVET * 103 A-6065-366-A FR-155 BOARD, COMPLETE 4-951-620-01 SCREW (2.6X8), +BVTP * 104 A-6065-363-A DS-87 BOARD, COMPLETE 4-963-404-02 EMBLEM,SONY... -
Page 104: Front Panel Section-2
9-1-4. FRONT PANEL SECTION-2 not supplied 177 188 not supplied not supplied not supplied not supplied not supplied Ref. No. Part No. Description Remarks Ref. No. Part No. Description Remarks 4-951-620-01 SCREW (2.6X8), +BVTP A-6062-221-A SUB BLOCK ASSY, FRONT PANEL X-3949-891-1 PANEL (OUTER) ASSY, CONTROL 3-056-972-01 BUTTON, OPEN/CLOSE * 153... -
Page 105: Mechanism Deck Section-1
9-1-5. MECHANISM DECK SECTION-1 not supplied not supplied not supplied Ref. No. Part No. Description Remarks Ref. No. Part No. Description Remarks X-4947-241-1 LEVER (C) ASSY 3-057-014-01 PULLEY (A) 4-982-882-01 SPRING (LIMITTER), TORSION 3-057-016-01 YOKE 3-057-906-01 SPRING FOR HOLDER 90 3-057-015-01 PULLEY (B) X-4947-239-1 LIMITTER (A) ASSY 4-983-319-01 SPRING (THRUST), COMPRESSION... -
Page 106: Mechanism Deck Section-2
9-1-6. MECHANISM DECK SECTION-2 not supplied not supplied supplied M802 Ref. No. Part No. Description Remarks Ref. No. Part No. Description Remarks 4-976-465-01 GEAR (LOADING 1) X-4947-227-1 LEVER (STOPPER) ASSY 4-976-466-01 GEAR (LOADING 2) 4-951-291-01 SCREW 4-982-893-01 GEAR (CENTER 2) X-4947-234-1 SLIDER (LOCK) ASSY X-4947-607-1 GEAR (PULLEY) ASSY 4-982-857-01 BEARING (CAM) -
Page 107: Mechanism Deck Section-3
9-1-7. MECHANISM DECK SECTION-3 Ref. No. Part No. Description Remarks Ref. No. Part No. Description Remarks 3-356-601-12 SCREW, STEP 3-531-576-11 RIVET X-4947-244-1 SLIDER (BU ADJUSTMENT) ASSY 3-057-023-01 INSULATOR (RB) X-3949-888-1 HOLDER ASSY, BU 4-981-923-01 SCREW (M), STEP * 304 A-6065-275-A TK-51 BOARD, COMPLETE ! 308 8-820-081-03 OPTICAL PICK-UP (KHM-220AAA/J1RP) Note :... -
Page 108: Electrical Parts List
AU-216 9-2. ELECTRICAL PARTS LIST NOTE: • Due to standardization, replacements in the • CAPACITORS: • SEMICONDUCTORS parts list may be different from the parts uF: µF In each case, u: µ, for example: specified in the diagrams or the components •... - Page 109 AU-216 Ref. No. Part No. Description Remarks Ref. No. Part No. Description Remarks C545 1-164-004-11 CERAMIC CHIP 0.1uF FB321 1-414-553-11 FERRITE C546 1-163-130-00 CERAMIC CHIP 360PF FB322 1-414-553-11 FERRITE C547 1-163-275-11 CERAMIC CHIP 0.001uF FB323 1-414-553-11 FERRITE C548 1-164-004-11 CERAMIC CHIP 0.1uF FB324 1-414-553-11 FERRITE...
- Page 110 AU-216 Ref. No. Part No. Description Remarks Ref. No. Part No. Description Remarks L306 1-412-953-11 INDUCTOR 15uH R326 1-216-021-00 METAL CHIP 1/10W L307 1-412-963-11 INDUCTOR 100uH R327 1-216-021-00 METAL CHIP 1/10W L321 1-412-963-11 INDUCTOR 100uH R328 1-216-021-00 METAL CHIP 1/10W R329 1-216-049-91 RES,CHIP 1/10W...
- Page 111 AU-216 CK-82 Ref. No. Part No. Description Remarks Ref. No. Part No. Description Remarks R528 1-216-049-91 RES,CHIP 1/10W C656 1-163-021-91 CERAMIC CHIP 0.01uF R541 1-216-089-91 RES,CHIP 1/10W C657 1-128-551-11 ELECT 22uF R542 1-216-069-00 METAL CHIP 6.8K 1/10W C658 1-124-767-00 ELECT 2.2uF R543 1-216-089-91 RES,CHIP...
- Page 112 CK-82 CO-25 DS-87 FL-105 Ref. No. Part No. Description Remarks Ref. No. Part No. Description Remarks R679 1-219-107-91 RES,CHIP 1/8W < RESISTOR > R684 1-216-295-91 SHORT R686 1-216-057-00 METAL CHIP 2.2K 1/10W R701 1-216-057-00 METAL CHIP 2.2K 1/10W R687 1-216-067-00 METAL CHIP 5.6K 1/10W R702...
- Page 113 FL-105 Ref. No. Part No. Description Remarks Ref. No. Part No. Description Remarks C222 1-163-021-91 CERAMIC CHIP 0.01uF < IC > C223 1-163-021-91 CERAMIC CHIP 0.01uF C224 1-124-589-11 ELECT 47uF IC201 8-759-640-12 IC M38B57MCH-G222FP C225 1-128-131-11 ELECT 22uF IC202 8-759-356-27 IC NJM2129M-TE2 C226 1-137-150-11 FILM 0.01uF...
- Page 114 FL-105 FR-155 FR-155 KB-36 Ref. No. Part No. Description Remarks Ref. No. Part No. Description Remarks R238 1-216-097-91 RES,CHIP 100K 1/10W < DIODE > R239 1-216-025-91 RES,CHIP 1/10W R259 1-216-025-91 RES,CHIP 1/10W D071 8-719-064-11 DIODE SPR-325MVW(:/1) R260 1-216-025-91 RES,CHIP 1/10W D072 8-719-056-06 DIODE SLR-342DCT32(EASY PLAY) R261...
- Page 115 LE-25 LM-58 LS-52 LT-34 MB-85 Ref. No. Part No. Description Remarks Ref. No. Part No. Description Remarks A-6065-367-A LE-25 BOARD, COMPLETE A-6065-360-A MB-85 BOARD, COMPLETE ********************* ********************** (Ref.No.: 1,000Series) (Ref.No.: 4,000Series) < CONNECTOR > < CAPACITOR > CN850 1-573-817-11 CONNECTOR, BOARD TO BOARD 3P C001 1-162-970-11 CERAMIC CHIP 0.01uF...
- Page 116 MB-85 Ref. No. Part No. Description Remarks Ref. No. Part No. Description Remarks C337 1-162-970-11 CERAMIC CHIP 0.01uF C702 1-162-970-11 CERAMIC CHIP 0.01uF C338 1-162-970-11 CERAMIC CHIP 0.01uF C703 1-107-826-91 CERAMIC CHIP 0.1uF C339 1-162-970-11 CERAMIC CHIP 0.01uF C704 1-107-826-91 CERAMIC CHIP 0.1uF C341 1-162-970-11 CERAMIC CHIP...
- Page 117 MB-85 Ref. No. Part No. Description Remarks Ref. No. Part No. Description Remarks C914 1-125-822-11 TANTALUM 10uF FB018 1-469-116-21 FERRITE C916 1-163-021-91 CERAMIC CHIP 0.01uF FB019 1-469-116-21 FERRITE C922 1-164-004-11 CERAMIC CHIP 0.1uF FB020 1-469-116-21 FERRITE C923 1-107-826-91 CERAMIC CHIP 0.1uF FB021 1-469-116-21 FERRITE...
- Page 118 MB-85 Ref. No. Part No. Description Remarks Ref. No. Part No. Description Remarks FL006 1-234-177-21 FILTER, CHIP EMI IC802 8-759-567-26 IC BA5983FP-E2 FL008 1-234-177-21 FILTER, CHIP EMI IC803 8-759-338-78 IC BA10324AFV-E2 FL009 1-234-177-21 FILTER, CHIP EMI IC902 8-759-572-26 IC CXD8799N-T2 FL010 1-234-177-21 FILTER, CHIP EMI IC904...
- Page 119 MB-85 Ref. No. Part No. Description Remarks Ref. No. Part No. Description Remarks R227 1-216-813-11 METAL CHIP 1/16W R501 1-216-809-11 METAL CHIP 1/16W R228 1-216-813-11 METAL CHIP 1/16W R519 1-216-809-11 METAL CHIP 1/16W R229 1-216-813-11 METAL CHIP 1/16W R520 1-216-833-91 RES,CHIP 1/16W R230 1-216-813-11 METAL CHIP...
- Page 120 MB-85 POWER BLOCK Ref. No. Part No. Description Remarks Ref. No. Part No. Description Remarks R803 1-216-841-11 METAL CHIP 1/16W R869 1-216-833-91 RES,CHIP 1/16W R804 1-216-841-11 METAL CHIP 1/16W R870 1-216-815-11 METAL CHIP 1/16W R805 1-216-840-11 METAL CHIP 1/16W R871 1-216-817-11 METAL CHIP 1/16W R806...
-
Page 121: Power Block
POWER BLOCK SI-24 SO-11 SW-322 Ref. No. Part No. Description Remarks Ref. No. Part No. Description Remarks D211 8-719-027-43 DIODE S2L20U A-6065-371-A SO-11 BOARD, COMPLETE D212 8-719-160-78 DIODE RD24FB2 ********************* D311 8-719-200-59 DIODE 21DQ04 (Ref.No.: 1,000Series) D401 8-719-210-21 DIODE 11EQS04 D402 8-719-110-02 DIODE RD7.5ESB1 4-976-473-01 HOLDER (LED-S) - Page 122 SW-322 TK-51 Ref. No. Part No. Description Remarks Ref. No. Part No. Description Remarks R134 1-216-059-00 METAL CHIP 2.7K 1/10W C019 1-164-172-11 CERAMIC CHIP 0.0056uF 10% R135 1-216-061-00 METAL CHIP 3.3K 1/10W C020 1-107-826-91 CERAMIC CHIP 0.1uF R136 1-216-065-91 RES,CHIP 4.7K 1/10W C021...
- Page 123 TK-51 TM-126 TS-150 Ref. No. Part No. Description Remarks Ref. No. Part No. Description Remarks R018 1-216-833-91 RES,CHIP 1/16W < VARIABLE RESISTOR > R022 1-216-811-11 METAL CHIP 1/16W R023 1-216-820-11 METAL CHIP 1/16W RV701 1-241-787-11 RES, ADJ, CARBON 47K R025 1-216-813-11 METAL CHIP 1/16W **************************************************************...
- Page 124 DVP-CX850D Sony Corporation 99H1619-1D Home Video Company 9-921-734-11 Printed in Japan ©1999.8 — 180 — Published by Quality Assurance Dept.
Need help?
Do you have a question about the DVP-CX850D and is the answer not in the manual?
Questions and answers