Honda EX5500 Owner's Manual
Honda stove user manual
Hide thumbs
Also See for EX5500:
- Parts list (13 pages) ,
- Owner's manual (48 pages) ,
- Owner's manual (57 pages)
Table of Contents
Advertisement
Advertisement
Table of Contents

Related Manuals for Honda EX5500


Summary of Contents for Honda EX5500
- Page 1 Owner’s Manual EX5500...
- Page 3 Owner’s Manual before operating the generator. Failure to do so could result in personal injury or equipment damage. and maintenance of the EX5500 generator. All is based on the latest product may be reproduced without a permanent...
-
Page 4: Table Of Contents
CONTENTS CONTENTS 1. GENERATOR SAFETY 2. COMPONENT IDENTIFICATION 3. PRE-OPERATION 4. STARTING THE ENGINE 5:GENERATOR USE ... 6. STOPPING THE ENGINE 7. MAlNTENAi)lCE 8. TRANSPORTING/STORAGE . 9. TROUBLESHOOTING 10. SPECIFICATIONS 11. WIRING DIAGRAM 12. INSTALLATION OF OPTIONAL CHECK PARTS... - Page 5 To ensure safe operation - Place the generator equipment when operating the generator. Operate the generator on a level surface. If the generator is tilted, fuel spillage may result. Exhaust gas contains poisonous carbon monoxide. Never run the generator in an enclosed area. Be sure to provide adequate ventilation.
-
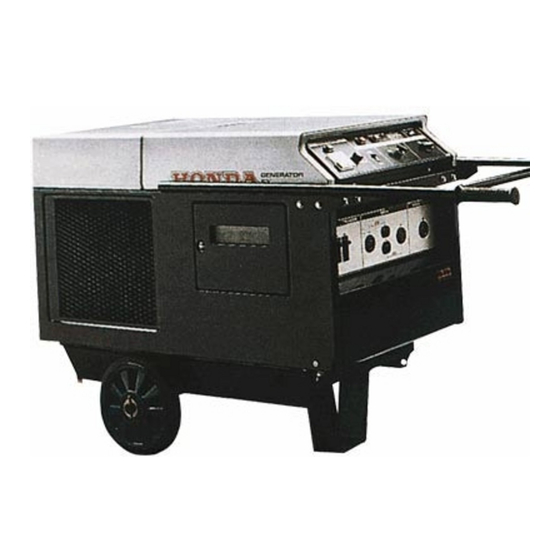
Page 6: Component Identification
2. COMPONENT IDENTIFICATION CLEANER TOP COVER LOCK .GROUND TERMlNAL-------- ENGINE FILLER -ENGINE OIL FILTER FUEL GAUGE MUFFLER... - Page 7 CONTROL VOLTAGE ADJUSTMENT KNOB PILOT LAMP VOLTMETER Cl RCUIT BREAKERS AUTO-THROTTLE SWITCH RESET BUTTON REMOTE CONTROL SWITCH FUEL VALVE KNOB AC RECEPTACLES ENGINE SWITCH...
- Page 8 3. PRE-OPERATION CAUTION: Be sure to check the generator on a level surface with the engine stopped. 1. Check the engine oil level. CAUTION: Engine oil is a major factor affecting engine performance service life. Non-detergent Use Honda 4-stroke oil, or an equivalent motor oil certified requirements...
-
Page 9: Starting The Engine
2. Check the fuel level. Use any regular grade automotive with a pump octane rating of 86 or higher. Never use an oil/gasoline or water in the fuel tank. CAUTION: Gasoline harmful to the fuel system components. Fuel tank capacity: 16.5 P (4.36 US gal 1 mm!! Gasoline is extremely... - Page 10 3. Check the coolant level. If there is no coolant in the reserve tank, check the cooling system for leaks and repair if necessary. Add coolant to the radiator, then check the coolant level in the reserve tank after the engine reaches operating temperature. Never remove the radiator cap when the engine is hot.
- Page 11 4. Check the battery. The electrolyte level must be maintained between the UPPER and LOWER level marks. If the electrolyte water. The batterv contains clothing. Antidote: Drink large quantities beaten egg or vegetable oil. Call a physician with water and get prompt medical attention. Batteries produce explosive away.
- Page 12 4. STARTING THE IENGINE 1. Turn the fuel valve...
- Page 13 2. Make sure that the circuit breakers are OFF. The generator may be hard to start if a load is connected. CIRCUIT-BREAKERS II 0 0 c c 3. Make sure the auto-throttle switch is off, or more time will be required for warm up.
- Page 14 4.Turn the engine switch to START and hold it there until the engine starts. Do not use the electric starter for more than 5 seconds at a time. If the engine fails to start, release the switch and wait 10 seconds before operating the starter again.
- Page 15 5. After the engine starts, let the engine-switch return to ON. ENGINE SWITCH 6. Warm up the engine for 2-3 minutes. Turn the auto-throttle switch to AUTO after the engine has warmed up.
- Page 16 5. GENERATOR To prevent electrical shock from faulty appliances, the generator should be grounded. terminal and the ground source. CAUTION: Limit operation minutes. For continuous KVA. In either case, the total considered. Connections for standby power to household circuits must be made by a qualified electrician codes.
- Page 17 Operation 1. Start the engine and make sure that the pilot lamp comes on. 2. Switch on the circuit breakers. 3. Plug in the appliance. NOTE: Connect 120V appliances to the 120V receptacles. You can use both 12OV/24OV appliances with the 12OV/24OV receptacle. CAUTION: Be sure that appliances do not exceed the rated load for more than 30 minutes,...
-
Page 18: Stopping The Engine
6. STOPPING THE ENGINE To stop the engine in an emergency, move the engine switch to OFF. In normal use: 1. Turn the circuit breakers OFF. CIRCUIT BREAKERS 2. Turn the engine switch OFF. ENGINE SWITCH... - Page 19 3. Turn the fuel valve OFF. ’ ’ FUELVALVE KNOB /...
- Page 20 7. MAINTENANCE The purpose of the maintenance generator in the best operating condition. Inspect or service as scheduled in the table on the next page. Shut off the engine before performing engine must be run, contains poisonous carbon monoxide gas. CAUTION: Use only genuine HONDA parts or their equivalent.
- Page 21 Maintenance Schedule orm at every indi- ating hour interval, whichever occurs NOTE (1 J : Service more frequently when used in dusty areas, (2) : These items should be serviced by an authorized Honda dealer, unless the owner has the proper tools and is mechanically proficient.
- Page 22 Toll kit The tools supplied are necessary for performing simple adjustments and repairs. Always keep the kit with the generator. Engine oil and oil filter change Drain the oil while the engine is still warm to assure rapid and complete draining.
- Page 23 Air cleaner service A dirty air cleaner will carburetor malfunction, more frequently when operating the generator in extremely Never use gasoline or low flash point solvents for cleaning the air cleaner elements. A fire or explosion could result. CAUTION: Never run the generator without wear may result.
- Page 24 4. Carefully check both elements for holes or tears and replace as required. Damaged elements will pass dirt into the system. Always clean the filter housing and air passages before installing clean elements. 5. Foam element: Clean in warm soapy water: thoroughly.
- Page 25 Fuel filter service The filter prevents dirt or water which may be in the fuel tank from entering the carburetor. If the engine has not been run for a long time, the filter should be cleaned. 1. Turn the two lock pins and open the carburetor cover. 2.
- Page 26 Spark plug service Recommended spark plug: BPRGHS-10 (NGK) To ensure proper engine operation, and free of deposits. 1. Pull the lock levers out and open the top cover. 2. Remove the spark plug cap. 3. Use the wrench supplied in the tool kit to remove the spark plug. 4.
- Page 27 Fuse replacement If the fuse is blown, the engine will not start until it is replaced. 1. Pull the lock levers out and open the top cover. 2. Turn the engine switch OFF. 3. Remove the fuse holder and replace the fuse. Use only a 10A fuse. 4.
- Page 28 Spark arrester maintenance If the generator has been running, Allow it to cool before proceeding. CAUTION: The spark arrester must be serviced every 100 hours to maintain its efficiency. 1. Loosen two 5 mm pan screws on the arrester cap. 2.
-
Page 29: Transporting/Storage
When transporting keep the generator level to prevent fuel spillage. Fuel vapor or spilled fuel may ignite. Before storing the unit for an extended period: 1. Be sure the storage area is free of excessive humidity 2. Drain the fuel - a. - Page 30 d. Drain the carburetor by loosening the drain screw. Drain the gasoline into a suitable container. DRAIN SCREW 3. Once a month, recharge the battery.
-
Page 31: Troubleshooting
A. When the engine will not start: 1. Is there enough fuel? 2. Is the fuel valve on? 3. Is gasoline reaching the carburetor? To check, loosen the drain screw with the fuel valve on. If any fuel is spilled, spark plug or starting ignite. - Page 32 a. Remove the spark plug cap. Clean any dirt from around the spark plug base, then remove the spark plug. b. Install the spark plug in the plug cap. c. Turn the engine switch on. d. Grounding the side electrode engine to see if sparks jump across the gap.
- Page 33 Dimension Length x Width x Height Dry weight Engine Model Engine Type Displacement [Bore x Stroke] Compression Ratio Engine Speed Ignition System Oil Capacity Cooling System Capacity Fuel Tank Capacity Spark plug Generator Rated voltage Rated frequency AC output Rated ampere Rated output Maximum output 10.
- Page 35 12. INSTALLATION Remote control kit The generator may be adapted for remote control optional kit. 1. Unscrew the two 6 x 10 mm flange bolts and 6 x 8 mm screws attaching the control panel. Remove the control panel. 2. Position the relay box on the back of the control inserted through the holes in the relay box flange.
- Page 36 5. Reinstall the control panel with the 6 x 10 mm flange bolts and 6 x 8 mm screws. 6. Connect the remote control 6-P male coupler the 6-P coupler on the sub panel. 6-P FEMALE COUPLER 7. Connect the remote control 6-P male coupler to the switch box.
- Page 37 Remote control operation (STARTING) i. Turn the fuel valve on. 2. Turn the auto-throttle switch off. 3. Turn the ignition switch key off or remove it from the generator. 41 Turn the relay switch on. 5. Flip the remote control engine switch knob up to ON. IN6lNt SW...
- Page 38 6. Depress the starter button until the pilot lamp is on.
- Page 39 When you write or call, please provide the following information: • Model and serial numbers • Name of the dealer who sold the Honda power equipment to you • Name and address of the dealer who services your equipment •...
Need help?
Do you have a question about the EX5500 and is the answer not in the manual?
Questions and answers