Table of Contents
Advertisement
Quick Links
Advertisement
Table of Contents

Related Manuals for Pioneer AVH-X8590BT


Summary of Contents for Pioneer AVH-X8590BT
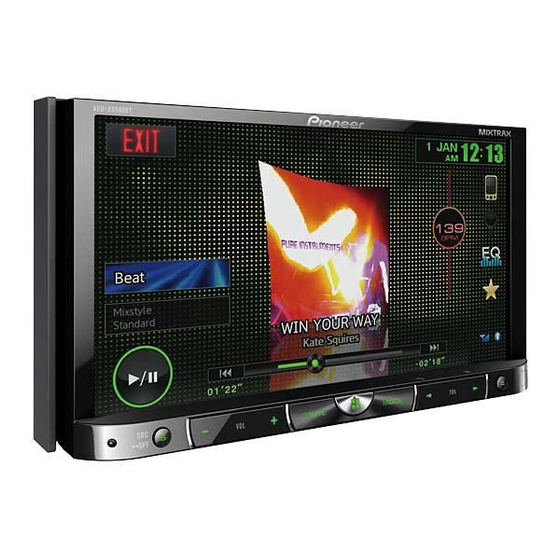
- Page 1 DVD RDS AV RECEIVER AVH-X8590BT Owner’s Manual...
-
Page 2: Table Of Contents
Contents Contents Tuning in to strong signals Starting procedure Setting automatic answering Precautions Receiving traffic announcements Setting the Keyboard Adjusting the other party’s listening IMPORTANT SAFEGUARDS Receiving alarm broadcasts interrupting Setting the App sound mixing volume To ensure safe driving regular broadcasts Switching the ring tone To avoid battery exhaustion... - Page 3 Contents Contents System settings Compressed audio compatibility (disc, USB, Selecting the OSD (on-screen display) Setting the App connection color Switching the auxiliary setting iPod compatibility Selecting the background display Setting AV input Sequence of audio files Setting the RGB Input Using the display correctly Other functions Setting the App sound mixing...
-
Page 4: Precautions
Section Precautions Precautions ! When no power is supplied to this unit, such Thank you for purchasing this PIONEER When using a display connected WARNING product. as when the vehicle battery is being re- to rear monitor output Do not attempt to install or service this... -
Page 5: Before You Start
! We offer the latest information about outside sounds. ! When disposing of used batteries, comply ! Avoid exposure to moisture. PIONEER CORPORATION on our website. with governmental regulations or environ- ! If the battery is disconnected or discharged, mental public institutions’ rules that apply in any preset memory will be erased. -
Page 6: What's What
Section What’s what What’s what 7 c/d (TRK) Head unit Home display The following section describes how to switch the output source for the rear monitor. Refer to HOME display (Front) 8 h (eject) Using the rear monitor on page 9. Source off display 9 Auto EQ microphone input jack Use to connect an auto EQ microphone. -
Page 7: Turning The Source On/Off
! If connecting both USB 1/iPod 1 and USB 2/ Notes sources. iPod 2 at the same time, use a Pioneer USB ! The USB/iPod 1 or USB/iPod 2 icon will Turning the source on using the buttons Press and hold to turn the rear source off. -
Page 8: Common Operations
Section What’s what Common operations 6 RETURN SUBTITLE Common operations for DVD-V 13.APR 12:25 Press to display the PBC (playback control) Press to change the subtitle language during menu settings/lists menu during PBC playback. DVD/DivX/MPEG-4 playback. XXXXXXXXXXXXXXXX ANGLE Starting the Bluetooth telephone Press to change the viewing angle during menu. -
Page 9: Activating The Touch Panel Keys
Section Common operations Common operations ! The port that supports the rear monitor will Activating the touch panel keys Using the rear view key to Zoom (zoom) only be USB input 1. The 4:3 picture is enlarged in the same propor- display the rear view ! USB/iPod 1 and SD are compatible DivX/ Touch panel keys... -
Page 10: Basic Operations
Section Basic operations Basic operations Adjusting the angle of the Eject an SD. Touch the detach key. Push on the bottom of the front panel until it clicks into place. LCD panel and ejecting media The front panel automati- Ejecting an SD. cally slides toward you. -
Page 11: Tuner
Section Tuner Tuner Tuner operations Storing and recalling radio text. Displaying radio text Tuning in to strong signals (Only available on FM stations) Local seek tuning allows you to tune in to only Touch panel keys 8 List key Radio text data transmitted by RDS stations, those radio stations with sufficiently strong sig- Displaying the preset channel list. -
Page 12: Receiving Alarm Broadcasts Interrupting Regular Broadcasts
Section Tuner Tuner The tuner returns to the original source but re- Using news program interruption Touch the system key to open the system Touch Alternative FREQ to turn AF on. # To turn AF off, touch Alternative FREQ again. mains in the TA function standby mode until the menu. -
Page 13: Disc (Cd/Dvd)
Section Disc (CD/DVD) Disc (CD/DVD) 9 Screen mode key g Audio output key Introducing movie operations Touch to change the fast forward and reverse speed. Changing the screen mode. Switching the audio output, when playing You can use this unit to view DVD/DVD-R/DVD- Refer to Changing the wide-screen mode on video discs recorded with LPCM audio. -
Page 14: Sound Playback Operations
Section Disc (CD/DVD) Disc (CD/DVD) ! You can also switch between subtitle lan- 2 Search key Operating the DVD menu Selecting a chapter using the buttons guages using Video Setup menu. For de- Displaying a list of track titles/file names to 1 Press c or d (TRK). -
Page 15: Random Play (Shuffle)
Section Disc (CD/DVD) Disc (CD/DVD) # Ways to display the menu will differ depending ! If you select another folder during repeat Start playback from the selected part. Touch 10key to display the numeric key- play, the repeat play range changes to Disc. pad. -
Page 16: Playing Divxâ Vod Content
Section Disc (CD/DVD) iPod ! DivX VOD content is protected by a DRM File name list is a list of file names (or folder iPod control Moving images operations names) from which you can select a file (or fold- (Digital Rights Management) system. This re- This manual applies to the following iPod mod- For iPod with 30-pin connector users er) to play back. -
Page 17: Sound Playback Operations
Section iPod iPod 4 Shuffle key 2 Artist name f Screen mode key Notes ! To ensure proper operation, connect the Displaying the Artists list on the iPod. Playing the video on your iPod in a random Changing the screen mode. order. -
Page 18: Shuffle Play
Section iPod iPod — iPod touch 1st generation ! You can play playlists created with the Touch Search to display iPod menus. Browsing for a video/music — iPod classic 160GB Refer to Moving images operations on page 16. MusicSphere application. The application on the iPod —... -
Page 19: Changing Audiobook Speed
AppRadio Mode Changing audiobook speed AppRadio Mode operation ! Pioneer is not liable for any issues that may arise from incorrect or flawed app- % Touch the change speed key to change This system can switch to the AppRadio Mode, based content. -
Page 20: Setting The App Connection
Section AppRadio Mode AppRadio Mode ! iPhone 4 4 Touch App Connection Settings on the sys- 4 Touch App Connection Settings on the sys- Depending on the application, you can input tem menu. tem menu. text on the display. In order to input text correctly 5 Touch the setting item to select iPhone (Digi- 5 Touch the setting item to select Others. -
Page 21: Setting The App Sound Mixing
Section AppRadio Mode USB/SD 6 Repeat key Setting the App sound mixing Moving images operations Selecting the repeat range. The sound of application during AppRadio You can use this unit to view external storage de- Refer to Repeating playback on page 23. Mode can be adjusted. -
Page 22: Sound Playback Operations
Section USB/SD USB/SD ! When playing back files recorded as VBR 3 Information key Basic operations Music browse mode (variable bit rate) files, the play time will not Switching the text information to display on This unit creates an index in order to facilitate be correctly displayed if fast forward or re- this unit when playing MP3/WMA/AAC/WAV Playing back videos... -
Page 23: Switching The Media File Type
Section USB/SD USB/SD 8 Rotate key Touch panel keys Random play (shuffle) Playing videos from external Rotating the displayed picture 90° clockwise. storage device (USB, SD) % Touch the random key. ! On – Play back files in random order within 9 Screen mode key the repeat range, Folder and Media. -
Page 24: Setting The Advanced Display Resolution
Section USB/SD Bluetooth Audio Setting the Advanced Sound playback operations Touch panel keys Display Resolution You can use this unit to listen to Bluetooth audio files. (Function for USB/SD) You can increase the resolution of moving im- Notes Bluetooth 22 JAN 12:22 ages on your external storage device (USB, SD). -
Page 25: Random Play (Shuffle)
Section Bluetooth Audio Using MIXTRAX 4 BPM reset key Notes MIXTRAX operation ! When playing back files recorded as VBR Switching to the original BPM (Beats Per Mi- MIXTRAX is original technology for creating nute). (variable bit rate) files, the play time will not non-stop mixes of selections from your audio li- The original BPM (Beats Per Minute) does be correctly displayed if fast forward or re-... -
Page 26: Setting The Effect
Section Using MIXTRAX Using MIXTRAX Press the home button to switch to the Sound effects Add a check mark to the desired sound home display. effect by touching the option. ! Flanger1 The marked sound effect is registered as a pre- ! Flanger2 Touch the system key to open the system set in Custom. - Page 27 Section Bluetooth telephone Bluetooth telephone 6 Auto-answer key Introduction of Bluetooth Touch panel keys Text information Turning automatic answering on or off. telephone operations e Incoming call notice Telephone standby display Indicates that an incoming call has been re- 7 History key You can use Bluetooth telephone.
-
Page 28: Bluetooth Telephone
Section Bluetooth telephone Bluetooth telephone ! Make sure to adjust the volume to a proper Selecting a number by Inverting names in phone book Select Missed Calls, Dialed Calls or Received Calls. level before disconnecting the cellular phone alphabet search mode When your cellular phone is connected to this from the unit. -
Page 29: Switching The Ring Tone
Section Bluetooth telephone Bluetooth telephone % Touch the volume key to select Making a call by entering Voice control Far-End VOL. phone number If your iPhone is connected to this unit, you can 1—2—3 use voice commands to make calls, for example. # This function can be performed even while talk- 13 APR 12:25... -
Page 30: Tv Tuner
Section TV tuner TV tuner TV tuner of IP-BUS connection Touch and hold down for more than few sec- The 4:3 picture is enlarged in the same pro- Display the preset screen. onds to skip stations. Seek tuning starts as portion both vertically and horizontally;... -
Page 31: Settings
Section Settings Audio adjustments ! If you start the Video Setup menu, playback Menu operations Using fader/balance adjustment Touch Balance on the audio function menu. is stopped. Fader/Balance displays when Rear Speaker is ! You cannot display the Audio function menu Touch panel keys set to Full on the System Menu. -
Page 32: Using The Auto-Equalizer
Section Audio adjustments Audio adjustments Press the home button to switch to the Touch the table to adjust the level of the Adjusting loudness Touch c or d next to Frequency to select home display. equalizer band. the cut-off frequency. Loudness compensates for deficiencies in the Range: +12dB to –12dB 50Hz—63Hz—80Hz—100Hz—125Hz... -
Page 33: Adjusting Source Levels
Section Audio adjustments Audio adjustments Adjusting source levels Digital Signal Processor Using the position selector Using fader/balance adjustment One way to assure a more natural sound is to You can change the fader/balance setting to pro- With SLA (source level adjustment), the volume Introduction of DSP adjustments optimize the stereo image and place you right in vide an ideal listening environment for all of the... - Page 34 Section Audio adjustments Audio adjustments Touch the DSP function key to open the Notes Touch the DSP function key to open the Press the home button to switch to the DSP function menu. ! The AM volume level can also be adjusted DSP function menu.
- Page 35 Section Audio adjustments Audio adjustments # Speakers with the size set to Off cannot be se- Touch Music and then touch Press the home button to switch to the Touch a or b to select Subwoofer (sub- Music Adjust. home display. woofer).
- Page 36 Section Audio adjustments Audio adjustments # The test tone will be emitted from the next speak- Note Adjusting time alignment Display Equalizer curve er after about two seconds after the last operation. When you select a cross-over frequency, you are The distance between the selected position and Powerful Powerful...
-
Page 37: Setting Up The Video Player
Section Audio adjustments Setting up the video player ! A separate Custom1 curve can be created Touch b and then touch c or d to select Setting the subtitle language the center frequency of selected band. for each source. Registering the code. You can set a desired subtitle language. -
Page 38: Setting The Multi-Angle Dvd Display
Section Setting up the video player Setting up the video player Touch the video setup key to open the Press the home button to switch to the Touch Time Per Photo Slide on the video setup menu. home display. Video Setup menu to select the slideshow in- Registering the code. -
Page 39: Setting The Divx Subtitle File
Section Setting up the video player Setting up the video player Touch 0 to 9 to input the registered code Notes Touch the video setup key to open the Press the home button to switch to the number. ! Up to 42 characters can be displayed on one video setup menu. -
Page 40: System Settings
Section System settings System settings # This unit will reset automatically after the firm- Setting the App connection Touch RGB Input on the system menu to Touch the system key to open the system select the RGB input. menu. ware update is completed if the update is success- Refer to Setting the App connection on page 20. -
Page 41: Selecting The System Language
Section System settings System settings If you are adjusting the Notes Touch the desired language. Touch Mute/ATT until the desired setting Picture Adjustment, select the unit. ! You cannot operate this function while driv- English (English)—Português (Portuguese)— appears. Français (French)— Touch Mute/ATT until the desired setting ap- (Persian)—Deutsch ing. -
Page 42: Using The Keyboard
Full (full-range speaker). Turn the source off. Pioneer recommends the use of a camera # When a subwoofer is connected to the rear out- Refer to Turning the source ON/OFF on page 7. which outputs mirror-reversed images. Oth- Touch Bluetooth Audio on the system put, select Subwoofer (subwoofer). -
Page 43: Auto Eq (Auto-Equalizing)
Section System settings System settings ! If the microphone is placed in an unsuitable ! Auto EQ changes the audio settings as fol- Touch Camera Polarity on the system Press the home button to switch to the menu to select the appropriate setting. home display. -
Page 44: Using The Auto-Equalizer
Section System settings System settings ! When this unit is connected to a power amp 10 Store the microphone carefully in the Fix the optional microphone in the center WARNING glove compartment or another safe place. of the headrest of the driver’s seat, facing with input level control, auto TA and EQ may As a loud tone (noise) may be emitted from the forward. -
Page 45: Correcting Distorted Sound
Section System settings System settings Plug the microphone into the micro- 12 Store the microphone carefully in the Touch Audio Reset. Touch the system key to open the system phone input jack. glove compartment or another safe place. menu. Touch Reset. If the microphone is subjected to direct sunlight Ready to reset. -
Page 46: Favorite Menu
Section Favorite menu Bluetooth connection menu # If three devices are already paired, Memory Full Using the Favorite menu Bluetooth connection menu is displayed and pairing cannot be performed. In operations Display menu columns to register. such cases, delete a paired device first. Refer to Refer to Menu operations on page 31. -
Page 47: Theme Menu
Section Bluetooth connection menu Theme menu Initially, this function is set to on. Press the home button to switch to the Selecting the illumination color The customized color has been stored in the home display. memory. This unit is equipped with multiple-color illumi- The set color will be recalled from the memory Press the home button to switch to the nation. -
Page 48: Other Functions
(such as the CD-V150M), you can ners of the screen. enjoy the video contents of the connected An external unit refers to a Pioneer product, # To cancel the adjustment, press and hold the iPod. such as those which will be available in the fu- home button. - Page 49 Section Other functions Connection ! The black cable is ground. When installing WARNING Actions will differ depending on this unit or power amp (sold separately), ! In some countries or states the viewing of images the connected external unit. make sure to connect the ground wire first. on a display inside a vehicle even by persons Make sure that the ground cable is properly other than the driver may be illegal.
- Page 50 Section Connection Connection — Secure the wiring with cable clamps or adhe- sive tape. Wrap adhesive tape around wiring that comes into contact with metal parts to protect the wiring. — Place all cables away from moving parts, such as the shift lever and seat rails. —...
-
Page 51: Connection
Section Connection Connection Connecting the power cord Microphone Microphone input Wired remote input Antenna input Hard-wired remote control adapter can be connected This product (sold separately). Violet/white Fuse (10 A) Of the two lead wires connected to the back lamp, connect the one in which the voltage changes when the gear shift is in the REVERSE (R) position. -
Page 52: When Connecting To Separately Sold Power Amp
Section Connection Connection When connecting to separately sold power amp When connecting with a multi-channel processor Front output IP-BUS cable (supplied with multi-channel processor) This product Rear output Power amp (sold separately) To front output This product Power amp Optical output (sold separately) To rear output Power amp... -
Page 53: Connecting And Installing The Optical Cable Connection Box
Section Connection Connection % When installing the optical cable connec- Connecting and installing the tion box with the lock tie. optical cable connection box Wrap the optical cable and connection box with the protection tape and fasten with the power WARNING code using the lock tie. -
Page 54: When Connecting The External Video Component And The Display
Section Connection Connection When connecting the external video component and the display When connecting with a rear Rear view camera input (R.C IN) view camera External video component If you switch the shift lever to REVERSE (R), the (sold separately) display on this unit will automatically switch to the rear view image. -
Page 55: Ipod With Lightning Connector
Section Connection Connection iPod with lightning connector When connecting with optional iPod with 30-pin connector When connecting with optional CD-IH202 cable CD-IU201S cable When connecting with When connecting with optional Lightning to USB Cable USB/iPod input 1 CD-IU201V cable This product USB/iPod input 1 HDMI input USB/iPod input 2... -
Page 56: Android
Section Connection Connection Android When connecting the Android Installing the HDMI cable holder device with HDMI port % Position the HDMI cable holder to insert When connecting the Android its two lower tabs into the groove of this device with MHL port USB/iPod input 1 product, and then tighten the screw (3 mm ×... -
Page 57: Installation
Section Installation Installation Notes Installation using the screw Installing the microphone ! Check all connections and systems before holes on the side of the unit final installation. CAUTION ! Do not use unauthorized parts as this may % Fastening the unit to the factory radio- It is extremely dangerous to allow the micro- cause malfunctions. -
Page 58: Troubleshooting
Section Installation Additional information Install the microphone on the steering Troubleshooting Symptom Cause Action (Refer- column. ence page) Common Playback is The disc is dirty. Clean the disc. Symptom Cause Action (Refer- not possible. ence page) The type of disc Check the disc loaded cannot type. - Page 59 Appendix Additional information Additional information Symptom Cause Action (Refer- Symptom Cause Action (Refer- Symptom Cause Action (Refer- ence page) ence page) Symptom Cause Action (Refer- ence page) ence page) The image The data could Stop playback Nothing is The rear view Connect a rear Playback is The DVD being...
-
Page 60: Error Messages
Sound from The audio out- Use the iPod to A call was Reconnect the tions may appear Pioneer Service Center, be sure to note the error the iPod can- put direction change the audio made with a Bluetooth con- when viewed on message. - Page 61 Appendix Additional information Additional information Message Cause Action Message Cause Action (Refer- Message Cause Action (Refer- Message Cause Action (Refer- ence page) ence page) ence page) No Data This unit cannot Move to the desir- receive program able location with Skipped The inserted The protected...
-
Page 62: Understanding Auto Eq Error
–Disconnect the authorized start of playback hear sound. menu is dis- Pioneer Service USB storage de- and when you played, reconnect vice. Station. start to hear any the iPod and reset –Change to a dif- sound. -
Page 63: Understanding Messages
The microphone Plug the optional Messages Translation nect the mi- is not con- microphone se- Area 1 Area 2 Pioneer rec- Indicates that the digital for- crophone for nected. curely into the ommends measure- mat is DTS. jack. the use of a ment. -
Page 64: Handling Guidelines
Appendix Additional information Additional information Handling guidelines Indicates that the unit is cur- Shows the file name of the Indicates the signal strength of rently processing an operation MP3/WMA/AAC file currently Discs and player the cellular phone. such as search. being played. - Page 65 Appendix Additional information Additional information USB storage device DVD-R/RW discs Condensation may temporarily impair the player’s Do not try to force an SD memory card into the SD performance. Let it rest for about one hour to ad- card slot as the card or this unit may be damaged. Unfinalized DVD-R/RW discs which have been re- Address any questions you have about your USB just to a warmer temperature.
-
Page 66: Audio Compatibility (Usb)
Appendix Additional information Additional information DualDiscs DivX video files Audio compatibility (USB) DualDiscs are two-sided discs that have a record- Depending on the composition of the file informa- Compatible format: AAC encoded by iTunes able CD for audio on one side and a recordable tion, such as the number of audio streams or file File extension: .m4a DVD for video on the other. -
Page 67: Ipod Compatibility
WMA files. Level 1 Level 2 Level 3 Level 4 sequence ! Pioneer accepts no responsibility for data 1.1.3) There may be a slight delay at the start of playback lost on the USB storage device even if that... -
Page 68: Using The Display Correctly
Bluetooth SIG, Inc. very hot resulting in possible damage to the “Made for iPod” and “Made for iPhone” mean and any use of such marks by PIONEER product lifetime, the screen will become dark LCD screen. You should avoid exposing the that an electronic accessory has been designed CORPORATION is under license. -
Page 69: Language Code Chart For Dvd
Nynorsk (nn), 1414 Tsonga (ts), 2019 Bislama (bi), 0209 Igbo (ig), 0907 Norwegian (no), 1415 Tatar (tt), 2020 MIXTRAX Ndebele, South (nr), MIXTRAX is a trademark of the PIONEER Bambara (bm), 0213 Sichuan Yi (ii), 0909 Twi (tw), 2023 1418 CORPORATION. -
Page 70: Specifications
Appendix Additional information Additional information Specifications Subwoofer (mono): Language (code), input code Frequency ....50 Hz/63 Hz/80 Hz/100 Hz/ Navajo, Navaho (nv), 125 Hz Bengali (bn), 0214 Inupiaq (ik), 0911 Tahitian (ty), 2025 General 1422 Slope ......–18 dB/oct Power source ....14.4 V DC (12.0 V to 14.4 V al- Gain ...... - Page 71 Appendix Additional information Additional information Usable sensitivity ..... 9 dBf (0.8 µV/75 W, mono, S/N: WMA decoding format ..Ver. 7, 7.1, 8, 9, 10, 11, 12 (2 ch MPEG-4 DivX audio) MPEG-4 video decoding format DivX decoding format 30 dB) (Windows Media Player) ......
- Page 72 PIONEER ELECTRONICS OF CANADA, INC. 340 Ferrier Street, Unit 2, Markham, Ontario L3R 2Z5, Canada TEL: 1-877-283-5901 TEL: 905-479-4411 PIONEER ELECTRONICS DE MEXICO, S.A. de C.V. Blvd.Manuel Avila Camacho 138 10 piso Col.Lomas de Chapultepec, Mexico, D.F. 11000 TEL: 55-9178-4270 先鋒股份有限公司...
Need help?
Do you have a question about the AVH-X8590BT and is the answer not in the manual?
Questions and answers