
Related Manuals for Honda EM3000


Summary of Contents for Honda EM3000
- Page 1 Owner’s Manual EM3000•EM4000 ©1994 American Honda Motor Co., Inc. — All Rights Reserved...
- Page 3 Thank you for purchasing a Honda generator. This manual covers operation and maintenance of the EM 3000 and EM4000 generators. All information information available at the time of approval for printing. Honda Motor Co., Ltd. reserves the right to make changes at any time notice and without incurring any obligation.
-
Page 4: Table Of Contents
CONTENTS CONTENTS 1. GENERATOR SAFETY 2. COMPONENT IDENTIFICATION 3. PRE-OPERATION THE ENGINE ... 4. STARTING USE ... 5. GENERATOR 6. STOPPING THE ENGINE 7, MAINTENANCE 8. TRANSPORTING/STORAGE 9. TROUBLESHOOTING 10. SPECIFICATIONS 11. WIRING DIAGRAM CHECK ... -
Page 5: Generator Safety
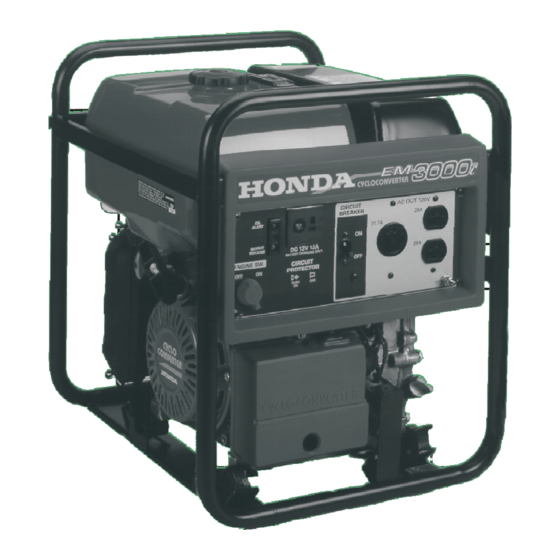
To ensure safe operation - Place the generator at least 1 m (3 ft) away from buildings equipment when operating the generator. Operate the generator on a level surface. If the generator is tilted, fuel spillage may result. Exhaust gas contains poisonous carbon monoxide. Never run the generator in an enclosed area. - Page 6 2. COMPONENT VOLTAGE SELECTOR SWITCH ENGINE SWITCH FUEL VALVE ,\ RECOIL STARTER, GRIP ENGINE OIL DRAIN PLUi; IDENTIFICATION VOLT METER PILOT LAMP AC CIRCUIT BREAKER DC CIRCUIT RECEPTACLES FILLER...
- Page 7 SPARK PLUG COVER FUEL GAUGE FUEL TANK CAP tkJFFLER...
- Page 8 3. PRE-OPERATION CAUTION: Be sure to check the generator on a level surface with the engine stopped. 1. Check the engine oil level. CAUTION: Engine oil is a major factor affecting engine performance and service life. Non-detergent or vegetable oils are not reommended. Use Honda cl-stroke oil, or an equivalent high detergent, premium quality motor oil certified...
- Page 9 NOTE: vyhen the oil runs lower than the specified level during operation, the oil alert switch automatically turns off to protect the engine from overheating. If this occurs, add oil to the top of the filler hole neck, then turn the switch on and restart the engine according to the instructions.
- Page 10 2. Check the fuel level. Use any regular grade automotive gasoline (unleaded gasoline is preferred) with a pump octane rating of 86 or higher. Never use an oil/gasoline tank. or water in the fuel CAUTION: Gasoline harmful to the fuel system components. Gasoline is extremely Refuel in a well ventilated area with the engine stopped.
- Page 11 3. Make sure that the AC circuit breaker is OFF and that nothing is con- nected to the DC terminals. The generator may be hard to start if a load is connected. AC ClRCUlT BREAKER DC TERMINALS...
-
Page 12: Starting The Engine
4. STARTING THE ENGINE 1. Turn the fuel valve on. FUEL VALVE 2. Pull the choke rod to CLOSE. CHOKE ROD... - Page 13 3. Turn the oil alert switch on. 4. Turn the engine switch on. ENGI...
- Page 14 5. Pull the starter grip until compression is felt, then pull briskly. NOTE: Do not allow the starter grip to snap back. Return it slowly by hand. STARTER GRIP 6. Push the choke rod to OPEN as the engine warms up. CHOKE ROD...
- Page 15 CAUTION: Limit operation requiring 4.0 kVA) to 30 minutes. For continuous operation, (EM3000) and 3.8 kVA (EM4000). In either case, the total wattage of all appliances connected must be considered. Do not exceed the current Connections’for emergency power to a qualified electrician and must comply cal codes.
- Page 16 AC applications 1. Start the engine and make sure the pilot filament may be burnt out. 2. Turn the voltage selector switch to either position as required. When the switch is turned to “120V ONLY” At “12OVf24OV” position, you can use both 120V and 240V sources. 3.
- Page 17 DC application The DC terminals may be used for charging 12 volt automotive-type only. Batteries produce cigarettes away. To prevent the possibility battery, connect charging cables first to the battery, and disconnect cables first at the generator. CAUTION: Do not attempt to start an automobile engine with the generator still connected to the battery.
-
Page 18: Stopping The Engine
6. STOPPING THE ENGINE To stop the engine in an emergency, turn the engine switch OFF. In normal use: 1. Turn the AC circuit breakers OFF and or disconnect the charging leads at the DC terminals. AC CIRCUIT BREAKER 2. Turn the engine switch OFF. -ENGINE SWITCH... - Page 19 3. Turn the fuel valve OFF. FUEL VALVE...
-
Page 20: Maintenance
7. MAINTENANCE The purpose of the maintenance generator in the best operating condition. Inspect or service as scheduled in the table on the next page. Shut off the engine before performing engine must be run, make sure the area is well ventilated. contains poisonous carbon monoxide gas. - Page 21 Maintenance Schedule erform at every indi- Clean every 100 operating hours. Spark arrester NOTE (1) : Service more frequently when used in dusty areas. (2) : These items should be serviced by an authorized Honda dealer, unless the owner has the proper tools and is mechanically proficient. See the Honda Shop Manual.
- Page 22 Tool kit The tools supplied are necessary for performing simple adjustments and repairs. Always keep the kit with the generator. Changing oil Drain the oil -while the engine is still warm to assure rapid and complete draining. 1. Remove the drain plug and filler cap, and drain the oil. Retighten the plug securely.
- Page 23 Air cleaner service A dirty air cleaner will carburetor malfunction, more frequently when operating the generator in extremely dusty areas. Never use gasoline or low flash point solvents for cleaning the air element. cleaner A fire or explosion could result. run the generator without the air cleaner.
- Page 24 2. Wash the element in a non-flammable or high flash point solvent and dry it thoroughly. 3. Soak the element in clean engine oil and squeeze out the excess oil. 4. Reinstall the air cleaner element and the cover.
- Page 25 Fuel filter service The filter prevents dirt or water which may be in the fuel tank from entering the carburetor. If the engine has not been run for a long time, the filter should be cleaned. I. Turn the fuel valve OFF. Remove the filter cup. 2.
- Page 26 Spark plug service Recommended spark plug: To ensure proper engine operation, the spark plug .must be properly gapped and free of deposits. 1. Remove the spark plug cover. 2. Clean any dirt from around the spark piug base. 3. Remove the spark plug cap. BPR4HS-10 (NG K) W14FPR-ULlO (ND) PLbG CAP...
- Page 27 4. Use the wrench supplied in the tool kit 5. Visually inspect the spark plug. Discard it if the insulator chipped. 6. Measure the plug gap with a feeler gauge. The gap should be 0.9-1.0 bending the side electrode. 7. Attach plug washer.
- Page 28 Spark arrester maintenance If the generator has been running, the muffler Allow it to cool before proceeding. CAUTION: The spark arrester must be serviced every 100 hours to maintain its efficiency. 1. Loosen the bolts and nuts and remove the muffler. 2.
-
Page 29: Transporting/Storage
When transporting keep the generator level to prevent fuel spillage. Fuel vapor or spilled fuel may ignite. Before storing the unit for an extended period: 1. Be sure the storage area is free of excessive humidity and dust. 2. Drain the fuel - With the fuel valve OFF, remove and empty the filter cup.. - Page 30 gasoline d. Drain the carburetor by loosening the drain screw. Drain the into a suitable container. DRAIN / SCREW e. Pull the starter grip until resistance is felt; the piston is coming up on its compression stroke. At this position, the exhaust and intake valves are closed, and this will help protect the engine from corrosion.
-
Page 31: Troubleshooting
A. When the engine wil! not stati: 1. Is there enough fuel? 2. Is the fuel valve on? 3. Is gasoline reaching the carburetor? To check, loosen the drain screw with the fuel valve on. If any fuel is spilled, make sure the area is dry before testing the spark plug or starting the engine. - Page 32 a. Remove the spark plug cover and cap. Clean any dirt from around the spark plug base, then remove the spark plug. b. Install the spark plug in the plug cap. c. Turn the engine switch on. d. Turn the oil alert switch on. e.
- Page 33 B. When the engine starts but stops immediately: Is there enough oil in the crankcase? If not, the oil alert switch will turn off after starting. C. No electricity at the AC receptacles: 1. Are the AC circuit breakers on? 2.
- Page 34 Rated frequency Rated ampere AC output Rated output Maximum -..*-.._ DC output EM3000: 605 x 425 x 545mm EM4000: 650 x 425 x 575mm EM3000: 64.0kg (141.1 lb) EM4000: 81 .Okg (178.6 lb) Honda GE300 4-stroke, side valve, 1 cylinder 272cm3 (16.6 cu in)
- Page 36 Warranty Service Owner Satisfaction Your satisfaction and goodwill Honda warranty Warranty. Normally, any problems concerning the product will be handled by your dealer’s service department. has not been handled to your satisfaction, ing action: Discuss your problem with a member of dealership ten complaints can be quickly has already...
- Page 37 Regional Office Locations NORTHWEST REGIONAL OFFICE (includes Alaska1 American Honda Motor Co.. Ins. Customer Relations Dspsrtmsnt P.O. 60x 30286 Portland. Ore@on 97220 T&phone: (6031256-l WESTERN’REGIONAL OFFICE (includes Hawaii) Americm Honda Motor CO.. Inc. Customer Relations Department P.O. Box 420 Gardena. California 90247 Telsphona:...
- Page 38 When you write or call, please provide the following information: • Model and serial numbers • Name of the dealer who sold the Honda power equipment to you • Name and address of the dealer who services your equipment •...
- Page 39 NOTE...
- Page 41 POM 53161 00809909 31899010 Printed on 00X31-899-0100 PRINTED IN U.S.A. Recycled Paper...
Need help?
Do you have a question about the EM3000 and is the answer not in the manual?
Questions and answers