Table of Contents
Advertisement
Advertisement
Chapters
Table of Contents

Related Manuals for Honda Automobiles HRM215 Harmony


Summary of Contents for Honda Automobiles HRM215 Harmony
- Page 2 Your mower is not equipped with a spark arrester, and it may be illegal to operate the mower in some areas. Check local laws and regulations. An optional spark arrester is available from authorized Honda lawn mower dealers. 01993 American Honda Motor Co., Inc. - All Rights Reserved...
- Page 3 Keep this owner’s manual handy, so you can refer to it any time, and make sure the manual stays with the lawn mower if you sell it. We suggest you read the warranty policy to fully understand its coverage and your responsibilities of ownership.
-
Page 4: Safety Messages
SERIOUSLY HURT if you don’t follow instructions. You CAN be KILLED or SERIOUSLY HURT if you don’t follow instructions. You CAN be HURT if you don’t follow instructions. Your lawn mower or other property can be damaged if you don’t follow instructions. -
Page 5: Table Of Contents
CONTENTS Turn to the beginning of subjects. MOWER SAFETY Important information you can do to prevent injury. BLADES AND A-ITACHMENTS Standard and optional equipment CONTROLS identification of components controls work. BEFORE MOWING How to fuel and check your mower to be sure it is ready. How to prepare your lawn and yourself before you begin mowing. -
Page 6: Mower Safety
MOWER SAFETY This section explains what you need to know to operate your mower safely. Safety Information Important Message to Parents Safety Label Locations... -
Page 7: Safety Information
MOWER SAFETY Safety Information Most accidents with walk-behind mowers can be prevented if you follow all instructions in this manual and on the mower. The most common hazards, according to accident statistics, are discussed below, along with the best way to protect yourself and others. Avoid Rotating Blades Rotating blades can cause serious cuts and even amputate fingers, hands, toes, or feet. -
Page 8: Keep Shields In Place
Keep Shields in Place Guards and shields are designed to protect you from being hit by thrown objects and from touching hot engine parts and moving components. For your safety and the safety of others, keep all shields in place when the engine is running. Refuel with Care Gasoline is extremely flammable and gasoline vapor can explode. -
Page 9: Important Message To Parents
YOUR CHILDREN’S SAFETY IS VERY IMPORTANT to Honda. That’s why we urge you to read this message before letting your youngster operate this lawn mower. Lawn mowers are tools, not toys. As with any equipment, bad judgments can result in serious injuries. -
Page 10: Safety Label Locations
Safety Label Locations The labels shown here contain important safety information. Please read them carefully. These labels are considered permanent parts of your mower. So if a label comes off or becomes hard to read, contact your dealer for a replacement. IS SUBJECT TO DETERIORATION AND WEAR, AND SHOULD BE CHECKED FREOUENTLY FOR BAG REPLACEMENT. -
Page 12: Blades And Attachments
This section shows standard and optional equipment for different lawn care needs, and it tells you how to adapt your mower for bagging, side-discharge and mulching. Blades (HRB215 and HRM215) Mulching Plug (standard for HRM215) Grass Bag (standard for HRB215) Side-Discharge (optional for HRB215 and HRM215) - Page 13 Best for bagging and side-discharge. Less effective for mulching. HRM215 HRM215 mowers are factory-equipped with a special two-piece mulching blade assembly. With the mulching plug installed (page 9), the two blades recirculate cut grass under the mower deck, where the clippings are chopped into small particles that fall through the turf and decompose quickly.
- Page 14 Grass Bag (standard for HRB215, optional for HRM215) With the grass bag installed, the lawn mower works like a vacuum cleaner. It blows air through the bag, which traps the clippings. Bagging should be considered where you want the lawn to be clear of loose particles, such as around swimming pools.
-
Page 15: Side-Discharge Chute
BLADES AND ATTACHMENTS Side-Discharge (optional for HRB215 and HRM215) The chute directs grass clippings away from the operator and spreads them over the lawn. The clippings will be larger than mulched particles, and they may need to be removed by raking. -
Page 16: Controls
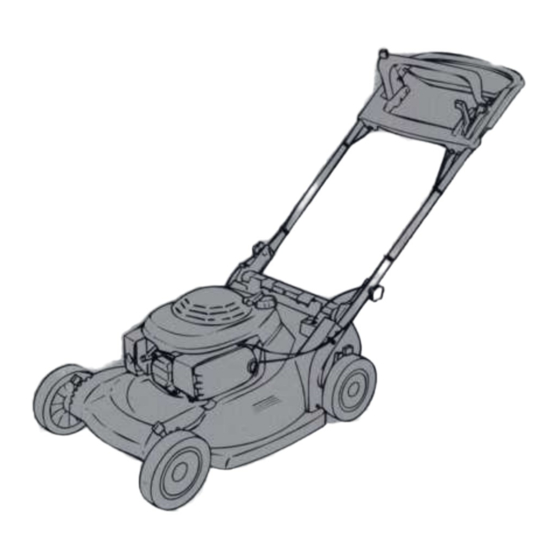
CONTROLS This section shows the locations of controls and other important parts of your mower, and it tells you how the controls work. Component Identification Controls ThrottleLever. Shift Lever (HFfB215SXA & HRM215SxA) Blade Control Lever Drive Clutch Lever (HRB215SXA & HRM275SXA) Handlebar. -
Page 17: Component Identification
CONTROLS Component Identification BLADE CONTROL BU-KON HANDLEBAR ADJUSTMENT LEVER OIL FILLER CAP HRB215PXA: Manually propelled, high-lift blade, and grass bag HRB21 SSXA: Self-propelled, high-lift blade, and grass bag HRM215PXA: Manually propelled, mulching blades, and mulching plug HRM215SXA: Self-propelled, mulching blades, and mulching plug BLADE CONTROL LEVER DRIVE CLUTCH LEVER (HRB215SXA... - Page 18 ENGINE SERIAL NUMBER SPARK PLUG CAP FRONT CUlllNG HEIGHT ADJUSTMENT LEVER Record the frame and engine serial numbers in the space below. You will need these serial numbers when ordering parts and when making technical or warranty inquiries (see page Frame serial number: Engine serial number: GEAR SHIFT LEVER...
-
Page 19: Controls
CONTROLS Controls Throttle Lever N CHOKE - For starting a cold engine. *FAST For restarting a warm engine and for mowing. *SLOW For idling the engine. STOP For stopping the engine and closing the fuel valve. When the mower is not in use, leave the throttle lever in the STOP position to prevent carburetor flooding and to reduce the possibility of fuel leakage. -
Page 20: Blade Control Lever
Blade Control Lever The blade control lever starts and stops blade rotation. To start blade rotation, press the button on top of the blade control lever, then pull the lever back and hold it against the handlebar. Release the blade control lever to stop the blade. Operate the blade control lever with a quick and complete motion, so the blade drive is always either fully engaged or stopped. -
Page 21: Drive Clutch Lever (Hrb215Sxa & Hrm275Sxa)
CONTROLS Drive Clutch Lever The drive clutch lever engages and disengages the transmission that drives the rear wheels. To propel the mower, move the drive clutch lever up and hold it against the handlebar. Release the drive clutch lever to stop the mower. Operate the drive clutch lever with a quick and complete motion, so the drive clutch is always either fully engaged or released. -
Page 22: Handlebar
Handlebar The handlebar is adjustable to a high, mid, or low position. Select the height that provides the most comfortable operating position. 1. Loosen the handlebar locking knobs. 2. Spread the lower ends of the handlebar to release the locating pins. -
Page 23: Cutting Height Adjustment Levers
Cutting HeigtIt HRM215 25 mm (1 in) 38 mm I1 % in1 ADJUSTMENT HRB215 19 mm (3/4 in) 25 mm (1 in) -
Page 24: Before Mowing
Air Cleaner .., . . , ..Grass Bag (standard for HRB215, optional for HRM215) . Handlebar Height .., .. -
Page 25: Check Your Lawn
BEFORE MOWING Check Your Lawn For your safety and for the safety of others, always inspect the area before mowing. Objects Anything which can be picked up by the blades and thrown is a potential hazard to you and others. Look for things like stones, sticks, bones, and wire. -
Page 26: Check Your Mower
When the blade(s) needs sharpening or replacement take the lawn mower to an authorized Honda lawn mower dealer. Or, if you have a torque wrench, you can remove and install the blade(s) yourself (see pages 58 - 59). -
Page 27: Engine Oil
BEFORE MOWING Engine Oil Check the engine oil level with the engine stopped and the mower on a level surface. 1. Remove the oil filler cap, and wipe the dipstick clean: 2. Insert and remove the dipstick without screwing it into the filler neck. -
Page 28: Fuel
Fuel Fuel tank capacity: 1 .O e (0.26 US gal) Refuel in a well-ventilated area before starting the engine. If the engine has been running, allow it to cool. Remove the tank cap and check the fuel level. Refill the tank if the fuel level is low. -
Page 29: Fuel Recommendations
If spark knock or pinging occurs at a steady engine speed, under normal load, change brands of gasoline. If spark knock or pinging persists, see an authorized Honda lawn mower dealer. 1 NOTICE Running the engine with persistent spark knock or pinging can cause engine damage. -
Page 30: Oxygenated Fuels
Oxygenated Fuels Some conventional gasolines are being blended with alcohol or an ether compound. These gasolines are collectively referred to as oxygenated fuels. Some areas of the United States and Canada use oxygenated fuels to help reduce emissions. If you use an oxygenated fuel, be sure it is unleaded and meets the minimum octane rating requirement. -
Page 31: Air Cleaner
BEFORE MOWING Air Cleaner Check that the air filters are clean and in good condition. Dirty air filters will restrict air flow to the carburetor, reducing engine performance. pEEi- Operating the engine without filters, or with damaged filters, will allow dirt to enter the engine, causing rapid engine wear. This type of damage is not covered by the Distributor’s Limited Warranty. -
Page 32: Grass Bag
Grass Bag (standard for HRB215, optional for HRM215) Check the condition of the grass bag. The grass bag wears during normal use and will eventually require replacement. Grass bag replacement is explained on page 60. Objects hit by the blade can be thrown through a worn or ~~Pdamagedgr~~ Thrown objects can senously Injure you. -
Page 33: Are You Ready To Mow
BEFORE MOWING ARE YOU Ready to Mow? Just in case you have missed a hidden object in your lawn, be sure to wear protective clothing. Long pants and eye protection can lower your risk of injury from thrown objects. Wear footwear that protects your feet and won’t let you slip if you mow on slopes or uneven ground. -
Page 34: Mowing
MOWING This section tells you how to operate the mower safely and effectively. Starting the Engine Operating the Controls for Mowing Throttle Lever Shift Lever (HRBZISSXA & HRM215SX4) Blade Control Lever Drive Clutch Lever (HRB215SXA & HRMZISSXA) ..Stopping the Engine Safe Mowing Practices Slopes... -
Page 35: Starting The Engine
MOWING Si :arting the Engine Because of the risk of carbon monoxide poisoning, it makes good sense to start the mower outside, or at feast in an open area with good ventilation. Before starting, make sure the discharge guard is closed, or that the grass bag or side-discharge chute is in place. -
Page 36: Operating The Controls For Mowing
Operating the Controls for Mowing Throttle Lever Blade speed is as important as sharpness. When the blade rotates at high speed, it creates a strong fan action that lifts and cuts grass more efficiently. Always mow with the throttle lever in the FAST position, but do not try to increase the preset engine speed. -
Page 37: Blade Control Lever
MOWING Blade Control Lever To start blade rotation, press the button on top of the blade control lever, then pull the lever back and hold it against the handlebar. Release the blade control lever to stop the blade. Operate the blade control lever with a quick and complete motion, so the blade drive is always either fully engaged or... -
Page 38: Stopping The Engine
Stopping the Engine 1. Release the drive clutch lever (HRB215SXA & HRM215SXA) and blade control lever (all models). 2. Move the throttle lever to the STOP position. When the mower is not in use, leave the throttle lever in the STOP position to prevent carburetor flooding and to reduce the possibility of fuel leakage. -
Page 39: Safe Mowing Practices
MOWING Safe Mowing Practices For your safety, keep all four wheels on the ground, and be careful to avoid losing your footing and your control of the mower. Keep a firm grip on the handlebar, and walk, never run, with the mower. -
Page 40: Obstacles
Obstacles Use the side of the mower to cut close to large obstacles, such as fences or walls. Release the drive clutch lever to disengage the drive when mowing around trees and other obstacles. Push the mower around obstacles for better directional control. Be careful when mowing over obstacles embedded in the lawn, such as sprinkler heads, paving, edging, etc. -
Page 41: Mowing Tips When To Mow
MOWING Mowing Tips When to Mow Most grasses should be mowed when they have grown l/2 to 1 inch above their recommended height. For best mulching results, mow the lawn frequently, cutting off less than one inch of grass each time. In growing season, you will probably need to mow the lawn twice a week. -
Page 42: Cutting Width
Cutting Width For an even lawn finish, overlap each mowing swath by a few inches. If the grass is very tall or thick, use more overlap narrower mowing swath. Blade Speed The blade must spin very fast to cut properly. Always use the FAST throttle setting, and keep the engine running at maximum rpm. -
Page 43: Fallen Leaves
The grass bag is standard equipment on HRB215 mowers (see page 9) and can be installed as optional equipment on HRM215 mowers. If using your mower to bag large accumulations of fallen leaves... -
Page 44: Mowing Patterns
Mulching requires the mulching blades (see page 8) and mulching plug (see page 9) that are standard equipment on HRM215 mowers and optional for HRB215 mowers. Use a counterclockwise mowing pattern. If the lawn has an irregular shape, or many... -
Page 46: Transporting
TRANSPORTING THE MOWER This section explains how to load and carry your mower safely. Before Loading Loading and unloading... -
Page 47: Before Loading
TRANSPORTING THE MOWER Before Loading If the engine has been running, allow it to cool for at least 15 minutes before loading the mower on the transport vehicle. Remove the grass bag, if so equipped. Be sure the throttle lever is in the STOP position to prevent carburetor flooding and reduce the possibility of fuel leakage. -
Page 48: Maintenance & Adjustments
MAINTENANCE This section explains when and how to perform routine inspection, service,and adjustments for do-it-yourself maintenance. More difficult maintenance tasks should be done by your dealer. Your dealer is best equipped and staffed to provide the level of service and safety you and your mower deserve. Maintenance Precautions Maintenance... -
Page 49: Maintenance Precautions
MAINTENANCE & ADJUSTMENTS Maintenance Precautions Periodic maintenance and adjustments are necessary to keep your mower in good operating condition. Service and inspect according to the MAINTENANCE SCHEDULE (page 45). If you do not follow these safety precautions, you can be seriously hurt or killed. -
Page 50: Maintenance Schedule
Maintenance Schedule \Regular Service Interval Perform at every indicated interval Blade condition and blade bolt tightness Change Air cleaner Spark plug Check 81 clean Spark arrester (optional equipment) Blade control mechanism Blade control cable Drive clutch cable (HRB21 SSXA & HRMPl SSXA only) Throttle cable Shift cable (HRB215SXA... -
Page 51: Engine Maintenance
MAINTENANCE & ADJUSTMENTS Engine Maintenance Engine Oil Change Drain the used oil while the engine is warm. Warm oil drains quickly and completely. Place a suitable container next to the mower to catch the used oil. 2. Wipe the oil filler area clean, then remove the oil filler cap/dipstick. - Page 52 5. After changing the engine oil, and before starting the engine, check the oil level with the mower on a level surface: a. Wipe the dipstick clean. Insert and remove the dipstick without screwing it into the filler neck. Check the oil level shown on the dipstick. c.
-
Page 53: Air Cleaner Service
MAINTENANCE & ADJUSTMENTS Air Cleaner Serwice Dirty air filters will restrict air flow to the carburetor, reducing engine performance. If you operate the mower in very dusty areas, clean the air filters more often than specified in the MAINTENANCE SCHEDULE. r-lzizq Operating the engine without air filters, or damaged filters, will allow dirt to enter the engine, causing rapid engine wear. -
Page 54: Spark Plug Service
1 NOTICE Excess oil will restrict air flow through the foam filter and may transfer to the paper filter, soaking and clogging it. 5. Wipe dirt from the inside of the air cleaner housing and cover, using a moist rag. Be careful to prevent dirt from entering the air duct that leads to the carburetor. - Page 55 MAINTENANCE & ADJUSTMENTS 4. Measure the spark plug electrode gap with a feeler gauge. The gap should be 0.7 - 0.8 mm (0.028 - 0.031 in). Correct the gap, if necessary, by carefully bending the side electrode. 5. Install the spark plug carefully, by hand, to avoid cross-threading.
-
Page 56: Spark Arrester Service (Optional Equipment)
In some areas, it is illegal to operate an engine without a spark arrester. Check local laws and regulations. A spark arrester is available from authorized Honda lawn mower dealers. The spark arrester must be serviced every 100 hours to keep it functioning as designed. -
Page 57: Carburetor Adjustment
MAINTENANCE & ADJUSTMENTS Carburetor Adjustment 1. Start the engine outdoors, and allow it to warm up to normal operating temperature. 2. Set the throttle lever in the SLOW position. 3. Turn the pilot screw in or out to the setting that produces the highest idle rpm. -
Page 58: Carburetor Modification For High Altitude
If you always operate the mower at altitudes higher than 1,800 meters (6,000 feet) above sea level, have an authorized Honda lawn mower dealer perform this carburetor modification. Even with carburetor modification, engine horsepower will decrease about 3.5% for each 300 meter(1 ,000 foot ) increase in altitude. -
Page 59: Blade Control Cable Adjustment
If the blade does not start or stop as it should, with correct cable adjustment, repair may be needed. Take the mower to an authorized Honda lawn mower dealer. 20-25mm BLADE CONTROL LEVER... -
Page 60: Drive Clutch Cable Adjustment (Hrb215Sxa & Hrm215Sxa)
Check to be sure the drive clutch engages and releases properly. If the drive clutch does not operate properly, with correct cable adjustment, repair may be needed. Take the mower to an authorized Honda lawn mower dealer. l-4mm MAINTENANCE LEVER & ADJUSTMENTS... -
Page 61: Throttle Cable Adjustment
3. If the choke arm does not move all the way to its stop, in either direction, take the mower to an authorized Honda lawn mower dealer. Throttle cable adjustment involves related control plate adjustments. THROTTLE LEVER... - Page 62 Gear Shift Cable Adjustment (HRB21 SSXA & HRM215SXA only) With the transmission in 1st gear, pull the gear shift lever all the way back and release it; the lever should be centered on the number “1” on the lever cover. If adjustment is necessary: 1.
-
Page 63: Blade Removal And Installation
BLADE SHARPENING: To avoid weakening the blade(s), or causing imbalance or poor cutting, the blade(s) should be sharpened by trained staff at an authorized Honda lawn mower dealer. BLADE REPLACEMENT: Use genuine Honda replacement blades or their equivalent. -
Page 64: Blade Lnstalla Tion
Blade bolt torque: If you do not have a torque wrench, have an authorized Honda lawn mower dealer tighten the blade bolts before you use the mower. If the blade bolts are overtightened, they could break. If the blade bolts are not tightened enough, they could loosen or come out. -
Page 65: Grass Bag Cleaning And Replacement
MAINTENANCE & ADJUSTMENTS Grass Bag Cleaning and Replacement (standard equipment for HRB215, optional for HRM215) Grass Bag Cleaning Wash the bag with a garden hose, and allow it to dry completely before use; a wet bag will clog quickly. Grass Bag Replacement... -
Page 66: Troubleshooting
TROUBLESHOOTING This section shows what to check if you have a problem with your mower. Engine Problems Engine will not start .., , . , loss of power . . , , . . , . . . , , , ..Vibration Problems Mowing/Mulching/Bagging Problems... - Page 67 (p. 49). Dry and reinstall spark plug. Start engine with throttle lever in FAST position. Take mower to Honda lawn mower dealer, or refer to shop manual. CORRECTION Clean out mower deck b. 381. Clean or replace air filters (p.
- Page 68 TROUBLESHOOTING CORRECTION bolts. Replace damaged blade(s) (p. 58 - 59). Take mower to Honda lawn mower dealer, or refer to shoD manual. CORRECTION Move throttle lever to the FAST position (P. 27). Shift to slow speed (HRB215SXA &...
-
Page 70: Storage
STORAGE This secfion explains how to protect your mower from rust and corrosion, and ensure that if will start easily when you want to use if again. Basic Preparation for Storage Preparation for Storage of 1 or 2 months Preparation for Storage longer than 2 months Storage Removal from Storage... -
Page 71: Storage Preparation
STORAGE Storage Preparation Proper storage preparation is essential for keeping your lawn mower trouble free and looking good. The following steps will help to keep rust and corrosion from impairing your mower’s function and appearance, and will make the engine easier to start when you use the mower again. - Page 72 STORAGE 7. Wash the grass bag (if equipped) with a garden hose and allow it to dry completely. 8. After the mower is clean and dry, touch up any damaged paint, and coat other areas that may rust with a light film of oil. Lubricate all control cable cores with a silicone spray lubricant.
- Page 73 STORAGE FUEL Gasoline will oxidize and deteriorate in storage. Old gasoline will cause hard starting, and it leaves gum deposits that clog the fuel system. If the gasoline in your mower deteriorates during storage, you may need to have the carburetor and other fuel system components, serviced or replaced.
- Page 74 Draining the Fuel Tank and Carburetor 1. Remove the carburetor drain bolt with a 10 mm wrench, and drain the carburetor bowl fuel into an approved container. Gasoline is highly flammable and explosive. You can be burned or seriously injured. When working on fuel system connections: Keep heat, sparks, and...
- Page 75 STORAGE Storage If your mower will be stored with gasoline in the fuel tank and carburetor, it is important to reduce the hazard of gasoline vapor ignition. Select a well-ventilated storage area away from any appliance that operates with a flame, such as a furnace, water heater, or clothes dryer.
- Page 76 Removal From Storage Check your mower as described in the BEFORE MOWING chapter of this manual. If the fuel was drained during storage preparation, fill the tank with fresh gasoline. If you keep a container of gasoline for refueling, be sure that it contains only fresh gasoline. Gasoline oxidizes and deteriorates over time, causing hard starting.
-
Page 78: Specifications
SPECIFICATIONS This section gives dimensions, capacities, and other technical information. Mower Models Dimensions and General Specifications Engine Transmission... - Page 79 19 mm (3/4 in), 25 mm (1 in), 38 mm (1 l/2 in), 51 mm (2 in), 64 mm (2’/2 in), 76 mm (3 in) HRM215 25 mm (1 in), 38 mm (1 t/2 in), 51 mm (2 in), 64 mm (2’/2 in), 76 mm (3 in), 89 mm (3’12 in)
- Page 80 Engine Engine Model Engine Type Displacement Bore and Stroke Compression Ratio Maximum Horsepower Maximum Torque Maximum Governed SDeed Ignition System Spark Plug Spark Plug Gap Fuel Fuel Tank Capacity Engine Oil Enaine Oil Capacitv Transmission Transmission Type Maximum Self-propelled Steeds 1 GXV140 4-stroke, overhead-valve, single cylinder, forced air-cooled...
-
Page 82: Index And Additional Information
INDEX & ADDITIONAL This section contains an index, lists additional Honda publications, and tells you how to contact us if you have a question or a warranty repair problem. Index Honda Publications Customer Service Information INFORMATION... - Page 83 INDEX & ADDITIONAL Index Air Cleaner Inspection ....26 Air Cleaner Service Attachments: Standard and Optional Bagging (requires optional grass bag) ..39 Blade(s): Inspection .
- Page 84 Damage Prevention Message Definition ..III Drive Clutch Lever (HRB215SXA & HRM215SXA): Cable Adjustment ....55 Operation ....Engine: Fuel Recommendations Maintenance...
- Page 85 Mulching .....39 Mulching Blade, 2-Piece (standard for HRM215) Mulching Plug Removal & Installation ..9 INFORMATION .
-
Page 86: Important Message To Parents
Oil (for engine): Change ... Level Check Recommendations Pre-Operation Check: Lawn ...., . .20 Mower ....21 Safety: Important Message to Parents ... -
Page 87: Honda Publications
Honda Publications These publications will give you additional information for maintaining and repairing your mower. You may order them from your Honda lawn mower dealer. Shop Manual This manual covers complete maintenance and overhaul procedures. It is intended to be used by a skilled technician. -
Page 88: Customer Service Information
Customer Service Information Honda Power Equipment dealership personnel are trained professionals. They should be able to answer any question you may have. If you encounter a problem that your dealer does not solve to your satisfaction, please discuss it with the dealership’s management. -
Page 89: Current Customer Service Contact Information
When you write or call, please provide the following information: • Model and serial numbers • Name of the dealer who sold the Honda power equipment to you • Name and address of the dealer who services your equipment •...
Need help?
Do you have a question about the HRM215 Harmony and is the answer not in the manual?
Questions and answers