D-Link ShareCenter Quattro DNS-345 User Manual
4-bay network attached storage device
Hide thumbs
Also See for ShareCenter Quattro DNS-345:
- User manual (384 pages) ,
- Quick installation manual (57 pages) ,
- Quick install manual (40 pages)
Table of Contents
Advertisement
Quick Links
Download this manual
See also:
User Manual
Advertisement
Table of Contents

Related Manuals for D-Link ShareCenter Quattro DNS-345


Summary of Contents for D-Link ShareCenter Quattro DNS-345
-
Page 2: Table Of Contents
Disk.Management........... 51 Drives..............21 Hard.Drive.Configuration........51 Replace.the.Front.Cover.and.Connect.to.the. Hard.Drive.Configuration.Wizard...... 52 Local.LAN............22 JBOD..............59 Power.and.Device.Selection......23 RAID.0.............. 64 Admin.Password..........24 RAID.1.............. 69 Networking.Setup..........25 RAID.5.............. 77 Dynamic.DNS........... 26 D-Link ShareCenter Quattro DNS-345 User Manual... - Page 3 Applications.-.FTP.Downloads......211 Admin.Password..........158 Remote.Backups..........213 Active.Directory.Settings......... 159 Local.Backups..........218 Distributed.File.System........160 Local.Backups.-.Time.Machine....... 219 Network.Management........165 Local.Backups.-.USB.Backups....... 220 Network.Management.-.DDNS....... 170 USB.Print.Server..........224 Network.Management.-.UPnP.Router. P2P.Downloads.-.Settings......232 D-Link ShareCenter Quattro DNS-345 User Manual...
- Page 4 Photo.Center........... 236 My.Favorites............241 Add.an.Icon.to.My.Favorites......242 Removing.an.Icon.from.My.Favorites..... 243 Knowledge Base ............244 What.is.RAID?............244 RAID.OPTIONS..........246 RAID.Comparison.Chart......... 249 USB.Print.Server..........250 UPS.Connectivity..........254 Deleting.a.UPS.Slave........... 259 Knowledge Base ............261 What.is.Ethernet.Bonding?........261 D-Link ShareCenter Quattro DNS-345 User Manual...
-
Page 5: Introduction
UPnP AV media server as you stream digital content to compatible media players (such as those found in D-Link’s MediaLounge product line). This feature is very convenient as it allows you to turn off a computer that would normally be needed for the same function. -
Page 6: Before.you.begin
XP (with Service Pack 2), Windows Vista , Windows 7 ® ™ ™ ‘ „ Windows 2003 Server „ Windows 2008 Server „ Mac OS X 10.5.6 or greater „ 3.5” SATA Hard Drive(s) D-Link ShareCenter Quattro DNS-345 User Manual... -
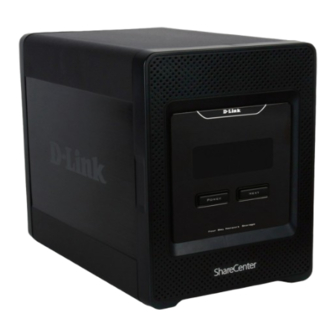
Page 7: Product Overview
D-Link ShareCenter™ Quattro DNS-345 „ CD-ROM with Manual and Software „ Quick Installation Guide „ Power Cord and 19VDC 4.74A Output Power Adapter „ Cat5E Ethernet Cable CDROM Manual Software Power Cord Ethernet Cable Quick Installation Guide D-Link ShareCenter Quattro DNS-345 User Manual... -
Page 8: Features
• Supports RAID migration: Standard to RAID 1, Hard Drive life Standard to RAID 5, RAID 1 to RAID 5 • Supports Auto Power Recovery • Supports Advanced Format HDD • Supports Schedule Power ON/OFF D-Link ShareCenter Quattro DNS-345 User Manual... - Page 9 • Supports HTTPs management • Network Recycle Bin • Supports Yahoo Widgets • Supports System Logging/FTP logging • Automatic e-mail and SMS notifications • Supports network UPS • Supports SNMPv2 • Supports Resource Monitor D-Link ShareCenter Quattro DNS-345 User Manual...
-
Page 10: Checking.the.hardware.requirements
• Understand the basic requirements for a router or switch Selecting Hard Drives: You can use hard drives from any manufacturer and with any capacity with your ShareCenter Quattro. All D-Link devices support standard 3.5” internal SATA drives. If you are unsure, ask your administrator or hard drive retailer/ manufacturer to verify that your hard drives meet this standard Warning - Any pre-existing data on the drives will be erased during installation. - Page 11 The ShareCenter Quattro DNS-345 makes it easy to increase storage capacity in the future by simply inserting additional drives or replacing smaller drives with larger ones. This means you can buy the hard drives one day and then easily expand another day.
-
Page 12: Setting.up.in.just.a.few.easy.steps
1. Insert the hard drives 2. Connect the power and LAN cables to your ShareCenter Quattro 3. Power on the device 4. Run the D-Link ShareCenter Setup Wizard to configure the NAS 5. Configure the hard drives D-Link ShareCenter Quattro DNS-345 User Manual... -
Page 13: Part I
Section 2 - Getting Started Part I D-Link ShareCenter Quattro DNS-345 User Manual... -
Page 14: Hardware.overview
Section 1 - Product Overview Hardware Overview Front Panel Front Bezel The front bezel comes off to reveal the hard disk drive rack D-Link ShareCenter Quattro DNS-345 User Manual... - Page 15 With the front cover off, SATA hard drives can be slid in and out of the of ShareCenter Quattro. Use Drive.Tray the tabs on the rear of the ShareCenter Quattro to initially push a HDD out of its connector and tray. D-Link ShareCenter Quattro DNS-345 User Manual...
- Page 16 Celsius storage capacity. drive(s) are present. Disconnected means there and Fahrenheit. No amber lights - the hard is no connection. drive(s) are absent Welcome to D-Link System Shutdown ShareCenter D-Link ShareCenter Quattro DNS-345 User Manual...
- Page 17 Section 1 - Product Overview Enter Backup mode Backup from NAS to USB Backups are complete D-Link ShareCenter Quattro DNS-345 User Manual...
-
Page 18: Rear.panel.(Latches)
Section 1 - Product Overview Rear Panel (Latches) Rear Hard Drive Latches Click the rear latches to disconnect the hard drives from the SATA sockets. Note - Remove the front cover before releasing the latches. D-Link ShareCenter Quattro DNS-345 User Manual... -
Page 19: Rear.panel.(Connections)
Power Receptacle Gigabit Ethernet Ports Cord Hook USB Port HDD Eject Lever Cooling Fan HDD Eject Lever COMPONENT DESCRIPTION Cooling.Fan The.cooling.fan.is.used.to.cool.the.hard.drives.and.features.speed.control..When.the.unit.is.first.powered.on. the.fans.rotate.at.a.low.speed.and.rotate.at.a.high.speed.when.the.temperature.rises.above.49.°C. Gigabit.Ethernet.Ports Use.the.Gigabit.Ethernet.Ports.to.connect.the.ShareCenter.Quattro.to.the.local.network..The.port.is.equipped. with.both.a.LAN.Link/Traffic.(R).and.Speed.LED.(L).to.indicate.connectivity.and.traffic.respectively.to.the. local.LAN..Dual.LAN’s.support.Port.Bonding. Power.Receptacle Connect.the.supplied.power.cord.to.the.receptacle. USB.Port A.single.USB.2.0.(Type.A).connector..The.USB.Host.port.is.for.Print.Servers,.USB.memory.disks,.or.USB. UPS.monitoring. Reset.Button Press.and.hold.this.button.for.more.than.5.seconds.to.reset.the.unit.to.factory.defaults. HDD.Eject.Lever Use.each.slot’s.lever.to.eject.the.HDD.drive.. D-Link ShareCenter Quattro DNS-345 User Manual... -
Page 20: Getting Started
Section 2 - Getting Started Getting Started Hardware Setup This.User.Guide.will.help.you.get.your.ShareCenter.Quattro.set.up.in.just.a.few.steps..To.install.the.ShareCenter. Quattro.on.your.local.network,.refer.to.the.steps.below: Slide Up Remove. the. front. panel:. Firmly. grip. Insert.one.3.5”.SATA.hard.drive.into. the. panel. and. slide. it. up. until. the. 4. an.available.drive.bay. panel.hooks.clear.the.slot.openings. Note:.Make.sure.to.align.the.drive.connector.to.the.SATA.connector.at.the.back.edge.inside.the.drive.bay.of.the. ShareCenter.Quattro..Gently.push.the.drive.in.until.it.connects..When.a.drive.is.inserted.properly,.you.will.feel.it.“seat”. into.the.connector..Some.hard.drives.that.are.thin.or.oddly.shaped.may.need.to.be.guided.carefully.into.position..If.a. drive.is.not.properly.seated,.the.hard.drive.icon.will.not.illuminate.on.the.OLED.screen.after.powering.on.the.device. D-Link ShareCenter Quattro DNS-345 User Manual... - Page 21 LAN.1.Ethernet.port..This.cable.should. slots.on.the.chassis.and.slide.the.front. connect. the. ShareCenter. Quattro. panel.down.until.it.is.firmly.seated. to. your. local. network. via. a. router,. switch,. or. directly. to. a. computer. for. configuration. Connect. the. power. adapter. to. the. power.receptacle. D-Link ShareCenter Quattro DNS-345 User Manual...
-
Page 22: D-Link.storage.utility
If it does not receive a DHCP assigned IP address, the ShareCenter will be automatically assigned a 169.254.xxx.xxx address. It is recommended that you use the included D-Link Storage Utility software when accessing and configuring the ShareCenter for the first time. If you want to change the IP address before logging in or you have having trouble connecting to the ShareCenter IP address, you can then use the Storage Utility software included on the product CD to locate the device on your network and make any necessary changes. - Page 23 Section 1 - Product Overview Select. the. ShareCenter. from. the. list. and. click. the. Configuration. button.. This. will. launch. the. computer’s. default.web.browser.and.direct.it.to.the.IP.address.listed. for.the.device..Make.sure.the.browser.is.not.configured. to.use.a.proxy.server. Note:.The.computer.used.to.access.the.ShareCenter web-based.configuration.manager.must.be.on.the.same. subnet. as.the.ShareCenter.. If.your. network. is. using. a. DHCP.server.and.the.computer.receives.IP.settings.from. DHCP.server,.the.ShareCenter.will.automatically.be.in. the.same.subnet. D-Link ShareCenter Quattro DNS-345 User Manual...
-
Page 24: Setup.wizard.and.storage.utility
ShareCenter Quattro. You can now install the ShareCenter Setup wizard from the resource CD that came with your product. To run the Setup Wizard, insert the ShareCenter Quattro CD into your CD-ROM drive: Click.Setup.Wizard.Utility The.Setup.Wizard.will.step.you.through.the. configuration. of. getting. your. ShareCenter. Quattro.ready.for.immediate.use..Select.the. Language.of.your.choice.and.click.the.Start. button. D-Link ShareCenter Quattro DNS-345 User Manual... -
Page 25: Remove The Front Cover And Install The Hard Drives
Section 2 - Getting Started Remove the Front Cover and Install the Hard Drives Follow.the.instructions.to.remove.the.front. Follow.the.instructions.to.slide.either.one.or. cover.of.your.ShareCenter.Quattro. two.hard.drive(s).into.an.available.hard.drive. bay.of.your.ShareCenter. Click.Next.to.continue. Click.Next.to.continue. D-Link ShareCenter Quattro DNS-345 User Manual... -
Page 26: Replace The Front Cover And Connect To The Local Lan
Replace the Front Cover and Connect to the Local LAN. With.the.hard.drives.installed.properly.into. Connect.a.Cat5E.Ethernet.cable.with.RJ-45. each. bay,. close. the. chassis. by. sliding. the. connectors.to.your.ShareCenter.and.connect. panel.down.into.place. the. other. end. to. a. switch. or. router. (Local. LAN). Click.Next.to.continue. Click.Next.to.continue. D-Link ShareCenter Quattro DNS-345 User Manual... -
Page 27: Power.and.device.selection
With. the. power. on,. press. the. Next. button. Connect. the. power. adapter. connector. on.the.device.and.check.and.make.sure.the. to. the. power. receptacle. at. the. back. of. IP. address. of. your. ShareCenter. Quattro. the. ShareCenter.. Then. power. on. the. matches.what.you.see.on.the.screen. ShareCenter™.by.pressing.the.power.button. located..under.the.OLED.screen. Click.Next.to.continue. Click.Next.to.continue. D-Link ShareCenter Quattro DNS-345 User Manual... -
Page 28: Admin.password
Section 2 - Getting Started Admin Password Enter.the.administrator.password..If.this.is. In.this.step.you.can.create.a.new.password. the.first.time.you.are.doing.the.installation.on. for.the.‘Admin”.username..It.is.recommended. this.NAS,.leave.the.password.blank. you.set.a.password,.however.you.may.also. leave.the.fields.blank. Click.Next.to.continue. Click.Next.to.continue. D-Link ShareCenter Quattro DNS-345 User Manual... -
Page 29: Networking.setup
Networking Setup You. may. either. use. Static. IP. or. DHCP. to. You. may. either. use. Static. IP. or. DHCP. to. configure.the.first.IP.network.settings.of.the. configure.the.second.IP.network.settings.of. ShareCenter.. If. you. select. Static. IP. then. the.ShareCenter..If.you.select.Static.IP.then. enter.the.IP.parameters.as.listed. enter.the.IP.parameters.as.listed. Click.Next.to.continue. Click.Next.to.continue. D-Link ShareCenter Quattro DNS-345 User Manual... -
Page 30: Dynamic.dns
Windows. Workgroup. network,. enter. the. have. a. DDNS. account. to. use. for. the. workgroup. name,. a. name. for. the. device,. ShareCenter.Quattro.DDNS..Click.the.‘No’. and. a. description.. The. name. you. entered. radio.button.and.proceed.to.step.16.to.obtain. will.be.used.whenever.you.map.one.of.the. a.new.DDNS.account. ShareCenter™.volumes.as.a.Network.Drive. Click.Next.to.continue. Click.Next.to.continue. D-Link ShareCenter Quattro DNS-345 User Manual... -
Page 31: Ddns.account.setup
Enter. the. DDNS. parameters. requested. in. and. links. on. how. to. obtain. a. free. DDNS. this.window.so.that.your.ShareCenter.can. account.. be.accessed.by.a.URL.over.the.Internet. Click. No. skips. the. DDNS. account. setup. Click.Next.to.continue. wizard. and. transfers. you. back. to. the. ShareCenter.Setup.Wizard. D-Link ShareCenter Quattro DNS-345 User Manual... -
Page 32: Ddns.account.and.system.time
Section 2 - Getting Started DDNS Account and System Time Follow.the.steps.listed.here.in.order.to.create. Select. the. ShareCenter. system. time. date. a. DDNS. account. and. configure. your. LAN. and.timezone.settings.using.this.step..You. equipment. and. ShareCenter. to. work. with. can.set.the.time.and.date.manually,.from.an. the.new.settings. NTP.server,.or.from.the.computers.settings.. The.timezone.is.set.manually. Click.Close.to.continue. Click.Next.to.continue. D-Link ShareCenter Quattro DNS-345 User Manual... -
Page 33: Email.settings.and.volume.information
Section 2 - Getting Started Email Settings and Volume Information Configure. an. e-mail. service. with. the. This.step.shows.the.configured.Volumes.set. ShareCenter. to. receive. e-mail. events. to. up.on.the.ShareCenter.Quattro. alert.users.of.any.changes.to.the.system. Click.Next.to.continue. You. must. have. all. mail. server. information. nearby.or.contact.your.systems.administrator. for.assistance. Click.Next.to.continue. D-Link ShareCenter Quattro DNS-345 User Manual... -
Page 34: Raid.configuration.and.encryption
Section 2 - Getting Started RAID Configuration and Encryption Select. one. of. the. 4. Volume. File. Systems. Once.the.RAID.configuration.is.complete,.the. desired.. Clicking. on. each. file. system. type. ShareCenter.Quattro.prompts.you.to.encrypt. radio.button.will.give.a.description.if.needed.. each.or.all.drives..Check.the.box.next.to.the. hard.drive(s).you.wish.to.encrypt. For.more.information.concerning.the.different. RAID.Disk.Formats.please.refer.to.the.user. Click.Next.to.continue. manual. Click.Next.to.continue. D-Link ShareCenter Quattro DNS-345 User Manual... -
Page 35: Mapping A Drive And Checking Volume Summary
Section 2 - Getting Started Mapping a Drive and Checking Volume Summary This.step.allows.you.to.map.the.volume(s). Review.the.detailed.summary.of.your.volume. created.as.network.drive(s).on.your configuration.here.before.clicking.next.and. computer. starting.the.drive.format..If.necessary.use.the. PREV.button.to.go.back.and.reconfigure.the. Click.Next.to.continue. RAID.comfiguration.of.the.volume(s). Click.Next.to.continue. D-Link ShareCenter Quattro DNS-345 User Manual... -
Page 36: Formatting.volumes
Section 2 - Getting Started Formatting Volumes When. you. click. Next,. a. warning. message. will.appear.to.inform.you.that.all.data.on.the. drive(s).will.be.lost..Click.Yes.to.proceed.or. No.to.exit. Click.Next.to.continue. During. the. format. process. the. wizard. displays.a.percentage.complete.bar.for.each hard.drive. Click.Next.to.continue. D-Link ShareCenter Quattro DNS-345 User Manual... -
Page 37: Formatting Hard Drives And Selecting Add-On Packages
Section 2 - Getting Started Formatting Hard Drives and Selecting Add-on Packages The.wizard.will.notify.you.when.formatting.is. Your. ShareCenter. supports. Add-On. complete.successfully. packages.. Here. you. may. install. the. Audio. Streamer,. Blog,. SqueezeCenter,. Photo. Click.Next.to.continue. Center,. aMule,. and. AjaXplorer. add-ons. which.extend.the.application.functionality.of. your.ShareCenter.Quattro. Click.Next.to.continue. D-Link ShareCenter Quattro DNS-345 User Manual... -
Page 38: Add-On.packages
Section 2 - Getting Started Add-on Packages The. wizard. will. notify. you. that. the. Add-on. The. next. screen. allows. you. to. enable. or. packages.are.installed.successfully. disable.the.installed.add-on.packages. Click.Next.to.continue. Click.Next.to.continue. D-Link ShareCenter Quattro DNS-345 User Manual... -
Page 39: Wizard.complete
If you did not use the wizard to map the drives, you can manually map or access the created volumes through your computers operating system. Detailed configurations using the Web UI is explained in the configuration section of this manual. The.ShareCenter.Setup.Wizard.is.complete.. Click.Finish.to.exit.the.wizard.and.start.using. your.DNS-345.NAS. Click.Next.to.continue. D-Link ShareCenter Quattro DNS-345 User Manual... -
Page 40: Mapping.a.drive
Map a drive to your NAS using Windows 7 to access it through Windows Explorer. Click. Start,. then. Computer. (the. name. of. This.screen.shows.some.details.on.selecting. your.computer).. a.network.drive. On.the.right-side.panel.is.a.list.of.your.hard. Click.Browse.to.find.your.network. drives,. removable. storage. ,. and. network. locations.. If. you. do. not. have. any. network. locations,.this.may.be.the.first.time.you.set. up.a.network.drive..Begin.by.clicking.on.‘Map network drive’. D-Link ShareCenter Quattro DNS-345 User Manual... - Page 41 Section 2 - Getting Started Windows.will.automatically.detect.all.devices. Click.on.your.NAS.to.see.the.volumes.you. on.your.network.including.your.DNS-345. created. earlier.. Then. select.the.volume. that.you.wish.to.access.and.click.OK. D-Link ShareCenter Quattro DNS-345 User Manual...
- Page 42 Section 2 - Getting Started After. selecting. your. volume,. click. Finish The.drive.will.then.appear.in.your.Windows. proceed. Explorer. in. green.. This. means. the. drive. is. active.and.ready.for.use.. D-Link ShareCenter Quattro DNS-345 User Manual...
-
Page 43: Part Ii
Section 2 - Getting Started Part II D-Link ShareCenter Quattro DNS-345 User Manual... -
Page 44: Managing.your.sharecenter.quattro.dns-345. 4
Applications FTP/HTTP.Downloads Configure remote backup services Remote.Backup Configures local backups, Time Machine settings and USB backups Local.Backups © Configure your P2P downloads and control your download schedules P2P.Downloads Web.File.Server Create,.configure,.and.manage.your.web.file.server.settings Amazon.S3 Create,.modify,.and.delete.your.Amazon.S3 .settings © D-Link ShareCenter Quattro DNS-345 User Manual... -
Page 45: Configuration - Web Ui Login
Configuration - Web UI Login To manage and access your ShareCenter Quattro DNS-345, open a web browser from our Systems Requirements list, type in the IP address of your NAS, and login. When you were configuring your DNS-345, you set up your LAN settings. -
Page 46: Web.ui.general.layout
After logging in, the ShareCenter web UI will navigate you to the ‘My Favorites’ tab by default. You will see the Applications and Management tabs alongside of it. You will find the configuration icons in the Management tab. The My Favorites screen D-Link ShareCenter Quattro DNS-345 User Manual... - Page 47 Section 4 - Configuration Applications screen D-Link ShareCenter Quattro DNS-345 User Manual...
- Page 48 Section 4 - Configuration Management screen D-Link ShareCenter Quattro DNS-345 User Manual...
-
Page 49: Management
Section 4 - Configuration Management The Management tab contains the Setup Wizard, Disk Management, Account Management, Network Management, Application Management, System Management, and Status icons. Click on each of the icons to see the submenus. D-Link ShareCenter Quattro DNS-345 User Manual... -
Page 50: Setup.wizard.(Web.ui)
The ShareCenter Quattro has a System Wizard that allows you to quickly configure some of the basic device settings. Click the System Wizard icon to start the Setup Wizard. Click the Run Wizard button to start the setup wizard. Click Next to continue. D-Link ShareCenter Quattro DNS-345 User Manual... - Page 51 Click Next to continue. Set the timezone to the appropriate geographical zone closest to your location from the drop-down menu. Click Next to continue. Click Skip to ignore these settings. D-Link ShareCenter Quattro DNS-345 User Manual...
- Page 52 Click Next to continue. The ShareCenter LAN 2 parameters can either use DHCP to obtain its IP settings dynamically or Static to set them manually in the parameters below. Click Skip to ignore these settings. D-Link ShareCenter Quattro DNS-345 User Manual...
- Page 53 The e-mail account will then receive Event Alerts from the ShareCenter. Click Anonymous to create a random account with no specific settings. Click Skip to ignore these settings. Click Next to continue. D-Link ShareCenter Quattro DNS-345 User Manual...
- Page 54 Click the Previous button to go back and heck your settings. If you are satisfied with the settings, click the Finish button to save and continue. Click Exit to end the wizard without saving the settings. D-Link ShareCenter Quattro DNS-345 User Manual...
-
Page 55: Disk.management
Note: You can still rebuild a drive using the RAID 1-5 functionality however you must initiate the rebuild manually. Manual If Auto-Rebuild is disabled then you can use the Manual Rebuild Now Rebuild option by clicking this button. D-Link ShareCenter Quattro DNS-345 User Manual... -
Page 56: Hard.drive.configuration.wizard
R A I D c o n f i g u r a t i o n u n d e r ‘Current RAID Type’. The options below provide other choices. 1. Set RAID type and Re-Format 2. Configure Newly Inserted Hard Drive(s) Click ‘Set RAID Type and Re-Format’ D-Link ShareCenter Quattro DNS-345 User Manual... - Page 57 Click Next to continue. The ‘Select a RAID Type’ page gives you six different RAID options to configure your hard drives. Select the type you wish to use. Click Next to continue. D-Link ShareCenter Quattro DNS-345 User Manual...
- Page 58 Section 4 - Configuration Select Standard to create separate volumes for each individual drive. Click Next to continue. Choose a volume or volumes that you would like to encrypt. Click Next to continue. D-Link ShareCenter Quattro DNS-345 User Manual...
- Page 59 Click Next to continue. The ‘Volume Configuration Summary’ shows details on all of the configured drives. Check the details on the list and click Format to continue or click Previous to make changes. Click Next to continue. D-Link ShareCenter Quattro DNS-345 User Manual...
- Page 60 Click Next to continue. Partitioning will now begin. Please be patient while this process takes place. Do not turn off your NAS during this process. D-Link ShareCenter Quattro DNS-345 User Manual...
- Page 61 If you would like to change your settings at this stage, click Exit. The system will now update all of the changes made. Please be patient during this process. Do not turn off your NAS during this process. D-Link ShareCenter Quattro DNS-345 User Manual...
- Page 62 The wizard is now complete. It will show the volume number(s), file system selected, the type of RAID, and the disk formation in the RAID. Click Finish to complete the process and start using your DNS-345. D-Link ShareCenter Quattro DNS-345 User Manual...
-
Page 63: Jbod
Section 4 - Configuration JBOD Select JBOD to create a single volume from all of the drives. Click Next to continue. Choose a volume or volumes that you would like to encrypt. Click Next to continue. D-Link ShareCenter Quattro DNS-345 User Manual... - Page 64 Click Format to continue or Previous make changes. If you are encrypting the volume, select Auto Mount, enter a password, and confirm the password. Click Next to continue. D-Link ShareCenter Quattro DNS-345 User Manual...
- Page 65 The ‘Volume Configuration Summary’ shows details on all of the configured drives. Check the details on the list and click Format to continue or click Previous to make changes. ShareCenter will now prepare the volume for partitioning. D-Link ShareCenter Quattro DNS-345 User Manual...
- Page 66 A graphical bar will show the volume being formatted. Please be patient during this process. Do not turn off your NAS during this process. If you would like to change your settings at this stage, click Exit. D-Link ShareCenter Quattro DNS-345 User Manual...
- Page 67 The wizard is now complete. It will show the volume number(s), file system selected, the type of RAID, and the disk formation in the RAID. Click Finish to complete the process and start using your DNS-345. D-Link ShareCenter Quattro DNS-345 User Manual...
-
Page 68: Raid.0
Select a capacity for RAID 0 (in GB) then check the box next to ‘Configure the remaining disk space as JBOD’ if you wish to configure the remaining space as JBOD. Click Next to continue. D-Link ShareCenter Quattro DNS-345 User Manual... - Page 69 Click Next to continue. The ‘Volume Configuration Summary’ shows details on all of the configured drives. Check the details on the list and click Format to continue or click Previous to make changes. Click Next to continue. D-Link ShareCenter Quattro DNS-345 User Manual...
- Page 70 Click Next to continue. Partitioning will now begin. Please be patient while this process takes place. Do not turn off your NAS during this process. D-Link ShareCenter Quattro DNS-345 User Manual...
- Page 71 If you would like to change your settings at this stage, click Exit. The system will now update all of the changes made. Please be patient during this process. Do not turn off your NAS during this process. D-Link ShareCenter Quattro DNS-345 User Manual...
- Page 72 The wizard is now complete. It will show the volume number(s), file system selected, the type of RAID, and the disk formation in the RAID. Click Finish to complete the process and start using your DNS-345. D-Link ShareCenter Quattro DNS-345 User Manual...
-
Page 73: Raid.1
Select RAID 1. All the drives are striped. Click Next to continue. Enter the amount of disk space you would like to assign to the first volume for RAID 1. Click Next to continue. D-Link ShareCenter Quattro DNS-345 User Manual... - Page 74 Enter the amount of disk space you would like to assign to the second volume for RAID 1. Click Next to continue. Click Enable Auto-rebuild to fix a RAID if it becomes corrupted. Click Next to continue. D-Link ShareCenter Quattro DNS-345 User Manual...
- Page 75 Section 4 - Configuration Choose a volume or volumes that you would like to encrypt. Click Next to continue. A warning message will appear, stating that your device will have some latency. Click Yes to continue. D-Link ShareCenter Quattro DNS-345 User Manual...
- Page 76 Enter a password and confirm it. Click Next to continue. The ‘Volume Configuration Summary’ shows details on all of the configured drives. Check the details on the list and click Format to continue or click Previous to make changes. D-Link ShareCenter Quattro DNS-345 User Manual...
- Page 77 The next window will ask you to confirm your drive selection. Click Yes to agree. Click No to exit. Partitioning will now begin. Please be patient while this process takes place. Do not turn off your NAS during this process. D-Link ShareCenter Quattro DNS-345 User Manual...
- Page 78 If you would like to change your settings at this stage, click Exit. ShareCenter will format the second drive of the volume as well If you would like to change your settings at this stage, click Exit. D-Link ShareCenter Quattro DNS-345 User Manual...
- Page 79 The wizard is now complete. It will show the volume number(s), file system selected, the type of RAID, and the disk formation in the RAID. Click Finish to complete the process and start using your DNS-345. D-Link ShareCenter Quattro DNS-345 User Manual...
- Page 80 Section 4 - Configuration Once you have completed the wizard. ShareCenter will return to the main screen. The RAID configuration you just set will be displayed. D-Link ShareCenter Quattro DNS-345 User Manual...
-
Page 81: Raid.5
Select a capacity for RAID 5 (in GB) then check the box next to ‘Configure the remaining disk space as JBOD’ if you wish to configure the remaining space as JBOD. Click Next to continue. D-Link ShareCenter Quattro DNS-345 User Manual... - Page 82 Section 4 - Configuration Click Enable Auto-rebuild to fix a RAID if it becomes corrupted. Click Next to continue. Choose a volume or volumes that you would like to encrypt. Click Next to continue. D-Link ShareCenter Quattro DNS-345 User Manual...
- Page 83 A warning message will appear, stating that your device will have some latency. Click Next to continue. Select Auto Mount to configure the volume to mount when the device becomes active. Enter a password and confirm it. Click Next to continue. D-Link ShareCenter Quattro DNS-345 User Manual...
- Page 84 Format to continue or click Previous to make changes. Click Next to continue. The next window asks you to confirm your selection to format the drives. Click Yes to agree. Click No to exit. D-Link ShareCenter Quattro DNS-345 User Manual...
- Page 85 A graphical bar will show the volume being formatted. Please be patient during this process. Do not turn off your NAS during this process. If you would like to change your settings at this stage, click Exit. D-Link ShareCenter Quattro DNS-345 User Manual...
- Page 86 Section 4 - Configuration The system will now update all of the changes made. ShareCenter will format the second drive of the volume too. If you would like to change your settings at this stage, click Exit. D-Link ShareCenter Quattro DNS-345 User Manual...
- Page 87 Section 4 - Configuration Once you have completed the wizard. ShareCenter will return to the main screen. The RAID configuration you just set will be displayed. D-Link ShareCenter Quattro DNS-345 User Manual...
-
Page 88: Raid.5.+.Spare
Table of Contents RAID 5 + Spare Select RAID 5. All the drives are striped. Click Next to continue. Click Create Spare Disk. This creates a RAID 5 plus the spare. Click Next to continue. D-Link ShareCenter Quattro DNS-345 User Manual... - Page 89 The volume is now configured for RAID 5 plus the spare. Click Next to continue. Choose a volume or volumes that you would like to encrypt. A warning message will warn you that the system will operate slower. Click Yes to continue. D-Link ShareCenter Quattro DNS-345 User Manual...
- Page 90 ShareCenter will now show the Volume Configuration Summary. Make sure under type it reads RAID5 + Spare. Check the details on the list and click Format to continue or click Previous to make changes. Click Next to continue. D-Link ShareCenter Quattro DNS-345 User Manual...
- Page 91 The next window asks you to confirm your selection to format the drives. Click Yes to agree. Click No to exit. Partitioning will now begin. Please be patient while this process takes place. Do not turn off your NAS during this process. D-Link ShareCenter Quattro DNS-345 User Manual...
- Page 92 If you would like to change your settings at this stage, click Exit. The system will now update all of the changes made. Please be patient during this process. Do not turn off your NAS during this process. D-Link ShareCenter Quattro DNS-345 User Manual...
- Page 93 RAID, and the disk formation in the RAID. Click Finish to continue. Once you have completed the wizard. ShareCenter will return to the main screen. The RAID configuration you just set will be displayed. D-Link ShareCenter Quattro DNS-345 User Manual...
-
Page 94: Raid.10
Select a capacity for RAID 10 (in GB) then check the box next to ‘Configure the remaining disk space as JBOD’ if you wish to configure the remaining space as JBOD. Click Next to continue. D-Link ShareCenter Quattro DNS-345 User Manual... - Page 95 Section 4 - Configuration Click Enable Auto-rebuild to repair a RAID if it becomes corrupted. Click Next to continue. Choose a volume or volumes that you would like to encrypt. Click Next to continue. D-Link ShareCenter Quattro DNS-345 User Manual...
- Page 96 A warning message will warn you that the system will operate slower. Click Next to continue. Select Auto Mount to configure the volume to mount when the device becomes active. Enter a password and confirm it. Click Next to continue. D-Link ShareCenter Quattro DNS-345 User Manual...
- Page 97 Format to continue or click Previous to make changes. A warning message will appear to inform you that all volumes and data will be formatted and erased. Click Yes to continue. Click No to exit. D-Link ShareCenter Quattro DNS-345 User Manual...
- Page 98 A graphical bar will show the volume being formatted. Please be patient during this process. Do not turn off your NAS during this process. If you would like to change your settings at this stage, click Exit. D-Link ShareCenter Quattro DNS-345 User Manual...
- Page 99 The wizard is now complete. It will show the volume number(s), file system selected, the type of RAID, and the disk formation in the RAID. Click Finish to complete the process and start using your DNS-345. D-Link ShareCenter Quattro DNS-345 User Manual...
- Page 100 Section 4 - Configuration Once you have completed the wizard. ShareCenter will return to the main screen. The RAID configuration you just set will be displayed. D-Link ShareCenter Quattro DNS-345 User Manual...
-
Page 101: A.quick.s.m.a.r.t
Quick Test radio button and click Start. A warning message will prompt you to stop all services and network activity. Click Yes to continue the Quick S.M.A.R.T. test. D-Link ShareCenter Quattro DNS-345 User Manual... - Page 102 Progress Tab. The Start button will change to a Stop button. Stop Button Progress Tab When the test is complete, the results will be displayed under the Results Tab. Results Tab D-Link ShareCenter Quattro DNS-345 User Manual...
-
Page 103: Creating.a.schedule.for.the.s.m.a.r.t.test
Click Create To view the Schedule List, click on the schedule list arrow. A new table will appear showing details of the new schedule created. To delete a scheudle, click on the Trash Can. D-Link ShareCenter Quattro DNS-345 User Manual... -
Page 104: Scanning.the.volumes
Scan Disk provides a method to test the disk’s file system on your ShareCenter Quattro. Scan Disk scans your disks file system for errors and/or corruption. Click Management, then Disk Management, and then Scan Disk. Select the volume from the drop-down list you wish to scan. Click Scan Disk D-Link ShareCenter Quattro DNS-345 User Manual... - Page 105 The DNS-345 will initialize the volume(s) and begin scanning. Please wait while the software scans your machine or click Exit to cancel the scan. When the scan is complete, the table will either display Success or Failure. Click Finish to exit. D-Link ShareCenter Quattro DNS-345 User Manual...
-
Page 106: Volume.encryption
Next, you will be prompted to configure the drive. Select Auto Mount if you wish to setup encryption when the NAS starts up. Enter a password, then confirm it and click Next to continue. ..NB:.Please.take.note.that.once.you.enable.volume.encryption.throughput.will.be.much.slower. D-Link ShareCenter Quattro DNS-345 User Manual... - Page 107 If the passwords do not match then a message will appear. Click Yes, to re-enter the matching passwords. The Volume Configuration Summary shows which volumes are encrypted and which ones are not. Click Format to start the formatting process. D-Link ShareCenter Quattro DNS-345 User Manual...
- Page 108 Section 4 - Configuration A message will appear asking you to confirm your hard drive selection for formatting. Click Yes to start the formatting process. Please be patient as the partitioning and formatting process begins. D-Link ShareCenter Quattro DNS-345 User Manual...
- Page 109 Click Finish to close this window. Go to Disk Management, Volume Encryption to see a list of encrypted volumes. Select the volume(s) you wish to modify. Your selection(s) will turn red. Click Modify. D-Link ShareCenter Quattro DNS-345 User Manual...
- Page 110 Enter the password into the field provided and click Apply. You have the option to enable Auto Mount and enter a new password. If you choose not to enable Auto Mount you can leave this field blank. Click Apply to continue. D-Link ShareCenter Quattro DNS-345 User Manual...
- Page 111 Please be patient while this process takes place. Do not turn off your NAS during this process. The wizard will return you to the Volume Encryption page where you can view the encrypted volumes. D-Link ShareCenter Quattro DNS-345 User Manual...
-
Page 112: Account.management.-.Creating.single.users
However access rules can be created and edited in the Network Shares menu. Click Management, Account Management. Under Users/Groups, User Settings click Create The User Setup Wizard will appear. Click Next to continue. D-Link ShareCenter Quattro DNS-345 User Manual... - Page 113 Section 4 - Configuration In Step 1, select ‘Create a Single User’ Click Next In Step 2, enter the user name and password for the new user. Click Next to continue D-Link ShareCenter Quattro DNS-345 User Manual...
- Page 114 In Step 3, add the user to a group by entering the group details. (If no group exists click Next) Click Next to continue. In Step 4, select the network share settings. Select Read Only, Read/Write, or Deny Access. Click Next to continue. D-Link ShareCenter Quattro DNS-345 User Manual...
- Page 115 Section 4 - Configuration Assign Privileges/Access Methods for the user(s). Check the options you need. Click Next to continue. WebDAV is one of the options. Click Next to continue. D-Link ShareCenter Quattro DNS-345 User Manual...
- Page 116 Click Next to continue. The final step is a summary of all the configurations you made. Click Finish to accept the changes. Click Exit to cancel the changes. D-Link ShareCenter Quattro DNS-345 User Manual...
-
Page 117: Account.management.-.Creating.multiple.users
Enter the amount of users you want to create. Next to the input field is the remaining amount of users you can add to the NAS. Enter a password and confirm it. Click Next to continue. D-Link ShareCenter Quattro DNS-345 User Manual... - Page 118 In Step 3, add the user to a group by entering the group details.(If no group exists click Next) Click Next to continue. In Step 4, select the network share settings. Select Read Only, Read/Write, or Deny Access. Click Next to continue. D-Link ShareCenter Quattro DNS-345 User Manual...
- Page 119 Click Next to continue. In Step 5, enter the amount of disk space you wish to assign the user on each volume. Type 0 to provide unlimited disk space to the user. Click Next to continue. D-Link ShareCenter Quattro DNS-345 User Manual...
- Page 120 The final step is a summary of all the configurations you made. Click Finish to accept the changes. Click Exit to cancel the changes. The User Settings window will show a list of the users created. D-Link ShareCenter Quattro DNS-345 User Manual...
-
Page 121: Account.management.-.Creating.the.same.user
Section 4 - Configuration Account Management - Creating the same user Click Management, Account Management. Under Users/Groups, User Settings click Create The User Setup Wizard will appear. Click Next to continue. D-Link ShareCenter Quattro DNS-345 User Manual... - Page 122 In Step 1, select ‘Create a Single User’ Click Next If you have created the same user twice, a message will appear prompting you to enter a new username. Click Yes and enter a new username. D-Link ShareCenter Quattro DNS-345 User Manual...
-
Page 123: Account.management.-.Modify.users
Section 4 - Configuration Account Management - Modify Users Click the user you wish to modify. The user will be highlighted in red. Click Modify to continue. The User Setup Wizard will appear. Click Next to continue. D-Link ShareCenter Quattro DNS-345 User Manual... - Page 124 Section 4 - Configuration In Step 1, change the username or password. Click Next to continue Change the Network Share Settings accordingly. Click Next to continue D-Link ShareCenter Quattro DNS-345 User Manual...
- Page 125 Click Next to continue. In Step 4, enter the re-assigned amount of disk space you wish to assign the user on each volume. Type 0 to provide unlimited disk space to the user. Click Next to continue. D-Link ShareCenter Quattro DNS-345 User Manual...
- Page 126 The final step is a summary of all the configurations you made. Click Finish to accept the changes. Click Exit to cancel the changes. A message will appear stating the user details have been changed successfully. Click Yes to exit the wizard. D-Link ShareCenter Quattro DNS-345 User Manual...
-
Page 127: Account.management.-.Deleting.users
Click the user you wish to delete. The user will be highlighted in red. Click Delete to continue. A message will appear prompting you to confirm deleting the user. Click Yes to confirm. The user is now automatically removed from the list. D-Link ShareCenter Quattro DNS-345 User Manual... -
Page 128: Account.management.-.Importing.users
Section 4 - Configuration Account Management - Importing Users Click Account Management, Users/Groups Click Import Users The Import Users Wizard will start. Click Next to continue. D-Link ShareCenter Quattro DNS-345 User Manual... - Page 129 In Step 1, click Download to see a sample file. Click Overwrite Duplicate Accounts if this is necessary Click Choose File to import the list. Click Next to continue Assign the privileges and access methods. Click Next to continue. D-Link ShareCenter Quattro DNS-345 User Manual...
- Page 130 If there are problems with the user list, the wizard will show the errors in red on the table. The Summary will show a list of imported users. Click Finish to close the wizard or go back to change the import file. D-Link ShareCenter Quattro DNS-345 User Manual...
-
Page 131: Account.management.-.Creating.a.group
Account Management - Creating a Group Click Account Management, Users/Groups Click the blue arrow and the Group Settings will appear. Click New to create a new Group. The Group Setup Wizard will now start. Click Next to continue. D-Link ShareCenter Quattro DNS-345 User Manual... - Page 132 Section 4 - Configuration In Step 1, enter a Group Name. Click Next to continue In Step 2, click the checkbox to select the user(s) you wish to add to the group. Click Next to continue. D-Link ShareCenter Quattro DNS-345 User Manual...
- Page 133 Click Next to continue. Select the Assigned Privileges for the group. The greyed out selections are there by default. Click Next to continue. D-Link ShareCenter Quattro DNS-345 User Manual...
- Page 134 Select the appropriate WebDAV settings. Click Next to continue. Enter the amount of space you want to assign to the group for each volume. Enter zero to give unlimited disk space to the group. Click Next to continue. D-Link ShareCenter Quattro DNS-345 User Manual...
- Page 135 The wizard is now complete. The last step shows a summary of the group you created. Click Previous to change your settings or Finish to end the wizard. Under Group Settings, a table will show the group you just created. D-Link ShareCenter Quattro DNS-345 User Manual...
-
Page 136: Account.management.-.Modifying.a.group
Click Account Management, Users/Groups Click the blue arrow and the Group Settings table will appear. Select the group you want to modify. Your selection will turn red. Click Modify to change the settings for the Group. D-Link ShareCenter Quattro DNS-345 User Manual... - Page 137 Section 4 - Configuration The Group Setup Wizard will now start. Click Next to continue. In Step 1, make the necessary modifications to the group(s). Click Next to continue. D-Link ShareCenter Quattro DNS-345 User Manual...
- Page 138 Click Next to continue. Select the appropriate Assigned Privileges to the group. The greyed out selections are there by default and cannot be modified. Click Next to continue. D-Link ShareCenter Quattro DNS-345 User Manual...
- Page 139 Enter zero to give unlimited disk space to the group. Click Next to continue. When editing the quota, make sure the size is not smaller than the user quota on his/her account. Click Yes to change the quota. D-Link ShareCenter Quattro DNS-345 User Manual...
- Page 140 The wizard is now complete and will show a summary of the group you edited. Click Previous to change your settings or Finish to end the wizard. Exit will cancel all changes you made. D-Link ShareCenter Quattro DNS-345 User Manual...
-
Page 141: Account.management.-.Deleting.a.group
Select the Group you want to delete. Click Delete. A warning message will appear asking you to verify if you want to delete the Group. Click Yes to delete the Group. Click No to cancel your decision. D-Link ShareCenter Quattro DNS-345 User Manual... -
Page 142: Quota.settings
Click Enable to activate Quota Settings. The status will now display ‘Started’, notifying you that the Quota Settings have begun. To Modify a User’s Quota Settings, click the blue arrow to reveal a table of users. D-Link ShareCenter Quattro DNS-345 User Manual... - Page 143 Select the User. Your selection will turn red. Click Modify to change his/her settings. The Quota Settings configuration box will display the user account you want to modify. Enter a new volume quota amount. Click Apply to confirm your settings. D-Link ShareCenter Quattro DNS-345 User Manual...
- Page 144 Section 4 - Configuration The modified quota settings will be displayed in the table. For Group Quota Settings, click the blue drop down arrow to view the group quota table. D-Link ShareCenter Quattro DNS-345 User Manual...
- Page 145 Select the group. Your selection will turn red. Click Modify. The Group Quota Settings screen will display the group you want to modify. Enter the new quota volume settings for the current group. Click Apply. D-Link ShareCenter Quattro DNS-345 User Manual...
- Page 146 Section 4 - Configuration The table under the Group Quota Settings window will display the modified quota settings. D-Link ShareCenter Quattro DNS-345 User Manual...
-
Page 147: Network.shares
At the bottom of the table, the user can navigate through pages and also refresh the window by click on the Refresh button. Click on the Reset Network Shares button to reset the network access list to the default configuration, D-Link ShareCenter Quattro DNS-345 User Manual... -
Page 148: Adding/Modifying New Network Shares Wizard
2) Configure shared folder access rights. 3) Configure network access settings. 4) View a summary of the configuration before completing. Click Next to continue. Select the Share Folder from one of the volumes. Click Next to continue. D-Link ShareCenter Quattro DNS-345 User Manual... - Page 149 Select the appropriate access rights for the share. Options to choose from are Read Only, Read/Write, and Deny Access. This procedure can also be used to block certain users from accessing certain folders. Click Next to continue. D-Link ShareCenter Quattro DNS-345 User Manual...
- Page 150 User configured on the ShareCenter Click Next to continue. If you selected specific user/group in Step 2 then this step allows you to set the access rights for each Group configured on the ShareCenter. Click Next to continue. D-Link ShareCenter Quattro DNS-345 User Manual...
- Page 151 No (off) when using file-based database applications. When enabled, the file attribute “Map Archive” will be copied as the file is being stored on the ShareCenter Quattro. Click Next to continue. D-Link ShareCenter Quattro DNS-345 User Manual...
- Page 152 AFP is short for Apple Filing Protocol. • FTP is short for File Transfer Protocol • NFS is short for Network File System. • WebDAV is short for Web-based Distributed Authoring and Versioning. Click Next to continue. D-Link ShareCenter Quattro DNS-345 User Manual...
- Page 153 Root Squash - Disables writing to the Root owned directories and files on the system when the user has root access privileges. • Write - provide write permission to the file system. Click Next to continue. D-Link ShareCenter Quattro DNS-345 User Manual...
- Page 154 If you checked WebDAV as an access method in Step 3, then this step will allow you to set the access parameters. Click Next to continue. Here a summary of the created shares will be displayed. Click Next to continue. D-Link ShareCenter Quattro DNS-345 User Manual...
-
Page 155: Deleting.a.network.share
Select the Network Share you wish to delete. Your selection will turn red. Click Delete. A warning message will appear prompting you to verify if you wish to delete te Share. Click Yes to delete. Click No to Cancel. D-Link ShareCenter Quattro DNS-345 User Manual... - Page 156 Section 4 - Configuration The deleted Share will be removed from the Network Share List. D-Link ShareCenter Quattro DNS-345 User Manual...
-
Page 157: Resetting.the.network.shares
Section 4 - Configuration Resetting the Network Shares Select the Reset Network Shares button. A warning message will prompt you to confirm your selection. Click Yes to confirm. Click No to cancel. D-Link ShareCenter Quattro DNS-345 User Manual... -
Page 158: Adding.new.iso.mount.shares.wizard
Click Next to continue. Expand one of your Volume File System trees to select the desired .iso file. Check the box to the left of the .iso file to select Click Next to continue. D-Link ShareCenter Quattro DNS-345 User Manual... - Page 159 The user can assign Read Only or Deny Access privileges to the ISO Mount share here. Click on the appropriate radio button for the privileges you would like to assign. Click Next to continue. D-Link ShareCenter Quattro DNS-345 User Manual...
- Page 160 AFP is short for Apple Filing Protocol. • FTP is short for File Transfer Protocol • NFS is short for Network File System. • WebDAV is short for Web-based Distributed Authoring and Versioning. • Click Next to continue. D-Link ShareCenter Quattro DNS-345 User Manual...
- Page 161 A summary of the share will be displayed. Click on the Finish button to accept the change and complete the wizard. Through the D-Link Storage Utility, the ISO Mount Share can now be mapped to your computer as a normal network share.
-
Page 162: Admin.password
Username and Password settings. Enter a new Username Type the original Password Enter a New Password Confirm the New Password Click Save Settings to accept the changes Click Don’t Save Settings to cancel changes D-Link ShareCenter Quattro DNS-345 User Manual... -
Page 163: Active.directory.settings
Enter the DNS 1 and/or DNS 2 IP addresses. Enter a Workgroup if required. Enter a Real Name. Enter an Active Directory Server name. Click Save Settings to connect to the Active Directory. Click Don’t Save Settings to cancel. D-Link ShareCenter Quattro DNS-345 User Manual... -
Page 164: Distributed.file.system
Distributed File System enables a better file management system without the complications of setting up each individual file system. Click Account Management,then Distributed File System. Check the Enable Distributed File System box. A new table list will appear called the Root Folder List. Note:.For.Administrators.-.Setup.a.username.and.password.identical.to.each.PC.connected.to.the.NAS.for.DFS.to.work.. D-Link ShareCenter Quattro DNS-345 User Manual... - Page 165 You will be prompted to enter a Root Folder Name in the field. Click Apply. The Root Folder List will now show the new root folder name and provide options to Modify, Delete, or Config Link. D-Link ShareCenter Quattro DNS-345 User Manual...
- Page 166 To modify a folder within the list, click Modify. Enter a new folder name and click Apply. The modified name will be shown in the table. To delete the folder list just click Delete. D-Link ShareCenter Quattro DNS-345 User Manual...
- Page 167 Click New to configure it. The Distributed File System Settings box will appear. Enter a Local Share Name Enter the Host IP address Enter the Remote Share Folder or click Get Remote Share Folder and click Apply D-Link ShareCenter Quattro DNS-345 User Manual...
- Page 168 Click Yes to enter the remote share folder manually. Once you have entered the correct details, the local share is created, displaying the host IP and remote share folder address. To delete a remote folder click the delete button. D-Link ShareCenter Quattro DNS-345 User Manual...
-
Page 169: Network.management
The network load is balanced across all links. Go to Network Management, then LAN Setup. Select the LAN port you wish to configure. Your selection will turn red. Click Setup. D-Link ShareCenter Quattro DNS-345 User Manual... - Page 170 IP settings and VLAN settings. Click Next to continue. Step 1 allows you configure your LAN settings. Here you can choose between DHCP settings or you can manually configure your own LAN. Click Next to continue. D-Link ShareCenter Quattro DNS-345 User Manual...
- Page 171 Select the Enable radio button to enable VLAN or click the Disable radio button to disable VLAN. Enter a VLAN identification number and click Next. Step 3 shows a summary of what you just configured. Click Finish to exit the wizard. D-Link ShareCenter Quattro DNS-345 User Manual...
- Page 172 Click OK, then logout and log back in to allow the changes to take effect. The wizard combined both LAN ports under one configuration group. 1..See more details on Link Aggregation termiinology under the help file. D-Link ShareCenter Quattro DNS-345 User Manual...
- Page 173 Section 4 - Configuration The basic LAN Setup also includes Link Speed Settings and LLTD Settings. Choose the option that suits your needs and click Save Settings to continue. Note:.Link.aggregation,.or.IEEE.802.3ad,.is.a.computer.networking.term.which.describes.using.multiple.Ethernet.network. cables/ports.in.parallel.to.increase.the.link.speed.beyond.the.limits.of.any.one.single.cable.or.port,.and.to.increase.the. redundancy.for.higher.availability..Link.aggregation.is.an.inexpensive.way.to.set.up.a.high-speed.backbone.network. that.transfers.much.more.data.than.any.one.single.port.or.device.can.deliver..Link.aggregation.also.allows.the.network’s. backbone.speed.to.grow.incrementally.as.demand.on.the.network.increases,.without.having.to.replace.everything.and. buy.new.hardware..The.ShareCenter.Quattro.DNS-345.provides.this.feature.to.better.enable.the.network.it’s.on..Apply. various.link.aggregation.options.that.warrant.support.for.your.network. D-Link ShareCenter Quattro DNS-345 User Manual...
-
Page 174: Network.management.-.Ddns
Host Name, username, password, verify the password, and click Save Settings. Note: refer to the D-Link DDNS site for more details on creating your Dynamic DNS connection with D-Link products. https://www.dlinkddns.com/howto. D-Link ShareCenter Quattro DNS-345 User Manual... -
Page 175: Detection
Login and select Network Management, then click the blue button to reveal the UPnP router settings. Click Test to run a search. The DNS-345 is searching for a router. Do not turn off your NAS. D-Link ShareCenter Quattro DNS-345 User Manual... - Page 176 Section 4 - Configuration A message will notify you that the wizard has found a UPnP router on the network. Click the blue arrow to reveal the Port Forwarding options. D-Link ShareCenter Quattro DNS-345 User Manual...
-
Page 177: Network.management.-.Port.forwarding
Section 4 - Configuration Network Management - Port Forwarding Login and select Network Management, then click the blue arrow to reveal Port Forwarding settings. Click Add. The Port Forwarding wizard will starts. Click Next to continue. D-Link ShareCenter Quattro DNS-345 User Manual... - Page 178 Click Next to continue. Select the default service you wish to Port Forward. Note: You can select more than one port. Click Previous to change the Port Forward Rule or Finish to end the wizard. D-Link ShareCenter Quattro DNS-345 User Manual...
-
Page 179: Application.management.-.Ftp.server
Select a default port range or select a passive mode type Select a language Select the correct flow control Click to enable SSL/TLS and click Enable FXP to continue Click Save Settings to save the changes. D-Link ShareCenter Quattro DNS-345 User Manual... - Page 180 Enter the IP address of a machine you wish to block. Select permanent if you wish to block the IP address permanently or Temporary if you wish to set a time frame. If your choice is permanent, click Apply and continue. D-Link ShareCenter Quattro DNS-345 User Manual...
- Page 181 Section 4 - Configuration If your choice was Temporary, then you need to select a blocked time frame. Click Apply to continue. The Blocked IP list will display the IP addresses you blocked. D-Link ShareCenter Quattro DNS-345 User Manual...
- Page 182 Section 4 - Configuration Click the blue arrow next to FTP server status to reveal the FTP details. The FTP server is stopped by default. Click Start FTP server to run the process. D-Link ShareCenter Quattro DNS-345 User Manual...
-
Page 183: Upnp.server
Click Application Management, then UPnP server. Click the Enable radio button to enable the UPnP server. Click Add to configure the UPnP share. Select the volume you like to share and click Apply. D-Link ShareCenter Quattro DNS-345 User Manual... - Page 184 Section 4 - Configuration The system will not build the media library. When the system has finished building the media library, a sucess message will appear. Click Yes to continue. D-Link ShareCenter Quattro DNS-345 User Manual...
- Page 185 Section 4 - Configuration The selected volume will appear in the table under the UPnP server. D-Link ShareCenter Quattro DNS-345 User Manual...
-
Page 186: Itunes.server
After enabling the iTunes server on the ShareCenter, launch iTunes. In your iTunes utility, select the ShareCenter and enter the iTunes server password if required. Select the ShareCenter. When prompted, enter in the iTunes server password. Media stored on the ShareCenter will then be available for use in iTunes. Click OK. D-Link ShareCenter Quattro DNS-345 User Manual... -
Page 187: Add.ons
Add Ons The Add On menu allows multiple application software to add extended functionality to your ShareCenter. The Add on software is available from the D-Link website in your country and some of them are available from the Installation Wizard. Below is a list of some of the supported Add-ons available. - Page 188 Once the path of the package has been located, click Apply to add the package. Under Add-ons, a red message will appear to show that the installation of the package was successful. Click the Start button under Start/Stop. D-Link ShareCenter Quattro DNS-345 User Manual...
- Page 189 WordPress can be accessed and commented on from any internet connection. Audio Turn your ShareCenter into an Internet Streaming Music Streamer site. From your ShareCenter, the Audio Streamer add-on can transmit multiple streams of playing music files to any internet connection. D-Link ShareCenter Quattro DNS-345 User Manual...
-
Page 190: Afp.and.nfs.services
Click the Enable radio button to turn AFP services Click Save Settings to save the AFP services. Click Application Management, then NFS Service. Click the Enable radio button to turn NFS services Click Save Settings to save the NFS service. D-Link ShareCenter Quattro DNS-345 User Manual... -
Page 191: System.management.-.Language
System Management - Language The language packs help users customize the DNS-345 to their specific region. Download your language pack from the D-Link website or the CD and follow the instructions below. When you disable the language pack, the GUI will return to English. -
Page 192: System.management.-.Time.and.date
NTP (Network Time Protocol) Server in order to periodically update your system time from the NTP Server. You can also use the time and date of your compute as the system time. Click System Management, then Time and Date. Select the Set Time from My Computer button. A confirmation message will appear. Select the time zone. D-Link ShareCenter Quattro DNS-345 User Manual... - Page 193 Section 4 - Configuration Select the NTP server. Click Save Settings. D-Link ShareCenter Quattro DNS-345 User Manual...
-
Page 194: System.management.-.Device
The device settings page allows you to assign a workgroup, name, and description to the device. You can access this device by typing the host name in the URL section of your web browser. For example: http://dlink-d10001 Click System Management, then Device. Enter a Workgroup. Enter a Name. Enter a Description. Click Save Settings to continue. D-Link ShareCenter Quattro DNS-345 User Manual... -
Page 195: System.management.-.System.settings
Type in the inactive time and click save settings. Under System Temperature Threshold, click the blue arrow to view the temperature settings. Change the settings according to your needs and click Save Settings. D-Link ShareCenter Quattro DNS-345 User Manual... -
Page 196: System.management.-.Power.management
Click Enable to enable hard drive hibernation. Then from the drop-down list select a time frame. Click the blue arrow to reveal Power Recovery. Select Enable to use Power Recovery. Click Save Settings to continue D-Link ShareCenter Quattro DNS-345 User Manual... - Page 197 Select a type of control settings Click Save Settings to continue. Click the blue arrow to reveal Power On/Off Schedule Settings Click Enable and choose the day and time for the schedule. Click Save Settings to continue. D-Link ShareCenter Quattro DNS-345 User Manual...
- Page 198 Section 4 - Configuration Click the blue arrow to reveal OLED Display Settings Click Enable to Display the OLED for a specific time period. Click Save Settings to continue D-Link ShareCenter Quattro DNS-345 User Manual...
-
Page 199: System.management.-.Notifications
E-mail Settings Create an account by entering your e-mail details. Click Save Settings to continue Click System Management, then Notifications, and then SMS Settings. Follow the instructions on the wizard. Click Next to proceed D-Link ShareCenter Quattro DNS-345 User Manual... - Page 200 Section 4 - Configuration Step 1 Enter your SMS provider details. Click Next to continue. Click Save Settings to proceed. D-Link ShareCenter Quattro DNS-345 User Manual...
- Page 201 Section 4 - Configuration Click System Management, then Notifications, and then Event Settings. Select the events you wish to enable. Click Save Settings to continue. D-Link ShareCenter Quattro DNS-345 User Manual...
-
Page 202: System.management.-.Logs
SysLog server. You can also view the NAS system logs and the FTP logs here. Click System Management, then Logs Click the blue arrow to reveal the Server Settings Click Enable Syslog Enter an IP address Click Save Settings. Click the blue arrow to reveal the Logs D-Link ShareCenter Quattro DNS-345 User Manual... -
Page 203: System.management.-.Firmware.upgrade
The Firmware Upgrade Page makes it simple to check for and upload new firmware releases to the device. This section provides a link to check for new firmware on the D-Link support website. If new firmware is available, download the file to your local computer. -
Page 204: System.management.-.Snmp
Enabling SNMP allows for the NAS administrator to receive notifications. Click System Management, then SNMP Click Enable to activate SNMP. Enter the SNMP community details. Enable notifications and specify the IP address. Click Save Settings to continue. D-Link ShareCenter Quattro DNS-345 User Manual... -
Page 205: System.management.-.Usb.devices
Enter an IP address and click Save Settings. The UPS Status will show the current status of your UPS. Click the blue arrow to reveal the USB storage Information. It displays information on the manufacturer, product name, and size(capacity). D-Link ShareCenter Quattro DNS-345 User Manual... - Page 206 Section 4 - Configuration Click the blue arrow to reveal Printer Information. It displays information on the manufacturer, product type, and connection details. D-Link ShareCenter Quattro DNS-345 User Manual...
-
Page 207: System.status.-.System.info
Click the blue arrow from each of the headings to reveal information on each segment. LAN Information, Device Information, and Volume Information. Click System Status, then Hard Drive Info Click the blue arrow to reveal a table of hard drive information. D-Link ShareCenter Quattro DNS-345 User Manual... - Page 208 Section 4 - Configuration Click the blue arrow to reveal the Resource Monitoring details. The monitor provides information on the CPU, memory, bandwidth, and processes in action. D-Link ShareCenter Quattro DNS-345 User Manual...
-
Page 209: Part Iii
Section 4 - Configuration Part III D-Link ShareCenter Quattro DNS-345 User Manual... -
Page 210: Applications
Click on Test to verify access to the site address and file/folder. If you have chosen File from the above drop down list, you must specify the exact file in the URL path, including the file extension. (e.g. http://example.com/test/ testfile.txt). D-Link ShareCenter Quattro DNS-345 User Manual... - Page 211 Current download statistics, such as % completed and download speed, are displayed for each event. List A refresh button is also provided to produce updated listings at any time. D-Link ShareCenter Quattro DNS-345 User Manual...
- Page 212 Select HTTP by clicking on the radio button. Enter a URL. Click Test to test the URL. Under Save To, click the Browse button to save your HTTP files. Enter (optional) details under Rename. D-Link ShareCenter Quattro DNS-345 User Manual...
- Page 213 Click Test to test the URL. The test results will either show pass or fail. Click Close to proceed. Select a date and time for the download settings Select a recurring backup time frame. Click Save Setting to continue. D-Link ShareCenter Quattro DNS-345 User Manual...
- Page 214 Section 4 - Configuration The table below will show the HTTP downloads. To edit an item, select it first then click Modify. To delete an item, select it first then click on the Delete button. D-Link ShareCenter Quattro DNS-345 User Manual...
-
Page 215: Applications.-.Ftp.downloads
Enter a username, password. Select a type Enter a URL Browse to a location to save files to. Select the Language and Scheduling Click Save Settings. The table below will now show the FTP path and status. D-Link ShareCenter Quattro DNS-345 User Manual... - Page 216 For Anonymous settings: Click the Anonymous radio button and follow the rest of step 1. Since the Login Method is Anonymous, the username and password sections are greyed out. Click Save Settings once complete. D-Link ShareCenter Quattro DNS-345 User Manual...
-
Page 217: Remote.backups
Backup jobs in the Remote Backup list. You must select the remote backup job first and then click the modify button. Delete To remove a Remote Backup job select the job in the list and then click the Delete button. D-Link ShareCenter Quattro DNS-345 User Manual... - Page 218 NAS or Linux file system. Remote To Local: sets the backup source as the remote NAS or Linux file system and the target destination for the backup files as the local NAS. D-Link ShareCenter Quattro DNS-345 User Manual...
- Page 219 The subsequent backups in the incremental series contain new files and folders plus the links to the first incremental backup. D-Link ShareCenter Quattro DNS-345 User Manual...
- Page 220 Once - select this option to run the Remote Backup once at a specific date and time set here. Scheduled: select this option to set the backup to occur daily, weekly, monthly per a specific schedule. D-Link ShareCenter Quattro DNS-345 User Manual...
- Page 221 Refresh Button: Click this button during a backup or Backup now : Clicking this button will execute the backup recovery process to monitor the progress by updating the job immediately as long as the job is enabled. progress completed bar. D-Link ShareCenter Quattro DNS-345 User Manual...
-
Page 222: Local.backups
Quattro compare identical file names at the source and Browse to select the destination. destination. Files will only be overwritten if the source file is more recent. Rename Enter the renamed file name here. D-Link ShareCenter Quattro DNS-345 User Manual... -
Page 223: Local.backups.-.Time.machine
Adds a NAS folder as a Time Machine destination. Delete Deletes a NAS folder setup as a Time Machine destination. Remove all Delete all the NAS folders in the list configured as Time Network Machine Destinations. Shares D-Link ShareCenter Quattro DNS-345 User Manual... -
Page 224: Local.backups.-.Usb.backups
The main benefit to using MTP backups is that there is no need for drivers. The protocol resides on the NAS and all configurations take place between your NAS and the portable device. D-Link ShareCenter Quattro DNS-345 User Manual... - Page 225 All files in this volume now support MTP. Under USB Backups click the Enable radio button Under Category, select your USB backup format, USB to NAS or NAS to USB. Clock Browse to locate your source. D-Link ShareCenter Quattro DNS-345 User Manual...
- Page 226 Section 4 - Configuration Under Source, select the path where you want to backup. Click Apply to continue. Click Browse to find the destination. Select the path or USB device for your backup. Click Apply to continue. D-Link ShareCenter Quattro DNS-345 User Manual...
- Page 227 Section 4 - Configuration Select the Type you wish to copy Click Save Settings. D-Link ShareCenter Quattro DNS-345 User Manual...
-
Page 228: Usb.print.server
Section 4 - Configuration USB Print Server The.ShareCenter.features.a.built-in.USB.print.server,.giving.users.the.ability.to.share.a.printer.on.their.local.network.. . Connect.a.USB.printer.to.the.USB.port.on.the.back.of.the.ShareCenter..It.is.important.to.ensure.that.the.printer’s.drivers. are.already.installed.on.any.computer.you.want.to.print.from. Adding.a.Printer: Click Start and select Printers and Faxes. D-Link ShareCenter Quattro DNS-345 User Manual... - Page 229 Section 4 - Configuration Select Add a printer. The.Windows .Add.Printer.Wizard.will.launch: ® Click Next to continue. D-Link ShareCenter Quattro DNS-345 User Manual...
- Page 230 When prompted to choose a local, or network printer, select “A network printer, or a printer attached to another computer.” Click Next to continue. Select “Browse for a printer” and click Next to continue. D-Link ShareCenter Quattro DNS-345 User Manual...
- Page 231 Section 4 - Configuration Select Double-click DNS-345 from the Shared Printers list to expand the tree. Select the available USB printer, and click Next to continue. D-Link ShareCenter Quattro DNS-345 User Manual...
- Page 232 Click OK to continue and select a printer driver. Select the appropriate printer driver from the list and click OK to complete the wizard. If the driver is not in the list, select Have Disk. D-Link ShareCenter Quattro DNS-345 User Manual...
- Page 233 Section 4 - Configuration Insert the print driver CD or browse to the appropriate directory. Select the appropriate driver file, and click Open to continue. Click OK to continue. D-Link ShareCenter Quattro DNS-345 User Manual...
- Page 234 Section 4 - Configuration Verify the driver is correct, and click OK to continue. The wizard will install the printer drivers, and return a completion screen. Click Finish. D-Link ShareCenter Quattro DNS-345 User Manual...
- Page 235 Section 4 - Configuration The printer should now appear as an available printer. D-Link ShareCenter Quattro DNS-345 User Manual...
-
Page 236: P2P.downloads.-.Settings
Here the user can choose to allow the device to automatically Control choose the bandwidth control speed, or you can manually configure the maximum download rate and maximum upload rate. Enter the value -1 to set the respective field to unlimited. D-Link ShareCenter Quattro DNS-345 User Manual... -
Page 237: P2P.downloads.-.Downloads
This will remove not only the torrent file, but also the partially downloaded files too. Start / Stop The Start and Stop buttons allow users to start and stop selected P2P downloads in the task list. D-Link ShareCenter Quattro DNS-345 User Manual... -
Page 238: Web.file.server
Moves the file to a new folder on the disk. Delete Removes the selected file from disk. Rename Allows you to configure a new file name for the selected file. Properties Displays the file properties such as ownership, access rights, and modify time. D-Link ShareCenter Quattro DNS-345 User Manual... -
Page 239: Amazon.s3
NAS in the cloud. Data can be stored and retrieved through a simple web interface from your NAS. Stored objects cannot be larger than 5GBs, but users can store an unlimited amount of objects. All objects are retrievable with a unique key code assigned to each user. D-Link ShareCenter Quattro DNS-345 User Manual... -
Page 240: Photo.center
Photo Center is an Add-On tool for photos. You can create individual albums, group albums, Gallery’s, and etc. This application is managed and placed on your DNS-345 from the Applications window. Login to your ShareCenter Click Management, then click Application Management. D-Link ShareCenter Quattro DNS-345 User Manual... - Page 241 Section 1 - Product Overview Click Add Ons Then click Choose File to find the Photo Center Application on your computer. Browse through your computer to find the folder for the application. Click Open. D-Link ShareCenter Quattro DNS-345 User Manual...
- Page 242 The File Path has now been set. Click Apply to continue. Photo Center is now installed on the NAS. Below File Path it should read Install Successfully. In the table, you will see the Photo Center application listed. D-Link ShareCenter Quattro DNS-345 User Manual...
- Page 243 Section 1 - Product Overview Click the green arrow under Start/Stop to activate the application. Return to the Application window. Photo Center will now appear under the Enabled Add-Ons section. Click Photo Center to launch the application. D-Link ShareCenter Quattro DNS-345 User Manual...
- Page 244 The application will now open in a new tab in your browser. The program is ready to create a Gallery in the following manners: Add Albums Add Comments Add Items Edit Albums Edit Permissions D-Link ShareCenter Quattro DNS-345 User Manual...
-
Page 245: My.favorites
The My Favorites tab allows you to add any icon you routinely access from the Applications or Management Tab in one convenient location for quick and easy access. You can add icons to the My Favorites tab using two different methods. D-Link ShareCenter Quattro DNS-345 User Manual... -
Page 246: Add.an.icon.to.my.favorites
Click and hold the left mouse button down over the icon and drag it over to the My Favorites tab. You will see a white arrow pointing to the My Favorites tab while you are dragging the icon. D-Link ShareCenter Quattro DNS-345 User Manual... -
Page 247: Removing.an.icon.from.my.favorites
To remove an Icon from the My Favorites tab, simply right click on it and select Remove From My Favorite in the context selection that appears. Right click an Icon in the My Favorites tab and select the Remove From My Favorite option. The Icon alias should disappear from the My Favorites tab view. D-Link ShareCenter Quattro DNS-345 User Manual... -
Page 248: Knowledge Base
Because the data is stored on multiple disks, tolerance means that if one drive fails, all data in the array RAID 1 provides fault tolerance and protection, in addition to will be lost. performance advantages. D-Link ShareCenter Quattro DNS-345 User Manual... - Page 249 240GB (3x80GB). Implementing RAID 5 on the ShareCenter Pro allows it to continue operating even if one of the disks fails. The diagram below indicates the operation of RAID 5: D-Link ShareCenter Quattro DNS-345 User Manual...
-
Page 250: Raid.options
Section 4 - Configuration RAID OPTIONS Here is a list of the RAID options available on the ShareCenter Quattro DNS-345 Standard RAID - creates a single volume for one drive or more drives. JBOD - allows you to create a large virtual disk drive by concatenating two or more smaller drives together. - Page 251 RAID 5 array can enter a data recovery mode, where the parity data in the array is used to rebuild the missing data on the newly installed drive. D-Link ShareCenter Quattro DNS-345 User Manual...
- Page 252 This ensures that if any single drive in the RAID 10 array fails, the data is not lost. RAID 10 requires a minimum of four drives and can be expanded in pairs. D-Link ShareCenter Quattro DNS-345 User Manual...
-
Page 253: Raid.comparison.chart
1 Disk per mirrored Combination of RAID Highest data High redundancy stripe 0 (data striping) and protection, can cost because all RAID 1 (mirroring) tolerate multiple data is duplicated, drive failures. twice the storage capacity is required. D-Link ShareCenter Quattro DNS-345 User Manual... -
Page 254: Usb.print.server
ShareCenter™. It is important to ensure that the printer’s drivers are already installed or available on any computer you want to print from. Note: Only Printer function is supported. The ShareCenter does not support the copy and scan functions of Multi-Function Printers. Log into ShareCenter D-Link ShareCenter Quattro DNS-345 User Manual... - Page 255 Section 5 - Knowledge Base Click Management Click System Management, then USB Devices. Click the blue arrow to view the Printer Information. D-Link ShareCenter Quattro DNS-345 User Manual...
- Page 256 The.Windows .Add.Printer.Wizard.will.launch: ® Select the printer driver from the installed Manufacturer list or use the Have Disk button to browse for the printer driver file. Click OK to continue. D-Link ShareCenter Quattro DNS-345 User Manual...
- Page 257 Section 5 - Knowledge Base Once you have selected the proper driver as shown in the browse list then click OK to install the printer. The printer is now installed and the printer queue will appear. D-Link ShareCenter Quattro DNS-345 User Manual...
-
Page 258: Ups.connectivity
The ShareCenter™ features a built-in USB UPS backup service, giving users the ability to share the UPS on their local network. Connect a UPS to the USB port on the back of the ShareCenter™. Log into ShareCenter D-Link ShareCenter Quattro DNS-345 User Manual... - Page 259 Click System Management, then USB Devices. Click the blue arrow next to UPS Settings. There are two modes, Standalone and Master. The UPS Status screen shows the mode, manufacturer, product type, battery charge meter, and status D-Link ShareCenter Quattro DNS-345 User Manual...
- Page 260 Click Add Enter the IP address of the other NAS on the network. Click the ‘+’ button to add more IP addresses. If you do not add an IP address a message will appear. D-Link ShareCenter Quattro DNS-345 User Manual...
- Page 261 Section 5 - Knowledge Base The message will asks you to enter an IP address. Click Yes to continue. Once you have entered an IP address, the system will check its database for IP address records. D-Link ShareCenter Quattro DNS-345 User Manual...
- Page 262 Section 5 - Knowledge Base The UPS Settings table will display the IP address(es) you added. D-Link ShareCenter Quattro DNS-345 User Manual...
-
Page 263: Deleting.a.ups.slave
Section 5 - Knowledge Base Deleting a UPS Slave Under Management, System Management, UPS Devices, select the IP address. Your selection will turn red. Click Delete. The DNS-345 will process your request. D-Link ShareCenter Quattro DNS-345 User Manual... - Page 264 Section 5 - Knowledge Base The IP address will no longer be listed in the table. D-Link ShareCenter Quattro DNS-345 User Manual...
-
Page 265: Knowledge Base
For example, bonding two WAN links gives you load balancing and fault tolerance between them, but it does not double your upstream throughput, since each connection (such as a Web page HTTP request) has to take one or the other route. D-Link ShareCenter Quattro DNS-345 User Manual...
Need help?
Do you have a question about the ShareCenter Quattro DNS-345 and is the answer not in the manual?
Questions and answers