
Related Manuals for Topfield TF 7100 HD PVRt


Summary of Contents for Topfield TF 7100 HD PVRt
-
Page 1: User Guide
TOPFIELD TF 7100 HD PVRt User Guide High Definition Digital Terrestrial Receiver Personal Video Recorder... - Page 3 The lighting flash with arrowhead symbol, within an equilateral triangle, is intended to alert the user to the presence of uninsulated “dangerous voltage” within the product’s enclosure that may be of sufficient magnitude to constitute a risk of electric shock to a person. The exclamation point, within an equilateral triangle, is intended to alert the user to the presence of important operating and maintenance (servicing) instructions in...
-
Page 4: Table Of Contents
iv Contents Contents Contents 1 Introduction Features ....... Controlling the digital receiver . - Page 5 Contents v 4.1.1 Television aspect ratio ....18 4.1.2 High definition television ....19 4.1.3 Audio mode .
- Page 6 vi Contents 7.2.1 To delete a recording ....47 7.2.2 To sort recordings ..... 47 7.2.3 To lock a recording .
-
Page 7: Introduction
Chapter 1 Introduction The TF 7100 HD PVRt digital receiver is fully compliant with the international Digital Video Broadcasting (DVB) standard, and thus is able to receive digital broadcasts of that standard. For its operation you need an antenna, which must be installed appropriately. -
Page 8: Controlling The Digital Receiver
• Time shift is a special technical feature available on the TF 7100 HD PVRt. You can pause the programme you are watching and resume it again at a later time. Then you can quickly go to whatever part of the current pro- gramme by fast forward or backward search. -
Page 9: The Front Panel
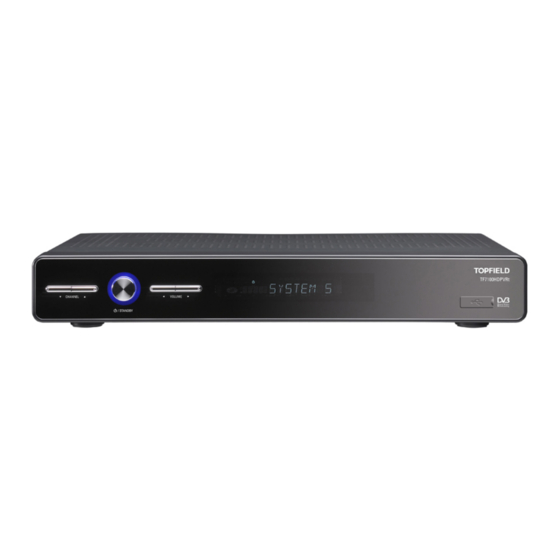
1.2 Controlling the digital receiver 3 1.2.1 The front panel The front panel of the digital receiver has buttons to control the digital receiver, and specific lamps and a display to indicate its status. The following indicates what they mean. STANDBY button switches the digital receiver between standby mode and operation mode. -
Page 10: The Remote Control
4 Introduction 1.2.2 The remote control button switches the digital receiver between standby mode and operation mode. is used to set a sleep timer in 10 minute increments. buttons decrease or in- crease the volume. They are also used to change values for menu options. - Page 11 1.2 Controlling the digital receiver 5 a video track of multifeed programme. is used to select a subtitle track. displays teletext. changes video resolution. See § 4.1.2 for more V.Format details. changes aspect ratio. See § 4.1.1 for more details. switches between television services and radio ser- vices.
- Page 12 6 Introduction is used to start reverse playback. Subsequent presses increase the rewind speed. is used to start fast motion playback. Subsequent presses increase the playback speed. is used to start slow motion playback. Subsequent presses change the playback speed. changes the position of sub-picture counterclock- wise.
-
Page 13: Setup
Chapter 2 Setup 2.1 Unpacking Before going any further, check that you have received the following items with your digital receiver. • Remote control unit • Two batteries for the remote control (AAA 1.5 V) • One power cord • One loop cable to link the first tuner with the second tuner •... - Page 14 8 Setup • The mains power must be 90 to 250 volts. Check it before connecting the digital receiver to the mains socket . For the power consumption of the digital receiver, refer to Table 2.1. • The mains socket should be near the equipment. Do not run an extension lead to the unit.
-
Page 15: Rear Panel Connections
4.5 kg Operating temperature 0 to 45 °C Storage relative humidity 5 to 90 % 2.3 Rear panel connections The TF 7100 HD PVRt has a wide range of connections on the back. VIDEO AUDIO S/PDIF ANT 1 ANT 2... - Page 16 10 Setup Y/Pb/Pr Component video output socket for the televi- sion set. (green/blue/red) S-VIDEO Super video output socket for the television set. LAN Local area network port. USB USB port for firmware update or connection of USB devices. RGB Component video output socket for the monitor. HDMI Audio and video output socket for the high defini- tion television set.
-
Page 17: Connecting Up Your Digital Receiver
2.4 Connecting up your digital receiver 11 2.4 Connecting up your digital receiver There are several ways to set up the digital receiver. Set up the digital receiver suitably to your television and other appliances. If you have any problem with your setup or need help, contact your dealer. -
Page 18: Connecting To Your Television Set
12 Setup 2.4.2 Connecting to your television set Between all the following connectors of the digital receiver, we recommend you to use the first connector to get best picture quality. If your television does not have the matching connector, then use the next connector in the following order for better picture quality. - Page 19 2.4 Connecting up your digital receiver 13 To use the RGB video connector You need to obtain a RGB cable (15 pin D-sub cable) to use the RGB connector. Plug one end of the cable into the RGB socket on the digital receiver, and plug the other end into the matching socket on your television.
-
Page 20: Inserting Batteries In The Remote Control
14 Setup To make the audio connection You need to obtain an audio cable (RCA ca- ble) to connect the audio connectors. Plug one end of the cable into the AUDIO L (white) and AUDIO R (red) sockets on the digital re- ceiver, and plug the other end into the match- ing sockets on your television or audio sys- tem. -
Page 21: Switching On For The First Time
2.6 Switching on for the first time 15 used batteries in an environmentally sound manner. Find out about the legal regulations which apply in your area. 2.6 Switching on for the first time Now that you have your digital receiver connected, you should plug it into a mains socket. -
Page 22: Service Search
16 Service Search Chapter 3 Service Search After connecting up the digital receiver, you will need to per- form a service search. 3.1 Searching broadcasting services To perform service search, select the Installation Service Search menu. You should see a screen like the left figure. -
Page 23: Resetting To Factory Settings
3.2 Resetting to factory settings 17 transponder. To do that, set the Search Mode option to Manual, and then at the Channel option select your desired transponder. The number ranges from 6 to 12 in VHF and 28 to 69 in UHF. To start service search, select the Start Search item;... -
Page 24: Preference Settings
18 Preference Settings Chapter 4 Preference Settings 4.1 Video and audio settings You have to configure the video and audio settings appropriately to your television set and other appliances. Select the System Setting A/V Output Setting menu. You should see a screen like the left figure. -
Page 25: High Definition Television
4.1 Video and audio settings 19 You cannot fully enjoy wide-screen programmes with your normal-screen television as the above figures show. The left figure shows a normal picture displayed in the normal screen. To watch wide-screen programmes in the shape like the centre figure, set the 16:9 Display Format option to Letter Box. -
Page 26: Audio Mode
20 Preference Settings Though the Auto setting is desirable, some television sets are not able to display a certian resolution. The Preferred Video Format option allows an exceptional resolution conversion against such a case. For example, if your television set cannot display 576i video, you should set this option to 576I to 576P;... -
Page 27: Local Time Setting
4.2 Local time setting 21 4.2 Local time setting You should set your local time for timer events. Select the System Setting Time Setting menu. You should see a screen like the left figure. You can set the clock manually or use the time signal, Green- wich Mean Time (GMT), carried as part of the digital television... -
Page 28: Parental Control
22 Preference Settings Table 4.1: Time offset table Time offset City 12:00 Eniwetok, Kwajalein 11:00 Midway Island, Samoa 10:00 Hawaii 09:00 Alaska 08:00 Pacific Time US, Canada 07:00 Mountain Time US, Canada 06:00 Central Time US, Canada, Mexico City 05:00 Eastern Time US, Canada, Bogota, Lima 04:00 Atlantic Time Canada, La Paz... - Page 29 4.3 Parental control 23 Select the System Setting Parental Control menu. should see a screen like the left figure, and you will be asked your Personal Identifica- tion Number (PIN). The number is initially set to ‘0000’. To block programmes with undesired content for family view- ing, set the Censorship option to your desired level among the following: No block restricts no prorgramme.
-
Page 30: Adjusting The On-Screen Display
24 Preference Settings information, your censorship setting will not take effect. If anyone is trying to watch a programme that is of or above the censorship setting, the person has to enter the personal identification number to override. To change the number, select the Change PIN Code menu; then an input box appears. -
Page 31: Preferences For Recording And Playback
4.5 Preferences for recording and playback 25 set this option to Never Hide, the information box will always be displayed. NOTE You can always hide the information box or other on-screen information manually by pressing the button. Exit In addition, you can raise or lower the position of the informa- tion box. -
Page 32: Progress Bar
26 Preference Settings When a playback of a recording comes to the end, you can have it replayed from the beginning by setting the End of playback option to Replay. Otherwise to just return to live television, set it to Live. button is used to jump back for an instant replay on a playback or time-shift. -
Page 33: To Turn On The Time Shift Feature
4.5 Preferences for recording and playback 27 If you want to preserve the empty space of the hard disk drive to some extent at all times for scheduled recordings, set the Reserved Space option to anything other than Disable. With this option enabled, the digital receiver will delete the oldest files. -
Page 34: Listing Services
28 Listing Services Chapter 5 Listing Services 5.1 Editing the favourite list You can make your own favourite services list. In fact, you can define multiple favourite services lists, each being a ‘group’ of chosen services. Select the Organizing Favorites menu. - Page 35 5.1 Editing the favourite list 29 You can add up to 30 groups. To add a group, select the NEW option in the group list; then the on-screen keyboard appears. See § for how to use the on-screen keyboard. To rename a group, put the highlight bar on the group entry you want and press the button;...
-
Page 36: How To Use On-Screen Keyboard
30 Listing Services 5.2 How to use on-screen keyboard You can move the highlight key horizontally with the buttons and vertically with buttons. Press- ing the button on a key en- ters its letter in the input line. To type a space, select the Space key or press the . -
Page 37: Daily Usage
Chapter 6 Daily Usage 6.1 Volume control Use the buttons to alter the volume to a com- fortable level. You may need to adjust the volume on your television set too. To temporarily switch off the sound, press button. Press it again to restore the sound to previous level. - Page 38 32 Daily Usage On the services list, you can see the service information: • Service number and name • Transponder information To select a desired service, put the highlight bar on its entry with the button and press the button; then it will be presented.
-
Page 39: The Favourite Services List
6.2 Watching television 33 will be displayed. Put the highlight bar on a desired group and press the button. 6.2.2 The favourite services list You can select a service to watch on a favourite list as well as on the services list. To display the favourite lists, press the button. -
Page 40: Viewing Programme Information
34 Daily Usage 6.2.3 Viewing programme information Pressing the button displays the information box, on which you can see all of the following: • Service number and name • Signal level and quality • Resolution of broadcast picture • Name of selected favourite group •... -
Page 41: Selecting Audio Tracks
6.3 Viewing electronic programme guide 35 6.2.4 Selecting audio tracks Some programmes are provided with audio tacks in one or more languages. Pressing the button displays available au- dio tracks. Once you select an audio track, it will be sounded. In addition, you can enjoy audio tracks in four sound modes: Stereo, Mono, Left or Right. - Page 42 36 Daily Usage Pressing the button dis- GUIDE plays the electronic programme guide, on which you can see the following: • Scheduled programmes • programme summary • Broadcasting date • Broadcasting time To see detailed information of a desired programme, put the highlight bar on your choice with the button and press the...
-
Page 43: Using Picture In Picture
6.4 Using picture in picture 37 To activate the IceTV programme guide on your digital receiver, you sholud take the following steps: 1. Download a programme guide file from into the memory stick which is inserted into your computer. NOTE The file needs to be placed in a sub-folder called ice. -
Page 44: Using Time Shift
38 Daily Usage 2. To display the services list for the sub-screen, press the button. NOTE When a recording is in progress, the available services in the services list may be limited. 3. Pressing the button moves the sub-screen counter- clockwise, and pressing the button moves it clock- wise. - Page 45 6.5 Using time shift 39 When enabled, the digital receiver will keep as much as thirty minutes, or greater as set by the Time Shifting option, recording buffer of current service by utilizing the hard disk drive storage. The buffer will reset each time you change to another service. With time shift enabled, the following operations are possible: •...
-
Page 46: Recording And Playing
40 Recording and Playing Chapter 7 Recording and Playing The TF 7100 HD PVRt digital receiver has two tuners so that you can enjoy the following: • You can watch two services at the same time using the picture-in-picture feature. See §... -
Page 47: Recording A Programme
7.1 Recording a programme 41 7.1 Recording a programme Once recording has started, a symbol like the left figure will be displayed at the top right of the screen for a few seconds. When you are watching a service different from the service being recorded, you can view a number on the centre of the symbol, which indicates the order that the recording is started. - Page 48 42 Recording and Playing To view the recorded programme list, press the button or alternatively select the File List menu. See § for the recorded programme list. While a recording is going on, you can watch or record another service. To additionally record another service, switch to the service you want to record, and press the To stop recording, press the button;...
-
Page 49: Timer Recording
7.1 Recording a programme 43 the electronic programme guide, the After this program and After next program options will be available. Once the After this program option is selected, the current recording will stop when the current programme is scheduled to end. Likewise, once the After next program option is selected, the current recording will stop when the next programme is scheduled to end. - Page 50 44 Recording and Playing specified time but not record; instead, you may record with your video cassette recorder or suchlike in this case. 2. If you want a radio programme, set the Type option to Radio; otherwise, set it to TV. 3.
-
Page 51: Scheduling Recordings Using The Programme Guide
7.1 Recording a programme 45 8. To set a timer recording with the above settings, select the OK item; otherwise, it will not be saved and will not occur. You can also edit or delete timer events in the timer list. To edit a timer entry, put the highlight bar on the entry you want and press button;... -
Page 52: File Archive
46 Recording and Playing with recording, press it once more or alternatively press button; then the letter R is displayed. 5. This timer event is placed on the timer list. To change its settings, press the button to show a box in which you can edit. -
Page 53: To Delete A Recording
7.2 File archive 47 To turn to another list, use the button. You can play, move, delete, rename and lock a recording file. You can also sort the recording files by file name, playing dura- tion or file size. In addition, you can make a new folder. 7.2.1 To delete a recording To delete a recording, put the highlight bar on it and press the button;... -
Page 54: To Rename A Recording
48 Recording and Playing If you select a locked recording to play it back, you will be asked for your personal identification number. NOTE Locking a recording can also be used to stop it being deleted, either manually or automatically–if you have Reserved Space enabled. -
Page 55: Playing Back A Recording
7.3 Playing back a recording 49 7.3 Playing back a recording Once playback has started, a symbol like the left fig- ure will be displayed at the top right of the screen for a few seconds. When a programme is recorded, its additional contents such as audio tracks or teletext are also recorded to- gether. -
Page 56: To Navigate Using The Progress Bar
50 Recording and Playing NOTE When a recording from the external hard disk drive is being played back, you must not disconnect it from the digital re- ceiver. Arbitrary disconnecting may cause the digital receiver to be down and cause damage to the recording file. 7.3.1 To navigate using the progress bar First press the button to display the progress bar, then:... -
Page 57: To Make A Bookmark
7.3 Playing back a recording 51 increments from 2 times up to 1500 times. To resume normal speed, press the button. You can play not only forward but also backward in fast mo- tion. To play backward, press the button. If you press it repeatedly, the playback speed changes from 2 times to 1500 times. -
Page 58: To Play Back Recordings In Sequence
52 Recording and Playing To play back in whole, press the button when the progress bar is hidden; then the repetition symbol ( ) is displayed on the information box. To cancel it, press the button again. To play back in part, perform the following steps: 1. -
Page 59: Editing A Recording
7.4 Editing a recording 53 7.4 Editing a recording You can cut out or save a part such as a commercial from a recording by performing the following steps: 1. Press the button to display the progress bar during a playback. 2. -
Page 60: Formatting The Hard Disk Drive
54 Recording and Playing 1. Press the button and then the button to display the list of MP3 files within the memory stick. 2. Put the highlight bar on a desired file; if you want to play several files, select them with the button. -
Page 61: External Hard Disk Drive
7.6 Formatting the hard disk drive 55 7.6.2 External hard disk drive If you are to use an external hard disk drive for the first time by connecting it to a USB port on the digital receiver, you must format it before use. Select the Installation Format External Storage menu, then you are asked for confirmation. -
Page 62: Accessing The Digital Receiver Via Networking
NOTE The following section describes complex functions that should only be used by owners with advanced computer knowledge. TF 7100 HD PVRt provides an FTP service. You can download recording files to your computer via the FTP service. Here you need a router, which will connect the digital receiver to your computer or the Internet. -
Page 63: Configuring The Router
8.1 Configuring the router 57 8.1 Configuring the router In this section, the setup program of WRT54G, which is a router manufactured by Linksys, will be referred to as an example of how to configure the router for network access. NOTE For detailed description about how to set up the router, refer to the manual of your router. -
Page 64: Configuring The Network Settings On The Digital Receiver
58 Accessing the digital receiver via Networking 8.2 Configuring the network settings on the digital receiver Make sure that the digital receiver is connected to your router before configuring the network settings on the digital receiver. You may make either a wired or wireless connection as you are pleased. - Page 65 8.2 Configuring the network settings on the digital receiver 59 Once you choose an entry, you should see a screen like the left figure. To change the profile name, launch the on-screen keyboard with the button. See § for how to use the on-screen key- board.
- Page 66 60 Accessing the digital receiver via Networking After you finish making network profiles, activate an available profile with the button to en- able the network connection. Enabling a network connection does not give rise to the startup of the FTP server. Select the Installation FTP Set- ting menu.
-
Page 67: Accessing The Ftp Server
8.3 Accessing the FTP server 61 8.3 Accessing the FTP server You need an FTP client program to access the FTP server of the digital receiver. You can log into the FTP server with the user name and pass- word specified in the FTP Setting menu. -
Page 68: To Access Over The Internet
62 Accessing the digital receiver via Networking 8.3.1 To access over the Internet When you are away from home, you can access the digital receiver inside your home if your router is configured to route FTP access to the digital receiver by means of port forwarding. Via this feature, your router will lead you to the digital receiver when you access your router with its IP address. - Page 69 8.3 Accessing the FTP server 63 1. Make an account on a web site providing DDNS service, which should be supported by your router. 2. Configure your router with the account so that it can communicate with the web site. Whenever a new dynamic IP address is assigned to the router, it will inform the DDNS service provider of the new IP address.
-
Page 70: Firmware Update
64 Firmware Update Chapter 9 Firmware Update The digital receiver has a stable and convenient firmware to use. However, once in a while a new firmware may be released to improve the digital receiver. You can get the latest firmware, from the Topfield web site, 9.1 Checking the firmware information You have to check up the... -
Page 71: From A Usb Memory
9.2 From a USB memory 65 NOTE It is only allowed to update with the firmware of which system identification is identical to that of yours. Otherwise you will fail in firmware update. 9.2 From a USB memory If you have a USB memory stick, you can update the firmware from it by performing the following steps: 1. -
Page 72: By Means Of The Ftp Server
66 Firmware Update 9.3 By means of the FTP server You can use the digital receiver’s FTP server for firmware up- date. Upload a new firmware to the root directory of the FTP server, which is in fact the root directory of the internal hard disk drive, and then restart the digital receiver. -
Page 73: Index
Index 15 mins, Continuing, 16:9, 16:9 Display Format, Date, 3 Hours, Daylight Saving Time, 4:3, Default Gateway, 576I to 576P, DHCP, Digital Output (Dolby Digital Only), A/V Output Setting, AC INPUT, Disable, Access Control, DNS, Add to Favorite, Duration, 42, After next program, DVB, After this program,... - Page 74 68 INDEX GMT, OSD Transition Fade, OSD Transparency, HDMI, 10, high definition, Parental Control, Password, IceTV, Info Box Display Time, picture-in-picture, Info Box Position, PIN, information box, port forwarding, Internal, Preferred Video Format, IP Address, Progress bar display, IRD Status, PVR Setting, Jump back Amount, 39, Jumpback Amount,...
- Page 75 Size, Sorting, Sound Mode, specifications, 8–10 Start Search, Start Time, Starting of playback, Static, stereo, Subnet Mask, subtitle, System ID, teletext, Time, time format, Time Offset, Time Padding, Time Setting, 21, Time Shifting, 27, 38, 39, timer list, Timer Setting, Timeshift Storage, Total block, Transfer Firmware,...
- Page 78 Manufactured under license from Dolby Laboratories. Dolby and the double-D symbol are trademarks of Dolby Laboratories. Correct disposal of this product This marking shown on the product or its literature indicates that it should not be disposed with other household wastes at the end of its working life. To prevent possible harm to the environment or human health from uncontrolled waste disposal, please separate this from other types of wastes and recycle it responsibly to promote the sustainable reuse of material resources.
Need help?
Do you have a question about the TF 7100 HD PVRt and is the answer not in the manual?
Questions and answers