
Related Manuals for Propel Trampolines KTS15-BE


Summary of Contents for Propel Trampolines KTS15-BE
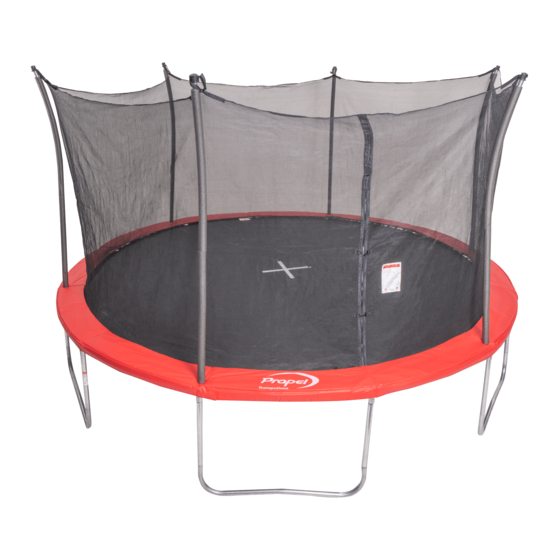
- Page 1 15 foot Trampoline and Enclosure User Manual WARNING READ THESE MATERIALS PRIOR TO ASSEMBLING AND USING THIS TRAMPOLINE.
- Page 2 User Manual for 3 Trampoline Models: Kinetic 15-ft Trampoline with Enclosure (KTS15-BE) Propel 15-ft Trampoline with Enclosure (PTS15-RE) Scrambler 15-ft Trampoline with Enclosure (STS15-OE) Do Not return this product to the store. Instead, please visit one of our websites at www.propeltrampolines.com, or www.
-
Page 3: Table Of Contents
TABLE OF CONTENTS WARNINGS - 3 WARNING LABEL PLACEMENT - 4 BEFORE YOU BEGIN - 5 USE AND INSTRUCTION MATERIAL - 6 INSTRUCTIONAL PROGRAM AND MODEL LESSONS - 7 ASSEMBLY - 10 FRAME ASSEMBLY - 11 ENCLOSURE ASSEMBLY - 14 DISASSEMBLY - 19 CARE &... -
Page 4: Warnings
WARNING In addition to any other instructions and precautions provided with your Trampoline, the following must be observed while using the Trampoline. WARNING: To reduce the risk of serious injury, read and 14. Never use the trampoline without the enclosure in place and follow all of the warnings, precautions, and instructions in attached to the trampoline. -
Page 5: Warning Label Placement
WARNING LABEL PLACEMENTS Trampoline Frame Labels Note: These labels are not shown at their actual size. Enclosure Frame Labels (Samples Only) These labels have been attached to the trampoline enclosure in the indicated locations. If one of the labels is ... -
Page 6: Before You Begin
BEFORE YOU BEGIN Thank you for selecting a Propel, Kinetic or Scrambler Trampoline and Enclosure Combination. This Trampoline and Enclosure Combination comes equipped with warnings and in- structions for its proper assembly, care, maintenance, and use. This information must be read by all supervisors and users before any person is allowed to use it. After reading this manual, if you have further questions, or if you would like to contact the manufacturer directly please visit our web sites at www.propeltrampolines.com, or www.kinetictrampolines.com or www.scramblertrampolines.com for additional infor-... - Page 7 INSTRUCTIONAL MATERIAL AND RULES FOR USE OVERVIEW OF TRAMPOLINE AND ENCLOSURE COMBINATION USE The first practice sessions of your new Trampoline and Enclosure Combination use should focus on learning fundamental body positions and practicing the eight basic jumps (see pages 8-9). During this learning period, jumpers should practice these basic techniques and perfect them.
-
Page 8: Instructional Program And Model Lessons
INSTRUCTIONAL PROGRAM AND MODEL LESSONS The following lessons are examples of an instructional program. They should follow a complete discussion and demonstration of body mechanics between the supervisor and the student(s). See pages 8 and 9 for descriptions of basic jumping skills. Lesson 1 1. - Page 9 Fundamental Jump Knee Drop 1. Start bouncing from a standing position, keeping your 1. Start from a standing position with your head erect and your eyes on the frame pad. eyes on the frame pad. 2. Swing your arms forward and up in a circular 2.
- Page 10 Front Drop Seat Drop 1. Start from a low bounce and land on the mat in a 1. Land in a sitting position with you legs parallel to prone position. the mat. 2. Keep your head up and your arms extended forward 2.
-
Page 11: Assembly
ASSEMBLY IMPORTANT ASSEMBLY INFORMATION You will need a Phillips screw driver (not included), and two adjustable wrenches (not included) to assemble this Trampoline and Enclosure Com- bination. Assembly requires two adults. Wear gloves to protect your hands from pinch points during assembly. To extend the life of your product, a thin film of oil has been applied to all metal parts. -
Page 12: Frame Assembly
Frame Assembly Step 1 Select 1 frame tube with a regular T-Bracket (A) plus 1 frame tube with square slot T-Bracket (B), place on ground in position shown below. Make sure the frame tubes are turned so the small holes (spring holes) are facing the ground. Insert the end of the frame tube (A) into the socket of frame tube (B). - Page 13 Step 2 - Slide two Legs (3) onto a Brace (4) as shown below. The peak of the Brace (4) should point toward the ground. Insert one of the Legs (3) into one of the Sockets (2) assembled in Step 1. Insert the other Leg into the other Socket.
- Page 14 Step 4 - Lay the Mat (9) on the ground. Make sure the two warning decals (not shown) are on top of the Mat. Stay-Lock end Spring end of spring Step 5 - Unfold enclosure to a large rectangle (Attach to Frame) (Attach to V-Ring) laying on the ground.
-
Page 15: Enclosure Assembly
Enclosure Assembly Read and understand all remaining Enclosure assembly in- structions before beginning the Enclosure assembly process. Your improved safety pad comes in two pieces. Lay both pad sections on top of the springs, with spring loops facing down (See step 3) 3) Then Velcro the two ends of 2) Align the brass O-rings ... - Page 16 5) Before assembling your 6 Enclosure Posts (poles), locate six net straps and connect all six bungee loops to your safety net as shown. 6) The upright post comes in two pieces. An upper (dog-legged) and a lower (straight). Attach each ring-head (eye-bolt) to each upper piece with ...
- Page 17 7) Connect the two post segments together and secure with a screw in the center hole for all 6 enclosure posts as shown in the photo below. Caution: Do not over-tighten screw or hole will be stripped out. ...
- Page 18 8) For easiest assembly, first attach each bungee cord hook through the circular-hole (eye) bolt in the first upright post. Then stand the post upright with the dog leg facing out and drop it through brass o-ring in the pad and into its T-Bracket slot.
- Page 19 Lower (squared base) section of upright post. Important: The bolt and nut securing this bottom segment of the Enclosure Post to the T-Bracket slot of the frame should be placed only after you have assembled each entire post as described in step five (above).
-
Page 20: Disassembly
The foam sleeves that cover the upright enclosure posts come pre- installed at the factory. Following enclosure assembly, gently slide all foam sleeves into place to cover all exposed metal parts of your 6 upright posts. NOTE: Foam sleeves may require a few warm days to fully return to their original round shapes after being flattened during the shipping process. - Page 21 CARE AND MAINTENANCE CARE Do not allow pets on or within the Trampoline and Enclosure Combination as their claws may damage the frame pad, or snag and pull the mat material or enclosure netting. This Trampoline and Enclosure Combination is intended to be used by only one person at a time, weighing not more than 300 pounds.
-
Page 22: Special Considerations
SPECIAL CONSIDERATIONS High Wind Hazards See our web site or ask your trampoline supplier about our Stormrider® Trampoline Anchor Kit, made especially for your trampoline. Your Trampoline and Enclosure combination will be blown around by high winds. One tested remedy is our specially designed Stormrider Trampoline Anchor Kit (not included with all Propel, Kinetic or Scrambler trampolines). -
Page 23: Moving The Trampoline
Moving the Trampoline and Enclosure Combination If the Trampoline and Enclosure Combination needs to be moved, it must be done by a minimum of two persons, (preferably four), keeping the trampoline horizontal, and lifted slightly. If necessary, it can be taken apart for moving. -
Page 24: Trampoline Parts List
TRAMPOLINE PARTS LIST Qty. Description Stitched Bed with 108 V-rings Frame Tube Frame Pad with Attached Sleeves T-Bracket with square slot (B) Springs Regular T-Bracket (A) Set of ASTM Frame Labels Leg Extensions (sewn onto the Jumping Mat and Enclosure) Leg Brace Pieces Specifications are subject to change without notice. -
Page 25: Enclosure Parts List
ENCLOSURE PARTS LIST No. Qty. Description No. Qty. Description Enclosure Net Post Screws 12 Foam Sleeves Post Frame Bolts & Nuts Bungees Dog-Leg Post Section Post Eyebolts & Nuts Straight Post Section Specifications are subject to change without notice. ORDERING REPLACEMENT PARTS To order replacement parts, please visit our website at www.propeltrampolines.com. -
Page 26: Limited Warranty
Note: You have the option of purchasing an EXTENDED WARRANTY for your PROPEL Trampoline and Enclosure Combination. Please go to www.propeltrampolines.com, or www.kinetictrampolines.com or www. scramblertrampolines.com to review all possible options and choose that which best meets your needs and desires. Printed in China © 2010 Propel Trampolines... - Page 27 OTHER GREAT PRODUCTS AVAILABLE FROM PROPEL TRAMPOLINES See our Stormrider Anchor Kit in use on our website. www.propeltrampolines.com...
-
Page 28: Warranty Registration
You may also register your trampoline by mailing a copy of your sales receipt along with your name, address, phone number and the model number of your trampoline to: Propel Trampolines Warranty Department 41 East 400 North #324 Logan, UT 84321...
Need help?
Do you have a question about the KTS15-BE and is the answer not in the manual?
Questions and answers