Table of Contents
Advertisement
Quick Links
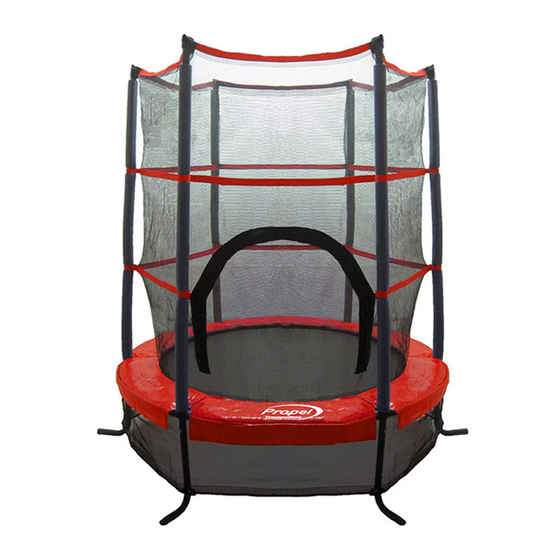
Preschool Trampoline
User Manual
Assembly, Installation, Care, Maintenance,
and Use Instructions
WARNING
READ THESE MATERIALS PRIOR TO ASSEMBLING
AND USING THIS TRAMPOLINE AND ENCLOSURE.
Failure to assemble and use this Preschool Trampoline
as specified in this manual will automatically void the warranty.
Advertisement
Table of Contents

Related Manuals for Propel Trampolines Preschool Trampoline


Summary of Contents for Propel Trampolines Preschool Trampoline
-
Page 1: User Manual
User Manual Assembly, Installation, Care, Maintenance, and Use Instructions WARNING READ THESE MATERIALS PRIOR TO ASSEMBLING AND USING THIS TRAMPOLINE AND ENCLOSURE. Failure to assemble and use this Preschool Trampoline as specified in this manual will automatically void the warranty. - Page 2 All merchandise is sold on this condition, which no representative of the company can waive or change. Warning This Preschool Trampoline and Enclosure Combination is intended to be used by only one person at a time, weighing not more than 100 lbs.
-
Page 3: Table Of Contents
TABLE OF CONTENTS BEFORE YOU BEGIN - 4 INSTRUCTIONAL MATERIAL AND RULES FOR USE - 5 OVERVIEW OF TRAMPOLINE AND ENCLOSURE COMBINATION USE - 6 INSTRUCTIONAL PROGRAM AND MODEL LESSONS - 7 FUNDAMENTAL TRAMPOLINE SKILLS - 8 ASSEMBLY INSTRUCTIONS - 10 WARNING LABEL PLACEMENT - 18 MOVING THE TRAMPOLINE - 19 DISASSEMBLY - 19... -
Page 4: Before You Begin
BEFORE YOU BEGIN Thank you for purchasing a Propel Preschool Trampoline. This Trampoline and Enclosure Combination comes equipped with warnings and instructions for its proper assembly, care, maintenance, and use. This information must be read by all supervisors and users before any person is allowed to use it. -
Page 5: Instructional Material And Rules For Use
INSTRUCTIONAL MATERIAL AND RULES FOR USE Warning 1. DO NOT attempt or allow somersaults. Landing 15. Stop bounce by flexing knees as feet come in on the head or neck can cause serious injury, contact with the trampoline bed. Learn this skill paralysis, or death, even when landing in the before attempting others. -
Page 6: Overview Of Trampoline And Enclosure Combination Use
OVERVIEW OF TRAMPOLINE AND ENCLOSURE COMBINATION USE The first practice sessions of your new Trampoline and Enclosure Combination use should focus on learning fundamental body positions and practicing the eight basic jumps (see pages 8-9). During this learning period, jumpers should practice these basic techniques and perfect them. -
Page 7: Instructional Program And Model Lessons
INSTRUCTIONAL PROGRAM AND MODEL LESSONS The following lessons are examples of an instructional program. They should follow a complete discussion and demonstration of body mechanics between the supervisor and the student(s). See pages 8 and 9 for descriptions of basic jumping skills. Lesson 1 1. -
Page 8: Fundamental Trampoline Skills
FUNDAMENTAL TRAMPOLINE SKILLS Knee Drop Fundamental Jump 1. Start bouncing from a standing position, 1. Start from a standing position with your head keeping your eyes on the frame pad. erect and your eyes on the frame pad. 2. Land on your knees, keeping your back 2. - Page 9 Front Drop Seat Drop 1. Start from a low bounce and land on the mat in 1. Land in a sitting position with your legs a prone position. parallel to the mat. 2. Keep your head up and your arms extended 2.
-
Page 10: Assembly Instructions
ASSEMBLY INSTRUCTIONS WARNINGS x Adequate overhead clearance is essential. A minimum of 8 ft from ground level is recommended. Provide clearance for ceilings, wires, tree limbs, and other possible hazards. x Lateral clearance is essential. Place the trampoline away from walls, structures, fences, and other play areas. - Page 11 Preschool Trampoline Assembly Read and understand all assembly instructions before beginning the assembly process. Step 1- Connect one Frame Piece another by inserting crimped end of one piece into the open end of the other. Step 2- Repeat step 1 until all six...
- Page 12 Step 4- With the Frame circle completed; return it to a position on the ground. Locate one of the curved Legs and insert it into one of the slots on the Frame. Rotate the leg so that it curves outward and the screw holes line up and secure it in place with a screw. Repeat until all of the Legs are in position and screwed in place.
- Page 13 Step 6- Flip the Frame so that the Legs are facing downwards and insert each Enclosure Pole into a slot in the frame. DO NOT screw the Enclosure Poles in place. Page 13...
- Page 14 Step 7- For Safety, the Jumping Mat and Safety Enclosure are sewn together as one piece. Unfold the Jumping Mat/Safety Enclosure Combo and locate the small Pole Sleeves sewn near the top of the Enclosure Netting. Slide one Sleeve over the top of each Enclosure Pole so the Enclosure is hanging loosely in position over the Frame.
- Page 15 Step 8- Count 5 Bungee Loops right and attach a bungee on the left side of the next Enclosure Pole. Repeat this process, attaching one Bungee to every 5 Loop until you have attached 6 Bungees. Step 9- Circle your way around the Trampoline and attach one Bungee next to each one you have already attached.
- Page 16 Step 11- Unfold the Frame Pad/Safety Skirt combo and place it on the Trampoline. Be sure that the Enclosure Pole slots are sticking up through the slits in the Pad. Step 12- Screw the Safety Skirt in place at the bottom of each Leg.
- Page 17 Step 13- Replace the Enclosure Poles making sure to align the screw holes near the bottom of the Enclosure Poles with those on the Frame. Step 14- Screw the Enclosure Poles in place. Step 15- Reattach the Enclosure Pole Loops to the top of the Enclosure Poles and screw them in place.
-
Page 18: Warning Label Placement
Make sure that all parts are securely attached. Familiarize yourself and all users of the Trampoline and Enclosure Combination with all safety precautions, use and instructional materials, and the care and maintenance instructions in this manual before using the Trampoline and Enclosure Combination. Your Preschool Trampoline is now fully assembled. Page 18... -
Page 19: Moving The Trampoline
If the Trampoline and Enclosure Combination needs to be moved, it can be done easily by two adults. Keep the Trampoline horizontal, and lifted slightly. If it is necessary to take the Preschool Trampoline through a doorway, remove the enclosure poles, turn the trampoline on its side, and roll through the doorway. - Page 20 MAINTENANCE Your Preschool Trampoline was manufactured using the highest quality materials. It was crafted to provide you and your family with years of enjoyment and exercise. Proper maintenance and care will help to prolong the life of the Trampoline and Enclosure Combination and reduce the possibility of injury.
-
Page 21: Parts List
PARTS LIST Letter Part Name Quantity Frame Tube Leg Piece Enclosure Pole – Upper Section Enclosure Pole – Lower Section Frame Pad with Safety Skirt Jumping Mat with Safety Enclosure Bungee Springs Screws Replacement Parts available at www.PropelTrampolines.com. Specifications are subject to change without notice. Page 21... -
Page 22: My Trampoline Information
MY TRAMPOLINE INFORMATION In the event you need to contact Customer Service, such as to ask questions, order replacement parts, or file a warranty claim you will be asked to provide some basic information about your Trampoline. By writing this information in the spaces below and keeping this Manual in an accessible location you can help expedite this process. -
Page 23: Limited Warranty
No other Warranty, expressed or implied, beyond that specifically set forth above is authorized. Propel is not responsible or liable for indirect, special, or consequential damages arising out of, or in connection with, the use or performance of this product, or other damages with respect to any economic loss, loss of property, loss of revenue or profits, loss of enjoyment or use, cost of removal, installation, or other consequential damages. -
Page 24: Warranty Registration
Trampoline to: Propel Trampolines Warranty Department 41 East 400 North #324 Logan, UT 84321 www.propeltrampolines.com v1.4 - © 2012 Propel Trampolines - Printed in China Page 24...
Need help?
Do you have a question about the Preschool Trampoline and is the answer not in the manual?
Questions and answers