Advertisement
Table of Contents
- 1 Table of Contents
- 2 Parts Identifications
- 3 Control and Display System
- 4 Refrigeration Principle
- 5 System Flow Chart
- 6 Circuit Diagram
- 7 Schematic
- 8 Connect Diagram
- 9 Sensor and Error Code
- 10 Troubleshooting
- 11 Troubleshooting
- 12 Other(Icemaker and Defrost Details)
- Download this manual
See also:
User Manual
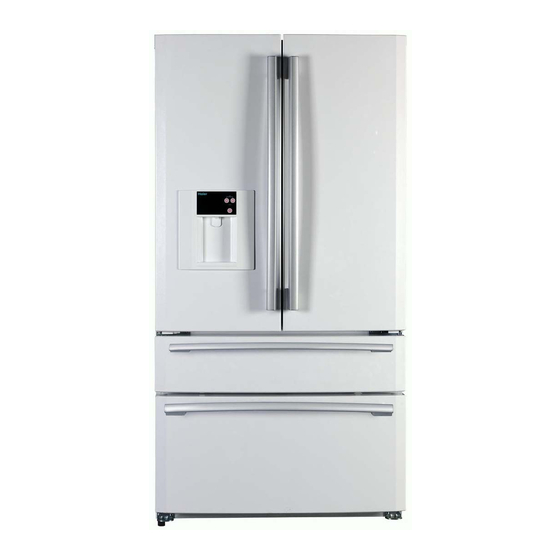
Refrigerator
SERVICE MANUAL
Features:
1.Chill drawer for delicatessen
2.Slide-out shelf for easy food access
3.Optimized condensing system
4.Pre-cooling for defrosting for freshness storage
5.Automatic problem detecting and warning system, door cooling warning system
6.Vitamin C technology for fresh food storage
7.Ice making
8.Intelligent operation for automatic operation
9.Dispenser for cold drinks
CAUTION
READ THIS MANUAL CAREFULLY TO
DIAGNOSE TROUBLE CORRECTLY
BEFORE OFFERING SERVICE .
MODEL: PBFS21EDAW/B/P/S/E
Haier Group
RBFS21TIAW/B/P/S/E
RBFS21SIAW/B/P/S/E
PRFS25EDAP/S/E
Advertisement
Table of Contents
Troubleshooting

Related Manuals for Haier PBFS21EDAW


Summary of Contents for Haier PBFS21EDAW
- Page 1 CAUTION READ THIS MANUAL CAREFULLY TO DIAGNOSE TROUBLE CORRECTLY BEFORE OFFERING SERVICE . Refrigerator SERVICE MANUAL MODEL: PBFS21EDAW/B/P/S/E RBFS21TIAW/B/P/S/E RBFS21SIAW/B/P/S/E PRFS25EDAP/S/E Features: 1.Chill drawer for delicatessen 2.Slide-out shelf for easy food access 3.Optimized condensing system 4.Pre-cooling for defrosting for freshness storage 5.Automatic problem detecting and warning system, door cooling warning system...
-
Page 2: Table Of Contents
CONTENTS CONTENTS PAGE 1.PARTS IDENTIFICATIONS-------------------------------------------------------------1 2.DISASSEMBLY of door----------------------------------------------------------------- 2 3.CONTROL AND DISPLAY SYSTEM----------------------------------------------3~8 Control and display panel----------------------------------------------------------------3~8 4.REFRIGERATION PRINCIPLE---------------------------------------------------------9 System flow chart-----------------------------------------------------------------------------9 4.CIRCUIT DIAGRAM-----------------------------------------------------------------10~11 4.1 Schematic---------------------------------------------------------------------------------10 4.2 Connect diagram------------------------------------------------------------------------11 5.Sensor and Error code-----------------------------------------------------------------12 6.TROUBLESHOOTING--------------------------------------------------------------13~30 6.1 Common Troubles in Refrigerators and Remedies------------------------13~24 6.2 Instruction of replacing mullion,heater and sensor-------------------------25~30 7.Other(Icemaker and defrost details)------------------------------------------------31... - Page 3 PRODUCT CODE and SERIES INTRODUCTION Model Designations Bottom Mount 21 - 25 cu ft Refrigerator / Freezer Details:...
-
Page 4: Parts Identifications
PARTS IDENTIFICATIONS Freezer Diary foChill-cold storage Liquid rack Slide rack Fruits and Gallon bottled seat Cooked- Ice-making drawer Deepfreeze refrigeration big drawer Deepfreeze Ice-maker fridge Ice spoon Ice-meeting drawer Drawer clapboard Deepfreeze fridge big drawer For the application of this brochure to different models, the characteristics of the refrigerator you are using may be different from the descriptions in this brochure. - Page 5 DISASSEMBLY 1. Removing and replacing the right door of refrigerator compartment Unscrew the upper right hinge cover by Unscrew the upper right hinge by means of means of screwdriver and then remove hexagonal screwdriver and then remove the hinge. the hinge cover. Remove the door and place it in a proper Remove the middle hinge if necessary.
-
Page 6: Control And Display System
CONTROL AND DISPLAY SYSTEM The door body vision controlling screen(just for PBFS21/PRFS25 series) A …………Hour Button B …………Minute Button C………… Lock Button D……………Time Area Function adjustment and control principle E …………Quick-refrigerant button F, G………Deepfreeze fridge temperature adjusting button H ………deepfreeze fridge temperature indicating area I……..………Chill-cold storage temperature indicating area J.K…...…chill-cold storage temperature adjusting button L…….…...………Chill-cold storage quick-deepfreeze fridge... - Page 7 CONTROL AND DISPLAY SYSTEM Press Button C, after the first sound of the buzzer, fix the indicating lamp to be lighted, and the clock setting of the door body vision cannot be operated, and the function of taking out cold drinks is locked;...
- Page 8 CONTROL AND DISPLAY SYSTEM 3. Deepfreeze fridge temperature adjustment (Only apply for the models with the function of taking out cold drinks) (Only apply for the models without the function of taking out cold drinks) Press Button G or Button H, the deepfreeze fridge temperature vision area H will flicker, and when the deepfreeze fridge temperature is set, the range of the deepfreeze fridge temperature is -7 degrees to 8 degrees, and each time you press Button G, the deepfreeze fridge temperature will increase a level, till the highest Level Seven is reached;...
- Page 9 CONTROL AND DISPLAY SYSTEM The function of quick-deepfreeze refrigeration is to refrigerate the food completely in the shortest time.Press Button E, the refrigerant quick-deepfreeze refrigeration button indicating lamp will be lighted, and the refrigerator will be in the refrigerant quick-deepfreeze refrigeration state, and the refrigerator will be out of the refrigerant quick-deepfreeze refrigeration state after it enters the refrigerant quick-deepfreeze refrigeration state for 4 hours;...
- Page 10 CONTROL AND DISPLAY SYSTEM When pressing chill-cold storage adjustment Button J and chill-cold storage adjustment Button K at the same time for three seconds, the chill-cold storage sign I will be out after the first sound of the buzzer an the chill-cold storage function is turn off; when pressing chill-cold storage adjustment Button J and chill-cold storage adjustment Button K at the same time for three seconds again, the chill-cold storage sign I will be on after the first sound of the buzzer and the chill-cold storage function is turn on again.
- Page 11 CONTROL AND DISPLAY SYSTEM 10. The function of showing and controlling 30 seconds after Operating the refrigerator by pressing the button, the vision screen is out automatically, and if you press any button or open any door or take out the cold drink, the vision screen will be shown to be on. 11.
-
Page 12: Refrigeration Principle
REFRIGERATION PRINCIPLE SYSTEM FLOW CHART 1.Compressor 2.Mullion Heater 3.Dry Filter 4.condenser 5.Mullion Heater 6.Evaporator 7.Capillary tube SYSTEM FLOW SCENOGRAPH... -
Page 13: Circuit Diagram
CIRCUIT DIAGRAM 1.Schematic... -
Page 14: Connect Diagram
2. Connect diagram(for PRFS25EDA* series) - Page 15 Mother Board Wiring Connections Power Input CN 3 to dispenser line display panel neutral CN 10 1 drawer lamp RRCS25 - line to compressor. CN 1 Fresh Food PRCS25 - not used. 1-2 temp sensor 3 main water 3-4 light switch 5-6 damper htr 4 ice maker water valve 7-10 Damper mtr...
-
Page 16: Sensor And Error Code
SENSOR AND ERROR CODE... -
Page 17: Troubleshooting
TROUBLESHOOTING 1. Analysis of Troubles and Troubleshooting A. Poor Refrigerating Effect The so-called “poor refrigerating effect “ refers to the fact that the refrigerator can operate and refrigerator normally, but the temperature in the refrigerator cannot drop to the prescribed value under the stipulated working conditions. - Page 18 Remedy According to the operating procedures, it is mandatory to turn the machine off, and several minutes later, open the refrigerant charging tube and let the refrigerant escape from it, replace the dry filter, recharge refrigerant after evacuating, and then seal the charging port. 3) There is air left in the refrigerating system Analysis of Trouble Residual air in the refrigerating system will reduce its refrigerating efficiency .The prominent...
- Page 19 confused. Generally speaking, you can make a judgment based on the frost formed on the evaporator. If the frost does not cover the evaporator, and moreover, it is loosely formed, you can make a judgment that the deterioration of refrigerating effect is due to the accumulation of refrigerating oil left in the evaporator tubing in case no other troubles have been found.
- Page 20 Remedy Check the whole machine, particularly those locations, which are liable to leak. After leak points have been found, repair them or replace them with new parts according to specific circumstances, then evacuate the system and finally charge refrigerant. 2) Refrigerating system has been clogged a) Clogged with Ice Analysis of Trouble The dryness treatment for the major parts in the refrigerating system has been performed...
- Page 21 Remedy Dismantle the system, remove the dry filter from it, purge the tubing with nitrogen, install a new filter, then evacuate it and finally charge it with refrigerant. C) Clogging in filter Analysis of Trouble Total clogging of a filter is rarely to occur. The paste-like matter formed from the substances filled into the system mostly causes this trouble or other dust after the refrigerator has been used for a longer time, or by the dirt accumulated gradually inside the filter.
- Page 22 A)Too much refrigerant charged into the system Analysis of Trouble The phenomenon, such as loose frosting and poor refrigerating effect, may occur if excessive refrigerant has been charged into the system. Superfluous refrigerant will occupy a certain space of the evaporator, thus reduce its heat dissipating area, and the phenomenon of “liquid striking”...
- Page 23 b) Overload of electric motor Analysis of Trouble Probably, too many things have been put into the refrigerator, and hence the thermal load exceeds its refrigerating capacity; or in case the power supply voltage drops considerably, the current flowing through the motor will increase drastically making the thermal protector actuate and the fuse blown, and hence the motor stops running.
- Page 24 b) Check the compressor accessories, including its thermal protector and relay. In case the thermal protector is damaged, the compressor cannot be powered on. If the relay is out of order, the motor will not run and hum sound can be heard from it after the compressor is turned on, in that case, shut it down immediately, otherwise, the motor windings will be burned out in case this condition lasts longer.
- Page 25 certain phase is low, this means that short circuit does exist in the windings and/or between turns, and insulation layers have been burned or deteriorated. A megametre can be used in this inspection, too. If the insulation resistance is lower than 2 M , this means that the insulation layer is already breakdown.
- Page 26 Sometimes, the compressor will run continuously (for several hours or run without end), If the food placed in the refrigerator is not too much, there may be the following two situations: I) the refrigerator very low, this means that the control system is probably out of order; ii) the control system works normally, and there are troubles in the refrigerating system or other parts.
- Page 27 Analysis of Trouble When the heat-insulation layer inside the case body deteriorates or the door seal is not closely touches the doorframe, the temperature in the refrigerator will rise and makes the compressor running continuously. Remedy Check the heat-insulation layer for its damaged parts; repair it to improve its heat-insulation property.
- Page 28 power supply circuit have been inversely connected accordingly ,this makes the null line become a live wire . G. Stronger vibration and loader noise 1) Refrigerator placed improperly a) Uneven ground Uneven ground will cause the refrigerator to be placed unsteadily, causing stronger vibration and noise during its operation.
- Page 29 TROUBLESHOOTING Instruction of assembling Mullion on BM21/25 series Instruction Notice 1.Install top axis of mullion through the heater; 5.Fix the bottom cover on the mullion,then fix the spring,bottom axis,foam airproof; 2.Paste The blue wire is heater(115V),and the heater the white wire is power onto wire(230V).
- Page 30 Instruction of replacing Mullion heater on BM21/25 series Instruction Notice 1.Be careful:the distortion of clip will cause gap between the bottom 1.Remove the screws on cover and mullion. mullion; 2.Disconnect the earth wire and connector; 3.Remove the screws on mullion; 4.Remove the upper 2.
- Page 31 Instruction of replacing Horizontal Mullion heater Instruction Notice 1.Remove the screws fixing horizontal mullion; 2.Dismantle the horizontal mullion and foam airproof; 1.Use a tooth-washer to fix the earth wire; 2.Be careful:the distortion of clip will cause gap between the airproof and horizontal mullion. 3.Disconnect the linking 4.Remove the screw fixing earth wire of clip and mullion heater;...
- Page 32 Instruction of removing FRZ sensor on BM21/25 series Instruction Notice 1.Remove the FRZ 2.Remove the rear gasket of FRZ airpassage cover; airpassage cover,then you can see the FRZ sensor; Place the sensor in middle of the clips. 3.Take off the sensor from the clip; 4.FRZ sensor wire Install the FRZ sensor according to the above steps.
-
Page 33: Troubleshooting
TROUBLESHOOTING Instruction of replacing sensor Instruction of replacing sensor Step Tools Operation content Pic I Pic II Open up sensor cover, nip 1.remove fault scissors connection thread of which near to part sensor root place. Cut off insulation skin orderly till appearing two thread with length of 2.poke knives... - Page 34 Instruction of compressor check Item Step Checkpoint Tools Content 1 Measure the voltage of power with a multimeter,if it beyond standard scope,adjust it to normal scope; multimeter,pan- Too high or too low voltage of power,bad connection of Check the power Notice:measure the power with "AC"...
-
Page 35: Other(Icemaker And Defrost Details)
Other 7.Other Icemaker and defrost details 1.You can manually start a defrost cycle according to Pressing FRZ< , FRZ> temp adjust keys and RESET(or TEST) for 3 seconds.There will be "T1,T1" on display panel. 2.Generally speaking,there will be a deforst cycle after 7 hours working of compressor.If there is less door openings or the temperature is proper,the defrost cycle will increase,maybe 90 hours.
Need help?
Do you have a question about the PBFS21EDAW and is the answer not in the manual?
Questions and answers