Table of Contents
Advertisement
Quick Links
Download this manual
See also:
User Manual
Advertisement
Table of Contents

Subscribe to Our Youtube Channel
Related Manuals for ZTE-G R228


Summary of Contents for ZTE-G R228
- Page 1 ZTE-G R228 Mobile Phone User Manual...
-
Page 2: Legal Information
LEGAL INFORMATION Copyright © 2011 ZTE CORPORATION. All rights reserved. No part of this publication may be excerpted, reproduced, translated or utilized in any form or by any means, electronic or mechanical, including photocopying and microfilm, without the prior written permission of ZTE Corporation. -
Page 3: Table Of Contents
Table of Contents SECURITY ............4 MAKING AND RECEIVING CALLS ..26 SAFETY PRECAUTIONS......4 CALL CENTER..........27 LIMITATION OF LIABILITY .....12 SENDING AND RECEIVING MESSAGES .............29 KEY FUNCTIONS..........13 SENDING AND RECEIVING EMAIL..32 TURNING ON / OFF OR WAKING UP YOUR PHONE ..........15 USER PROFILES..........33 LOCKING / UNLOCKING THE KEYPAD SETTINGS ............34 ................15... -
Page 4: Security
Security To protect your mobile phone from illegal use, take the security measures as follows: Set PIN codes of the SIM card. Set handset password. Set call restrictions. Safety Precautions This section includes some important information on safe and efficient operation. - Page 5 exposed to flashing lights, such as when watching television or playing video games. If you have experienced seizures or blackouts, or if you have a family history of such occurrences, please consult your doctor before playing video games on your phone or enabling a flashing-light feature on your phone.
- Page 6 Precautions for Medical Devices and Facilities When using your phone near pacemakers, please always keep the phone more than eight inches (about twenty centimeters) from the pacemaker when the phone is switched on. Do not carry the phone in the breast pocket. Use the ear opposite the pacemaker to minimize the potential for interference.
- Page 7 Mobile Phone Please use original accessories or accessories approved by the phone manufacturer. Using any unauthorized accessories may affect your mobile phone’s performance, damage your phone or even cause danger to your body and violate related local regulations about telecom terminals. Turn off your phone before you clean it.
- Page 8 Do not connect the phone with any incompatible enhancement. Do not attempt to disassemble the mobile phone or battery. Do not store the phone with flammable or explosive articles. Do not charge the mobile phone without battery. Some electronic devices are susceptible to electromagnetic interference sent by phone if inadequately shielded.
- Page 9 Keep phone out of the reach of small children. Phone may cause injury if used as a toy. Do not put other things on the terminal to avoid overlaying radiator. Keep the antenna free from obstructions and position the antenna straight up.
- Page 10 Precautions for Electronic Devices Some electronic devices are susceptible to electromagnetic interference sent by mobile phone if inadequately shielded, such as electronic system of vehicles. Please consult the manufacturer of the device before using the phone if necessary. Safety and General Use in Vehicles Safety airbag, brake, speed control system and oil eject system shouldn’t be affected by wireless transmission.
- Page 11 you to have permission from a crew member to use your phone while the plane is on the ground. If the mobile phone has the function of automatic timing power-on, please check your alarm setting to make sure that your phone will not be automatically turned on during flight.
-
Page 12: Limitation Of Liability
Return the worn-out battery to the provider or dispose of it in accordance with environment regulations. Do not dispose of it in household rubbish. Please use original batteries or batteries approved by the phone manufacturer. Using any unauthorized battery may affect your handset performance or may cause danger of explosion, etc. -
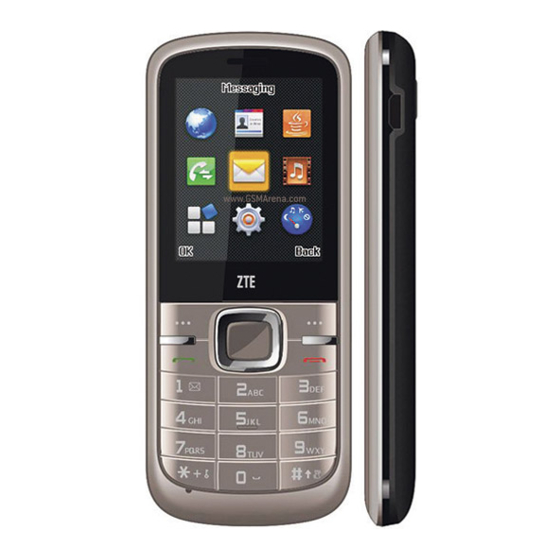
Page 13: Key Functions
Key Functions Torch Earpiece USB/Charger interface 4-Way Navigation keys and Center key Right soft key Left soft key End/Power key Send key Alpha numeric keys # key * key Headset jack... -
Page 14: Function Description
Function Description Performs the function indicated at the left bottom of the Left soft key screen. Performs the function indicated at the right bottom of the Right soft key screen. Center key Press to confirm actions and make selections. These keys (UP, DOWN, LEFT and RIGHT) allow for 4-Way navigation through menu options and quick access to Navigation keys... -
Page 15: Turning On / Off Or Waking Up Your Phone
Turning On / Off or waking up your phone Hold the Power key to turn your phone on or off. In Menu→Settings→Phone settings→Misc. settings→LCD backlight, set the LCD backlight time. If the phone is not operated within this time, the screen will turn black. Press any key to wake up your phone. -
Page 16: Status Bar Icons
Status bar icons Indicator What it means Indicator What it means New SMS, message box full Signal strength when blinking Keypad locked New MMS Missed call Call forwarding Silent GPRS General Battery status Outdoor Alarm clock set Meeting Writing Text You can use the keyboard to enter text messages, contact information, notes and so on. - Page 17 • Change input mode: Press the # key to change the input mode. (Input modes: eZi Abc, eZi ABC, eZi abc, Abc, ABC, abc, 123) • Input letters: In ABC/abc/Abc mode, constantly press the corresponding letter key till the letter appears. In eZi ABC/eZi abc/eZi Abc mode, press the corresponding letter key, then use Left/Right Navigation keys to choose the letter you want.
-
Page 18: Battery
• Input symbol: Press the * key to enter symbol mode, select the required symbol (common symbols) by pressing the Navigation keys and then press the Left soft key or Center key to confirm it. In eZi ABC/eZi abc/eZi Abc mode, press the 1 key, and select the required symbol (common symbols) by pressing the Navigation keys. - Page 19 1. Pull the battery cover from the notch at the bottom and remove the cover. 2. Insert the battery by aligning the gold-coloured contacts with the contacts in the battery slot. 3. Push down the upper section of the battery until it clicks into place.
-
Page 20: Removing The Battery
4. Replace the battery cover and close it gently until you hear a click. Removing the battery 1. Make sure that your mobile phone is switched off. 2. Remove the battery cover. 3. Pull the battery up and remove it from the mobile phone. -
Page 21: Charging The Battery
Charging the battery Your phone is powered by a rechargeable battery. For maximum battery performance, it is recommended that you first use up the battery power and then charge it completely. A new battery’s full performance is achieved only after three complete charge and discharge cycles. •... -
Page 22: Inserting The Sim Card
Inserting the SIM card You want a mobile phone that is sophisticated yet easy to use and here it is in your hands! Naturally you are eager to start using it, but first you need to insert the SIM card. Insert the SIM card as follows: Make sure that the phone is switched off and the charger is disconnected from the phone. -
Page 23: Inserting The Memory Card
Every mobile phone has a SIM card (Subscriber Identity Module). This is a micro-chip that holds your personal information such as names and phone numbers. Your phone won’t work without it. If you already have contacts on your SIM card, they can be transferred in most cases. Inserting the Memory Card You can use a memory card to expand the storage of the phone. -
Page 24: Contacts
Insert the memory card as follows: The memory card slot is beside the camera lens. Insert the card with the metal contacts facing downwards until it clicks to the right position. Contacts There are some numbers that you may want to call again and again, so it makes sense to add these numbers to your Contacts. - Page 25 contact. If you have selected All in Preferred storage, the phone will remind of you choosing a storage when you save the contact. Go to Menu→Contacts→Add new contact to add new contact. Then Edit the information and save it. • Save number to Contacts You can also save a number right after you’ve made or received a phone call or a message from someone who is not yet in your Contacts list.
-
Page 26: Making And Receiving Calls
Select Options→Mark several and choose the records you want to mark. Then select Opitons to view the submenu. • View memory status Select Options→Contacts settings→Memory status to check the memory status about the phone and SIM card. Making and receiving calls •... -
Page 27: Call Center
Press the End key. • Use call options During a call, you can select Options to enter the call options. You can use the speakerphone by pressing Center key. You can put a call on hold, make a new call, and use applications such as Messaging &... - Page 28 ♦ Save to Contacts: Save the current number. ♦ Edit before call: Edit the number before you call. ♦ Delete: Delete the current call record. ♦ Delete all: Delete all your call records. ♦ Advanced: View call timers, call cost, text msg. counter and GPRS counter.(Call cost need network support.) •...
-
Page 29: Sending And Receiving Messages
♦ Line switching: Switch the call line. ♦ Closed user group: You can create groups and numbers in one group can call each other, but can not call numbers in other groups. Advance settings: You can set auto redial, call time display and call time reminder. - Page 30 5. When you finish writing, press Options→Send to to enter numbers or add from Contacts. If you are writing an MMS, after adding recipients, you can select Options→Change to Cc or Change to Bcc to change the current contact to Cc or Bcc. 6.
- Page 31 the message, then select Options→Advanced→Use number. You can view the message boxes in Messages interface. ♦ Select Inbox to view received messages. ♦ Select Drafts to view unsent messages. ♦ Select Outbox to view messages that failed to send. ♦ Select Sent messages to view messages been successfully sent and saved.
-
Page 32: Sending And Receiving Email
♦ Preferred storage: Set the preferred storage to SIM or Phone. Go to Menu→Messages→Message settings→Multimedia message. ♦ Profiles: You can activate a preset profile or add new ones. ♦ Common settings: In Compose, you can set Slide time, Creation mode, Picture resizing, Auto signature and Signature. In Sending, you can set Validity period, Delivery report, Read report, Priority, Delivery time and Send and save. -
Page 33: User Profiles
enter your email address, protocol, data account, and server information, etc. 3. Activate your email account. • Send an email Go to Menu→Messages→Email→Write Email. When you finish writing, select to send or save the email. • Send and receive emails If you want to receive emails, go to Menu→Messages→Email. -
Page 34: Settings
• Alert type: Choose among four modes. • Ring type: Choose among Single, Repeat and Ascending. • Extra tone: Let the phone alert when warning, error, camp on or connect. • Answer mode: Select Any key to answer a call. Note: The Headset mode can only be activated with the headset connected. - Page 35 ♦ Writing language: You can set the preferred input method. ♦ Display: You can set Wallpaper, etc. ♦ Dedicated key: You can set Navigation keys refer to some certain functions, and when you press Navigation keys in the standby mode, you can directly and quickly get access to these functions. ♦...
- Page 36 ♦ SIM1/SIM2 lock: If SIM1/SIM2 Lock is currently set Off, select it and input SIM1/SIM2 PIN code to turn it on. You need to input the correct PIN code to unlock your SIM card when you turn on your mobile phone next time. Note: The PUK code is required to unlock the SIM card if you have incorrectly input the PIN code for three consecutive times.
-
Page 37: Bluetooth
change the phone password. • Connectivity ♦ Bluetooth: See chapter “Bluetooth”. ♦ Data account: You can add and view your GPRS data usage. • Restore factory settings You need to input the correct phone password to restore factory settings. Bluetooth Go to Menu Settings→Connectivity→Bluetooth. - Page 38 1. Go to Bluetooth→My device→Search new device to search other Bluetooth-enabled devices and list them. 2. Select the desired device name in the list and press Pair. 3. Enter a passcode (1 up to 16 characters), and then press OK. When the opposite party enters the same passcode, the connection will be established.
-
Page 39: Applications
Go to Bluetooth→Search audio device to search for the Bluetooth hands-free or stereo headset. Applications Go to Menu→Applications. • Calendar Enter Calendar, the calendar of the current month will be displayed on the screen and the current date will be marked by a background box in a special colour. -
Page 40: Multimedia
You can perform simple calculations. Press digit key to enter the number. Press Navigation keys to select the operational character. Press Left soft key or Center key to get the result. Note: This calculator has limited accuracy and rounding errors may occur especially in long division. - Page 41 Aim the camera at the object and then press the Center key to take the shot. Before capturing a photo, press the Left/Right Navigation keys to adjust the brightness. ♦ Configure your camera Press the Left soft key to configure your camera. •...
- Page 42 Before recording a video, press the Navigation keys to adjust brightness and zoom to the right size. ♦ Configure your video recorder Go to Video recorder. Press the Left soft key to configure your video recorder. • Video player The videos you want to play in Video player must be put in the ..\Videos folder in the phone or memory card, and in Options→Storage, the storage must be set to phone or memory card correspondingly.
- Page 43 • Sound recorder Go to Options→New record to record a sound clip. Go to Options→List to view the sound clips you recorded. Go to Options→Settings to set preferred storage and file format. • FM radio With the radio, you can search for radio channels, listen to them, and save them on your device.
-
Page 44: Java Midlets
Java MIDlets Go to Menu→Java MIDlets. Java MIDlets are Java™-based applications that can run on your phones. It supports Java 2 Edition, J2ME™. Java allows you to download Java-based applications, such as games and tools that are specifically designed for mobile phones. Java gives you the flexibility of installing and managing additional J2ME applications from the Internet. - Page 45 Your phone supports Wireless Application Protocol (WAP). You can get access to this service through your network provider. Internet service lets you get information about news, weather forecasts and so on. You can perform the following operations: ♦ Homepage: Homepage is a WAP site you set in Settings→Profiles.
Need help?
Do you have a question about the R228 and is the answer not in the manual?
Questions and answers