True TCGG-48-S Installation Manual
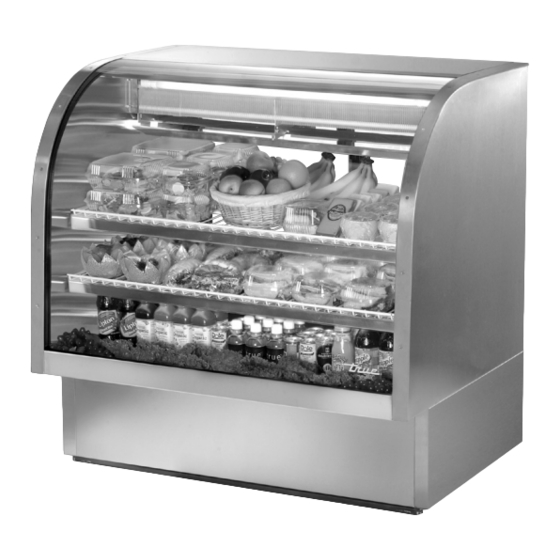
Tcgg models (curved glass deli case)
Hide thumbs
Also See for TCGG-48-S:
- Installation manual (18 pages) ,
- Specifications (2 pages) ,
- Installation manual (18 pages)
Table of Contents
Advertisement
Quick Links
TRUE FOOD SERVICE EQUIPMENT, INC.
2001 East Terra Lane • O'Fallon, Missouri 63366-4434
(636) 240-2400 • FAX (636) 272-2408 • INT'L FAX (636) 272-7546 • (800) 325-6152
Parts Department (800) 424-TRUE • Parts Department FAX# (636) 272-9471
IN S TAL L AT I O N M ANU A L F O R T C G G M O D E L S
( C U RVE D GL AS S DE L I C A S E )
TABLE OF CONTENTS
Safety Precautions ------------------------- 1
Proper Disposal ---------------------------- 2
Connecting Electricity ----------------------- 4
Adapter Plugs ----------------------------- 4
Ownership ------------------------------- 4
Required Tools ---------------------------- 4
Uncrating -------------------------------- 4
Location ---------------------------------- 5
TCGG-48-S
Leveling Cabinet --------------------------- 5
Defrost Timer Instructions (Grasslin Timer) -------- 6
Conductors and Circuits ----------------------- 7
Electrical Instructions & Start-up ---------------- 8
Sealing the Cabinet to the floor ---------------- 9
Shelving Installation & Operation ------------- 9-10
Temperature Control Adjustment -------------- 11
Cleaning Condenser Coil ------------------ 12-13
Stainless Steel Equipment Care & Cleaning ----- 14-15
Light Bulb Replacement --------------------- 15
Warranty (U.S.A. & CANADA ONLY!) -------------- 16
TCGG-72-S
CONGRATULATIONS!
You have just purchased the finest commercial
refrigeration available. You can expect many years
of trouble-free operation.
TCG G M ODELS
(C U RVE D GL A SS DE LI CAS E )
............ www.truemfg.com ............
#912627
Advertisement
Table of Contents

Related Manuals for True TCGG-48-S


Summary of Contents for True TCGG-48-S
-
Page 1: Table Of Contents
Installation / Operation Instructions Ownership ––––––––––––––––––––––––––––––– 4 Required Tools –––––––––––––––––––––––––––– 4 Uncrating –––––––––––––––––––––––––––––––– 4 Location –––––––––––––––––––––––––––––––––– 5 TCGG-48-S Leveling Cabinet ––––––––––––––––––––––––––– 5 Defrost Timer Instructions (Grasslin Timer) –––––––– 6 Conductors and Circuits ––––––––––––––––––––––– 7 Electrical Instructions & Start-up –––––––––––––––– 8 Sealing the Cabinet to the floor ––––––––––––––––... -
Page 3: Safety Information
True Food Service Equipment, Inc. SAFETY INFORMATION How to Maintain Your Unit to Receive the Most Efficient and Successful Operation You have selected one of the finest commercial refrigeration units made. It is manufactured under strict quality controls with only the best quality materials available. Your TRUE cooler, when properly maintained, will give you many years of trouble-free service. -
Page 4: Proper Disposal
True Food Service Equipment, Inc. SAFETY INFORMATION DANGER! RISK OF CHILD ENTRAPMENT PROPER DISPOSAL OF THE REFRIGERATOR Refrigerant Disposal Child entrapment and suffocation are not problems of the past. Junked or abandoned display cases are still Your old refrigerator may have a cooling system dangerous… even if they will sit for “just a few days.” If that uses “Ozone Depleting ” chemicals. If you are you are getting rid of your old display case, please follow throwing away your old refrigerator, make sure the the instructions below to help prevent accidents. refrigerant is removed for proper disposal by a Before You Throw Away Your Old Refrigerator or qualified service technician. If you intentionally Freezer: release any refrigerants you can be subject to fines and imprisonment under provisions of the • Take off the doors. -
Page 5: Adapter Plugs
True Food Service Equipment, Inc. SAFETY INFORMATION WARNING! HOW TO CONNECT ELECTRICITY Do not, under any circumstances, cut or remove the ground prong from the power cord. For personal safety, this appliance must be properly grounded. The power cord of this appliance is equipped with a Repair or replace immediately all power cords that have grounding plug which mates with a standard grounding become frayed or otherwise damaged. Do not use a cord wall outlet to minimize the possibility of electric shock that shows cracks or abrasion damage along its length or hazard from this appliance. -
Page 6: Installation / Operation Instructions Ownership
True Food Service Equipment, Inc. INSTALLATION / OPERATION INSTRUCTIONS INSTALLATION / OPERATION INSTRUCTIONS OWNERSHIP To ensure that your unit works properly from the first Before you start to install your TRUE unit, carefully day, it must be installed properly. We highly recommend inspect it for freight damage. If damage is discovered, a trained mechanic and electrician install your TRUE immediately file a claim with the delivery freight carrier. equipment. The cost of a professional installation is TRUE is not responsible for damage incurred during money well spent. shipment. REQUIRED TOOLS • Adjustable Wrench • Phillips Head Screwdriver • Level UNCRATING B. Move your unit as close to the final location as The following procedure is recommended for uncrating the unit:... - Page 7 True Food Service Equipment, Inc. INSTALLATION / OPERATION INSTRUCTIONS LOCATING C. Carefully lift cabinet upright. A. Remove packing material behind cabinet as a cushion. Carefully lay the unit on its back to remove D. Applicance tested according to the climate classes 5 skid. and 7 for temperature and relative humidity. When lifting unit remember to leave the Removing skid from cabinet upright for 24 hours before bottom of cabinet. plugging into power source. B. Remove skid by unscrewing all base rail anchor brackets. Place skid to the side.
- Page 8 True Food Service Equipment, Inc. INSTALLATION / OPERATION INSTRUCTIONS DEFROST TIME CLOCK OPERATION (GRASSLIN TIMER) RECOMMENDED DEFROST SETTINGS: Adjusting The Defrost Timer: STEP 1 The white tabs located on the outmost area TRUE Manufacturing has factory set your (time initiated, time or temperature defrost time clock to a recommended time terminated) of the time clock have been factory set for and duration defrost scenario. All units (6:00 a.m., 2:00 p.m., and 10:00 p.m.). will require routine defrosts. Your TRUE Each tab represents 15 minutes of defrost Your TRUE equipment contains a defrost equipment has been designed for three time. Notice that at each defrost time four system that is temperature terminated, defrost periods (6:00 a.m., 2:00 p.m. and white tabs are set for 15 minutes each for a however the time clock has been designed total of 60 minutes of defrost.
- Page 9 True Food Service Equipment, Inc. INSTALLATION / OPERATION INSTRUCTIONS TEMPERATURE CONTROL ADJUSTMENT FOR HIGH ALTITUDE ONLY! TERMS: STEP 4 • Cut-out - Temperature sensed by For high elevation installations, it the controller that shuts the compres- may be necessary to “warm-up” the sor off. set points. To make the adjustment, insert the appropriate tool in each • Cut-in - Temperature sensed by the adjustment screw and turn 1/4 of a controller that turns the compressor revolution clockwise (to the right). This procedure will adjust both the cut-in and cut-out about 2°F warmer. TOOLS REQUIRED: STEP 5 • Phillips head screwdriver • " or 2 mm Allen Key Make sure to reconnect the pink wire • T-7 Torx Key to the proper spade terminal when reinstalling.
-
Page 10: Conductors And Circuits
True Food Service Equipment, Inc. INSTALLATION / OPERATION INSTRUCTIONS CONDUCTORS AND CIRCUITS Wire Gauge for 2% Voltage Drop in Supply Circuits. 115 Volt Distance In Feet To Center of Load Amps 100 120 140 160 Wire Gauge for 2% Voltage Drop in Supply Circuits. 230 Volt Distance In Feet To Center of Load Amps... -
Page 11: Electrical Instructions & Start-Up
True Food Service Equipment, Inc. INSTALLATION / OPERATION INSTRUCTIONS ELECTRICAL INSTRUCTIONS A. Before your new unit is connected to a power supply, NOTE check the incoming voltage with a voltmeter. If To reference wiring diagram - Remove front louvered grill, wiring diagram is positioned on the inside cabinet wall. anything less than 100% of the rated voltage for operation is noted, correct immediately. B. All units are equipped with a service cord, and must Curved Glass Deli Cases be powered at proper operating voltage at all times. -
Page 12: Shelving Installation & Operation
True Food Service Equipment, Inc. INSTALLATION / OPERATION INSTRUCTIONS SEALING CABINET TO FLOOR Optional D. When applying the cove base trim, thoroughly clean both the cabinet and floor of dirt and grease. Apply A. It may be necessary to seal the deli case to the floor a recommended contact cement to the cove base for local sanitary codes or if the customer so desires. trim. After cove base trim has dried, fill in cracks and TRUE recommends either of the following methods. joints with a caulking material. B. Using a vinyl cover base trim as produced by E. When applying a mastic, draw an outline of the Armstrong, Johnson, or Kentile (available at floor cabinet on the floor. Raise and block the front side of covering suppliers) or the cabinet. Apply a bead of mastic to the floor 1/2” inside the outline drawn. Lower the cabinet. Raise C. Using mastics available at hardware stores. and block the rear side of the cabinet. Apply the bead of mastic, lower the cabinet. SHELVING INSTALLATION / OPERATION STAINLESS STEEL SHELF INSTALLATION NOTE... - Page 13 True Food Service Equipment, Inc. INSTALLATION / OPERATION INSTRUCTIONS SHELVING INSTALLATION / OPERATION INSTALLING BAKERY CASE SHELVES Step 1 A. Lift each door up and out of track (do not disconnect elastic tubing). Stretch elastic surgical tubing and set doors on each side of unit. B. Remove brackets, lights, shelves, etc. from cabinet interior. C. Locate shelf supports wrapped in Figure 1. micro foam and install teeth end into stainless pilasters located on interior walls. Adjust to desired height matching right and left pairs. See Figure 1 & 2. D. Locate three horizontal lights wrapped in micro foam and install (light side down). Electrical cords...
-
Page 14: Maintenance, Care & Cleaning
True Food Service Equipment, Inc. MAINTENANCE, CARE & CLEANING CLEANING THE CONDENSER COIL TOOLS REQUIRED: STEP 6 • Phillips Screwdriver After brushing condenser coil vacuum • 5/64" Stiff Bristle Brush dirt from coil, and interior floor. • Adjustable Wrench • Vacuum Cleaner STEP 7 Replace cardboard cover. STEP 1 Carefully slide compressor assembly Unplug or disconnect power to back into position and replace bolts. the cabinet. STEP 8 STEP 2 Reinstall louver assembly onto unit, Take off rear lower grill assembly tighten all screws. by removing two (2) bottom screws. STEP 9 If necessary, loosen screws holding the top pivot pins. Swing grill up... -
Page 15: Important Warranty Information
True Food Service Equipment, Inc. MAINTENANCE, CARE & CLEANING IMPORTANT WARRANTY INFORMATION Condensers accumulate dirt and require cleaning every 30 days. Dirty condensers result in com- pressor failure, product loss, and lost sales... which are not covered by warranty. If you keep the Condenser clean you will minimize your service expense and lower your electrical costs. The Condenser requires scheduled cleaning every thirty days or as needed. -
Page 16: Stainless Steel Equipment Care & Cleaning
True Food Service Equipment, Inc. MAINTENANCE, CARE & CLEANING STAINLESS STEEL EQUIPMENT CARE AND CLEANING CAUTION: Do not use any steel wool, abrasive or chlorine based products to clean stainless steel surfaces. Stainless Steel Opponents • There are three basic things which can break down your stainless steel’s passivity layer and allow corrosion to rear its ugly head. 1. Scratches from wire brushes, scrapers, and steel pads are just a few examples of items that can be abrasive to stainless steel’s surface. 2. Deposits left on your stainless steel can leave spots. You may have hard or soft water depending on what part of the country you live in. Hard water can leave spots. Hard water that is heated can leave deposits if left to sit too long. -
Page 17: Light Bulb Replacement
True Food Service Equipment, Inc. MAINTENANCE, CARE & CLEANING STAINLESS STEEL EQUIPMENT CARE AND CLEANING Recommended cleaners for certain situations / environments of stainless steel A) Soap, ammonia and detergent medallion applied with a cloth or sponge can be used for routine cleaning. B) Arcal 20, Lac-O-Nu Ecoshine applied provides barrier film for fingerprints and smears. C) Cameo, Talc, Zud First Impression is applied by rubbing in the direction of the polished lines for stubborn stains and discoloring. D) Easy-off and De-Grease It oven aid are excellent for removals on all finishes for grease-fatty acids, blood and burnt-on foods. E) Any good commercial detergent can be applied with a sponge or cloth to remove grease and oil. F) Benefit, Super Sheen, Sheila Shine are good for restoration / passivation. NOTE The use of stainless steel cleaners or other such solvents is not recommended on plastic parts. -
Page 18: Warranty (U.s.a. & Canada Only!)
EFRIGERATION ® MADE IN U.S.A. WARRANTY INFORMATION (U.S.A & CANADA ONLY!) SINCE 1945 THIS WARRANTY ONLY APPLIES TO UNITS SHIPPED FROM TRUE’S MANUFACTURING FACILITIES AFTER JANUARY 1, 2013. PRODUCT MUST BE PURCHASED IN THE COUNTRY WHERE SERVICE IS REQUESTED. THREE YEAR PARTS & LABOR WARRANTY TRUE warrants to the original purchaser of every new TRUE refrigerated unit, the cabinet and all parts thereof, to be free from defects in material or workmanship, under normal and proper use and maintenance service as specified by TRUE and upon proper installation and start-up in accordance with the instruction packet supplied with each TRUE unit.
Need help?
Do you have a question about the TCGG-48-S and is the answer not in the manual?
Questions and answers