Table of Contents
Advertisement
Quick Links
TRUE FOOD SERVICE EQUIPMENT, INC.
2001 East Terra Lane • O'Fallon, Missouri 63366
(636)-240-2400 • FAX (636)272-2408 • INT'L FAX (636)272-7546 • (800)325-6152
Parts Department (800)424-TRUE • Parts Department FAX# (636)272-9471
I N S TAL LATIO N M A N U A L F O R
T C GD D I S P L AY C AS E S (D RY B A KE RY ) M OD E LS
TABLE OF CONTENTS
Safety Precautions ---------------------- 1
Proper Disposal ------------------------- 2
Connecting Electricity ------------------- 3
Adapter Plugs -------------------------- 3
Ownership ----------------------------- 4
Required Tools -------------------------- 4
TCGD-50
Uncrating ------------------------------ 4
Locating ------------------------------- 5
Leveling Cabinet ------------------------ 5
Electrical Instructions -------------------- 6
Start-up -------------------------------- 6
Wire Gauge Chart ----------------------- 7
Shelving Installation --------------------- 8
Installing Optional Castors --------------- 9
Installing Optional Laminate Kit ---------- 10
Optional Sealing Cabinet To Floor -------- 11
Cabinet Cleaning ---------------------- 11
TCGD-77
Light Bulb Replacement ----------------- 12
Warranty (U.S.A. and Canada ONLY!) ----- 13
* Spanish, German, French and Dutch versions included.
CONGRATULATIONS!
You have just purchased the finest display case
available. You can expect many years of
trouble-free operation.
C U RV ED GL AS S DI SP LAY C ASE S
- D RY BAK ERY -
............ www.truemfg.com ............
#912625 • RD 3/13
Advertisement
Table of Contents

Related Manuals for True TCGD


Summary of Contents for True TCGD
-
Page 1: Table Of Contents
2001 East Terra Lane • O’Fallon, Missouri 63366 (636)-240-2400 • FAX (636)272-2408 • INT’L FAX (636)272-7546 • (800)325-6152 Parts Department (800)424-TRUE • Parts Department FAX# (636)272-9471 I N S TAL LATIO N M A N U A L F O R... - Page 2 True Food Service Equipment, Inc..... www.truemfg.com ....
-
Page 3: Safety Information
Successful Operation You have selected one of the finest display cases made. It is manufactured under strict quality controls with only the best quality materials available. Your TRUE cooler, when properly maintained, will give you many years of trouble-free service. -
Page 4: Proper Disposal
• Leave the shelves in place so that children may not easily climb inside. USE OF EXTENSION CORDS NEVER USE AN EXTENSION CORD! TRUE will not warranty any display case that has been connected to an extension cord (applies to cabinets ordered with optional 12" power cord). REPLACEMENT PARTS • Component parts shall be replaced with like components. -
Page 5: Connecting Electricity
True Food Service Equipment, Inc. SAFETY INFORMATION WARNING! HOW TO CONNECT ELECTRICITY Hard wiring is required on standard "Dry" Display Cases. Optional 12" (30.5 cm) corded model available, factory installed only (exterior scale receptacle will not be included with this option). -
Page 6: Installation / Operation Instructions Ownership
INSTALLATION / OPERATION INSTRUCTIONS INSTALLATION / OPERATION INSTRUCTIONS OWNERSHIP To insure that your unit works properly from the first Before you start to install your TRUE unit, carefully day, it must be installed properly. We highly recommend inspect it for freight damage. If damage is discovered, a trained mechanic and electrician install your TRUE immediately file a claim with the delivery freight carrier. equipment. The cost of a professional installation is TRUE is not responsible for damage incurred during money well spent. shipment. REQUIRED TOOLS • Tin Snips / Band Cutters • " (19 mm) Open-End Wrench • Claw Hammer • Phillips Head Screwdriver • Hex Head Driver • Level • Adjustable Wrench... -
Page 7: Locating
True Food Service Equipment, Inc. INSTALLATION / OPERATION INSTRUCTIONS LOCATING TOOLS REQUIRED: • Phillips screw driver • ” (9.5 mm) socket or ” (9.5 mm) wrench A. Use a Phillips screw diver and remove four screws from the L-bracket connected the unit to the wood skid (image 1). Then use a 3/8” (9.5 mm) socket or wrench and remove the L-bracket from the unit (image 2). To avoid damage to glass DO NOT lay cabinet on its side or back when removing skid, installing leg levelers, cleaning, etc. Removing bracket from skid. B. Lift up from the base and walk unit off the skid and set in final location. Removing bracket from cabinet. C. Unblock doors, (free plastic wedges, blue foam and tape. Remove fiberglass tape securing glass. Remove components: (shelves, brackets, etc.) from inside cabinet. -
Page 8: Electrical Instructions
DISPLAY CASES (hard wired models only) REPLACEMENT PARTS Hard wired Bakery Cases are equipped with TRUE maintains a record of the cabinet serial number for a service receptacle (found on the upper right cabinet backside). No electrical load greater your unit. If at any time during the life of your display case, than 4.0 amps should be connected to it. a part is needed, you may obtain this part by furnishing the model number and serial number to the company from whom you purchased the cabinet. -
Page 9: Wire Gauge Chart
True Food Service Equipment, Inc. INSTALLATION / OPERATION INSTRUCTIONS CONDUCTORS AND CIRCUITS Wire Guage for 2% Voltage Drop in Supply Circuits. 115 Volt Distance In Feet To Center of Load Amps 100 120 140 160 Wire Guage for 2% Voltage Drop in Supply Circuits. -
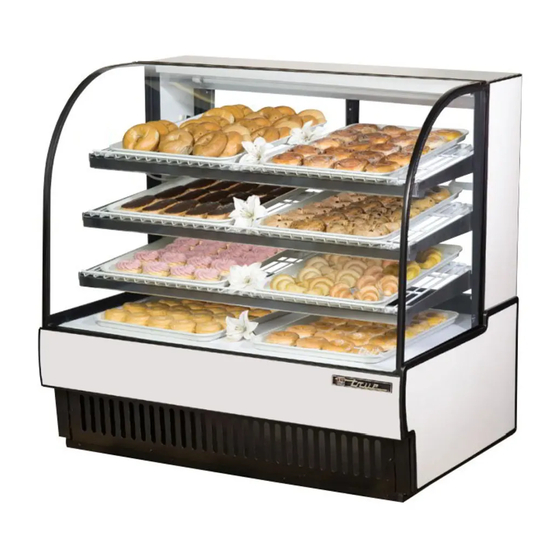
Page 10: Shelving Installation
True Food Service Equipment, Inc. INSTALLATION / OPERATION INSTRUCTIONS SHELVING INSTALLATION ("DRY" BAKERY) SHELF INSTALLATION: A. Lift each door up and out of track (do not disconnect elastic tubing). Stretch elastic surgical tubing and set doors on each side of unit. B. Locate brackets, lights, shelves, etc. from cabinet interior. C. Locate shelf supports wrapped in micro foam and install teeth end into stainless pilasters located on Install shelf supports. teeth interior walls. Adjust to desired height matching right end into stainless pilasters. -
Page 11: Installing Optional Castors
True Food Service Equipment, Inc. INSTALLATION / OPERATION INSTRUCTIONS OPTIONAL (INSTALLING OPTIONAL CASTORS FOR MODELS WITH 12" CORD OPTION ONLY) CASTOR INSTALLATION: TOOLS REQUIRED: • Castor wrench (if not included contact TRUE) • Adjustable wrench NOTE Castors not available for hard wired models. WARNING Make sure unit is empty of all its contents (shelving, shelving lighting). -
Page 12: Installing Optional Laminate Kit
True Food Service Equipment, Inc. INSTALLATION / OPERATION INSTRUCTIONS OPTIONAL (INSTALLING OPTIONAL LAMINATE KIT) NOTE: NOTE: Laminate Kit Components 2 Laminate Top End Pieces After installing the bottom end pieces The bottom left and right pieces are Dimensions: width = 10-3/4”... -
Page 13: Maintenance, Care & Cleaning
True Food Service Equipment, Inc. MAINTENANCE, CARE & CLEANING OPTIONAL (SEALING CABINET TO FLOOR) It may be necessary to seal the bakery case to the floor for C. When applying a mastic, thoroughly clean both the local sanitary codes or if the customer so desires. TRUE rec- cabinet and floor of dirt and grease. Draw an outline ommends either of the following methods. of the cabinet on the floor. Raise and block the front side of the cabinet. Apply a bead of mastic to the floor A. Using a vinyl cove base trim as produced by " (1.3 cm) inside the outline drawn. Lower the Armstrong, Johnson, or Kentile (available at floor cover- cabinet. Raise and block the rear side of the cabinet. ing suppliers) or Apply the bead of mastic, lower the cabinet. Using mastics available at hardware stores. B. When applying the cove base trim, thoroughly clean both the cabinet and floor of dirt and grease. Apply a recommended contact cement to the cove base trim. After cove base trim has dried, fill in cracks and joints with a caulking material. CABINET CLEANING • The exterior may be wiped clean with mild soap and... -
Page 14: Light Bulb Replacement
True Food Service Equipment, Inc. MAINTENANCE, CARE & CLEANING LIGHT BULB REPLACEMENT SHELF MOUNTED BULB REPLACEMENT: WARNING When replacing a light bulb make sure power to the unit is either turned off or unplugged. A. Unplug the light assembly from the receptacle on the interior side wall. Remove shelf and light assembly from cabinet. B. Remove the lampshield by gently squeezing the sides together and rotating out (image 1). -
Page 15: Warranty (U.s.a. And Canada Only!)
WARRANTY CLAIMS All claims for labor or parts must be made directly through TRUE. All claims should include: model number of the unit, the serial number of the cabinet, proof of purchase, date of installation, and all pertinent information supporting the existence of the alleged defect.
Need help?
Do you have a question about the TCGD and is the answer not in the manual?
Questions and answers