Tascam MX-2424 Operational Tutorial
24-track 24-bit hard disk recorder
Hide thumbs
Also See for MX-2424:
- Owner's manual (67 pages) ,
- Manual update (60 pages) ,
- Instructions manual (15 pages)

Related Manuals for Tascam MX-2424


Summary of Contents for Tascam MX-2424
- Page 1 TASCAM TEAC Professional Division MX-2424 24-Track 24-Bit Hard Disk Recorder Operational Tutorial...
-
Page 2: Table Of Contents
Track Select............................... 11 Edit Controls..............................11 Transport & Locate............................11 Data Entry................................12 Jog/Shuttle Wheel.............................. 12 MX-2424 Control Sections..........................12 Navigating the System ..........................13 Jog/Shuttle Wheel & Affiliated Buttons ......................13 Main Menu Buttons Explained......................13 [SETUP] ................................14 Setup Bank Descriptions ........................... 14 [PROJ/NEW].............................. - Page 3 LED Conventions .............................. 20 Changing Parameters ............................20 Escaping an Action............................21 First Session ..........................22 Loading the Factory Demo ........................22 Loading the Factory Demo Song ........................22 Creating a Project..........................23 Create a New Project ............................23 Choosing The Project’s Parameters ....................24 Selecting a Sample Rate ............................
- Page 4 Digital Transfers ...........................42 Hard Drive & SCSI Basics......................42 Remaining Drive Space ........................42 Checking Remaining Recording Time....................... 42 SCSI Basics............................42 SCSI Connection Rules ............................. 43 Hard Drive Management ........................44 Backup Your Stuff! ............................44 DVD-RAM:............................... 45 Ethernet: ................................45 Offline: ................................45 Disk Cleanup ............................46 Performing a Disk Cleanup..........................
-
Page 5: Introduction
INTRODUCTION INTRODUCTION Congratulations on the purchase of your new MX-2424. We are pleased that you’ve chosen the MX-2424 for your digital multi-tracking needs. The MX-2424 is a very flexible Hard Disk Recorder/Editor with many powerful features. Designed and built to exacting standards, the MX-2424 will give you many years of outstanding service—the... -
Page 6: Using This Tutorial
USING THIS TUTORIAL USING THIS TUTORIAL This tutorial covers the basics of how to set up and operate the MX-2424. It provides details on the machine's operating conventions and gives a step by step tutorial on recording your first project. There are four main sections: Setup, Recording Your First Project, Digital Audio Basics and a Glossary of terms. -
Page 7: Hot Tips
• HOT TIP! — While reading the MX-2424 Instructions & Tutorial guide, keep your eyes peeled for special operating tips that are highlighted in boxes just like this one. -
Page 8: Explaining The I/O Options
Whether your mixing console has analog or digital connections, or some combination of the two, the MX-2424 can be outfitted with the connectors that best suit your system. -
Page 9: Set Up
But with your MX-2424 plugged into a UPS, you can avoid this pitfall. A UPS will provide enough power to run your MX-2424 for several minutes, without power from a utilities company. -
Page 10: Audio Cable Considerations
ADAT Optical and TDIF in a variety of convenient lengths. Visit us online to see our full Cable Up product line and ask you local TASCAM dealer which Cable Up cables are right for your setup. -
Page 11: Getting Around
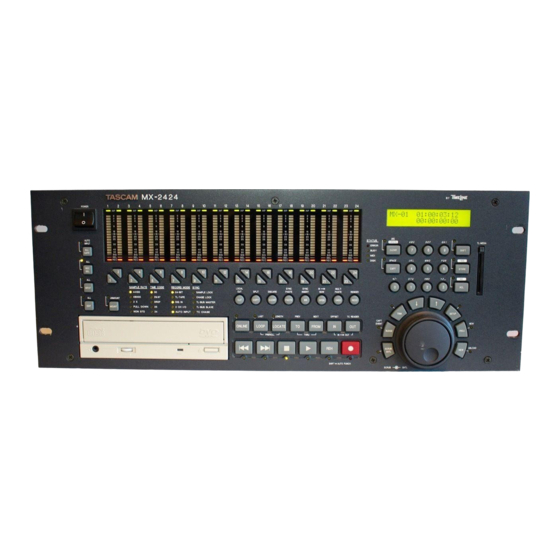
GETTING AROUND GETTING AROUND When you first look at your MX-2424's front panel, the wide array of buttons can be overwhelming. However, understanding that the MX-2424's front panel is divided into several different control sections, each with it's own set of related functions, can help bring the front panel into clear focus. -
Page 12: Data Entry
Jog/Shuttle Wheel Surrounding the Jog/Shuttle wheel are several buttons for navigating the MX-2424's system, project, and track pages. Use these buttons to call up specific LCD displays, scroll through menus, and edit parameters. The Jog/Shuttle Wheel isn't just for audio editing, it also doubles as a data entry and navigation tool. -
Page 13: Navigating The System
LCD displays. Below are descriptions of these displays and their associated menu items. • HOT TIP! — Many buttons on the MX-2424 are dual function, that is, they have a shifted function. Press [SHIFT] (located near the top right of the numeric keypad in the Data Entry section) and then hit the button whose shifted function you want to access. -
Page 14: [Setup]
MX-2424's system setup menus. These menus [SETUP] include everything having to do with how your MX-2424 operates. For example, from these pages you can set sample rate, format a hard drive, choose a recording mode (TapeMode or non-destructive), specify timecode type, and decide how specific transport buttons will operate. -
Page 15: Load
Load - 15 -... -
Page 16: Delete
Delete - 16 -... -
Page 17: Rename
Rename - 17 -... -
Page 18: Smart Copy - Tapemode Convert - Convert/Copy Abort
Smart Copy – TapeMode Convert – Convert/Copy Abort - 18 -... - Page 19 [VIEW/UNLOAD] Press [VIEW/UNLOAD] to see the names of the tracks in your current project (see the LCD illustration below). In this display, you can scroll through the tracks one at a time using the [Up Arrow] and [Down Arrow] buttons, or the Jog Dial. It is also possible to go directly to a track using the Track Select buttons.
-
Page 20: Operating Conventions
There are several prompts, indicators, and ways of performing an action which are common across many functions of the MX-2424. These are called operating conventions and they help to streamline the MX-2424's interface. For example, the Scrub Dial, the [Up Arrow] and [Down Arrow] work as navigation tools in every window. -
Page 21: Escaping An Action
• Pressing [CLEAR/CANCEL] lets you escape any page or action and returns you back to the main timecode display. • Press [UNDO] to reverse the last edit operation or recording pass (if your MX-2424 is in the non-destructive record mode—more on this in a minute). Each consecutive press of [UNDO] takes you back to the previous edit or recording pass, up to 100 times. -
Page 22: First Session
Loading the Factory Demo Song 1) Turn your MX-2424 on using the rocker type power switch on its face. Give it a minute to boot up. You will see the message, "Mounting Volumes," on the LCD. When it... -
Page 23: Creating A Project
4) Press [STORE/YES] and your new project is created. An asterisk will appear in front of the project's name to let you know it is the currently loaded project. The project is stored in the memory of the MX-2424 but not actually written to disk until audio is recorded. -
Page 24: Choosing The Project's Parameters
• HOT TIP! — If you tend to record at a sample rate other than 44.1 kHz on a regular basis, you may want to set a different sample rate as your MX-2424's default. Press [9] to jump to system page #900 ("Store Settings") and press [STORE/YES]. This stores the new sample rate as your default. -
Page 25: Tapemode Or Non-Destructive
Destructive Mode allows you to perform/undo/redo edits as well as undo/redo recordings. In Non-Destructive Mode, an Edit Decision List (EDL) called a project file is written on the drive by the MX-2424 to keep track of all your recordings and edits. The Non-Destructive Mode is the MX-2424's default setting. -
Page 26: Creating A Tapemode Project
• HOT TIP! — Generally, it’s a good idea to avoid starting a project at 00:00:00:00 due to the need for pre-roll during loop, auto-punch or synchronized operation. If a pre-roll value sends the transport to a location earlier than 00:00:00:00 the MX-2424 would not know to go forward or backward. -
Page 27: Record
1) Use the Track Select buttons to arm the track, or tracks, you want to record on. 2) Send some audio from your mixer to the MX-2424's input. You should see a level, representing the incoming signal, on the record enabled tracks’ meters. Be sure the outputs of the MX-2424 are connected to playback channels of your mixer in order to hear the recorded sound. -
Page 28: Naming Tracks
Naming Tracks 1) After recording a track, you may want to name it. Since the MX-2424 automatically assigns your track a name (for example, "MX Trk 2_002"), naming a track is actually the process of renaming a track. 2) Press [PROJ/NEW]. -
Page 29: Power Off
The MX-2424''s internal hard drive should be unmounted before powering down. Make it a habit to unmount your hard drive before turning your MX-2424 off. • HOT TIP! — Remember also to make a back up of your most current work. If you have done anything during your last session that you want to keep, back it up now. -
Page 30: Making Operating Choices
The MX-2424 has a few different recording and monitoring modes. However, by default—when you first take your MX-2424 out of its box—it acts just like a traditional tape machine. That is, when a track is record enabled, in Stop and Record you hear your source inputs, and in Play you hear playback (the recording on the hard disk). -
Page 31: Entering Record
While the default method of punching in and out is familiar to many people, there are alternative methods to choose from. For example, you can set your MX-2424 to enter record without having to hold down [Play]. In this mode, all you need to do is press [Record] to punch in (to punch out you still hit [Play]). -
Page 32: Setting One Button Recording
5) To change one touch "Record" back to "Record + Play," repeat steps 1 to 4. Footswitch Punching 1) Make sure your MX-2424 is turned off, and plug in the footswitch. The footswitch jack is located on the rear of your MX-2424 (at the bottom left corner). -
Page 33: Setting Auto Punch
[IN/OFFSET] button as the punch in point. 3) With your MX-2424 still in play, press [CAPT/SPACE] at the desired punch Out Point and press [OUT/TC READER] to assign the Out Point to the [OUT/TC READER] button. -
Page 34: Rehearse Function
Rehearse Function Sometimes you just aren't sure if your punch In and Out Points are set right. On other occasions, a musician might need to practice their part along with the recorded tracks and hear where the punch will happen. In both instances, you need to monitor playback before and after the punch, and monitor the incoming signal during the punch without recording. -
Page 35: Virtual Tracks
24 tracks. Using Virtual Tracks You are in complete control of creating Virtual Tracks. The MX-2424 does not, by default, create virtual tracks every time you go into record. Instead, it is up to you whether the track you recorded will become a Virtual Track or not. -
Page 36: Unloading Tracks
Unloading Tracks 1) Press [VIEW/UNLOAD]. 2) Select the track you want to Unload using the Track Select buttons. When you have selected a track for unloading, the "SEL" LED of the track's Track Meter will blink to indicate the chosen track. You will also see the track's number and name on the second line of the LCD screen;... -
Page 37: Loading A Track
Loading a Track 1) Press [PROJ/NEW]. (The display should look like this.) Load *Select Action 2) Press [STORE/YES]. You should see the names of the projects currently on your hard drive. For example: Load Project Warmness.t1 [0:212] 3) Scroll to the project that contains the Virtual Tracks you want to load. (Don't press "Yes"... -
Page 38: Locate Functions
There are times when you need more than just a pen and paper to keep track of location points. Fortunately, the MX-2424 can remember up to 100 locations that are automatically stored in your project file. Locations can be stored or recalled using the numeric keypad. -
Page 39: Recalling A Location
4) Press [Play] to begin playback from the recalled memory location. 5) To return to the regular timecode screen, press [CLEAR/CANCEL]. • HOT TIP! — Using memory locations, you can take full advantage of your MX-2424's non-linear playback capabilities. For example, storing locate points for different sections of your song (such as, verse, chorus, bridge, and so on) will give you instant access to those parts. -
Page 40: Digital Recording Basics
• HOT TIP! — When operating in one of the high sample rate modes (88.2 kHz or 96 kHz, the MX-2424 reduces its track count by half to 12 to take into account the doubled amount of data. In this way 12 tracks of 24-bit/96 kHz audio takes up the same amount of storage space as 24 tracks of 24-bit/48 kHz audio. -
Page 41: Bit Depth Defined
256 numbers, with 16-bits it can make 65,536 numbers, and with 24-bits (like the MX-2424) it can express a whopping 16,777,216 numbers. The number of bits used to represent each sample of sound is the resolution, or bit depth. -
Page 42: Digital Transfers
Digital Transfers The only time you don't have to set a level going into your MX-2424 is when you make a digital transfer (such as, AES/EBU, TDIF, or ADAT Optical). This is because the level has already been set at the source. During a digital transfer, the MX-2424 is simply copying data from the digital source to its own hard drive HARD DRIVE &... -
Page 43: Scsi Connection Rules
9) High quality SCSI cables will greatly improve the reliability of a SCSI bus. • HOT TIP! — Approved devices are hard drives, removable media systems, and other SCSI peripherals that have been successfully tested with the MX-2424. To see the most current approved device list, visit our web site (www.TASCAM.com). -
Page 44: Hard Drive Management
You can never tell when you might need to recall an old project for some reason later. If you did not purchase a backup solution with your MX-2424, now is a good time to do so while you are experimenting and getting to know your new recorder. Following are explanations of some backup solutions. -
Page 45: Dvd-Ram
2) If the DVD-RAM disk is initialized to FAT-32 by the MX-2424 then it will be treated like a hard drive by the Smart Copy process. The advantage of this method is that a FAT-32 DVD-RAM disk will be recognized by a PC. -
Page 46: Disk Cleanup
Performing a Disk Cleanup 1) To clear the MX-2424’s memory of your current project, you must first unmount then remount the drive. Press [SHIFT] then [UNMOUNT] to unmount the hard drive. Then press [MOUNT] to remount the drive. -
Page 47: Low Level Formating
Low Level Formating A low level format erases a disk sector by sector and maps out any physically bad sectors in the drive’s FAT (File Allocation Table). This is different than initializing a disk which simply erases the disk's master directory files. Low level formatting always takes longer than initializing a disk—about 20 minutes for a 9 GB drive. -
Page 48: Initializing A Drive
When you initialize a hard drive you define its format type. In turn, this format type dictates the kind of audio files the MX-2424 will write. The MX-2424 supports three formats, HFS, HFS+ and FAT 32. The HFS and HFS+ formats are compatible with Apple Macintosh computers, and supports the time stamped Sound Designer II (SDII) audio file format (popularized by Digidesign's Pro Tools). -
Page 49: Synchronization Basics
For example, when 24 tracks just aren't enough, or maybe you need to lock the MIDI tracks of your sequencer with the audio tracks on your MX-2424. In these instances, you must lock your multi-track decks together for synchronized operation. -
Page 50: Selecting A Frame Rate
4) If you have selected a valid external digital clock source that is connected to the MX- 2424, the "SAMPLE LOCK" LED will light. If the "SAMPLE LOCK" LED is blinking, it means that the MX-2424 is not receiving the digital clock source set in Menu 002. Chasing Timecode 1) Press [SETUP] then the [0] button on the numerical keypad. -
Page 51: Glossary
GLOSSARY GLOSSARY GLOSSARY GLOSSARY A/D Converter (ADC) This is a hardware device that converts analog voltages into digital information. AES/EBU A protocol for transferring digital audio agreed to by the Audio Engineering Society and the European Broadcast Union. AES/EBU connections require 110 Ohm cable. ADAT This acronym (Alesis Digital Audio Technology) refers not only to the ADAT multi-track machine itself, but also to its recording medium and the optical connection that transmits eight channels of digital audio on a... - Page 52 Smart Media Card A thin rewritable data card. The MX-2424 uses a Smart Media Card to update its Operating System. SMPTE An acronym for the Society of Motion Picture and Television Engineers. This term is often used in place of the phrase “Linear Time Code”...
Need help?
Do you have a question about the MX-2424 and is the answer not in the manual?
Questions and answers