Tascam MX-2424 Owner's Manual
24 track 24 bit hard disk recorder, remote control unit
Hide thumbs
Also See for MX-2424:
- Manual update (60 pages) ,
- Operational tutorial (52 pages) ,
- Instructions manual (15 pages)

Related Manuals for Tascam MX-2424


Summary of Contents for Tascam MX-2424
- Page 1 » D00224500A MX-2424 24 Track 24 Bit Hard Disk Recorder RC-2424 Remote Control Unit OWNER'S MANUAL...
-
Page 2: Table Of Contents
Menu Bank 800 Project Menu Bank 900 System Advanced Functions Auto Punch Loop Mode Auto Punch/Loop Mode Using & Managing Virtual Tracks Auto Unload Editing Functions MX-OS Operations System Specifications Check the TASCAM web site at http://www.tascam.com For software and manual updates... - Page 3 Important Safety Precautions Important Safety Precautions Important Safety Precautions Important Safety Precautions CAUTION: TO REDUCE THE RISK OF ELECTRIC SHOCK, DO NOT REMOVE COVER (OR CAUTION: TO REDUCE THE RISK OF ELECTRIC SHOCK, DO NOT REMOVE COVER (OR CAUTION: TO REDUCE THE RISK OF ELECTRIC SHOCK, DO NOT REMOVE COVER (OR CAUTION: TO REDUCE THE RISK OF ELECTRIC SHOCK, DO NOT REMOVE COVER (OR BACK).
-
Page 4: Safety Instructions
Article 810 of the National Electrical Code, ANSI/NFPA 70, provides information with regard to proper grounding of the mast and support- provides information with regard to proper grounding of the mast and support- CE Marking Information of MX-2424 CE Marking Information of MX-2424 CE Marking Information of MX-2424... -
Page 10: Installation
To replace the feet: 1. Insert the fastener into the foot 2. Snap the fastener & foot back into the hole in the bottom of the MX-2424 chassis 3. Snap the screw into the fastener's hole... - Page 11 MX-2424 REAR PANEL ( LRC )
-
Page 12: Rear Panel
Footswitch This connector allows the use of a foot switch for Record Punch In/Out. The MX-2424 will sense the polarity of the footswitch when the unit is powered on with the footswitch connected. (Do not hold down the footswitch during power up as this will cause the MX-2424 to incorrectly sense the polarity.) See MX-2424 Installation for details on... - Page 13 Word Clock In/Out/Thru The Word Clock In connector allows the MX-2424 to lock to a variety of standard word clock sources. If the MX- 2424 is set to read digital clock and it is not present or there is a mismatch in the frequencies, the Sample Lock [50] indicator will flash.
- Page 14 MIDI In/Out/Thru: The MIDI In connector will allow the MX-2424 to lock to MIDI time code for chase play and record. The MX- 2424 will also respond to standard MIDI machine control messages for play, track arm, record, rewind, fast forward, stop, jog/shuttle and scrub.
-
Page 15: Connecting The Mx-2424 (Cabling)
CU/SD105 DB25(M) – DB25(M) 5 Meters 8 Channels, input or output per cable To connect the outputs of the IF-AN24 if installed in the MX-2424 to the inputs of an analog device with XLR connectors: CU/SD203 DB25(M) – XLR(M) 3 Meters CU/SD205 DB25(M) –... - Page 16 [52] Digital Multi-Track Connections To connect digitally to another device using TDIF connections when the IF-TD24 is installed in the MX-2424 (NOTE: This is not an AES/EBU or analog cable.): CU/PW88DS TDIF Cable 0.5 Meter CU/PW88D TDIF Cable 1 Meter...
- Page 17 [62] Net Connection Category 5 Ethernet cables are used to connect the MX-2424 to a computer running the ViewNet application. When connecting directly to a computer a Crossover Cable is used. When connecting to a computer through an Ethernet hub a Straight Cable is used.
- Page 18 XLR(M) – ¼’ TRS(M) 3 Meters CU/AB305 XLR(M) – ¼’ TRS(M) 5 Meters For time code output from the MX-2424 to a device with XLR time code connections CU/AD402 XLR(F) – ¼” TRS(M) 2 Meters CU/AD403 XLR(F) – ¼” TRS(M)
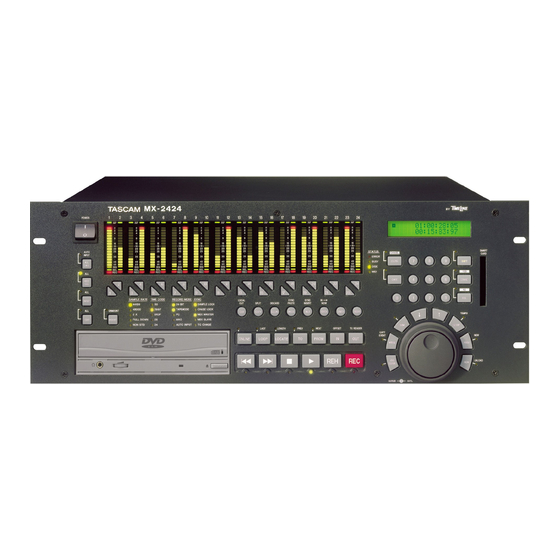
- Page 19 MX-2424 FRONT PANEL...
- Page 20 RC-2424 FRONT PANEL 15 16 19 20 21...
-
Page 21: Front Panel
MOUNT/UNMOUNT When MOUNT [3] is pressed the MX-2424 will attempt to mount all drives attached to the SCSI bus. If there are any devices on the SCSI bus already mounted then un-mounted drives will not be mounted and “Already Mounted”... - Page 22 Record Mode LED’s (Yellow) 24-BIT: Indicates that the MX-2424 will record new audio in 24-bit mode. When the LED is off the MX- 2424 will record new audio in 16-bit mode. Indicates that the MX-2424 is in TL-Tape Mode. When this LED is off the MX-2424 is in non- TL-TAPE: destructive mode.
-
Page 23: Edit Keys
UNDO This key reverses the last edit operation. This key will also undo the previous recording pass if the MX-2424 is in non-destructive mode. There are 100 level of undo available. In and Out points will be updated according to the operation that has been undone. -
Page 24: Special Transport Keys
From the MX-2424: Pressing ONLINE [25] so that its LED is lit will enable the MX-2424 to chase an external sync source via TL-Bus, SMPTE or MTC as determined in Menus 000 and 110. Online status must also be selected for an MX-2424 to operate as a master on the TL-Bus. - Page 25 TO/PREV/REF [28] From the MX-2424 Pressing TO [28] then IN [30] will play up to the In point and stop (using the pre-roll amount determined in Menu 212). Pressing TO [28] then OUT [31] will play up to the out point and stop (using the pre-roll amount determined in Menu 212).
- Page 26 [30, 31] From the MX-2424 Pressing IN [30] or OUT [31] will cause the MX-2424’s Play Head to locate to the In or Out point and stop. Pressing CAPT [16] then IN [30] or OUT [31] will place the time code location of the Play Head at the time CAPT [16] was pressed into the In or Out memory locations.
-
Page 27: Special Key Combinations
ON (Menu 110) and the Online button is on, then the TL-Bus offset is shown. In all other cases the time code (LTC or MTC) offset is shown. If the MX-2424 is a MASTER on the TL-BUS it will still display the LTC offset since the TL-BUS offset is ignored in this case. -
Page 28: Main Transport Keys
PLAY This button puts the MX-2424 into play mode. If Chase is active or the MX-2424 is a slave on the TL-Bus, this play command takes the MX-2424 offline when pressed on the chasing machine. Pressing PLAY [35] while recording will punch out of record mode while the transport continues to play. -
Page 29: Locator Section
In the Error state pressing CLEAR [15] will clear the error message and return the MX-2424 to the previous operating state. During memory location trim or track slip, pressing the CLEAR [15] key returns the memory locations to their previous values (before the slip or trim operation changed them). During time code entry in the Normal state, CLEAR [15] returns the time code to a zero value. -
Page 30: Jog/Shuttle Wheel & Surrounding Keys
This key is used to recall locations from memory. Pressing RCL [21] then a numeric key sequence (00 through 99) would recall the location currently in that memory location into the lower line of the LCD [18]. The following keys (or key combinations) also represent memory locations that can have values recalled from them: From the MX-2424 [30] [30] <SHIFT>IN<OFFSET>... - Page 31 Pressing <SHIFT> [19] then PROJ<NEW> [45] immediately activates Menu 800 where a new Project may be created by entering a new and unique Project name. If a project is already loaded into the MX-2424 a new project name will automatically be created that is the same as the loaded project with an additional numerical suffix.
-
Page 32: Rc-2424 Specific Functions
[22] TL Media Slot: This slot is used when updating/archiving the version of MX-OS running in the MX-2424. (See MX-OS Operations for details.) RC-2424 SPECIFIC FUNCTIONS [66] MACRO KEYS These keys allow key sequences of up to 99 strokes to be stored and recalled by a single key. -
Page 33: Backup/Restore Procedures
BACKUP/RESTORE PROCEDURES The MX-2424 incorporates an advanced backup software called Smart Copy. This system is a smart back up similar to computer-based backup software. Smart Copy operates on one project at a time, supports disk-spanning on DVD- RAM media and only backs up files that have been added or changed since the last backup. - Page 34 LCD until it is completed. (NOTE: If projects already exist on the tape the backup process will begin after the tape’s directory information has been loaded into the MX-2424’s memory, this may take a few minutes. When completed, press SHIFT then UNMOUNT to remove the Travan...
-
Page 35: Menu Operations
MX-2424 SETUP & CONFIGURATION NAVIGATING THE MX-2424’S MENU STRUCTURE: The menus on the MX-2424 are grouped into ten Menu Banks. The Menu Banks are organized so that related setup menus are in the same Menu Bank. The Menu Banks are as follows: Rates &... -
Page 36: Menu Bank 000 Rates & References
This menu enables the MX-2424 to use house video sync such as blackburst, composite sync or color bars for resolve to the edge of the video frame. Both NTSC and PAL formats can be accepted by the MX-2424. The MX-... - Page 37 Sample Reference The setting of this Menu determines the digital clock source for the MX-2424. This needs to be determined whenever the MX-2424 is digitally connected to another piece of digital equipment. Automatic This will set the MX-2424 to internal clock as long as the Frame Reference is not set to video in Menu 001, in which case the sample clock will lock to video.
- Page 38 Timecode Type From this Menu it is possible to change the frame rate of the time code that is output from the MX-2424. (NOTE: It is not possible for the MX-2424 to chase one frame rate and simultaneously output a different frame rate.) The...
-
Page 39: Menu Bank 100 Buss Controls
TL-Bus. Ident Request This menu chooses manual or automatic selection of machine ID (1-32) for any MX-2424 connected on the TL-Bus. Auto Assign When connected on the TL-Bus the MX-2424 will automatically assign itself to the next available machine ID. - Page 40 (NOTE: The MX-2424 will not loop over “midnight” {time code location 00:00:00:00}. If it is necessary to use 00:00:00:00 as the In point of a Loop operation then the pre-roll will have to be set to zero and audition key commands relative to the In point will not be possible.)
- Page 41 Play Once & Stop This setting will cause the MX-2424 to play from the In point (with Pre-Roll) through the Out point (with Post-Roll) and stop, disengaging LOOP. Loop Record This Menu allows automatic creation of virtual tracks when a record operation is performed. STOP [34] can be pressed at any time to immediately cancel any recording or Loop operation.
-
Page 42: Menu Bank 300 Midi
LAST<ROLLBACK> [77]. A play head Jump can be activated on either the RC-2424 or the front panel of the MX-2424 by holding STOP [34] and pressing either FAST FORWARD [33] or REWIND [32] to send you forward or backward using the amount set up as the Rollback value. - Page 43 [54] digital inputs. 2CH In Source This Menu selects either the AES/EBU [55] or SPDIF [54] input for transferring stereo audio into the MX-2424 digitally. (NOTE: When using input it may be necessary to enable sample rate conversion under Menu 461 and...
-
Page 44: Menu Bank 500 Audio Controls
If selected to Silent Clock, the stereo AES/EBU and SPDIF out connectors will output clock only. This can be useful if an external device needs to be digitally clocked to the MX-2424 using an XLR or RCA connector. (The default setting is 1,2.) - Page 45 Macintosh to Mac OS Standard before recording audio on the MX-2424. If audio has been recorded on a disk with the MX-2424 and it is later determined that the disk must be mounted on a Macintosh then Hard Disk Toolkit 3.0 must be used to install driver software on the disk without affecting the recorded audio.
- Page 46 This Menu Utility is used to free up disk space by deleting all audio files from the disk that are associated with Projects that have been deleted by the MX-2424. THERE IS NO UNDO FOR THIS UTILITY. This process will NOT remove any virtual tracks that are associated with a project.
-
Page 47: Menu Bank 800 Project
SCSI ID’s Mounted This is a display indication only of the SCSI ID number of drives that are currently mounted on the MX-2424. Menu Bank 800: Project Project Name From this Menu it is possible to create a new Project simply by creating a new and unique file name. As soon as audio is recorded for a new Project, audio file directories will be automatically created. - Page 48 This displays the version number of the software currently installed in the MX-2424. Save S/W To Card This Menu Utility allows the firmware in the MX-2424 to be stored to a TL Media card inserted in the TL Media Slot [22]. (Please refer to MX-OS Operations for details.) Copyright ©...
-
Page 49: Advanced Functions
The screen shots below from ViewNet illustrate this. Press SHIFT [19] then REC [37] or REH [36] to enable Auto Record or Auto Rehearse mode. When the MX-2424 is enabled for Auto Record/Rehearse the REC/REH LED will flash to indicate that when the transport is engaged a record/rehearse operation will be executed at the current In/Out points. -
Page 50: Loop Mode
There are three Loop Modes determined by Menu 210 as described below: Play Repeatedly This setting will cause the MX-2424 to play from the In point (with Pre-Roll) through the Out point (with Post-Roll) repeatedly until the STOP key {34} is pressed. (This is the default setting.) -
Page 51: Auto Punch/Loop Mode
Using Auto Punch with Loop Mode If the MX-2424 is set to perform an Auto Record/Rehearse and Loop Mode is engaged then the Auto Punch will be executed at the In and Out points during the Loop operation. When used in this way the MX-2424 will function as described below for the three possible settings of Menu 210. -
Page 52: Using & Managing Virtual Tracks
Virtual Track Overview The MX-2424 is capable of up to 999 Tracks per project. 24 of those tracks can be played back at once. This allows up to 975 virtual tracks to be utilized/stored in a project for alternate takes, work tracks, etc. The process of managing these Virtual Tracks is called loading and unloading. - Page 53 Manually Unloading Tracks To select a track for unloading, press VIEW [46] then use the UP/DOWN [41,43] arrow keys, SCRUB [42] wheel or the Individual Track Selection Keys [4] to choose a track. The SEL indicator will be flashing on the selected track.
-
Page 54: Auto Unload
MX-2424. (NOTE: If using this function in Non-Destructive Record Mode all audio events on a track will be unloaded along with the newly recorded section before recording the next virtual track. -
Page 55: Editing Functions
Editing Functions The CUT function removes the audio from the selected track(s) between the In and the Out points and places it into the clipboard. All subsequent audio will be slipped earlier in time to replace the audio that was cut. LOCAL CUT (SHIFT then CUT) The LOCAL CUT function removes the audio from the selected track(s) between the In and the Out points within an... - Page 56 COPY The COPY function copies the audio from the selected track(s) between the In and Out points and places it into the clipboard. SPLIT (SHIFT then COPY) The SPLIT function creates an event boundary at the play head location.
- Page 57 CLEAR The CLEAR function removes the audio between the In and Out points, replacing it with silence. It does not affect the position of any other audio material on the track(s). DISCARD (SHIFT then CLEAR) The DISCARD function removes the audio on both sides of the In and Out points, replacing it with silence but will NOT remove audio beyond the next or previous edit boundaries.
- Page 58 PASTE PASTE places the contents of the clipboard into the selected track(s) at the position of the In point and overwrites any existing material on those selected tracks starting at the In point and extending for the duration of the clipboard contents.
- Page 59 INSERT INSERT places the contents of the clipboard into the selected track(s) at the In point, while slipping all subsequent audio on the selected tracks later in time an amount equal to the inserted audio. SYNC INSERT (SHIFT then INSERT) Sync insert is similar to SYNC PASTE except instead of pasting over existing audio, the audio is moved later in time an amount equal to the pasted audio.
- Page 60 OPEN OPEN places a segment of silence into the selected track(s) at the In point equal to the time between the In and Out points, while slipping all subsequent audio later in time an amount equal to the time between the In and Out points. IN NOW (SHIFT then OPEN) This function will move the audio defined by the In and Out points to the current position of the play head...
- Page 61 REVERSE (SHIFT then UNDO) The Reverse function reverses the audio on edit-enabled track(s) between the In and Out points. This function will split audio events if necessary. RENDER (SHIFT then REDO) The Render function creates a single continuous audio file from multiple audio events on edit-enabled track(s) between the In and Out points.
-
Page 62: Mx-Os Operations
MX-2424 MX-OS Backup & Update Procedures MX-OS is the system software that the MX-2424 runs. It is stored in Flash ROM inside the MX-2424 for ease of update and speed of power up. This provides the additional advantage of a flexible system so features can easily be added to your MX-2424 as they are developed. - Page 63 Backing Up MX-OS to a Computer It may be desirable to save the version of MX-OS that is currently installed in the MX-2424 to a computer to ensure that version is safely archived if it is ever needed again. With the MX-2424 connected to a Mac or PC via 100Mb Ethernet the steps below will save the version of MX-OS in the MX-2424 to the computer.
- Page 64 LCD and instructions will be displayed in ViewNet. Leave the TL Media card in its slot and cycle the power on the MX-2424. The Flash ROM in the MX- 2424 will be updated with the MX-OS from the TL Media card.
-
Page 65: System Specifications
MX-2424 SYSTEM SPECIFICATIONS 6/15/00 Rev F ANALOG OPTION I/O Capacity: 6 D-Sub 25F connectors, 8 input or 8 output channels per connector. 24 in/out channels total. Quantization: 24 bits, A/D and D/A Sample Rate: 38.5kHz to 54kHz – 24 I/O Channels, or at 96kHz – 12 I/O channels (future s/w) Analog Input and Output Level: +4 dBu balanced, +22 +/- 1 dBu clip, not adjustable. -
Page 66: Main Unit
MX-2424 SYSTEM SPECIFICATIONS 6/15/00 Rev F ADAT OPTION I/O Capacity: 3 Lightpipe I/O connector pairs. 8 In and 8 Out channels per connector set. 24 In / Out channels total. Quantization: 24 bits Sample Rate: 38.5kHz to 54kHz – 24 I/O Channels, or at 96kHz – 12 I/O channels (future s/w) Frequency Response: 20 Hz - 20 kHz +/- 0.0 dB... - Page 67 TASCAM TEAC Professional Division MX-2424 RC-2424 3-7-3, Nakacho, Musashino-shi, Tokyo 180, Japan Phone: (0422) 52-5081 3-7-3, Nakacho, Musashino-shi, Tokyo 180, Japan Phone: (0422) 52-5081 3-7-3, Nakacho, Musashino-shi, Tokyo 180, Japan Phone: (0422) 52-5081 3-7-3, Nakacho, Musashino-shi, Tokyo 180, Japan Phone: (0422) 52-5081...
Need help?
Do you have a question about the MX-2424 and is the answer not in the manual?
Questions and answers