Crown DCi 8|600N Operation Manual

Crown DCi 8|600N Operation Manual

Dci series – network input models

Advertisement

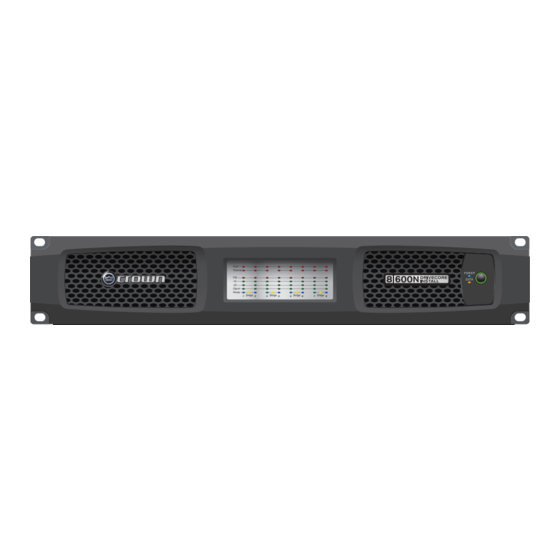
DCi Series – Network Input Models
Obtaining Other Language Versions: To obtain information in another language about the use of this product, please contact your local Crown Distributor. If you need
assistance locating your local distributor, please contact Crown at 574-294-8000.
This manual does not include all of the details of design, production, or variations of the equipment. Nor does it cover every possible situation which may arise during
installation, operation or maintenance.
The information provided in this manual was deemed accurate as of the publication date. However, updates to this information may have occurred. To obtain the latest
version of this manual, please visit the Crown website at www.crownaudio.com.
Trademark Notice: Com-Tech, BCA, Crown, Crown Audio, Amcron and Multi-Mode are registered trademarks of Crown International. DriveCore, DriveCore Install,
IQwic, PIP and PIP2 are trademarks of Crown International. Other trademarks are the property of their respective owners.
Some models may be exported under the name Amcron
© 2013 by Harman International

Operation Manual

®
, Inc. 1718 W. Mishawaka Rd., Elkhart, Indiana 46517-9439 U.S.A. Telephone: 574-294-8000
®
DCi 8|600N
DCi 8|300N
DCi 4|600N
DCi 4|300N
DCi 2|600N
DCi 2|300N
5032774 - 08/13

Advertisement

Table of Contents
loading
Need help?

Need help?

Do you have a question about the DCi 8|600N and is the answer not in the manual?

Questions and answers

Subscribe to Our Youtube Channel

Summary of Contents for Crown DCi 8|600N

  • Page 1: Operation Manual

    Crown website at www.crownaudio.com. Trademark Notice: Com-Tech, BCA, Crown, Crown Audio, Amcron and Multi-Mode are registered trademarks of Crown International. DriveCore, DriveCore Install, IQwic, PIP and PIP2 are trademarks of Crown International. Other trademarks are the property of their respective owners.
  • Page 2: Important Safety Instructions

    DriveCore Install Network Series Power Amplifiers Important Safety Instructions 1. Read these instructions. WATCH FOR THESE SYMBOLS: 2. Keep these instructions. The lightning bolt triangle is used to alert the user to the risk of electric shock. 3. Heed all warnings. The exclamation point triangle is used to alert the user to important 4.
  • Page 3: Declaration Of Conformity

    United Kingdom Equipment Type: Commercial Audio Power Amplifiers Family Name: DCi Model Names: DCi 2|300N, DCi 2|600N, DCi 4|300N, DCi 4|600N, DCi 8|300N, DCi 8|600N EMC Standards: EN 55103-1:2009 EMC Compatibility – Product Family Standard for Audio, Video, Audio-Visual and Entertainment...
  • Page 4: Table Of Contents

    Per Channel Settings ........................................48 Protection System........................................49 Troubleshooting ........................................... 50 DCi Specifications ........................................53 AC Power Draw and Thermal Dissipation ................................55 Service ............................................61 Warranty ............................................63 Crown Audio Factory Service Information ................................. 65 Operation Manual page 4...
  • Page 5: Welcome

    DriveCore Install Network Series Power Amplifiers Welcome Thank you for purchasing a new Crown DriveCore Install Network™ Series installation amplifier, one in a complete line of high-performance amplifiers based on exclusive DriveCore™ technology. DriveCore Install Network Series amplifiers are designed, engineered and manufactured to the industry’s highest quality standards, and provide system integrators with the advanced features and flexibility required for challenging 21st century installed sound applications.
  • Page 6: Installation

    DriveCore Install Network Series Power Amplifiers Installation Unpacking Unpack your amplifier and inspect for any damage that may have occurred during transit. If damage is found, notify the shipping company immediately. Only you can initiate a claim for shipping damage, though Crown will be happy to help as needed. If the product arrived showing signs of damage, save the shipping carton for the shipper’s inspection.
  • Page 7: Front & Back Panel Features

    RJ-11. There are 2 analog the amplifier is in any of these terminal forks. input controls and 2 digital conditions: OFF, SLEEP, or FAULT. output controls. (see Page 29) Note: This image reflects the DCi 8|300N back panel Operation Manual page 7...
  • Page 8: Set-Up And System Configuration

    DriveCore Install Network Series Power Amplifiers Set-up and System Configuration Figure 3 Wire Input Connectors Crown recommends using pre-built or professionally wired balanced cables (two-conductor plus shield). Balanced wiring provides better rejection of unwanted noise and hum; however, unbalanced line may also be used. For more information, refer to the Crown Amplifier Application Guide, available online at www.crownaudio.com.
  • Page 9 DriveCore Install Network Series Power Amplifiers Set-up and System Configuration Connect Loudspeakers and Configure for Loudspeaker Load Determine load impedances and power requirements Before making any connections, carefully check and review the total impedance for loudspeaker systems to be connected to each amplifier output. If multiple loudspeakers are connected to one output (in series, parallel or series-parallel) for Low-Z operation, be certain the total system impedance is within allowed specification for the output.
  • Page 10: Netsetter

    DriveCore Install Network Series Power Amplifiers NetSetter Introduction The Harman HiQnet NetSetter is a software tool which enables you to discover HiQnet devices and reconfigure network settings in real-time for each device. Its function is to configure a system of devices to interoperate correctly on the same network and resolve conflicts quickly and easily. NetSetter Window The top of the NetSetter page list overall operational functions that are available.
  • Page 11: Mac Address

    DriveCore Install Network Series Power Amplifiers • Export – The export button brings up a “Save As” window allowing you to save the HiQnet Addresses and IP Configurations of all devices on the network to a .CSV (Comma Separated Values) format. This allows you to archive the information and open it in a spreadsheet program such as Microsoft Excel.
  • Page 12 DriveCore Install Network Series Power Amplifiers The devices in the current filter view may be set to DHCP / Auto-IP off by unchecking the check box in the column header. DHCP server status will be among the information displayed at the bottom of the window. If a DHCP server is not detected, the information will read ‘DHCP server not detected’...
  • Page 13 DriveCore Install Network Series Power Amplifiers If the edited value scopes the device out of the current Display filter, it will not be visible. No devices will be selected If devices discovered with a conflicting HiQnet Address then: • The HiQnet ID field of a discovered device with a HiQnet Address which conflicts with a HiQnet Address which has already been discovered will be displayed in pink.
  • Page 14: Device Type

    DriveCore Install Network Series Power Amplifiers • The device has a unique HiQnet address • The device is not Access Controlled IP conflict - The 'IP conflict’ status is determined by the following conditions: • The device is discoverable at the MAC Address level •...
  • Page 15 DriveCore Install Network Series Power Amplifiers the value. A blank field or ‘-‘ implies the value is null Device Name The user-definable Device Name is displayed, as reported by the discovered device • May be edited inline if you want to change the Device Name. •...
  • Page 16: Offline/Online Operation

    DriveCore Install Network Series Power Amplifiers Offline/Online Audio Architect has two define modes of operation: Online and Offline. Offline operation allows the system to be configured without real time changes to the system. In this mode, changes have to be sent to the edited device. In Online mode, changes to amplifiers are made real time. When Audio Architect first opens, the Offline Design Tab is the ribbon presented, and the Device Toolbox appears on the left and an empty Properties window is at the bot- tom.
  • Page 17 DriveCore Install Network Series Power Amplifiers Each amplifier can be dragged into the room window. Each device will have a IP address listed on the left of the amplifier and a Name ID on the right on the amplifier. The Name ID can be edited in the properties menu at the bottom of the page.
  • Page 18 DriveCore Install Network Series Power Amplifiers Set-up and System Configuration Amplifier Mode Settings Figure 7 (above) shows the DriveCore Install 2 channel configuration page. The 4 and 8 channel amplifier configuration pages have the same feature set. The DriveCore Install Network amplifier includes Digital Signal Processing (DSP), multiple input/output routing options and a comprehensive diagnotics feature set. All of these features can be adjusted in from the configuration page.
  • Page 19 DriveCore Install Network Series Power Amplifiers Set-up and System Configuration Cascading Inputs Cascading the analog inputs, or "Y-ing channels" gives more flexibility to the installation of this amplifier (See Figure 9). One input can be used to drive some or all of the amplifier outputs.
  • Page 20 DriveCore Install Network Series Power Amplifiers Set-up and System Configuration Bridge Mono Operation The DriveCore Install amplifier outputs can be bridged to increase the power and voltage available at the output of the amplifier. The amplifier can be bridged in the Amplifier Mode window.
  • Page 21 DriveCore Install Network Series Power Amplifiers Set-up and System Configuration Low-Z (8, 4 or 2 Ohm) Output Operation Typical input and output wiring, along with Audio Architect software settings are shown in Figure 12. INPUTS: Connect the input with wiring in place for each channel.
  • Page 22 DriveCore Install Network Series Power Amplifiers Set-up and System Configuration Bridge Mode (16, 8, or 4 Ohm) Output Operation Typical input and output wiring, along with software settings are shown in Figure 13. INPUT WIRING: If using analog inputs, it is only necessary to wire the odd number inputs.
  • Page 23 DriveCore Install Network Series Power Amplifiers Set-up and System Configuration Dual Mode Hi-Z (70V/100V) Mode Typical input and output wiring, along with software settings are shown in Figure 14. A 35Hz high pass filter is selected automatically when the amplifier channel is in Hi-Z or Bridged Hi-Z mode.
  • Page 24 DriveCore Install Network Series Power Amplifiers Set-up and System Configuration Bridge Mode Hi-Z (140V/200V) INPUTS: Connect the input to the odd-numbered channels (1,3,5,7) only. Even-numbered inputs are disabled when the Bridge Mono mode is active. OUTPUTS: Connect the speaker across the positive terminals of each channel pair.
  • Page 25: Precautions

    DriveCore Install Network Series Power Amplifiers Set-up and System Configuration Connect to AC Mains Connect your amplifier to the AC mains power source (power outlet) using the supplied AC power cord set. First, connect the IEC end of the cord set to the IEC connector on the amplifier;...
  • Page 26: General Purpose In/Out Control Port

    DriveCore Install Network Series Power Amplifiers General Purpose In/Out Control Port DriveCore Install Network amplifiers come with a 2-in, 2-out General Purpose In/Out (GPIO) control port in the form of a 6 position RJ-11 connector. The Control Port has multiple functions and uses which include preset selection, and gain control among others. Hardware Specification Inputs are analog capable of either binary or analog control of a State Variable (SV) within the amplifier.
  • Page 27 DriveCore Install Network Series Power Amplifiers General Purpose In/Out Control Port Figure 16 Control Port Configuration Page In the Venue Explorer, select and expand the device for a list of objects. Expand an object for a list of state variables (SV’s) within the object. A state variable can be added to the control port input assignment by clicking and dragging with the mouse into the “Parameter Assignment”...
  • Page 28 DriveCore Install Network Series Power Amplifiers General Purpose In/Out Control Port Additional state variables can be added to a given control port input by selecting the SV and dragging on top of a previously assigned row of the desired input. However, once an SV has been assigned and the MODE has been set, any subsequent SV that is added must function in the same MODE.
  • Page 29 DriveCore Install Network Series Power Amplifiers General Purpose In/Out Control Port Configuration of the Control Port Outputs 2 outputs: Binary only. • There is a polarity control on each output so that it may function as active-high or active-low. • Output Mode 1 - Manual: Controlled directly by the output enable button •...
  • Page 30 DriveCore Install Network Series Power Amplifiers General Purpose In/Out Control Port Figure 19 Control Port Output Configuration NOTE: that in all modes, the polarity of the binary output can be toggled under the OUTPUT POLARITY tab, where “Normal” or “Inverted” can be selected. Operation Manual page 30...
  • Page 31: Aux Port/Sleep/Amp Status

    DriveCore Install Network Series Power Amplifiers Aux Port AUX Port The AUX port can be used for basic monitoring of the amplifier and for remote standby. The port is a 3 pin block connector with pin-2 used as ground. Sleep The amplifier can be put to sleep by connecting pins 1 and 2 on the AUX port.
  • Page 32: Blu Link

    DriveCore Install Network Series Power Amplifiers BLU Link BLU link BLU link is an audio bus found on the DriveCore Install Network amplifier series. It carries 256 channels of audio at 48kHz, and 128 channels at 96kHz, both at 24bit. When connected in a loop, it has redundancy, allowing any one BLU link cable to break while still maintaining audio.
  • Page 33 DriveCore Install Network Series Power Amplifiers BLU Link Any multi-transport combination NOT specifically listed above is not allowed in Soundweb London systems (without being forced to use analog interconnects between transports). For example, BLU link + AVB + CobraNet is NOT allowed, because the AVB and CobraNet networks would each be synced to different clocks—their own. Mastership is negotiated between all the devices on the ring, and change to the ring will trigger the negotiation to be started.
  • Page 34 DriveCore Install Network Series Power Amplifiers BLU Link Figure 21 BLU Link Input Channel Assignment BLU Link Routing Double-clicking on the BLU Link Routing button opens the BLU Link channel assignment dialogue. The DCI-N amplifiers have 8 'slots' available for receiving a BLU Link audio stream, which can then be sent to any one of the channels in the amplifier via the Source Routing panel.
  • Page 35 DriveCore Install Network Series Power Amplifiers BLU Link Figure 22 BLU-Link Output Configuration The analog inputs for the DriveCore Install Netowrk amplifier provide additional flexibility when for the BLU Link digital audio bus. From the BLU Link Output Configuration window (Input Icon >Source Routing > BLU Link Output Configuration), it is possible to utilize the DCI-N amplifier to be a BLU Link On-Ramp in two different ways: Send unprocessed audio from the analog inputs of the amplifier to 1 of the 8 available BLU Link outputs NOTE: The audio from the analog inputs passes though the amplifier input gain stage (affected by selecting 28dB or 34dB of gain), and then through the input trim and polarity switches in the Source Routing - Input Configuration panel, before being sent to the BLU Link bus.
  • Page 36: Advanced Operation

    DriveCore Install Network Series Power Amplifiers Advanced Operation Introduction Your DriveCore Install amplifier has a wide variety of onboard Digital Signal Processing (DSP). HiQnet Audio Architect software lets you adjust the DSP settings, such as filter slope, compression ratio, EQ frequency bands, and so on. A preset is a group of DSP settings that configure the amp for a specific application.
  • Page 37 DriveCore Install Network Series Power Amplifiers Figure 23 Signal Path Operation Manual page 37...
  • Page 38 DriveCore Install Network Series Power Amplifiers Advanced Operation Speaker Tunings Crown and JBL engineers have designed DriveCore Install DSP settings that are opti mized for various JBL loudspeakers. Speaker tunings can be downloaded at the following website: www.jblpro.com. An improved speaker tuning approach has been developed for the DriveCore Install Network Series. The system is software library based rather than device preset based.
  • Page 39 DriveCore Install Network Series Power Amplifiers Advanced Operation Advanced STP functions are available to create/modify speaker tunings. Holding CTRL-ALT-SHFT while double-clicking the speaker tuning icon opens the advanced panel. See Figure 25 Figure 25 Basic Speaker Tuning Panel The advanced panel includes every parameter implemented in a speaker tuning : All parameters from basic panel (Recall, Store, Load, Delete, Mfr Name, Model, Band) Crossover Filters (HP lower band-edge, LP upper band-edge, 18 types up to 48dB/oct) EQ Filters (8 second order filter sections, 11 types, full parametric control)
  • Page 40 DriveCore Install Network Series Power Amplifiers Advanced Operation JBL Master Screen Array Library This library is included with Audio Architect at install. The tunings in this library were developed and validated against previous same tunings for Crown DSI amplifiers. It is read-only to prevent over-write.
  • Page 41 DriveCore Install Network Series Power Amplifiers Advanced Operation Software-Controllable Onboard DSP Crown DriveCore Install Network amplifier have Digital Signal Processing built into the amplifier. When you use an DriveCore Install Network amp, the loud speaker processors, crossovers, limiters and delays are in the onboard DSP – so dicrete rack mount devices are not needed.
  • Page 42 DriveCore Install Network Series Power Amplifiers Advanced Operation Input Level, Faders, Mute, Link, I/O Level Meters, and Indicators Figure 27 This panel is on the left side of the DriveCore Install Network main control panel shown above. Channels 1, and 2 Level Controls set the input signal level of each channel. Each channel can be muted, and both faders can be linked with the Link button.
  • Page 43 DriveCore Install Network Series Power Amplifiers Advanced Operation Input Signal Router Each channel of the DriveCore Install signal processing has an Input Signal Router that lets you choose the audio signal that will be used by the channel. • Analog Audio: This selection set up the input router for analog sources.
  • Page 44 DriveCore Install Network Series Power Amplifiers Advanced Operation Source Routing/Configuration Figure 29 Quick Start Selection button at the bottom of the page. Manual configuration of Threshold, Attach, Release, and Depth of Cut can be adjusted in this page. These items are defined as follows: •...
  • Page 45 DriveCore Install Network Series Power Amplifiers Advanced Operation Input Delay and Driver/Output Delay Input delay includes up to 2 seconds of delay. Output delay is typically used for driver alignment. Up to 0.1 seconds of output delay is provided. See Figure 30 Figure 30 Input/Output Equalization These screens let you adjust channel equalization for up to 8 frequencies.
  • Page 46 DriveCore Install Network Series Power Amplifiers Advanced Operation Crossover Filters The Crossover section lets you use infinite impulse response (IIR) Crossover filter. Each audio channel has three separate places where filters can be placed in the system: input EQ, Crossover, and Output EQ. Up to 16 EQ filters per channel are available, plus crossover filters.
  • Page 47 DriveCore Install Network Series Power Amplifiers Advanced Operation LevelMax™ Suite This is a suite consisting of a peak voltage limiter, RMS power limiter, clip limiter and transducer thermal limiter. First you will set the mode to automatic or advanced: See Figure 33 •...
  • Page 48: Per Channel Settings

    DriveCore Install Network Series Power Amplifiers Per Channel Settings Channel Attenuators Each channel is supplied with a logrithmic 21-position detented input attenuator. Use a flat-blade screwdriver to set input level. Attenuation is from -95 dB (full counter-clockwise) to 0 dB (full clockwise). For gain structure purposes, it is important to note that attenuators are at the end of the DSP signal chain. Position Typical -0.1...
  • Page 49: Protection System

    A fuse (F1) located near the IEC power inlet protects the amplifier from excessive AC current draw. The fuse is field replaceable. Replace with same type fuse; LittelFuse 314 Series F20AH 250V. The 8|600N utilizes a resettable breaker instead of a fuse. Please contact Crown Service department for more information.
  • Page 50: Troubleshooting

    DriveCore Install Network Series Power Amplifiers Troubleshooting CONDITION: Power indicator Mains indicator is on. is off. POSSIBLE REASON • The amplifier’s Power switch is off. “Off/Flashing/On” above means that the LED can be off, or flashing, or on. CONDITION: Power indicator Mains indicator is off.
  • Page 51 DriveCore Install Network Series Power Amplifiers Troubleshooting CONDITION: Distorted sound. POSSIBLE REASON: • Load is wired incorrectly or Stereo/Bridge mode switch is set incorrectly. Check both. • Input is overloaded by a signal level that is too high. Turn down your amplifier level controls, or turn down the input signal, until “Off/Flashing/On”...
  • Page 52 DriveCore Install Network Series Power Amplifiers Troubleshooting CONDITION: No input signal. Signal indicator is not flashing even though audio is applied, and the channel is ready.. POSSIBLE REASON: • Input signal level is very low. “Off/Flashing/On” above means that the LED can be off, or flashing, or on. CONDITION: Bridge LED is lit.
  • Page 53: Dci Specifications

    Dual-Mode - All Channels Driven DCi Network Model Channels 2 Ohms 4 Ohms 8 Ohms 16 Ohms 70Vrms 100Vrms 2|300N 150W 300W 300W 150W 300W 300W 2|600N 300W 600W 600W 300W 600W 600W 4|300N 150W 300W 300W 150W 300W 300W 4|600N 300W...
  • Page 54 Required AC Mains (±10%) 100V - 240V~ 50/60Hz Cooling Continuously variable speed forced air, front-to-back airflow Power Supply Connector 15A IEC Connector; 8|600N utilizes a 20A IEC connector Load Impedance 2 - 16 Ohms; 70Vrms and 100Vrms Stereo/Dual Mode Load Impedance 4 - 16 Ohms;...
  • Page 55: Ac Power Draw And Thermal Dissipation

    DriveCore Install Network Series Power Amplifiers AC Power Draw and Thermal Dissipation AC Power Draw and Thermal Dissipation: Pink noise 12dB crest factor, bandwidth limited 22Hz to 22kHz. Typical line impedance used. Data based on all channels driven. DCi 2|300N - Bridge 120 VAC / 60 Hz 230 VAC / 50 Hz "Line cur-...
  • Page 56 Pink noise 12dB crest factor, bandwidth limited 22Hz to 22kHz. Typical line impedance used. Data based on all channels driven. DCi 2 600N - Bridge 120 VAC / 60 Hz 230 VAC / 50 Hz "Line cur- Power Dissipated as Heat "Line cur-...
  • Page 57 DriveCore Install Network Series Power Amplifiers AC Power Draw and Thermal Dissipation AC Power Draw and Thermal Dissipation: Pink noise 12dB crest factor, bandwidth limited 22Hz to 22kHz. Typical line impedance used. Data based on all channels driven. DCi 4 300N - Bridge P1-32 120 VAC / 60 Hz...
  • Page 58 Typical of program material at 140V (16 ohms) extreme clip 200V (33.33 ohms) DCi 4600N - Dual 120 VAC / 60 Hz 230 VAC / 50 Hz "Line cur- Power Dissipated as Heat "Line cur- Power Dissipated as Heat Condition...
  • Page 59 Typical of program material at 1037 (16.33 ohms) extreme clip 100V 1007 (33.33 ohms) DCi 8300N - Bridge P1-32 120 VAC / 60 Hz 230 VAC / 50 Hz "Line cur- Power Dissipated as Heat "Line cur- Power Dissipated as Heat...
  • Page 60 1500 1305 (16 ohms) extreme clip 200V 17.0 1407 1168 (33.33 ohms) DCi 8600N - Dual 15004563770 120 VAC / 60 Hz 230 VAC / 50 Hz "Line cur- Power Dissipated as Heat "Line cur- Power Dissipated as Heat Condition...
  • Page 61: Service

    Complete the Crown Audio Factory Service Information form, in the back of this manual, when returning a Crown product to the factory or authorized service center. The form must be included with your product inside the box or in a packing slip envelope securely attached to the outside of the shipping carton.
  • Page 62 5. Record the SRA number for future reference. The SRA number can be used to check the repair status. Packing Instructions Important: These instructions must be followed. If they are not followed, Crown Audio, Inc. assumes no responsibility for damaged goods and/or accessories that are sent with your unit.
  • Page 63: Warranty

    DriveCore Install Network Series Power Amplifiers Warranty SUMMARY OF WARRANTY Crown International, 1718 West Mishawaka Road, Elkhart, Indiana 46517-4095 U.S.A. warrants to you, the ORIGINAL PURCHASER and ANY SUBSEQUENT OWNER of each NEW Crown product, for a period of three (3) years from the date of purchase by the original purchaser (the “warranty period”) that the new Crown product is free of defects in materials and workmanship.
  • Page 64 DriveCore Install Network Series Power Amplifiers Crown Audio Factory Service Information Shipping Address: Crown Audio Factory Service, 1718 W. Mishawaka Rd., Elkhart, IN 46517 PLEASE PRINT CLEARLY SRA #: ______________________ (If sending product to Crown factory service.) Model: ______________________ Serial Number: _________________________ Purchase Date: ____________________...
  • Page 65: Crown Audio Factory Service Information

    DriveCore Install Network Series Power Amplifiers PRODUCT REGISTRATION Crown Audio, Inc. 1718 W. Mishawaka Rd. Elkhart, IN 46517-9439 Phone: 574-294-8000 Fax: 574-294-8329 www.crownaudio.com Warranty is only valid within the country in which the product is purchased. When this form is used to register your product, it may be mailed or faxed.

Table of Contents