Table of Contents
Advertisement
For Your Safety
VM-E52A
Model No.
Serial No.
Date of Purchase
Dealer's Name
Dealer's Address
City
Province
HITACHI
1
Instruction Manual
8mm Video Camcorder
VM-E56A / VM-E58A
Hitachi Home Electronics (America),
Inc.
3890 Steve Reynolds Blvd., Norcross, GA 30093
Tel. 404-279-5600
HITACHI SALES CORPORATION OF
HAWAII, INC
3219 Koapaka Street, Honolulu, Hawaii 96819
Tel. 808-836-3621
Thank you for buying a Hitachi product. You've chosen the best 8 mm video camera/recorder for you, and
we want to help you make the most of your purchase. Please take time to become familiar with the
manual and how it is set up. Keep it handy for feature reference.
QR10352 © Hitachi, Ltd. 1994
For Your Safety........................................................................................................................................... 4
- 1 -
HITACHI (HSC) CANADA, INC.
3300 Trans Canada Highway, Pointe Claire,
Quebec, H9R1B1, CANADA
Tel. 514-697-9150
Printed in Japan KG-M(N)
1
Advertisement
Table of Contents

Related Manuals for Hitachi VM-E56A


Summary of Contents for Hitachi VM-E56A
- Page 1 3219 Koapaka Street, Honolulu, Hawaii 96819 Tel. 808-836-3621 Thank you for buying a Hitachi product. You've chosen the best 8 mm video camera/recorder for you, and we want to help you make the most of your purchase. Please take time to become familiar with the manual and how it is set up.
-
Page 2: Table Of Contents
For Your Safety IMPORTANT SAFEGUARDS IMPORTANT SAFETY INSTRUCTIONS FOR AC ADAPTER/CHARGER Read This First ... 11 Before You Begin... 12 Features ... 12 Components and Accessories... 13 Optional RF Output Adapter ... 13 MOISTURE ... 14 Attaching the Shoulder Strap ... 14 Table of Contents pg. - Page 3 Specifications pg. 54... 56 Accessories Add Excitement To Order in the United States... 58 HITACHI WARRANTY CARD (USA Front)... 59 HITACHI WARRANTY CARD (USA Back) ... 60 HITACHI WARRANTY CARD (Front) CANADA ONLY... 61 - 3 - pg. 56... 58...
-
Page 4: For Your Safety
For Your Safety For Your Safety The CAMERA/OFF/VIDEO switch turns the camera/recorder on and off, leaving the date/time feature unaffected. If the unit is to be left unattended for a long period of time, turn the camera/recorder off and attach the lens cap. WARNING: TO PREVENT FIRE OR SHOCK HAZARD, DO NOT EXPOSE THIS UNIT TO RAIN OR MOISTURE. - Page 5 For Your Safety - 5 - does not indicate a fault as the LCD panel stretches the limits of current technology. Warning: This device complies with Part 15 of the FCC Rules. Operation is subject to the following two conditions: (1) This device may not cause harmful interference, and (2) this device must accept any interference received, including interference that may cause undesired operation.
-
Page 6: Important Safeguards
IMPORTANT SAFEGUARDS IMPORTANT SAFEGUARDS In addition to the careful attention devoted to quality standards in the manufacture of your video product, safety is a major factor in the design of every instrument. But, safety is your responsibility too. This page lists important information that will help to assure your enjoyment and proper use of a Video Camera/Recorder and accessory equipment. - Page 7 IMPORTANT SAFEGUARDS 7 Power Cord Protection -- Power supply cords should be routed so that they are not likely to be walked on or pinched by items placed upon or against them, paying particular attention to cords at , convenience receptacles, and the point where they exit from the appliance. plugs 8 Ventilation -- Slots and openings in the cabinet are provided for ventilation to ensure reliable operation of the video product and to protect it from overheating.
-
Page 8: Important Safeguards Pg. 4
IMPORTANT SAFEGUARDS pg. 4 - 8 - 12 Outdoor Antenna Grounding -- If an outside antenna or cable system is connected to the video product, be sure the antenna or cable system is grounded so as to provide some protection against voltage surges and built-up static charges. -
Page 9: Service
IMPORTANT SAFEGUARDS pg. 4 - 9 - SERVICE 17 Servicing -- Do not attempt to service this video product yourself as opening or removing covers may expose you to dangerous voltage or other hazards. Refer all servicing to qualified service personnel. 18 Conditions Requiring Service -- Unplug this video product from the wall outlet and refer servicing to qualified service personnel under the following conditions. -
Page 10: Important Safety Instructions For Ac Adapter/Charger
IMPORTANT SAFETY INSTRUCTIONS FOR AC ADAPTER/CHARGER IMPORTANT SAFETY INSTRUCTIONS FOR AC ADAPTER/CHARGER 1. Save these Instructions -- This page contains important safety and operating instructions for AC Adapter/Charger Model VM-AC 83A. 2. Before using AC Adapter/Charger, read all instructions and cautionary markings on (1) AC Adapter/Charger, (2) battery and (3) product using battery. -
Page 11: Read This First
"Advanced Techniques" to help you with some of the exciting, sophisticated features of the Hitachi VM-E56A/E58A. We hope you will take the time to learn about these functions since they have been designed for you. You can use the video camera/recorder without reading this section. -
Page 12: Before You Begin
VM-E56A Electric Image Stabilizer Feature Stereo Microphone l l l l This instruction manual shows the illustrations for the VM-E56A. If there is a difference in operating the VM-E58A and the VM-E56A, both illustrations are shown. - 12 - VM-E58A... -
Page 13: Components And Accessories
IN U.S.A. Hitachi Home Electronics (America), Inc. Parts Division 401 West Atresia Blvd. Compton, California. U.S.A. 90220 Tel: 1-800-HITACHI (1-800-448-2244) For more information concerning the purchase of camera/recorder accessories, please see the optional accessory listing on page 55. -
Page 14: Moisture
Before You Begin MOISTURE Avoid operating your camera/recorder immediately after moving it from a cold place to a warm, humid place. Give the camera/recorder 2 to 3 hours to stabilize in the ambient conditions of the surroundings before inserting a cassette. When moved from a cold place to a warm, humid place, moisture may condense on the head drum inside the machine. -
Page 15: Table Of Contents
Table of Contents Table of Contents For Your Safety...2 Important Safeguards...4 Installation...4 Use...5 Service...5 Important Safety Instructions for AC Adapter/Charger...6 Read This First...7 Quick Index...7 Features...8 Components and Accessories...8 MOISTURE...9 Attaching the Shoulder Strap...9 Charging the Battery...12 Additional Information...12 Adjusting the Electronic Viewfinder...13 Eyepiece Adjustment...13 Viewfinder Bright, Color and Tint Control...13 Attaching the Optional Wide or Tele Converter Lens...14... - Page 16 Table of Contents pg. 13 - 16 - Connecting to a Television with a VCR Attached...27 Connecting to a Television with Audio In and Video In Jacks...28 Connecting to a Television without Audio In and Video In Jacks...29 Simple Playback...30 Using Still...30 Using Forward and Reverse Search...30 Using the Power Zoom...32...
-
Page 17: Getting Started
Set aside some time, relax, and familiarize yourself with this quality instrument. Enjoy getting to know all about your Hitachi 8mm camera/recorder. The more comfortable and familiar you are with the machine and its features, the more you can make it do for you. Let's get started! It is crucial that you read and understand all the safety instructions before you begin. -
Page 18: Additional Information
Getting Started whether the battery is charged or uncharged. Note: The marker switch is not concerned with the battery's performance. Additional Information To use a battery in optimum condition: l l l l Use the battery until the low charge light ( then recharging it may shorten the operation time. -
Page 19: Adjusting The Electronic Viewfinder
Getting Started The product that you have purchased contains a rechargeable battery. The battery is recyclable. At the end of its useful life, under various state and local laws, it may be illegal to dispose of this battery into the municipal waste stream. -
Page 20: Viewfinder Bright, Color And Tint Control
Getting Started Viewfinder Bright, Color and Tint Control This small "BRIGHT", "COLOR" and "TINT" controls are set at the factory and should require no adjustment. If they ever require adjustment, use a plastic screwdriver. Make the adjustments with caution to prevent damaging the miniature controls. Attaching the Optional Wide or Tele Converter Lens 1. -
Page 21: Loading Batteries
Getting Started Loading Batteries Install the remote control battery now to prevent misplacing it. Remote Control Battery 1. Push the tab to the right of the remote control and hold it, then remove the battery holder. 2. Press the PLAY button and hold it for about two seconds. 3. -
Page 22: Checking The Battery's Charge
Getting Started toward the left of the camera/recorder and remove. Checking the Battery's Charge A battery charge indicator is located on the upper right corner of the viewfinder. One of three symbols displays when the battery is used. This symbol indicates a fully charged battery. This symbol indicates a partially charged battery. -
Page 23: Using Alkaline Dry-Cell Batteries
Note: The AC adapter/charger can be used around the world. An AC plug adapter is required in some foreign countries. If you need one purchase it at your Hitachi distributor. Note: The battery level indicator sometimes displays partial charge symbol when using the AC adaptor/charger. -
Page 24: Inserting And Removing Cassettes
Getting Started Car Battery Cord Hookup 1. Plug the car battery cord into the car's cigarette lighter socket. 2. Align the arrow on the external power adapter with the guide arrow on the camera/recorder. 3. Hold the external power adapter firmly against the camera/recorder while sliding it toward the right of the machine. -
Page 25: Protecting Recorded Material
Getting Started Slide the EJECT switch in the direction of the arrow. The cassette door opens automatically. Remove the cassette. Protecting Recorded Material Protect 8mm cassettes from accidental erasure by sliding the tab on the side of the cassette towards the opposite side until the tab is completely visible. -
Page 26: Replacing The Dc Camera Light Bulb
Getting Started pg. 15 - 26 - Replacing the DC Camera Light Bulb 1. Turn the front of the case counter-clockwise and remove it. 2. Remove the bulb by pulling it out through the opened case. 3. Install the new bulb by aligning the notch in the rim of the bulb's base with the " " mark outside the socket. -
Page 27: Using Memory
Getting Started Using Memory The linear time counter memory stops a rewinding tape at approximately 0:00:00M. This feature helps in locating a specific point in the tape to which you wish to return. An example might be that you have recorded some tape that you have already watched, you continue recording but do not care to watch the tape you recorded earlier. -
Page 28: Correcting The Date And Time
Getting Started pg. 15 - 28 - 1. Load the battery ("Loading the Batteries: Camera/Recorder battery" p 14). Press the red button on the CAMERA/OFF/VIDEO switch as you slid it to CAMERA. 2. Press the DATE button and look into the viewfinder. The date and time should appear in the lower right with the "1"... -
Page 29: Using The Linear Time Counter
Getting Started pg. 15 - 29 - Using the Linear Time Counter The linear time counter displays the tape run in hours, minutes, and seconds helping you to keep track of how long you've been filming or time you have left to film before running out of tape. Turn the camera/recorder on to display the linear time counter. -
Page 30: Remaining Tape
Getting Started Remaining Tape The tape remaining display shows the remaining tape that can be used for recording and playback, using seven dashes. This feature is handy when recording since it lets you know how long you can record on the loaded tape. Insert a cassette into the camera/recorder and start recording or playback;... -
Page 31: Getting Started - Identifying Controls
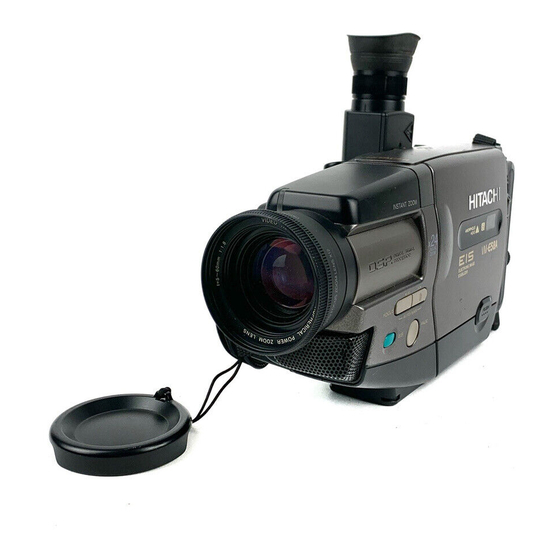
Getting Started - Identifying Controls Getting Started - Identifying Controls Left side / Front Controls Illustration 1. Lens F1.8 (5~60mm) 12:1 power zoom lens with auto focus and auto iris functions. 2. Record Indicator This indicator lights when the camera/recorder is recording. 3. - Page 32 24. REW/REVIEW Button Use this button to fast rewind tapes or for visual search. During visual search the camcorder rewinds at approximately 7 times normal playback speed. Also use this button to set date and time. Furthermore, use this button...
- Page 33 CHANNEL: Top ( ) button switches to the next higher channel, bottom ( ) button switches to the next lower channel. For these to operate, you must have preset your channels. ("Controlling your TV with the Camcorder's Remote Control" p 41). 30. Recorder's Remote Control The shaded buttons on the remote control have the same functions as the corresponding buttons on the camera/recorder.
-
Page 34: Basic Techniques
Let's get started! Making a Basic Recording The Hitachi VM-E56A/E58A uses PROGRAM AE auto exposure that automatically selects the optimum shutter speed (either 1/60, 1/120, 1/180, 1/250, 1/350, 1/500, 1/750, 1/1000, 1/1500, 1/2000, or 1/4000 of a second). The iris adjusts automatically in response to shutter speed. -
Page 35: Playing Back Your Recording
VCR. Connect either the right of left audio plug into your VCR if it has only one AUDIO in jack. Note for VM-E56A: Connect either the right or left audio plug into your VCR if it has only one AUDIO IN jack. -
Page 36: Connecting To A Television Without Audio In And Video In Jacks
Basic Techniques 5. Hold down the red button on the CAMERA/OFF/VIDEO switch while sliding the switch to VIDEO. 6. Press the PLAY button to begin playback. 7. Press the STOP button when finished. Connecting to a Television without Audio In and Video In Jacks 1. -
Page 37: Using Forward And Reverse Search
Basic Techniques Using Forward and Reverse Search When looking for a particular point in your videotape use the F.FWD button and REW/REVIEW button to find the spot quickly. l l l l Press F.FWD button during playback to play the tape forward at approximately 9 times normal speed. -
Page 38: Advanced Techniques
Advanced Techniques Advanced Techniques The Hitachi VM-E56A/E58A offers a diverse group of features that add interest and excitement to your videos. Adding fades to smooth transitions creates videos with a professional look. As you learn and practice with these features think of situations that they might fit in and add a special touch. - Page 39 Advanced Techniques pg. 37 - 39 -...
-
Page 40: Advanced Techniques
Advanced Techniques Advanced Techniques Using the Digital Zoom The digital zoom increases the magnification of the power zoom by 2 times. You must place the subject you wish to magnify at the center of the viewfinder. Note: When the digital zoom is used, the more the image is magnified, the rougher the picture becomes. -
Page 41: Using Auto Focus
Advanced Techniques Using Auto Focus The camera/recorder focuses the subject in the center of the viewfinder automatically unless the manual focus is engaged. If FOCUS appears in the viewfinder, manual focus is engaged. Press the FOCUS control (AUTO/MAN) buttons simultaneously to return to auto focus. The auto focus will not work under the following conditions and you must focus manually: Objects outside the center of the viewfinder Objects at different distances in the center of the viewfinder... -
Page 42: Using Manual Focus
Advanced Techniques Dark objects Note: With the T zoom control you can use the auto focus with subjects that are 3.6 feet away from the lens and further away to infinity. With the W zoom control you can use the auto focus with subjects 1.2 inches away from the lens and further away to infinity. -
Page 43: Using Fade
Advanced Techniques l l l l While you record from inside a moving vehicle. 1. Press the EIS button. The EIS icon appears in the viewfinder. 2. Press the Start/Stop button to start recording. When EIS is engaged the viewfinder image shakes with a slight delay. -
Page 44: Using Instant Review
Advanced Techniques Note: When fading out be sure to wait until the PAUSE indicator ( put the camera/recorder into the record mode again. Using Instant Review Use this feature to view the last few seconds of the tape you shot. 1. -
Page 45: Creating And Recording Titles
Advanced Techniques pg. 37 - 45 - This function allows you to shoot subjects as close as 1.2 inches. Press and hold the power zoom control W. The camera focuses on the subject automatically. Check your lighting as it tends to be insufficient when filming close up. -
Page 46: Correcting Errors
Advanced Techniques . When you complete your title, press PLAY to create a second title as required, or press the TITLE ON/OFF button on the remote control to store the title in memory and remove the title graphics from the viewfinder. -
Page 47: Using The Wireless Remote Control
Note: The remote control code of this camera/recorder is Hitachi code VCR2. If you have a VCR with the same code you Hitachi VCR may malfunction when you use the camera/recorder's wireless remote control. -
Page 48: Using Synchro Edit
Use synchro edit to record only segments of a previously recorded tape when dubbing from the camera/recorder to a VCR. This requires an optional synchro edit cord. The Hitachi VM- E56A/E58A uses a flying erase head to eliminate glitches or rainbow noise that sometimes occurs between edits. -
Page 49: Controlling Your Tv With The Camera/Recorder's Remote Control
If the TV channel still doesn't change after going through all the button combinations listed, it is likely that you will not be able to program this remote control for your TV. TV Brands Press CH ( ) and This Button Hitachi Zenith VOL ( ) Sony ZOOM.(W) -
Page 50: Controlling The Tv
Advanced Techniques DISPLAY Panasonic TITLE ON/OFF Mitsubishi ZOOM.(T) COUNTER RESET Sharp S.EDIT Controlling the TV Once programmed, the camera/recorder's remote control is ready to control the TV. l l l l Press the button of the TV function that you want. Be aware that not all of your TV's functions may work even though the remote control is correctly programmed. -
Page 51: Recording Television Programs
Advanced Techniques 3. Hold down the red button on the CAMERA/OFF/VIDEO switch while sliding the switch to VIDEO. 4. Insert a previously recorded tape in the camera/recorder. 5. Use the wireless remote control and press the PLAY button. Use the PLAY, F.FWD, and REW buttons to find the place where you want to stop dubbing. - Page 52 Advanced Techniques pg. 37 - 52 - Note: If the tape is played back while the AV input cord is left connected to the camera/recorder, noise may appear in the picture. In this event, press the STOP button to stop the camera/recorder, unplug the AV input cord and play back the tape again.
-
Page 53: General Maintenance
3. Align the reference mark and rotate the eye cup in the direction of arrow. Periodic Maintenance A precision electromechanical device, the Hitachi VM-E56A/E58A requires maintenance after a period of normal use. We expect that no other maintenance other than head cleaning will be required during the period of warranty unless the camera/recorder is used either heavily or seldom. -
Page 54: Troubleshooting
General Maintenance Troubleshooting Quality is very important at Hitachi. We inspect and check every camera/recorder carefully at the factory under the most rigid quality control and inspection systems. If problems develop please check the following possible solutions before inquiring about professional service. - Page 55 General Maintenance Picture bends at the top of the TV screen. Color of your TV screen is too bright, too faint or change. BATTERY CONDITION SYMPTOM The ( ) indication in the electronic viewfinder flashes. NO OPERATION IS ACCEPTED SYMPTOM Power is not turned on and no button operations are accepted.
-
Page 56: Specifications
VM-E56A: 5.5W (when recording) VM-E58A: 5.6W (when recording) 3-11/16" W x 4-8/16" H x 8-7/16" D (94mm x 114mm x 214mm) VM-E56A: 1.65 lbs (750g) without battery pack, lens hood, lens cap or cassette VM-E58A: 1.66 lbs (755g) without battery pack, lens hood, lens cap or cassette 32°F ~ 104°F (0°C ~ 40°C) - Page 57 54 - 57 - Hitachi has made every effort to assure you hours of trouble free operation from your unit. However, should you require service, a network of Hitachi Authorized Service Facilities has been established in all 50 states and Puerto Rico. Each facility will provide you with convenient and expedient assistance.
-
Page 58: Accessories Add Excitement
Accessories Add Excitement Accessories Add Excitement We know that once you discover how much your Hitachi VM-E56A/E58A can add to your life you will want to use these accessories for even more excitement. Converter lenses, adapters for synchro editing, and car cords are just a few of the exciting accessories available to you from Hitachi. -
Page 59: Hitachi Warranty Card (Usa Front)
Hitachi Video Products are warranted to be free of defects in parts and workmanship at the time of purchase by the original owner. If this product is found to be defective, Hitachi will repair or replace defective parts at no charge to the original owner. Parts used for replacement are warranted for the remainder of the original Limited Warranty period. -
Page 60: Hitachi Warranty Card (Usa Back)
OR TO ANY OTHER PERSON FOR ANY INCIDENTAL OR CONSEQUENTIAL DAMAGES OR LOSS OF PROFIT OR PRODUCT RESULTING FROM ANY DEFECT IN OR MALFUNCTION OR FAILURE OF THIS HITACHI PRODUCT. SOME STATES DO NOT ALLOW LIMITATIONS ON HOW LONG AN IMPLIED WARRANTY LASTS, OR THE EXCLUSION OF INCIDENTAL OR CONSEQUENTIAL DAMAGES, SO THE ABOVE LIMITATIONS MAY NOT APPLY TO YOU. -
Page 61: Hitachi Warranty Card (Front) Canada Only
The program is available only for products covered by an original validated Hitachi warranty given at the time of the purchase. B - Hitachi will make repairs to the product mentioned in this plan, parts and labour charges included, until the expiry date of this plan. - Page 62 Plan. Hitachi, however, reserves the right to refuse any renewal. I - Hitachi reserves the right to cancel the Protection Plan in case of abuse by the owner, in such case, Hitachi will reimburse the owner the portion of the plan cost, based on the period used.
-
Page 63: Warranty Does Not Cover
Camera, camcorder, AC Adaptor, Charger, 1 year parts and labour. All goods returned to either Hitachi or a Hitachi Authorized Service Center must be shipped on a "PREPAID BASIS". To avoid any damage to the returned goods, please ensure that proper packaging procedures are followed. - Page 64 HITACHI WARRANTY CARD (Front) CANADA ONLY - 64 -...
Need help?
Do you have a question about the VM-E56A and is the answer not in the manual?
Questions and answers