Table of Contents
Advertisement
Advertisement
Table of Contents

Related Manuals for Sagem MY WEB TUNER 500


Summary of Contents for Sagem MY WEB TUNER 500
- Page 1 My Web Tuner 500 User Guide English...
- Page 2 The SAGEM site (www.sagem-communications.com assistance section) also provides information on how your Web Tuner SAGEM works and how to solve any problems you may encounter. You can also contact our assistance service by E-mail. If the problem persists, you should contact our call centre (see the table below).
- Page 3 Sagem Communications accepts no liability if the regulations in force on the installation site are not complied with. Some sensitive medical equipment and safety equipment may be affected by the radio-frequency transmissions of your radio.
-
Page 4: Table Of Contents
ONTENTS Your Web Tuner Main Features Unpacking Front Panel Rear Panel Remote control functions Installing the batteries Web Tuner SET-UP Menu Structure Installation Network Setup Basic Requirements Configuration as a Wireless Client Configuration as a Wired Client Configuration as a Wireless Access Point (AP) Listening to Music Listening to Internet Radio Handle your VTuner web interface... - Page 5 ONTENTS Miscellaneous Setup Functions Backlight Settings Language Choice Equalizer Settings Reset to Factory Default Settings Clear Favorites Check Firmware Version Software Updation Appendix Care and Maintenance Problems Specifications Environment Packaging Batteries The product...
-
Page 6: Your Web Tuner
UNER 1. Y UNER This product is a Web Tuner that will allow you, once connected to an internet gateway and plugged in your hi-fi system, to access worlwide internet radio stations and to listen to your digital musical files stored on your PC, on a multimedia UPnP server or on a portable music player. -
Page 7: Front Panel
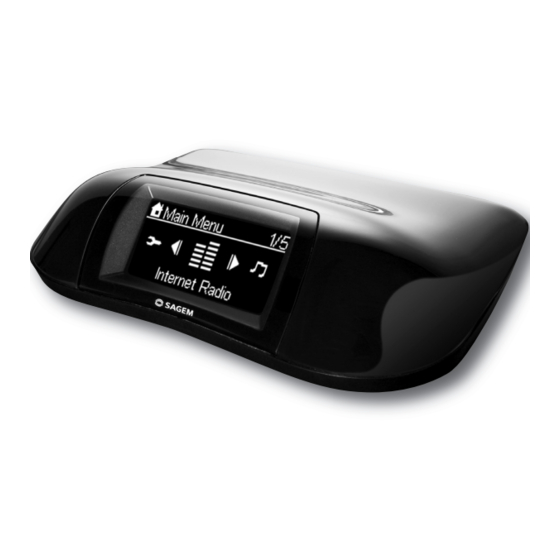
UNER 1.3. RONT ANEL IrDA receiver Display screen 1.4. ANEL Power switch DC power jack RJ45 port USB port RCA jacks for line out... -
Page 8: Remote Control Functions
UNER 1.5. EMOTE CONTROL FUNCTIONS Put the device in Standby on / Adjust / off the screen mode. backlight Stop the music and go back to the main menu/ Alphanumeric Keypad Stop the alarm Direct access Internet Radio menu / Snooze function / Sleep mode Direct access to Media... -
Page 9: Installing The Batteries
UNER 1.5.1. Installing the batteries Take the remote control and turn it around so that the battery compartment is accessible. Insert the batteries one after the other in compliance with the battery polarity, as shown on the battery slot. Refit the battery compartment cover, first by the bottom, then lowering the top until full closure. At the end of their useful life, batteries must be disposed of according to the recycling instructions presented in this booklet. -
Page 10: Web Tuner Set-Up
UNER 1.6. SET-UP UNER Your Web Tuner does not have any loudspeakers. To listen to radio stations on the Internet, your songs stored on your PC or your songs stored on your MP3 key; your Web Tuner must be connected to a Hi-Fi system via an RCA cable. R IG E IN L IN... - Page 11 UNER (A) For the Selection Screen & Playback screen Playback Screen Select Screen (Screen with name (Screen with menu list) of station / song) SNOOZE No function Launches the timer for 15, 30, 45, or 60 min (stops the current music source after time selected) - Information screen displayed for 3s.
- Page 12 UNER (B) For the Idle screen (clock screen) Standby screen Standby Screen Standby Screen & Music Playing & Alarm Music & No Music SNOOZE Launches 15, 30, 45, STOPS the No function or 60 min timer to stop music (Goes current music source back clock...
- Page 13 UNER For the Idle screen (clock screen) (continued) Standby screen Standby Screen Standby Screen & Music Playing & Alarm Music & No Music RIGHT Radio IP Goes back to Station Identical. Main menu radio screen. displayed. Media First press: Identical. Server Goes back to song playing screnn.
-
Page 14: Menu Structure
UNER 1.7. TRUCTURE Locations Internet Radio Station List Genres New Stations Popular Stations Favorite Stations Genre Location VTuner ID Media Server MP3 Player Alarm Alarm 1 Alarm 2 Sleep Function Current time Setup Clock Time Setup Time Display Format Language Main Language V-Tuner Language Backlight... -
Page 15: Installation
NSTALLATION 2. I NSTALLATION 2.1. ETWORK ETUP 2.1.1. Basic Requirements For the Web Tuner device to work properly under your existing network environment, your network must feature the following: You must have a router device with an enabled DHCP server function, so that it can automatically assign the IP address to your computer or another network device. -
Page 16: Configuration As A Wireless Client
NSTALLATION Case II I use wireless connection, and 1. I have to execute a dial-up program from my computer to link to the ISP service, and I can then access the Internet. There is no router device in your home. You need to purchase a new router device to upgrade your home network. - Page 17 NSTALLATION (A) Using the device for the first time, without an Ethernet cable connection: Screen on the Screen shot Next screen Comment right Initial screen Device run as a Wireless Client. "OK" button Select language. "OK" button Select the Internet radio menu language.
- Page 18 NSTALLATION Using the device for the first time, without an Ethernet cable connection (continued) Screen on the Screen shot Next screen Comment right "OK" button ! You could have the option to connect to the internet through a proxy server. If you are connected directly to the internet, select «No».
- Page 19 NSTALLATION Using the device for the first time, without an Ethernet cable connection (continued) Screen on the Screen shot Next screen Comment right device already connected to your network.
- Page 20 NSTALLATION (B) Manually set to the Wireless Client Mode: Screen on the Screen shot Next screen Comment right "OK" button Initial screen " " button " " button (4 times) or "OK" button " " button " " button (Once) or "OK"...
- Page 21 NSTALLATION Manually set to the Wireless Client Mode (continued) Screen on the Screen shot Next screen Comment right "OK" button ! You could have the option to connect to the internet through a proxy server. If you are connected directly to the internet, select «No». Otherwise, activate this option and enter the IP address and the port of your proxy server.
- Page 22 NSTALLATION Manually set to the Wireless Client Mode (continued) Screen on the Screen shot Next screen Comment right device already connected to your network.
-
Page 23: Configuration As A Wired Client
NSTALLATION 2.1.3. Configuration as a Wired Client If there is no 802.11b/g wireless network in your home, and only a wired 802.3 network is available, the Web Tuner device can connect to the wired network via an Ethernet cable. In this case, before powering the device, you need to plug the Ethernet cable into the RJ45 connector. - Page 24 NSTALLATION (B) Manually set to the Wired Client Mode: Screen on the Screen shot Next screen Comment right "OK" button Initial screen " " button " " button (4 times) or "OK" button " " button " " button (Once) or "OK"...
- Page 25 NSTALLATION Manually set to the Wired Client Mode (continued) Screen on the Screen shot Next screen Comment right Apply new settings. The device is now wired client mode. device already connected to your network.
-
Page 26: Configuration As A Wireless Access Point (Ap)
NSTALLATION 2.1.4. Configuration as a Wireless Access Point (AP) If you wish to extend your wireless network coverage range, you need to add new access points to specific locations in your home. This will enable other wireless notebook PCs and network devices to access the extended wireless network. - Page 27 NSTALLATION Manually set to the Wireless AP Mode (continued) Screen on the Screen shot Next screen Comment right " " button " " button Select the DHCP (Once) or "OK" button for auto configured IP address. Numeric "OK" button Enter the Identifier (name) for this AP.
- Page 28 NSTALLATION Manually set to the Wireless AP Mode (continued) Screen on the Screen shot Next screen Comment right "OK" button Confirm the settings above. Apply new settings. The device is in wireless AP mode now. device already connected to your network and can now operate.
-
Page 29: Listening To Music
ISTENING TO USIC 3. L ISTENING TO USIC The Web Tuner device is a high-performance audio player that can play music from various types of source. You can use it to listen to Internet radios all over the world, music files in your computer, and even music files in portable USB storage devices (external USB HDD-based storage, USB Flash, MP3 player).. - Page 30 ISTENING TO USIC Your Web Tuner connects to the Vtuner server storing the list of internet radios avalaible. the following screen is displayed: The access to the list of radios can take a few seconds. The next screen is as follows. It means the Web Tuner has successfully connected to the Internet server and has retrieved information from the server.
- Page 31 ISTENING TO USIC Access sequence to the French FM station "FM PLUS" (continued) Screen on the Next screen Comment Screen shot right " " button " " button (4 times) or "OK" button " " button " " button (15 times) or "OK"...
- Page 32 ISTENING TO USIC Access sequence to the French FM station "FM PLUS" (continued) Screen on the Next screen Comment Screen shot right Music playing… The navigation in the list of radios is done using the keys on your remote control. You can also use the alphanumerical keypad on your remote control in order to do an alphabetical search by entering the first letters of the searched station.
-
Page 33: Handle Your Vtuner Web Interface
ANDLE YOUR UNER WEB INTERFACE Sagem offers you the possibility to handle your personnal web interface of radio stations on its web site http://sagem.vtuner.com/. You can create and sort out your own list of Vtuner radio stations but also add a radio station that would not be in the VTuner list. - Page 34 ISTENING TO USIC Click on 4. The next page presents the different radio stations grouped by format, location and language. From the field "Browse by Format, Location or Language" click on the desired link to choose a grouping type. 5. A list of folders sorted out following your choice is displayed. The number of radio stations available for each category is displayed between brackets.
- Page 35 ISTENING TO USIC 6. A list of radio stations is displayed on your web browser: 7. To listen to a radio station on line, click on A window proposes you to download the radio station file. Click on "Download". Once the download is over, open the downloaded file with Windows Media Player 11. The radio station is played.
-
Page 36: Create And Edit Your Own Radio Station Folders
3.2.2. Create and edit your own radio station folders Once register on the web site http://sagem.vtuner.com, you can open a Vtuner session by using your email address and the password you have defined. 1. Choose a folder, the list of radio station appears. Click on... - Page 37 ISTENING TO USIC 2. A message confirms that your station has been added. 3. You can access the various folders that you have created from the main menu of your web interface in the field : "My favorite groups".
-
Page 38: Add Internet Radio Stations
ISTENING TO USIC 3.2.3. Add internet radio stations You can add internet radio stations that do not appear on the initial list by doing the following : 1. From the main page, click on from the menu "My added Stations". 2. -
Page 39: Listening To The Music In Your Computer
ISTENING TO USIC 3.3. ISTENING TO THE MUSIC IN YOUR COMPUTER To listen to the music stored in your own computer, you need to install and activate the media server utility for the computer in which your digital music is stored. Please refer to the section describing installation of the Media Server. - Page 40 ISTENING TO USIC Step 3: Switch from "Now Playing" to "Library" by clicking on the Library Tab to manage the content and share your media. The following screen will be displayed: Step 4: Add your Media content to the WMP11 media library. Click on the "Library"...
- Page 41 ISTENING TO USIC Click on the Add button , select the media folder in your computer, and then click on the OK button. You can put all of the music files in the D:\Music directory to be able to add the folder to the share list.
- Page 42 ISTENING TO USIC You will see that the specified folder will have been added to the WMP11 monitor folder list. Click on the OK button. A pop-up window will be displayed, showing you that the WMP11 is searching for the media files. Once completed, click on the "Close"...
- Page 43 ISTENING TO USIC Step 5: Share the WMP11 media library. As in to Step 4, click on the "Library" tab again to access the pull-down menu. Click on "Media Sharing" to activate the media sharing function. The following dialog windows will be displayed. Select the "Share my media"...
- Page 44 If the Web Tuner device is already connected to your home network, a screen similar to the following may be displayed, showing you that the WMP11has detected a network device named "My Web Tuner 500". Step 6: Manage the media sharing settings.
- Page 45 ISTENING TO USIC Next, press OK to exit. Step 7: Authorize access from your Web Tuner device. The WMP11 access control settings are simple. When the WMP11 detects a new network device (as shown on the final screen in Step 5), you need to decide whether you want to allow or deny the requests from that device.
- Page 46 ISTENING TO USIC Next, press the OK button to activate the settings. There is an alternative means of access management for your network devices. A small icon will be added to the Windows XP status bar to inform you that the WMP11 has detected network devices.
-
Page 47: Command From The Remote Control
ISTENING TO USIC This is the WPM11 server that you installed. Press the 'OK' button to try to connect to the server. The Web Tuner screen will read "Connecting…." and will then display the following list: You can browse the "Music" list and play the music of your choice. For further details, please refer to paragraph, “Listening to the music in your computer”, page 38. - Page 48 ISTENING TO USIC The following message will be displayed while the device is detecting all available media servers on your network. It takes a few seconds to complete. The screen will then list all of the available media servers that you are able to select. If you stay locked on one of the intermediates windows, you may have to activate the service "...
- Page 49 ISTENING TO USIC Screen on the Screen shot Next screen Comment right " " button Initial screen or "OK" button " " button " " button (Once) or "OK" button " " button or "OK" button " " button " " button (6 times) or "OK"...
- Page 50 ISTENING TO USIC Access sequence to connect to the multimedia server "SNNECCI: Windows Media" (continued) Screen on the Screen shot Next screen Comment right " " button Press " " or "OK" button button to add the current station to the list of favorites for quick access in future.
-
Page 51: Listening To The Music On Your Usb Drive
ISTENING TO USIC 3.4. ISTENING TO THE USIC ON YOUR DRIVE To listen to the music on your USB drive or portable MP3 player, connect the USB drive to the USB connector on the Web Tuner device. Next, select the "MP3 Player" function in the main menu and press the "OK"... - Page 52 ISTENING TO USIC The following screen shots illustrate the sequence used to listen to the music in the folder "Diamonds Love Song" in the attached USB drive. Screen on the Screen shot Next screen Comment right " " button Initial screen or "OK"...
-
Page 53: The Playback Screen
ISTENING TO USIC Warning ! : The interface of MP3 reader must be USB2. USB1 is not guaranteed. Warning ! : Before disconnecting the MP3 player, go to the setup menu and choose "Remove MP3 player". Select "Yes" to confirm. 3.5. -
Page 54: Alarm
LARM 4. A LARM In addition to the music playback function, the Web Tuner Device also provides a simple alarm function. There are two different alarms, one to wake you up in the morning, and another used to remind you of important times of day, or dates. 4.1. -
Page 55: Setting The Clock
LARM 4.1.1. Setting the Clock Press the "OK" or " " button to access the sub-menu to set-up the time. 4.1.1.1. Manual setting of the clock If you decide to set the clock manually, press the "OK" or the " " button to access the date and time screen. -
Page 56: Setting The Time Display Format
LARM If you want to set the clock automatically (automatic retrieval of the date and time on the Internet), select the menu "Auto-Sync (NTP)" and choose your time zone. You can also choose to activate the automatic handling of daylight saving time. The device then changes the date and time automatically when the clocks change. -
Page 57: Alarm Settings
LARM 4.2. LARM SETTINGS To enable an alarm setting, you need to set the time and alarm music. The following table illustrates a typical alarm setting procedure. It sets Alarm 1 to generate an alarm (play music) at 7:00 AM, and to use the Internet radio station "4U Classical Rock" as the source of alarm music. - Page 58 LARM " " button Set Internet radio or "OK" button as alarm source. "OK" button Select the station from your Favorites. (Refer to Sec. 3.1) Select the alarm volume level. Alarm information, displayed for 3~5 seconds The alarm is set. Once you have set and activated the alarm, a bell icon will be added to the clock screen.
-
Page 59: Snooze
LARM As with traditional clock alarms, the Web Tuner device also provides a SNOOZE function for you to stop the alarm, and request it to be activated 10 minutes later. You can press the "STOP" button to switch the alarm and music off completely. If your Web Tuner is not on the clock screen, there is no icon displayed to indicate that alarm is on. - Page 60 LARM You are listening to a radio station (IP radio) or a file (on PC /MP3 reader), You can also use the remote control by pressing the " snooze " key up to the choosen time. Once the sleep function is activated, the following icon is displayed on the clock screen:.
-
Page 61: Miscellaneous Setup Functions
ISCELLANEOUS ETUP UNCTIONS 5. M ISCELLANEOUS ETUP UNCTIONS There are other useful setup functions to ensure optimum use of the device. 5.1. ACKLIGHT ETTINGS You can adjust the backlight ON / OFF settings. The default setting is always ON. You can set the backlight to be turned OFF when the device is idle (no keys pressed) after a specified amount of time. -
Page 62: Equalizer Settings
ISCELLANEOUS ETUP UNCTIONS Choice of V-Tuner language: 5.3. QUALIZER ETTINGS You can adjust the equalization from Radio, media server and MP3 menus. Once on the selected station screen, or file , key OK. 5.4. ESET TO ACTORY EFAULT ETTINGS When you reset the device to its factory default settings, your Internet radio favorites settings will be stored in the device. -
Page 63: Check Firmware Version
ISCELLANEOUS ETUP UNCTIONS 5.6. HECK IRMWARE ERSION 5.7. OFTWARE PDATION This function will allow you to proceed the software updating by mean of an USB2 key containing the programm file. You can visit the supplier's website to check whether there is any new firmware for this device to upgrade it. - Page 64 ISCELLANEOUS ETUP UNCTIONS Step 4: You can check whether the Web Tuner upgrade has been successful by checking the F/W version in the menu "Setup\Advanced Setup\Firmware Version". In this case, the firmware version must be the same as the new firmware file downloaded.
-
Page 65: Appendix
PPENDIX 6. Appendix 6.1. Care and Maintenance Switch off your Web Tuner. Use a smooth and dry cloth to wipe it. Do not use a rough cloth, powerful liquid cleaners, thinner painting, alcohol nor other solvents to clean it. These products can damage your Web Tuner. - Page 66 PPENDIX Access denied to the Check that your Web Tuner is not encoded. Web Tuner from a Else you must have the encoding key to access. personal computer as an access point (Media Server). The alarm does not ring. • Check that the alarm source is configurated well (sample: the mp3 player is disconnected,...).
- Page 67 PPENDIX In case of non receiving on Internet, refer to the table here under. What has been done with succes What could be the trouble ? The Web Tuner is booted normally. The Web Tuner doesn't get an IP address. 1.
- Page 68 PPENDIX Connection between Web Tuner and 1. The streaming service of the radio station is radio station is OK. unavailable or heavy loaded. 2. The Web Tuner doesn't support the service type of the radio station. ONLY THREE BARS IN THE RADIO STATION LOGO.
-
Page 69: Specifications
PECIFICATIONS 7. S PECIFICATIONS Hardware and Port Characteristic AMRISC 10020 Memory Flash 1MB, SDRAM 2MB Front Panel Display 128x64 Graphic-based & Back-lighted LCD Remote Control 1 x IrDA Receiver on front panel Audio Port 2 x RCA connectors for stereo out 1 x RJ45, 10/100 Mbps with Auto - MDI/MDIX Ether Port 1 x USB Jack (type A),... - Page 70 PECIFICATIONS Main Characteristic PC-based audio server (streaming out the music per audio adapter's request) Attached USB-based storage or MP3/WMA player Audio source vTuner Internet radio stations (streaming MP3 & WMA). 1. Thru vTuner: .mp3, .wma (w/o DRM). 2. Thru Audio Server: .mp3, .wma (w/o DRM), Supported Audio Format wav (including IMA-ADPCM @48kbps).
-
Page 71: Environment
8. E NVIRONMENT Preservation of the environment is an essential concern of Sagem Communications. The desire of Sagem Communications is to operate systems observing the environment and consequently it has decided to integrate environmental performances in the life cycle of its products, from manufacturing to commissioning, use and elimination. - Page 72 User Manual Data subject to change without notice Sagem Communications SAS Société par actions simplifiée au capital de 158.291.895 € - 440 294 510 RCS PARIS Le Ponant de Paris - 27, rue Leblanc - 75015 PARIS - France www.sagem-communications.com...
Need help?
Do you have a question about the MY WEB TUNER 500 and is the answer not in the manual?
Questions and answers