Table of Contents
Advertisement
Advertisement
Table of Contents

Related Manuals for Digi-Frame Photo Scanner

Summary of Contents for Digi-Frame Photo Scanner
- Page 1 Photo Scanner User Guide...
-
Page 2: Supported Memory Cards
What’s in the Box Check the package for the following items. If there are any items missing or damaged, please contact your place of purchase immediately. Scanner AC Power Adapter CD containing User Guide Scan To PC software (on CD) Calibration Card Roller Cleaning Tool Sensor Cleaning Swab... -
Page 3: Table Of Contents
Table of Contents Introduction ..................3 Scanner Overview .................4 Installation & Operation .............5 Initial Setup ............5 Power on the Scanner ..........6 Scan an Original ............ 7 Power off the Scanner..........8 ... -
Page 4: Introduction
Introduction Congratulations on your purchase of a DigiFrame Photo Scanner. Now you can scan and store your printed photos directly to your memory card or USB Stick without connecting to any computer. Simply insert a memory card or USB into the scanner, and power it on. -
Page 5: Scanner Overview
Scanner Overview Name Function/ Description 1 Power Button Press to power on or off. 2 Custom Button Press the button to start cleaning the roller. Slide the guide lever to adjust for various sized 3 Guide Lever originals to ensure the proper alignment. 4 Indicator light Indicates the operating status of the scanner. -
Page 6: Installation & Operation
Installation & Operation Precautions Keep the product out of direct sunlight. Direct exposure to the sun or excessive heat may cause damage to the unit. Do not install the product in a humid or dusty place. Be sure to use the proper AC power source. Place the product securely on an even, flat surface. -
Page 7: Power On The Scanner
Power on the Scanner Press and hold the Power button for about 1 second. The power indicator light blinks. Wait until the power indicator stops blinking and stays on steady indicating the scanner is ready. The indicator light patterns represent function status as follows: Light Description Steadily on... -
Page 8: Scan An Original
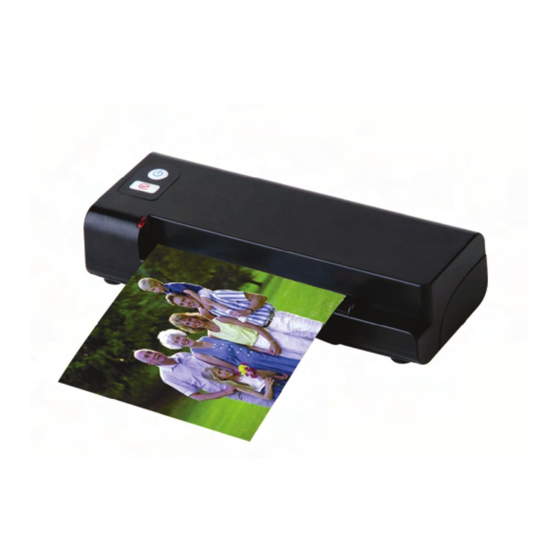
Scan an Original Insert your photo into the plastic sheath supplied with scanner. (The detailed usage of the plastic sheath is described in the next page.) With the side to be scanned facing upward and in correct orientation (bottom of photo against light/power button side), place the left edge of the original against the left edge of the feed slot, and then adjust the guide lever so that it is against the right side of the original. -
Page 9: Power Off The Scanner
Plastic Sheaths Use the clear plastic sheath (included) when scanning photos to ensure the best scanning results. The sheath helps eliminate the possibility of de-focusing due to the uneven surface of curled photos. Curled photo Fuzzy areas that result from the uneven surface of the curled photo Insert the photo into the plastic sheath as shown below. - Page 10 Important: Insert only one photo at a time, and insert the next one only when the previous one is done. Otherwise, the scanner may malfunction. The acceptable paper size is 2”x 2” ~ 4” x 6” DO NOT use the following types of originals for scanning; otherwise the scanner may malfunction or cause the original to jam in the slot.
-
Page 11: Connecting To A Computer
Connecting to a Computer By connecting the scanner to a computer, you can access the scanned images on the memory card directly, or use the scanner as a memory card reader, so that you can freely copy, paste or delete files to and from the memory card using the computer. -
Page 12: Disconnecting The Scanner From A Computer
Disconnecting the scanner from a computer On the Windows System Tray, click the hardware removal icon. Click the ‘Safely remove USB mass Storage device’ message with the corresponding Drive. When the ‘Safe to Remove Hardware’ message appears, you can safely remove the scan engine’s USB cable. -
Page 13: Scanning To Pc Manager
Scanning To PC Manager With the Scan To PC Manager, you can easily scan photos and save the scanned images directly to the connected PC. You can also choose the location where the scanned images will be saved. Starting the Scan To PC Utility Connect the scanner to your computer with a USB cable. -
Page 14: Uninstalling The Scan To Pc Manager
Scan your photo described. After your scan, a folder titled Photo1 to save the scanned images is added to a default or specified location. Note each scanned image is given a file name with the prefix img followed by a 4-digit sequential number. For example, img0001.jpg, img0002.jpg. -
Page 15: Maintenance
Maintenance Cleaning the Roller Clean the scanner’s outer casing first, using only the recommended and supplied tools. Connect the power supply to the scanner. Press and hold the power button for about 0.5 seconds to power the scanner on. Insert SD card or USB device, then the light turn green. Please hold the Custom button about 0.5 seconds. -
Page 16: 6.2 Calibrating The Scanner
Place the supplied roller cleaning tool on the feeding slot. The cleaning tool will be brought into the feeding slot automatically, and the cleaning process will begin. When the cleaning process is completed, the cleaning tool will be ejected from the feeding slot automatically. 6.2 Calibrating the scanner If the scanned image looks fuzzy or there are strange stripes on it, the scan engine may need calibrating in order for the sensor to resume its... -
Page 17: Cleaning The Image Sensor
Cleaning the Image Sensor Clean the scanner’s outer casing first, using only the recommended and supplied tools. please turn the power off first then take the adaptor off, place the supplied senor cleaning tool on the feeding slot。 Put the cleaning from one side to other side lightly and repeat it 5 or 6 times. -
Page 18: Troubleshooting
Troubleshooting If you have problems with the operation of the product, please check the following troubleshooting hints. Frequently asked Questions Question: There are strange lines on the scanned image, or the image is not clear. Answer: Check the following: Are there scratches on the original, or is the original clean? Remove any stains or dust from the original before scanning. -
Page 19: Specifications
Specifications All specifications are subject to change without notice. Sheet-fed type Specification Photo Scanner Acceptable paper size 2”x 2” ~ 4” x 6” Output image formats JPEG with compression Flash...
Need help?
Do you have a question about the Photo Scanner and is the answer not in the manual?
Questions and answers