
Related Manuals for BBQ 146.23676310


Summary of Contents for BBQ 146.23676310
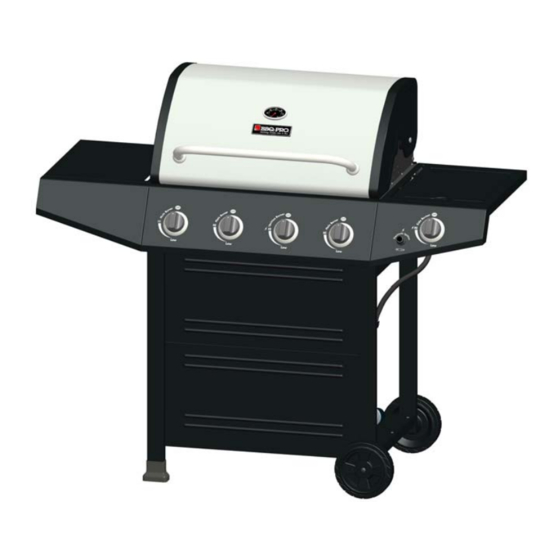
- Page 1 OWNER’S MANUAL BBQ PRO 4 BURNER GAS GRILL WITH SIDE BURNER Product code: 23676 / 0-05032629-7 Item: 146.23676310 UPC code: 182995000910 Date of purchase:...
-
Page 2: For Your Safety
CAUTION CAUTION CAUTION: Indicates a potentially hazardous situation or For residential use only. Do not use for commercial unsafe practice which, if not avoided, may result in minor cooking. or moderate injury. 2 • 146.23676310... -
Page 3: Table Of Contents
Limited Warranty on Burners Congratulations on making a smart purchase. Your new BBQ PRO the warranty period, or are conditions that can be the result For three years from the date of purchase, any burner that product is designed and manufactured for years of of normal use, accident or improper maintenance. -
Page 4: Use And Care
Never leave an LP tank inside directory under “Gas Companies” for nearest certified LP a vehicle which may become overheated by the sun. dealers. • Do not store an LP tank in an area where children play. 4 • 146.23676310... - Page 5 ▲Do not use household cleaning agents. Damage to the gas nut, holding regulator in a straight line train components (valve/hose/regulator) can result. with LP tank valve so as not to crossth- thread the connection. Nipple has to be centered into the LP tank valve. 146.23676310 • 5...
- Page 6 • If a leak is detected at any time, STOP and call the fire department. • If you cannot stop a gas leak, immediately close LP cylinder valve and call LP gas supplier or your fire department ! 6 • 146.23676310...
- Page 7 • Always close LP cylinder valve and remove After Lighting: Turn knobs to HI position for 5 minutes to coupling nut before moving LP cylinder from pre-heat grill. Then turn knob to desired setting for cooking. specified operation position. 146.23676310 • 7...
- Page 8 • Cooking surfaces: If a bristle brush is used to clean any of the grill cooking surfaces, ensure no loose bristles remain on cooking surfaces prior to grilling. It is not recommended to clean cooking surfaces while grill is hot. 8 • 146.23676310...
-
Page 9: Spider Alert
•Store grill indoors ONLY if LP cylinder is turned off and Disconnected, remove from grill and stored outdoors. • When removing grill from storage, follow “Cleaning the Burner Electrode Assembly” instructions before starting grill. 146.23676310 • 9... -
Page 10: Indirect Cooking
Ground Whole Poultry (Turkey, * United States Department of Agriculture Chicken, Duck, etc.) 165°F **Allow meat to rest three minutes before carving or consuming. Ground or Pieces Poultry 165°F (Chicken Breast, etc.) *United States Department of Agriculture 10 • 146.23676310... -
Page 11: Parts List
To order replacement parts after using grill, call 1-800-4-MY-HOME ® NOTE: Some grill parts shown in the assembly steps may differ slightly in appearance from: Those on your particular grill model. However, the method of assembly remains the same.: 146.23676310 • 11... -
Page 12: Parts Diagram
PARTS DIAGRAM 146.23676310 •... -
Page 13: Before Assembly
Step 1: Open shipping box by slicing down its edges with a box cutter, take out hardware pack and manual from top(A and B). Remove all packing materials, take out one left leg assembly (C), take out another right leg assembly (D), axle rod (E),warming rack (F), back rail (G) and bottom shelf (H). 146.23676310 • 13... - Page 14 BEFORE ASSEMBLY Step 2: Open grill lid and take out there boxes and take all parts out of boxes. • 146.23676310...
- Page 15 BEFORE ASSEMBLY Step 3: Take out the cooking grates , Grease Accumulate Panel and Front Panels from the firebox. 146.23676310 • 15...
-
Page 16: Assembly
The following hardware is provided in blister pack: M4X10 screw AAA Battery Qty: 24 pcs Qty: 1 pc M5X10 screw M5 flat washer Qty: 4pcs Qty: 4 pcs M6X13 screw M6 compression washer Qty: 16 pcs Qty: 8 pcs 16 • 146.23676310... - Page 17 (6) M4x10 screws. Do not fully tighten at this time. Cart will not be level. This will be corrected when the feet and wheels are installed. The screws used in this step: 6pcs of M4x10 screws Left Leg Assembly Right Leg Assembly Rear Front Bottom Shelf Axle hole 146.23676310 • 17...
- Page 18 □ Insert axle rod through wheel and other wheel. Attach with (1) Axle washer, nut and hitch pin. □ Hammer leg extenders into left legs. The screws used in this step: 4pcs of M6x13 screws: Axle Rod Leg Extender Front Leg Extender Rear Axle Washer Hitch Pin 18 • 146.23676310...
- Page 19 □ Attach front panel to line up with top for cart with (8) M4x10 screws. □ Attach tank baffle to front left leg and bottom shelf with (4) M4x10 screws. The screws used in this step: 12pcs of M4x10 screws Front of cart Front of cart 146.23676310 • 19 146.23676310 • 19...
- Page 20 Open lid and attach head to cart with (4) M6x13 screws and M6 compression washers. The screws used in this step: 4pcs of M6x13 screws 4pcs of M6 compression washers: 20 • 146.23676310...
- Page 21 □ Attach fascia to control panel with (1) M4x10 screw. The screws used in this step: 2pcs of M5x10 screws: 2. 2pcs of M5 flat washers: 3. 4pcs of M6x13 screws: 4. 2pcs of M6 compression washers: 4. 1pc of M4x10 screw: Side Burner Tube Valve 146.23676310 • 21...
- Page 22 □ Attach fascia to control panel with (1) M4x10 screw. (C) The screws used in this step: 2pcs of M5x10 screws: 2. 2pcs of M5 flat washers: 3. 4pcs of M6x13 screws: 4. 2pcs of M6 compression washers: 4. 1pc of M4x10 screw: 22.146.23676310...
- Page 23 □ Unscrew igniter cap from control panel. Insert (1) AAA battery (provided in blister pack) into battery slot with positive end (+) facing outward. Screw igniter cap back onto panel. (J) 146.23676310 • 23...
- Page 24 Fit diffuser tips beside tabs in firebox rear. □ Place cooking grates onto grate rests. □ Insert warming rack into brackets at top of firebox as shown. Warming Racks Cooking Grates Heat Diffusers 24 • 146.23676310...
- Page 25 Failure to install grease cup clip and cup will Failure to install tank correctly may allow gas cause hot grease to drip from bottom of grill with hose to be damaged in operation. risk of fire or property damage. 146.23676310 • 25...
-
Page 26: Troubleshooting
• Wires are loose or disconnected. • Reconnect wires or replace electrode/wire assembly. • Wires are shorting (sparking) between ignitor and electrode. • Replace ignitor wire/electrode assembly. • Dead battery. • Replace with a new AAA-size alkaline battery. 26 • 146.23676310... - Page 27 • The worn nozzles don’t have enough “bite” to engage the valve. Try cylinder. with worn threads. a second LP dealer. • Clean carry-over tube(s) with wire brush. One burner does • Grease buildup or food particles in end(s) not light from other of carryover tube(s). burner(s). 146.23676310 • 27...
- Page 28 • Electrodes are wet. • Has moisture accumulated • Use paper towel to remove moisture. on electrode and/or in burner ports? • Electrodes cracked or • Inspect electrodes for cracks. • Replace cracked or broken electrodes. Broken; “sparks at crack” 28 • 146.23676310...
- Page 29 MANUAL DE PROPIETARIO BBQ PRO PARILLA DE GAS CON 4 HORNILLAS Y HORNILLA LATERAL Código de producto: 23676 / 0-05032629-7 Item: 146.23676310 Código de UPC: 182995000910 Fecha de compra:...
- Page 30 CAUTION CAUTION CAUTION: Indica una situación potencialmente peligrosa o Sólo para uso particular. No lo use para fines comerciales. práctica peligrosa que, de no evitarse, puede resultar en lesiones menores o moderadas. 29 • 146.23676310...
- Page 31 GARANTIA LIMITADA Por su propia seguridad ..29 Garantía completa de un año para la parrilla BBQ PRO Centro de servicio para parrillas..29 Información de inscripción de la garantía . . .
- Page 32 Identifique a los vendedores daños materiales graves. autorizados de propano de su región en la sección de • No guarde el tanque de gas en lugares donde jueguen los niños. "compañías de gas" de la guía telefónica. 31 • 146.23676310...
- Page 33 El manguito de unión debe quedar centrado en la válvula del tanque de gas. 146.23676310 • 32...
- Page 34 • En caso de detectar una fuga en cualquier momento, DETÉNGASE y llame a los bomberos. • Si no puede detener una fuga de gas, ¡cierre de inmediato la válvula del tanque de gas y llame al distribuidor o a los bomberos! 33 • 146.23676310...
- Page 35 • Siempre cierre la válvula del tanque de gas y retire la con fósforos. Después del encendido: Perillas de vuelta a HI posición tuerca de unión antes de mover el tanque del sitio durante 15 minutos para precalentar parrilla. específico de uso. 146.23676310 • 34...
- Page 36 • Superficies para cocinar: Si utiliza un cepillo de cerdas para limpiar las superficies para cocinar, antes de usar la parrilla verifique que no queden cerdas sueltas sobre éstas. Se recomienda no limpiar las superficies para cocinar cuando la parrilla esté aún caliente. 35 • 146.23676310...
- Page 37 Electrode • Siga las instrucciones sobre Cómo limpiar la unidad del quemador antes de encender la parrilla, cuando la misma haya estado guardada. 146.23676310 • 36...
- Page 38 Carne molida o presas de pollo 165°F Turquía, Pollo& Pato–Todo, Piezas& Tierra 165° F (pechuga de pollo, etc.) *Departamento de Agricultura de Estados Unidos * Departamento de agricultura de Estados Unidos Deje reposar tres minutos antes de tallar o consumir las carnes. 37 • 146.23676310...
- Page 39 146.23770310 • 27 NOTA: Algunas de las piezas de la parrilla, ilustradas en los pasos de armado, pueden ser ligeramen Diferentes a las de su modelo de parrilla. Sin embargo, el metodo de armado es el mismo. 146.23676310 • 38...
- Page 40 DIAGRAMA DE PARTES DIAGRAMA DE PARTES 39 • 146.23676310...
- Page 41 (A y B) de arriba. Quite todos los materiales de embalaje, Saque una Asamblea de la pierna izquierda (C), sacar otra pierna derecha Asamblea (D), barra del eje (E), (F) de rejilla para calentar, riel (G) y estante inferior (H). 146.23676310 • 40...
- Page 42 ANTES DE LA ASAMBLEA Paso 2: Tapa de la parrilla abierta y tomar allí cajas y sacar todas las piezas de cuadros. • 146.23676310...
- Page 43 ANTES DE LA ASAMBLEA Paso 3: Quite las rejillas para cocinar, Panel de acumular grasa y paneles frontales de la cámara de combustión. 146.23676310• 42...
- Page 44 Pila AAA Tornillos de M4X10 Cant.: 24 us Cant.: 1 us Tornillos de M5X10 Arandelas de fibra de M5 Cant.: 4us Cant.: 4 us Tornillos de M6X13 Arandelas de compresión de Cant.: 16 us Cant.: 8 us 43 • 146.23676310...
- Page 45 M4x10. No apriete totalmente en este momento. Unidad de la pata izquierda Los tornillos utilizados en este paso: 6 piezas de tornillos de M4x10 Unidad de la pata derecha Parte Posteriro Parte Delantera Parte delantera Repisa inferior Orificio para el eje 146.23676310 • 44...
- Page 46 □ Martillo extensores de pierna en piernas izquierdas. Los tornillos utilizados en este paso: 4 piezas de tornillos de M6x13 Extensor de pata delantero Extensor de pata delantero Extensor de pata trasero Separador Arandela de rueda para el eje Pasador acoplamiento • 146.23676310...
- Page 47 Deflector tanque Adjuntar a los paneles frontal y la plataforma inferior con (4) tornillo de M4x10 . Los tornillos utilizados en este paso: 12 piezas de tornillos de M4x10 Parte delantera del carro Parte delantera del carro 146.23676310 • 46...
- Page 48 Fíjela con (4) tornillos de M6x13 y (4) Arandelas de compresión Los tornillos utilizados en este paso: 1. 4 piezas de tornillos de M6x13 4 piezas de arandelas de compresión de M6 • 146.23676310...
- Page 49 1. 2 piezas de tornillos de M5x10 2. 2 piezas de Arandelas de fibra de M5 3. 4 piezas de tornillos de M6x13 4. 2 piezas de arandelas de compresión de M6 5. 1 pieza de tornillos de M4x10 146.23676310 • 48...
- Page 50 6. 2 piezas de tornillos de M5x10 7. 2 piezas de Arandelas de fibra de M5 8. 4 piezas de tornillos de M6x13 9. 2 piezas de arandelas de compresión de M6 10. 1 pieza de tornillos de M4x10 Side Burner Tube Valve 49 • 146.23676310...
- Page 51 Tapa de encendido Desenrosque de panel de control. Insertar (1) pila AAA (presenta en blister) en la ranura de la batería con el extremo positivo (+) hacia afuera. Tornillo tapa encendido de nuevo en el panel. (J) 146.23676310 • 50...
- Page 52 □ Coloque rejillas para cocinar sobre la parrilla descansa. □ Insertar rejilla para calentar en los soportes en la parte superior de la cámara de combustión tal como se muestra. Parrilla de calentamiento Las parrillas de cocción Difusores de calor 51 • 146.23676310...
- Page 53 146.23676310 • 52...
- Page 54 Ajústela si es necesario. Quemador lateral (si lo tiene) • La punta del electrodo debe estar orientada hacia el agujero de combustión del quemador. La distancia debe ser de 1/8" a 3/169. Ajústela si es necesario. 53 • 146.23676310...
- Page 55 (s) de tubo tapa en su posición y dejar que el fuego se queme. Después de quemador otra (s). de prórroga (s).Fuegos persistentes, la parrilla se enfríe, quite y limpie todas las partes. 146.23676310 • 54...
- Page 56 Made in/Hecho en CHINA Distributed by Sears, Roebuck and Co., Hoffman Estates, IL 60179 See our extensive assortment of outdoor living products On-line at www.sears.com and www.kmart.com...
Need help?
Do you have a question about the 146.23676310 and is the answer not in the manual?
Questions and answers