Table of Contents
Advertisement
Quick Links
Home Entertainment System
HT-D6750W_XY_0221.indd 1
HT-D6750W_XY_0221.indd 1
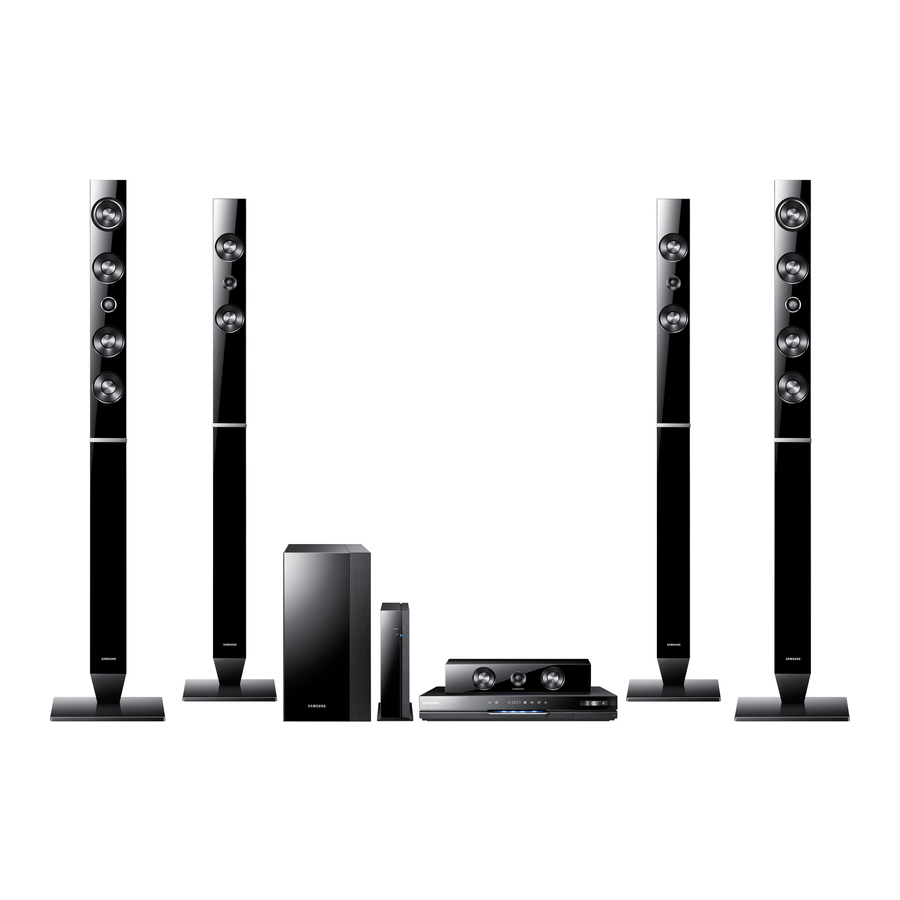
7.1CH Blu-ray™
user manual
imagine
Thank you for purchasing this Samsung product.
To receive more complete service,
please register your product at
www.samsung.com/register
the possibilities
HT-D6750W
2011-03-17
2011-03-17
1:46:39
1:46:39
Advertisement
Table of Contents

Related Manuals for Samsung HT-D6750W


Summary of Contents for Samsung HT-D6750W
- Page 1 HT-D6750W 7.1CH Blu-ray™ Home Entertainment System user manual imagine the possibilities Thank you for purchasing this Samsung product. To receive more complete service, please register your product at www.samsung.com/register HT-D6750W_XY_0221.indd 1 HT-D6750W_XY_0221.indd 1 2011-03-17 2011-03-17 1:46:39 1:46:39...
-
Page 2: Safety Information
Safety Information Safety Warnings TO REDUCE THE RISK OF ELECTRIC SHOCK, DO NOT REMOVE THE COVER(OR BACK). NO USER-SERVICEABLE PARTS ARE INSIDE. REFER SERVICING TO QUALIFIED SERVICE PERSONNEL. CAUTION RISK OF ELECTRIC SHOCK DO NOT OPEN This symbol indicates “dangerous CAUTION : TO PREVENT ELECTRIC This symbol indicates important voltage”... -
Page 3: Precautions
Precautions • Ensure that the AC power supply in your house complies with the identifi cation sticker located on the back of your product. • Install your product horizontally, on a suitable base (furniture), with enough space around it for ventilation (7.5~10cm). -
Page 4: Cautions On Handling And Storing Discs
Licenses are available on the product menu. operate correctly. If this occurs, remove the disc and let the product stand for 1 or 2 hours with the Copyright power on. © 2011 Samsung Electronics Co., Ltd. All rights reserved. English HT-D6750W_XY_0221.indd 4 HT-D6750W_XY_0221.indd 4 2011-03-17... -
Page 5: Table Of Contents
Connecting to the Network SETUP Initial Settings Accessing the Settings Menu Display 3D Settings TV Aspect Smart Hub Screen Size BD Wise (Samsung Products only) Resolution HDMI Color Format Movie Frame (24 Fs) HDMI Deep Color Still Mode Progressive Mode Audio... - Page 6 General Front Display Light Effect Network Remote Control Support Software Upgrade Contact Samsung Playing a Disc BASIC FUNCTIONS Using the Disc menu / Title menu / Popup menu Using the Search and Skip Functions Slow Motion Play/Step Motion Play Repeat Playback...
-
Page 7: Getting Started
Getting Started Icons that will be used in manual Make sure to check the following terms before reading the user manual. Term Logo Icon Definition BD-ROM This involves a function available on a BD-ROM. This involves a function available on a BD-RE/-R disc recorded in the BD-RE/-R BD-RE format. -
Page 8: Disc Types And Characteristics
Getting Started Logos of Discs that can be played Disc Types and Characteristics Blu-ray Disc Compatibility Blu-ray is a new and evolving format. Accordingly, disc compatibility issues are possible. Not all discs are compatible and not every disc will play back. For Blu-ray Disc 3D Blu-ray Disc additional information, refer to the Disc Types and... -
Page 9: Disc Types
Region Code BD-RE/-R This Blu-ray disc can be recorded and played back. Both the product and the discs are coded by This product can play back a BD-RE/-R disc region. These regional codes must match in recorded by other compatible Blu-ray disc order to play the disc. -
Page 10: Disc Format
Getting Started Disc Format Using JPEG disc • CD-R/-RW, DVD-RW/-R recorded with UDF or JOLIET format can be played back. • Only JPEG fi les with the ".jpg", ".JPG", ".jpeg" or "JPEG" extension can be displayed. • Progressive JPEG is supported. DVD-RW/-R (V) •... -
Page 11: Music File Support
File Extension Container Video Codec Audio Codec Resolution MPEG2 1920x1080 *.vro MPEG 352x288 MPEG1 LPCM 352x288 MPEG1 *.mpg MPEG 1920x1080 MPEG2 *.mpeg LPCM 1920x1080 H.264 1920x1080 MPEG2 *.ts 1920x1080 H.264 *.tp *.trp 1920x1080 HE-AAC Restrictions • Some of the Codecs above listed are not supported if having a problem with the contents. •... -
Page 12: Accessories
Getting Started Notes on USB connection Connect directly to the product's USB port. Connecting through another cable may raise problems with USB compatibility. Supported devices: Inserting more than one memory device to a multi-card reader may not operate properly. USB storage media, MP3 player, digital camera, USB card reader PTP protocol for digital camera is not supported. -
Page 13: Description
Description Front Panel 500mA ASC IN Turns the product on and off. POWER BUTTON ( The mode switches as follows : FUNCTION BUTTON BD/DVD D. IN R. IPOD W. IPOD H. IN1 H. IN2 DISPLAY Displays the playing status, time, etc. STOP BUTTON Stops disc playback. -
Page 14: Rear Panel
Getting Started Rear Panel COMPONENT OUT SPEAKERS OUT FM ANT CENTER FRONT FRONT TOP DIGITAL iPod HDMI OUT HDMI IN AUDIO IN OPTICAL SUBWOOFER FRONT FRONT TOP WIRELESS AUX IN VIDEO OUT SPEAKER IMPEDANCE : 3 Can be used for network based services (see pages 61~68), LAN TERMINAL BD-LIVE and software upgrade under the network connection. -
Page 15: Remote Control
Remote Control Tour of the Remote Control FUNCTION This is mode selection button. POWER TV SOURCE Turn the product on and off. Press to select TV's video mode. If you want to change to TV mode, Set a Sleep time to shut off the press the TV button. -
Page 16: Installing Batteries In The Remote Control
York 15, 17, 18, 48, 54, Magnavox be possible, depending on your brand of TV. 59, 60, 62, 72, 89 Yupiteru The remote control will work with Samsung TVs Marantz 40, 54 Zenith 58, 79 Matsui Zonda by default. - Page 17 Connections This section involves various methods of connecting the product to other external components. Before moving or installing the product, be sure to turn off the power and disconnect the power cord. Connecting the Speakers Position of the product Place it on a stand or cabinet shelf, or under the TV stand. Selecting the Listening Position The listening position should be located about 2.5 to 3 times the distance of the TV's screen size away from the TV.
-
Page 18: Speaker Components
Connections Speaker Components (L) (R) SWA-5000 STAND SUBWOOFER TX Card FRONT/FRONT TOP Wireless Receiver Module Speaker Cable (2EA) CENTRE SCREW (4x20): 16EA (L) (R) SCREW (5x15): 8EA SPEAKER CABLE SURROUND STAND BASE Installing the Speakers on the Tallboy Stand Turn the Stand Base upside-down and connect it to the Stand. -
Page 19: Connecting The Speakers
Connecting The Speakers Press down the terminal tab on the back of the speaker. Insert the black wire into the black terminal (–) and the red wire into the red (+) terminal, and then release the tab. Connect the connecting plugs to the back of the product by matching Black the colors of the speaker plugs to the speaker jacks. -
Page 20: Attaching The Toroidal Ferrite Core To The Power Cord Of
"0""1""3""5" number buttons and then turn on the unit. With the wireless receiver module turned on, press "ID SET" button on the back of the wireless receiver module for 5 seconds. And then power on the product (HT-D6750W). Attaching the Toroidal Ferrite Core to the Power Cord of the Main Unit If you attach a Toroidal ferrite core to the power cord of the man unit, it will help to prevent RF interference from radio signals. - Page 21 Connecting External Devices/your TV via HDMI HDMI is the standard digital interface for connecting to devices such as a TV, projector, DVD player, Blu-ray player, set top box, and more. Because HDMI is all digital, you'll enjoy digital quality video and sound as it was originally created, without the distortions that can be caused when digital content is converted to analogue.
-
Page 22: Connecting The Fm Antenna
Connections HDMI IN : Connecting to an External Component with an HDMI Cable Connect an HDMI cable (not supplied) from the HDMI IN jack on the back of the product to the HDMI OUT jack on your digital device. Press the FUNCTION button to select H. IN1 or H. IN2 input. The mode switches as follows : BD/DVD D. - Page 23 Blue Green METHOD 1 COMPONENT OUT SPEAKERS OUT SPEAKERS OUT CENTER FRONT FRONT TOP METHOD 2 Yellow SUBWOOFER FRONT FRONT TOP AUX IN AUX IN VIDEO OUT SPEAKER IMPEDANCE : 3 SPEAKER IMPEDANCE : 3 METHOD 1 : Component Video (BETTER QUALITY) If your television is equipped with Component Video inputs, connect a Component video cable (not supplied) from the Component Video Output (Pr, Pb and Y) Jacks on the back of the product to the Component Video Input Jacks on your TV.
-
Page 24: Connecting Audio From External Components
Connections Connecting Audio from External Components COMPONENT OUT COMPONENT OUT FM ANT FM ANT DIGITAL HDMI OUT HDMI OUT HDMI IN HDMI IN AUDIO IN OPTICAL WIRELESS WIRELESS AUX IN VIDEO OUT VIDEO OUT White Optical Cable (not supplied) Audio Cable (not supplied) If the external analogue component has only one... -
Page 25: Connecting To The Network
✎ NOTE Internet access to Samsung’s software update server may not be allowed, depending on the router you use or the ISP’s policy. For more information, contact your ISP (Internet Service Provider). For DSL users, please use a router to make a network connection. -
Page 26: Wireless Network
If you select the Pure High-throughput (Greenfi eld) 802.11n mode and set your AP's Security Encryption type to WEP, TKIP or TKIPAES (WPS2Mixed), your Samsung home cinema will not support the connection in compliance with new Wi-Fi certifi cation specifi cations. -
Page 27: Initial Settings
Plug the ASC microphone into the ASC IN jack product to an Anynet+(HDMI-CEC)- on the product. (See page 34) compliant Samsung TV and 1.) You have set Press the ENTER button to select Start button. the Anynet+(HDMI-CEC) feature to On in Setting the Musical Auto Calibration function both the TV and the product and 2.) You have... -
Page 28: Accessing The Settings Menu
When the product is connected to a network, select Internet from the Home menu. MENU Button : Press to move to the Home menu. Download the desired content from Samsung Apps. (See pages 68~70) RETURN Button : Return to the previous menu. -
Page 29: Display
Depending on the content and the position of Display the picture on your TV screen, you may see You can confi gure various display options such as vertical black bars on the left side, right side, or the TV Aspect Ratio, Resolution, etc. both sides. -
Page 30: Tv Aspect
When you connect a Samsung product and a 16:9 Original : Select when you connect the Samsung TV with BD Wise to each other via HDMI, product to a 16:9 TV screen. The product will and BD Wise is on in both the product and TV, the display all content in its original aspect ratio. - Page 31 Resolution according to the output mode • Blu-ray Disc/E-contents/Digital Contents playback HDMI / connected HDMI / not connected HDMI Mode Component Mode Output Component/ Setup E-contents/ E-contents/ VIDEO Mode VIDEO Mode Blu-ray Disc Digital Blu-ray Disc Digital contents contents Resolution of BD Wise 1080p@60F 576i/480i...
-
Page 32: Hdmi Color Format
Setup ✎ NOTE Movie Frame (24 Fs) If the TV you connected to the product does Setting the Movie Frame (24Fs) feature to Auto not support Movie Frame or the resolution you allows you to adjust the product’s HDMI output to selected, the message “If no pictures are 24 frames per second for improved picture quality. -
Page 33: Audio
Distance Audio If the speakers cannot be placed at equal Speaker Settings distances from the listening position, you can adjust the delay time of the audio signals from the front, front top, centre, surround and subwoofer Settings speakers. Speaker Settings Display •... -
Page 34: Musical Auto Calibration
Setup ✎ Musical Auto Calibration NOTE Setting the Musical Auto Calibration By setting the Musical Auto Calibration (MAC) function takes about 3 minutes. function just once when you relocate or install the The Musical Auto Calibration setup can be made product, you can have the product automatically when there is no disc in the product. -
Page 35: Hdmi Audio
• HDMI Audio Bitstream (Re-encoded Dolby D) : Select if you don’t have an HDMI supported AV The audio signals transmitted over the HDMI receiver, but have an AV receiver with Dolby Digital decoding capabilities. Cable can be toggled On/Off. •... -
Page 36: Dynamic Range Control
Setup Digital Output Selection Bitstream Bitstream Bitstream Setup (Re-encoded (Re-encoded (Unprocessed) DTS) Dolby D) HDMI supported HDMI supported HDMI supported HDMI supported Connection AV receiver AV receiver AV receiver AV receiver Re-encoded Up to 7.1ch DTS re-encoded Dolby Digital * Re-encoded Dolby Digital Up to 7.1ch... -
Page 37: Audio Sync
Audio Sync Wired Network Video may look slower than the audio when the Setting Up a Wired Connection - Auto product is connected to a digital TV. If this occurs, adjust the audio delay time to match the Press the ▲▼ buttons to select Wired. video. - Page 38 Setup To enter the Network settings into your product, Wireless Network follow these steps: You can setup a wireless network three ways: Press the ▲▼ buttons to select Wired, and • Wireless (General) then press the ENTER button. • Using WPS(PBC). Press the ◄►...
- Page 39 On the Security screen, enter your network’s To enter the Network settings into your product, Pass Phrase. Enter numbers directly using follow these steps: your remote control. Follow Steps 1 through 5 in the ‘Setting Up To select a letter, press the ▲▼◄► buttons the Wireless Network Connection - Auto’...
-
Page 40: Network Status
BD-LIVE contents containing a You can set up the wireless connection valid certifi cate. automatically if you have a Samsung Wireless • Prohibit : No Internet connection is allowed for Router which supports One Foot Connection. To any BD-LIVE content. -
Page 41: System
This function is not available if the HDMI cable Settings does not support CEC. Time Zone Display If your Samsung TV has an Anynet+ logo, then Audio it supports the Anynet+ function. Network Depending on your TV, certain HDMI output... -
Page 42: Language
Setup Change Password Language Change the 4-digit password used to access You can select the language you prefer for the security functions. Home menu, disc menu, etc. • On-Screen Menu : Select the language for the If you forgot your password on-screen displays. -
Page 43: Network Remote Control
Select On in the Network Remote Control Download pop-up appears with a progress menu. bar and the download starts. Install the Samsung network remote control When the download is complete, the application to control your product on your Upgrade Query window appears with three compatible portable device. - Page 44 By USB In the product’s menu, go to Settings > Support > Software upgrade. To upgrade by USB, follow these steps: Select By Disc. Visit www.samsung.com/bluraysupport Download the latest USB software upgrade ✎ NOTE zip archive to your computer. ...
-
Page 45: Contact Samsung
✎ NOTE To use the Download in Standby Mode function, your product must be connected to the Internet. Contact Samsung Provides contact information for assistance with your product. English HT-D6750W_XY_0221.indd 45 HT-D6750W_XY_0221.indd 45 2011-03-17... -
Page 46: Using The Disc Menu / Title Menu / Popup Menu
Basic Functions • Audio CD (CD-DA) Playing a Disc track 1 track 2 track 3 track 4 track 5 Playback Insert a disc into the disc slot with the disc's label facing up. • MP3, WMA, DivX, MKV and MP4 Press the PLAY (►) button. -
Page 47: Using The Search And Skip Functions
Using the Title Menu Using the Search and Skip Functions During playback, you can search quickly through a chapter or track, and use the skip function to jump to the next selection. During playback, press the TITLE TITLE MENU MENU button on the remote POPUP Searching for a Desired Scene control. -
Page 48: Slow Motion Play/Step Motion Play
Basic Functions Slow Motion Play/Step Motion Play > Off Repeat Slow Motion Play hzZyx To return to normal play, press the REPEAT button again. • pause ( mode, press the SEARCH () Press the ▲▼ buttons to select Off, the button. -
Page 49: Using The Tools Button
Information about the primary / secondary Using the TOOLS button mode will be also displayed if the Blu-ray Disc has a BONUSVIEW section. During playback, you can operate disc TOOLS menu by pressing the TOOLS button. Use the ◄► button to switch between primary and secondary audio modes. -
Page 50: Changing The Camera Angle
Basic Functions • Caption Function User : The user can adjust the sharpness, noise reduction, Contrast, Brightness, Colour, Tint(G/R) function. ✎ • You must have some experience with video NOTE extraction and editing in order to use this If the system is connected to a BD Wise- feature properly. -
Page 51: Listening To Music
Listening to Music ENTER button : Plays the selected track. ► button : During playback, moves to the next page in the Music List or moves to the next track Buttons on the Remote Control in the Playlist. used for Music Playback ◄... -
Page 52: Basic Functions
Basic Functions Playing an Audio CD (CD-DA)/MP3 Repeat an Audio CD (CD-DA)/MP3 REPEAT Insert an Audio CD (CD-DA) or an MP3 Disc During the Playlist playback, press into the disc slot. the REPEAT button. • For an Audio CD (CD-DA), the fi rst track will Select the desired play mode by be played automatically. -
Page 53: Sound Mode
• SMART SOUND : This will regulate and Audio CD 1/2 Page Music stabilize the volume level against a drastic Selected Items : 3 volume change when changing channels or TRACK 001 TRACK 002 during a scene transition. 00:43 03:56 TRACK 003 TRACK 004 •... -
Page 54: Playing Back A Picture
Basic Functions Dolby Pro Logic II Mode Models below support lip sync settings. Press iPod SYNC on the remote control to You can select the desired Dolby Pro change audio delay. Logic II audio mode. Supported Models : classic/3G nano/4G nano/120GB classic/160GB Classic/5G nano PL II button. -
Page 55: Playing Back A Usb Storage Device
Using the TOOLS button Playing back a USB Storage Device During the slide show playback, you TOOLS can use various function by pressing the TOOLS button. You can use the USB connection to play multimedia fi les (MP3, JPEG, DivX, etc) downloaded from the USB storage device. -
Page 56: Listening To Radio
Basic Functions Presetting Stations Listening to Radio Example : Presetting FM 89.10 into memory Using buttons on the Remote Control Press the FUNCTION button to select FM. Press the FUNCTION button to select FM. Press the TUNING/CH ( ) button to select Tune in to the desired station. -
Page 57: Connecting Ipod/Iphone Using The Usb Cable
Connecting iPod/iPhone Using the USB Cable Connecting iPod/iPhone Using the Dock If the system is connected to iPod/iPhone using If the system is connected to the iPod/iPhone the provided USB cable, you can play music in specifi c dock, you can play videos or music in iPod/iPhone using the system. -
Page 58: Use Ipod/Iphone With A Wireless Dock Cradle (Sold
Basic Functions Watching a Movie Use iPod/iPhone with a Wireless Dock Cradle (sold separately) for iPod/iPhone You can play video fi les stored in the iPod player by connecting it to the product. You can enjoy fi ner quality music through the speakers by transmitting an iPod/iPhone’s audio Connect the iPod dock connector to the iPod signal using a Wireless Transmitter. - Page 59 SWA-5000 is used. listed above. If you have a problem with any of the models listed above, please update Only Samsung wireless transmitter that is the software of the iPod/iPhone to the compliant with the system can be lastest version.
-
Page 60: How To Link The Wireless Transmitter With The Main Unit
Basic Functions Operation status of the wireless How to Link the Wireless Transmitter with the Main Unit transmitter's LED Turn off your Home Cinema. Press the 4, 7, 6, 3 buttons on the remote control in order. • The Power LED blinks once. Connect the iPod/iPhone to the Wireless transmitter. -
Page 61: Network Services
Network Services You can enjoy various network services such as The Smart Hub screen appears. Smart Hub or BD-LIVE by connecting the ✎ product to your network. NOTE Certain applications are available only in certain Read the following instructions before using countries. - Page 62 For pay DivX contents with copy protection can only be played through a composite, a Samsung Apps : You can download various for component or an HDMI cable. pay or free-of-charge application services. Recommended : Displays recommended contents managed by Samsung.
- Page 63 To create an account, follow these steps: Press the RED (A) button on your remote control. The Login screen appears. . , – Search Your Video Samsung Apps Contents 1 Contents 2 Contents 3 Contents 4 pqrs wxyz Login...
- Page 64 Network Services When done, press the ENTER button to Select the Down Arrow next to the Smart select OK, and then press the ENTER TV ID fi eld, and then press the ENTER button again. The Create Account screen re- button.
- Page 65 NOTE you registered on the Register Service Account screen. If you have a Samsung account and you want to use the Samsung Apps function in Smart Deactivate Account Hub, you must register your Samsung Apps account here. See page 68 for more The Deactivate Account function deactivates your information.
- Page 66 ENTER button. The Move Runs a test which shows how fast your window opens. connection to the Samsung's server is in Mbps (Megabits per second). Press the ▲▼◄► to move the icon. Press Speeds lower than 1.5 Mbps can limit your the ENTER button when the icon is in the enjoyment of Smart Hub.
- Page 67 Move to Folder Rename Folder The Move to Folder function lets you move a The Rename Folder function lets you rename widget to a folder. To use the Move to Folder folders. To use the Rename Folder function, function, follow these steps: follow these steps: Press the YELLOW (C) button on your Press the YELLOW (C) button on your...
- Page 68 Released window appears confi rming the lock has been release, and then closes. To download for pay apps, you need to create a Samsung Account and add a credit card to the Delete account. The Delete function lets you delete widgets from To create a Samsung account, please visit www.
- Page 69 Using the Samsung Apps Screen Samsung Apps by category To use the Samsung Apps screen, follow these The following categories are available: steps: • What’s New? : Displays newly registered applications. Press the ◄► buttons to move to the category list on the left.
-
Page 70: Bd-Live
The Internet contents services may be added You can download the PC software and get detailed or deleted by providers without notice. instructions for using AllShare from the Samsung. com web site. For instructions to use Your Video or Search Function, please visit www.samsung.com... -
Page 71: Other Information
Refer to the chart below when this product does not function properly. If the problem you are experiencing is not listed below or if the instruction below does not help, turn off the product, disconnect the power cord and contact the nearest authorized dealer or Samsung Electronics Service Centre. Symptom Check/Remedy I cannot eject the disc. - Page 72 Other Information Symptom Check/Remedy Aspect ratio cannot be changed. • You can play 16:9 BD/DVDs in 16:9 Wide mode, 4:3 Letter Box mode, or 4:3 Pan - Scan mode, but 4:3 BD/DVDs can be seen in 4:3 ratio only. Refer to the Blu-ray Disc jacket and then select the appropriate function.
- Page 73 Symptom Check/Remedy PC Share Manager function I can see folders shared through • Since it shows only fi les corresponding to the Image, Music, and Movie the PC Share Manager, but I categories, fi les that do not correspond to these categories may not be cannot see the fi...
-
Page 74: Specifi Cations
Other Information Specifi cations Weight 3.5 kg Dimensions 429.3 (W) x 58.4 (H) x 325.1 (D) mm General Operating Temperature Range +5°C to +35°C Operating Humidity Range 10 % to 75 % Signal/noise ratio 55 dB FM Tuner Usable sensitivity 12 dB Total harmonic distortion 0.5 %... - Page 75 Centre : 0.57 kg, Subwoofer : 3.80 kg *: Nominal specifi cation - Samsung Electronics Co., Ltd reserves the right to change the specifi cations without notice. - Weight and dimensions are approximate. - Design and specifi cations are subject to change without prior notice.
- Page 76 Contact SAMSUNG WORLD WIDE If you have any questions or comments relating to Samsung products, please contact the SAMSUNG customer care centre. Contact Centre Contact Centre Area Web Site Area Web Site ` North America 0700 Samsung (0700 726 Serbia www.samsung.com...
- Page 77 HT-D6750W_XY_0221.indd 77 HT-D6750W_XY_0221.indd 77 2011-03-17 2011-03-17 1:48:45 1:48:45...
Need help?
Do you have a question about the HT-D6750W and is the answer not in the manual?
Questions and answers