Advertisement
Available languages
Available languages
Quick Links
Questions or problems? Before returning to your retailer, call our
technical service department at 1-800-858-8501 (English speaking
only), 7:30 am to 4:30 pm, CST, Monday – Friday.
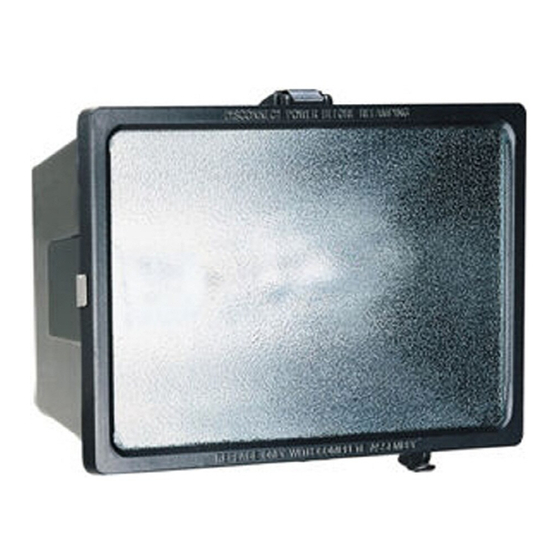
PaCkage CONTeNTs
• Floodlight
• Bulb
• Wire connectors
iNsTaLLaTiON iNsTruCTiONs
Estimated Installation Time: 30 minutes
Items needed for installation (not included):
• Phillips and flathead screwdrivers
• Pliers
• Wire strippers/cutters
• Safety glasses
• Silicone caulk
• Ladder
• Black tape
reaD aLL iNsTruCTiONs CareFuLLY BeFOre
BegiNNiNg iNsTaLLaTiON.
NOTe: All wiring must be run in accordance with the National
Electrical Code (Canadian Electrical Code in Canada)
through conduit or another acceptable means. Contact a
qualified electrician if there is any question as to the suit-
ability of the system.
Lamp in Fixture Contains Mercury. Dispose according
to Local, state, or Federal Laws.
WarNiNg: Turn power off at the circuit breaker or
fuse.
1. Install light fixture to an approved outdoor weatherproof junction
box cover plate (not included).
Fixture
Locking Screw
Metal Reflector
© 2007 HeathCo LLC
items
247589
247588
Photocontrol
Mounting
Lock Nut
Arm
Cover Plate
Gasket
Models
UT-5675-BZ
UT-5677-BZ
2. Connect the fixture wires to the junction box wires (black
to black, white to white, and the fixture ground wire to the
junction box ground wire). Secure with the wire connectors
provided.
3. Secure the cover plate (not included) to the outdoor weatherproof
junction box (not included) with two screws (not included).
4. Apply weatherproof silicone caulking around cover plate to
provide a watertight seal.
5. Adjust the fixture to aim in the general direction desired. If pos-
sible, turn the light fixture so the photocontrol* does not point
at another light or reflective surface near the fixture.
6. When you have the floodlight aimed where you want it, tighten
the lock nut on the mounting arm and the locking screw at the
fixture joint.
7. Release the clasp that holds the lens closed.
Model 5675 - Install ONLY a 100 watt mercury vapor type
H38 bulb (provided).
Model 5677 - Install ONLY a 70 watt high pressure sodium
type S62 bulb (provided).
8. Close the lens and lock it shut with the clasp.
To test operation during daylight, cover the photo control with black
tape. Turn on the power. The light will take up to ten minutes to reach
full brightness. Remove the tape from the photo control and your unit
will operate automatically—on at dusk, off at dawn.
in Case of Difficulty
If your floodlight does not turn on automatically or cycles on and off,
it could be affected by other nearby lights or is seeing its own light.
In either case, loosen the plastic nut that secures the photocontrol.
Slide the metal reflector under the nut so that the reflector causes the
photocontrol to look away from nearby lights or reflective surfaces
and retighten the plastic nut.
WarNiNg - risk of fire. Do not aim the bulbs at a
combustible surface within 3 ft. (1 m).
Junction Box
Floodlight
TesTiNg
598-1287-03
598-1287-03
Advertisement

Related Manuals for Utilitech UT-5675-BZ


Summary of Contents for Utilitech UT-5675-BZ
- Page 1 Locking Screw Metal Reflector © 2007 HeathCo LLC items Models 247589 UT-5675-BZ 247588 UT-5677-BZ 2. Connect the fixture wires to the junction box wires (black to black, white to white, and the fixture ground wire to the junction box ground wire). Secure with the wire connectors provided.
- Page 2 Reflector Metálico Empaque © 2007 HeathCo LLC articulos Modelos 247589 UT-5675-BZ 247588 UT-5677-BZ 2. Conecte los conductores del artefacto con los de la caja de empalme (negro con negro, blanco con blanco, y el conductor de puesta a tierra del artefacto con el conductor de puesta a tierra de la caja de empalme). Asegúrelos con los conectores de cable provistos.
- Page 3 Réflecteur métallique Garniture © 2007 HeathCo LLC articles Modèles 247589 UT-5675-BZ 247588 UT-5677-BZ 2. Raccordez les fils du luminaire aux fils de la boîte de jonction (Noir avec noir, blanc avec blanc; fil de mise à la terre du luminaire avec fil de mise à la terre de la boîte de rac- cordement). Fixez les connexions avec les serre-fils inclus.
- Page 4 ONe Year LiMiTeD WarraNTY This is a “Limited Warranty” which gives you specific legal rights. You may also have other rights which vary from state to state or province to prov- ince. For a period of one year from the date of purchase, any malfunction caused by factory defective parts or workmanship will be corrected at no charge to you.