ZyXEL Communications AMG1001-T Series User Manual
Adsl2+ 1-port gateway and adsl2+ 1-port ethernet/usb gateway
Hide thumbs
Also See for AMG1001-T Series:
- Quick start manual (2 pages) ,
- Quick start manual (2 pages) ,
- Quick start manual (2 pages)
Table of Contents
Advertisement
Advertisement
Table of Contents

Related Manuals for ZyXEL Communications AMG1001-T Series


Summary of Contents for ZyXEL Communications AMG1001-T Series
- Page 1 AMG1001-T Series ADSL2+ 1-port Gateway AMG1011-T Series ADSL2+ 1-port Ethernet/USB Gateway Version 1.00 Edition 1, 07/2013 Quick Start Guide User’s Guide Default Login Details IP Address http://192.168.1.1 User Name admin Password 1234 www.zyxel.com Copyright © 2013 ZyXEL Communications Corporation...
- Page 2 IMPORTANT! READ CAREFULLY BEFORE USE. KEEP THIS GUIDE FOR FUTURE REFERENCE. Note: This guide is a reference for a series of products. Therefore some features or options in this guide may not be available in your product. Screenshots and graphics in this book may differ slightly from your product due to differences in your product firmware or your computer operating system.
-
Page 3: Table Of Contents
Contents Overview Contents Overview User’s Guide ............................10 Introducing the AMG1001-T/AMG1011-T ....................12 Introducing the Web Configurator ......................21 Technical Reference ..........................25 Device Information ..........................27 System Logs ............................29 Traffic Statistics ............................31 Quick Start Wizard ..........................33 Internet Setup ............................39 LAN Setup ...............................53 Static Route .............................61 Network Address Translation (NAT) ......................64 Quality of Service (QoS) .........................74 ADSL ...............................81... -
Page 4: Table Of Contents
Table of Contents Table of Contents Contents Overview ..........................3 Table of Contents ..........................4 Part I: User’s Guide ..................10 Chapter 1 Introducing the AMG1001-T/AMG1011-T ..................12 1.1 Overview ............................12 1.2 Ways to Manage the AMG1001-T/AMG1011-T ................12 1.3 Good Habits for Managing the AMG1001-T/AMG1011-T ..............12 1.4 Applications for the AMG1001-T/AMG1011-T ...................13 1.4.1 Internet Access ........................13 1.5 LEDs (Lights) ............................13... - Page 5 Table of Contents 4.1 Overview ............................29 4.2 The System Log Screen ........................29 Chapter 5 Traffic Statistics ..........................31 5.1 Overview ............................31 5.2 The Statistics Screen ........................31 Chapter 6 Quick Start Wizard ..........................33 6.1 Overview ............................33 6.2 Quick Start Wizard ..........................33 Chapter 7 Internet Setup............................39 7.1 Overview ............................39 7.1.1 What You Can Do in the Internet Screens ................39...
- Page 6 Table of Contents 8.3.2 DHCP Setup ..........................57 8.3.3 DNS Server Addresses ......................57 8.3.4 LAN TCP/IP ..........................58 8.3.5 RIP Setup ..........................59 8.3.6 Multicast ..........................59 Chapter 9 Static Route ............................61 9.1 Overview ............................61 9.1.1 What You Can Do in the Static Route Screens ................61 9.2 The Routing Table List Screen ......................62 9.2.1 The Static Route Screen ......................62 Chapter 10...
- Page 7 Table of Contents 12.1 Overview ............................81 12.2 The ADSL Screen ...........................81 Chapter 13 Firewall ..............................82 13.1 Overview ............................82 13.1.1 What You Can Do in the Firewall Screens ................82 13.1.2 What You Need to Know About Firewall ................82 13.2 The Firewall Screen ........................83 Chapter 14 Access Control ...........................84 14.1 Access Control Overview ........................84...
- Page 8 Table of Contents 18.1 Overview ............................105 18.1.1 What You Can Do in the DDNS Screen ................105 18.1.2 What You Need To Know About DDNS ................105 18.2 The Dynamic DNS Screen ......................106 Chapter 19 CWMP ..............................107 19.1 Overview ............................107 19.2 The CWMP Setup Screen ......................108 Chapter 20 Administrator Settings ........................
- Page 9 Table of Contents Appendix A Setting Up Your Computer’s IP Address ..............126 Appendix B IP Addresses and Subnetting..................154 Appendix C Pop-up Windows, JavaScripts and Java Permissions ..........164 Appendix D Common Services......................173 Appendix E Legal Information......................176 Index ..............................179 AMG1001-T/AMG1011-T Series User’s Guide...
-
Page 10: User's Guide
User’s Guide... -
Page 12: Introducing The Amg1001-T/Amg1011-T
H A PT ER Introducing the AMG1001-T/AMG1011-T This chapter introduces the main applications and features of the AMG1001-T/AMG1011-T. It also introduces the ways you can manage the AMG1001-T/AMG1011-T. 1.1 Overview The AMG1001-T/AMG1011-T is an ADSL2+ router. By integrating DSL and NAT, you are provided with ease of installation and high-speed, shared Internet access. -
Page 13: Applications For The Amg1001-T/Amg1011-T
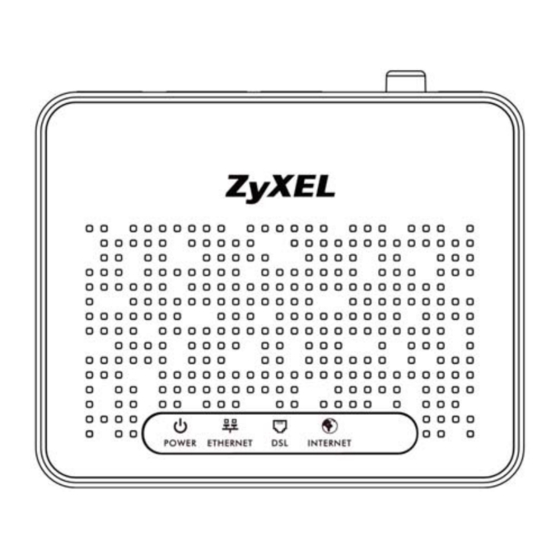
Chapter 1 Introducing the AMG1001-T/AMG1011-T • Back up the configuration (and make sure you know how to restore it). Restoring an earlier working configuration may be useful if the device becomes unstable or even crashes. If you forget your password, you will have to reset the AMG1001-T/AMG1011-T to its factory default settings. - Page 14 Chapter 1 Introducing the AMG1001-T/AMG1011-T Figure 2 LEDs on the Top of the AMG1001-T/AMG1011-T None of the LEDs are on if the AMG1001-T/AMG1011-T is not receiving power. Table 1 LED Descriptions COLOR STATUS DESCRIPTION POWER Green The AMG1001-T/AMG1011-T is receiving power and ready for use. Blinking The AMG1001-T/AMG1011-T is self-testing.
-
Page 15: The Reset Button
Chapter 1 Introducing the AMG1001-T/AMG1011-T 1.6 The RESET Button If you forget your password or cannot access the web configurator, you will need to use the RESET button at the back of the device to reload the factory-default configuration file. This means that you will lose all configurations that you had previously and the password will be reset to “1234”. - Page 16 Chapter 1 Introducing the AMG1001-T/AMG1011-T Click Next in the Welcome screen to begin the USB Installation Wizard. Follow the installation prompts. You may need to restart your computer at the end of the installation. AMG1001-T/AMG1011-T Series User’s Guide...
- Page 17 Chapter 1 Introducing the AMG1001-T/AMG1011-T Click Yes to agree to the license agreement. A Start Copying Files screen displays. Click Next. AMG1001-T/AMG1011-T Series User’s Guide...
- Page 18 Chapter 1 Introducing the AMG1001-T/AMG1011-T Windows XP: Connect the AMG1001-T/AMG1011-T to the computer’s USB port when prompted. A windows displays indicating that the system has found new hardware. 10 Windows XP: If a warning window displays, click Continue Anyway. AMG1001-T/AMG1011-T Series User’s Guide...
-
Page 19: Verifying Your Usb Installation
Chapter 1 Introducing the AMG1001-T/AMG1011-T 11 Click Finish to complete the installation. Restart the computer if prompted. 1.7.2 Verifying Your USB Installation Check the status of the AMG1001-T/AMG1011-T in the Device Manager window. Click Start > Settings > Control Panel > System > Hardware and then click Device Manager. (Steps may vary depending on the version of Windows). - Page 20 Chapter 1 Introducing the AMG1001-T/AMG1011-T AMG1001-T/AMG1011-T Series User’s Guide...
-
Page 21: Introducing The Web Configurator
H A PT ER Introducing the Web Configurator 2.1 Overview The web configurator is an HTML-based management interface that allows easy device setup and management via Internet browser. Use Internet Explorer 6.0 and later or Netscape Navigator 7.0 and later versions. The recommended screen resolution is 1024 by 768 pixels. In order to use the web configurator you need to allow: •... -
Page 22: Web Configurator Main Screen
Chapter 2 Introducing the Web Configurator Note: For security reasons, the AMG1001-T/AMG1011-T automatically logs you out if you do not use the web configurator for five minutes (default). If this happens, log in again. 2.2 Web Configurator Main Screen Figure 4 Main Screen As illustrated above, the main screen is divided into these parts: •... - Page 23 Chapter 2 Introducing the Web Configurator Table 2 Navigation Panel Summary LINK FUNCTION Quick Start Quick Start Use this wizard to set up your Internet connection. Interface Setup Internet Internet Use this screen to configure ISP parameters, WAN IP address assignment and other advanced properties.
-
Page 24: Main Window
Chapter 2 Introducing the Web Configurator Table 2 Navigation Panel Summary LINK FUNCTION Time Zone Use this screen to change your AMG1001-T/AMG1011-T’s time and date. Firmware Use this screen to manage configuration files and upload firmware to your device. SysRestart This screen allows you to reboot the AMG1001-T/AMG1011-T without turning the power off. -
Page 25: Technical Reference
Technical Reference... -
Page 27: Device Information
H A PT ER Device Information 3.1 Overview Use the Device Info screen to look at the current status of the device, system resources, and interfaces (LAN and WAN). 3.2 The Device Info Screen Use this screen to view the status of the AMG1001-T/AMG1011-T. Click Status > Device Info to open the following screen. - Page 28 Chapter 3 Device Information The following table describes the fields in this screen. Table 3 Status > Device Information LABEL DESCRIPTION Device Information Firmware This is the current version of the firmware inside the device. It also shows the date the Version firmware version was created.
-
Page 29: System Logs
H A PT ER System Logs 4.1 Overview This chapter contains information about viewing the AMG1001-T/AMG1011-T’s logs. A log is a message about an event that occurred on your AMG1001-T/AMG1011-T. For example, when someone logs in to the AMG1001-T/AMG1011-T. 4.2 The System Log Screen Use this screen to see the logs for your AMG1001-T/AMG1011-T. - Page 30 Chapter 4 System Logs The following table describes the fields in this screen. Table 4 Status > System Log LABEL DESCRIPTION System Log This field displays the log messages of your AMG1001-T/AMG1011-T. CLEAR LOG Click this to delete all the logs. SAVE LOG Click this to save the logs in a text file.
-
Page 31: Traffic Statistics
H A PT ER Traffic Statistics 5.1 Overview This chapter contains information about viewing traffic statistics of your AMG1001-T/AMG1011-T. 5.2 The Statistics Screen Use this screen to check the traffic statistics of your AMG1001-T/AMG1011-T. Click Status > Statistics to open the following screen. The screen varies depending on what type of port you selected in the Interface field. - Page 32 Chapter 5 Traffic Statistics Table 5 Status > Statistics (Ethernet) (continued) LABEL DESCRIPTION Receive Multicast This field displays the number of good multicast frames received. Frames Receive total Bytes This field displays the number of bytes received on this port. Receive CRC errors This field displays the number of frames received with Cyclic Redundant Check (CRC) errors.
-
Page 33: Quick Start Wizard
H A PT ER Quick Start Wizard 6.1 Overview This chapter provides information on the Quick Start Wizard screens. Use the wizard screens to configure your system for Internet access with the information given to you by your ISP. Note: See the advanced menu chapters for background information on these fields. 6.2 Quick Start Wizard After you enter the password to access the web configurator, click Quick Start >... - Page 34 Chapter 6 Quick Start Wizard The following screen summarizes the steps required to configure an Internet connection. Click NEXT to begin the setup. Figure 11 Wizard Summary Enter a new password for accessing the web configurator or enter your old one if you don’t want to change it.
- Page 35 Chapter 6 Quick Start Wizard Figure 14 ISP Connection Type The next wizard screen varies depending on what connection type you use. Configure the fields and click NEXT to continue. Figure 15 ISP Connection: Dynamic IP The following table describes the fields in this screen. Table 7 ISP Connection: Dynamic IP LABEL DESCRIPTION...
- Page 36 Chapter 6 Quick Start Wizard Figure 16 ISP Connection: Static IP Address The following table describes the fields in this screen. ISP Connection: Static IP Address Table 8 LABEL DESCRIPTION Enter the VPI assigned to you. This field may already be configured. VPI defines a virtual circuit.
- Page 37 Chapter 6 Quick Start Wizard ISP Connection: PPPoE/PPPoA Figure 17 The following table describes the fields in this screen. Table 9 ISP Connection: PPPoE/PPPoA LABEL DESCRIPTION Username Enter the username exactly as your ISP assigned. If assigned a name in the form user@domain where domain identifies a service name, then enter both components exactly as given.
- Page 38 Chapter 6 Quick Start Wizard The following table describes the fields in this screen. Table 10 ISP Connection: Bridge Mode LABEL DESCRIPTION Enter the VPI assigned to you. This field may already be configured. VPI defines a virtual circuit. Refer to the appendix for more information. Enter the VCI assigned to you.
-
Page 39: Internet Setup
H A PT ER Internet Setup 7.1 Overview This chapter describes how to configure Wide Area Network (WAN) settings from the Internet screens. Use these screens to configure your AMG1001-T/AMG1011-T for Internet access. A WAN connection is an outside connection to another network or the Internet. It connects your private networks (such as a Local Area Network (LAN) and other networks, so that a computer in one location can communicate with computers in other locations. - Page 40 Chapter 7 Internet Setup ADSL Terms A Permanent Virtual Circuit (PVC) is the connection for your device to the ISP. You need a Virtual Path Identifier (VPI) and a Virtual Channel Identifier (VCI) to identify a PVC. Multiplexing is a way of carrying protocols on a PVC.
-
Page 41: Before You Begin
Chapter 7 Internet Setup 7.1.3 Before You Begin You need to know your Internet access settings such as encapsulation and W AN IP address. Get this information from your ISP. 7.2 The Internet Screen Use this screen to change your AMG1001-T/AMG1011-T’s WAN settings. Click Interface Setup > Internet. -
Page 42: Dynamic Ip Address
Chapter 7 Internet Setup Table 11 Interface Setup > Internet (continued) LABEL DESCRIPTION Virtual Path Identifier (VPI) defines a virtual circuit. Refer to the appendix for more information. Enter the VPI assigned to you. Virtual Channel Identifier (VCI) defines a virtual circuit. Enter the VCI assigned to you. Refer to the appendix for more information. - Page 43 Chapter 7 Internet Setup The following table describes the labels in this screen. Table 12 Interface Setup > Internet (Dynamic IP) LABEL DESCRIPTION Encapsulation Select the method of multiplexing used by your ISP from the drop-down list box. Available options are: 1483 Bridged IP LLC, 1483 Bridged IP VC-Mux, 1483 Routed IP LLC(IPoA) and 1483 Routed IP VC-Mux.
-
Page 44: Static Ip Address
Chapter 7 Internet Setup 7.2.2 Static IP Address In the Interface Setup > Internet screen, select Static IP Address from the ISP field to display the following screen. Figure 23 Interface Setup > Internet (Static IP) The following table describes the labels in this screen. Table 13 Interface Setup >... - Page 45 Chapter 7 Internet Setup Table 13 Interface Setup > Internet (Static IP) (continued) LABEL DESCRIPTION Direction Use this field to control how much routing information the AMG1001-T/AMG1011-T sends and receives on the subnet. Select the RIP direction from None, Both, IN Only and OUT Only. Multicast Multicast packets are sent to a group of computers on the LAN and are an alternative to unicast packets (packets sent to one computer) and broadcast packets (packets sent to...
-
Page 46: Pppoa/Pppoe
Chapter 7 Internet Setup 7.2.3 PPPoA/PPPoE In the Interface Setup > Internet screen, select PPPoA/PPPoE from the ISP field to display the following screen. Figure 24 Interface Setup > Internet (PPPoA/PPPoE) The following table describes the labels in this screen. Table 14 Interface Setup >... - Page 47 Chapter 7 Internet Setup Table 14 Interface Setup > Internet (PPPoA/PPPoE) (continued) LABEL DESCRIPTION Bridge Interface This field is only available when you select PPPoE LLC or PPPoE VC-Mux in the Encapsulation field. Use this field to enable or disable the bridge mode. Activate the bridge mode when your ISP provides you with more than one IP address and you want the connected computers to get individual IP address from ISP’s DHCP server directly.
-
Page 48: Bridge Mode
Chapter 7 Internet Setup 7.2.4 Bridge Mode In the Interface Setup > Internet screen, select Bridge Mode from the ISP field to display the following screen. Figure 25 Interface Setup > Internet (Bridge) The following table describes the labels in this screen. Table 15 Interface Setup >... -
Page 49: Wan Technical Reference
Chapter 7 Internet Setup Table 16 Interface Setup > PVCs Summary (continued) LABEL DESCRIPTION ENCAP This field displays the type of encapsulation. This field displays the multiplexing method. IP Address This field displays the type of IP address. Status This field displays the connection status of the PVC. 7.3 WAN Technical Reference This section provides some technical background information about the topics covered in this chapter. -
Page 50: Multiplexing
Chapter 7 Internet Setup RFC 1483 RFC 1483 describes two methods for Multiprotocol Encapsulation over ATM Adaptation Layer 5 (AAL5). The first method allows multiplexing of multiple protocols over a single ATM virtual circuit (LLC-based multiplexing) and the second method assumes that each protocol is carried over a separate ATM virtual circuit (VC-based multiplexing). -
Page 51: Always-On Connection (Ppp)
Chapter 7 Internet Setup 7.3.5 Always-On Connection (PPP) An always-on connection is a dial-up line where the connection is always up regardless of traffic demand. The AMG1001-T/AMG1011-T does two things when you specify an always-on connection. The first is that idle timeout is disabled. The second is that the AMG1001-T/AMG1011-T will try to bring up the connection when turned on and whenever the connection is down. -
Page 52: Atm Traffic Classes
Chapter 7 Internet Setup 7.3.7 ATM Traffic Classes These are the basic ATM traffic classes defined by the ATM Forum Traffic Management 4.0 Specification. Constant Bit Rate (CBR) Constant Bit Rate (CBR) provides fixed bandwidth that is always available even if no data is being sent. -
Page 53: Lan Setup
H A PT ER LAN Setup 8.1 Overview A Local Area Network (LAN) is a shared communication system to which many networking devices are connected. It is usually located in one area such as a building or floor of a building. Use the LAN screen to help you configure a LAN DHCP server and manage IP addresses. -
Page 54: The Lan Screen
Chapter 8 LAN Setup DHCP A DHCP (Dynamic Host Configuration Protocol) server can assign your AMG1001-T/AMG1011-T an IP address, subnet mask, DNS and other routing information when it's turned on. RIP (Routing Information Protocol) allows a router to exchange routing information with other routers. - Page 55 Chapter 8 LAN Setup Figure 28 Interface Setup > LAN The following table describes the fields in this screen. Table 17 Interface Setup > LAN LABEL DESCRIPTION Router Local IP IP Address Enter the LAN IP address you want to assign to your AMG1001-T/AMG1011-T in dotted decimal notation, for example, 192.168.1.1 (factory default).
-
Page 56: The Dhcp Ip Pool Summary Screen
Chapter 8 LAN Setup Table 17 Interface Setup > LAN LABEL DESCRIPTION Starting IP Address This field specifies the first of the contiguous addresses in the IP address pool. Current Pool Click this to display a summary table for the IP address pool. See Section 8.2.1 on page Summary for more details. -
Page 57: Lan Technical Reference
Chapter 8 LAN Setup The following table describes the labels in this screen. Table 18 Interface Setup > LAN > DHCP IP Pool Summary LABEL DESCRIPTION Host Name This field displays the name of a computer that receives an IP address from the AMG1001-T/AMG1011-T. -
Page 58: Lan Tcp/Ip
Chapter 8 LAN Setup computer before you can access it. The DNS server addresses you enter when you set up DHCP are passed to the client machines along with the assigned IP address and subnet mask. There are two ways that an ISP disseminates the DNS server addresses. •... -
Page 59: Rip Setup
Chapter 8 LAN Setup Private IP Addresses Every machine on the Internet must have a unique address. If your networks are isolated from the Internet, for example, only between your two branch offices, you can assign any IP addresses to the hosts without problems. - Page 60 Chapter 8 LAN Setup improvement over version 1 (RFC 1112) but IGMP version 1 is still in wide use. IGMP version 3 supports source filtering, reporting or ignoring traffic from specific source address to a particular host on the network. If you would like to read more detailed information about interoperability between IGMP version 2 and version 1, please see sections 4 and 5 of RFC 2236.
-
Page 61: Static Route
H A PT ER Static Route 9.1 Overview The AMG1001-T/AMG1011-T usually uses the default gateway to route outbound traffic from computers on the LAN to the Internet. To have the AMG1001-T/AMG1011-T send data to devices not reachable through the default gateway, use static routes. For example, the next figure shows a computer (A) connected to the AMG1001-T/AMG1011-T’s LAN interface. -
Page 62: The Routing Table List Screen
Chapter 9 Static Route 9.2 The Routing Table List Screen Use this screen to view the static route rules. Click Advanced Setup > Routing to display the following screen. Figure 32 Advanced Setup > Routing Table List The following table describes the labels in this screen. Table 19 Advanced Setup >... - Page 63 Chapter 9 Static Route The following table describes the labels in this screen. Table 20 Advanced > Static Route: Edit LABEL DESCRIPTION Destination IP This parameter specifies the IP network address of the final destination. Routing is Address always based on network number. If you need to specify a route to a single host, use a subnet mask of 255.255.255.255 in the subnet mask field to force the network number to be identical to the host ID.
-
Page 64: Network Address Translation (Nat)
HAPTER Network Address Translation (NAT) 10.1 Overview This chapter discusses how to configure NAT on the AMG1001-T/AMG1011-T. NAT (Network Address Translation - NAT, RFC 1631) is the translation of the IP address of a host in a packet, for example, the source address of an outgoing packet, used within one network to a different IP address known within another network. -
Page 65: The Nat Screen
Chapter 10 Network Address Translation (NAT) Port Forwarding A port forwarding set is a list of inside (behind NAT on the LAN) servers, for example, web or FTP, that you can make visible to the outside world even though NAT makes your whole inside network appear as a single computer to the outside world. -
Page 66: The Dmz Screen
Chapter 10 Network Address Translation (NAT) Table 21 Network > NAT > General (continued) LABEL DESCRIPTION Virtual Server Click this to configure port forwarding rules for your AMG1001-T/AMG1011-T. See Section 10.4 on page 67 for more details. IP Address This is available only when you select Multiple in the Number of IPs field. Click this to Mapping configure address mapping rules for your AMG1001-T/AMG1011-T. -
Page 67: The Virtual Server Screen
Chapter 10 Network Address Translation (NAT) 10.4 The Virtual Server Screen LAN computers usually have DHCP-assigned private IP address that cannot be accessed directly from the WAN. Use this screen to allow the AMG1001-T/AMG1011-T to forward traffic to the servers on the LAN. -
Page 68: Configuring The Virtual Server Screen
Chapter 10 Network Address Translation (NAT) 10.4.2 Configuring the Virtual Server Screen Click Advanced Setup > NAT > Virtual Server to open the following screen. Appendix D on page 173 for port numbers commonly used for particular services. Figure 37 Advanced Setup > NAT > Virtual Server The following table describes the fields in this screen. -
Page 69: The Ip Address Mapping Screen
Chapter 10 Network Address Translation (NAT) Table 24 Advanced Setup > NAT > Virtual Server LABEL DESCRIPTION Start Port Enter a port number in this field. Number To forward only one port, enter the port number again in the End Port Number field. To forward a series of ports, enter the start port number here and the end port number in the End Port Number field. - Page 70 Chapter 10 Network Address Translation (NAT) Use this screen to change your AMG1001-T/AMG1011-T’s address mapping settings. Click Advanced Setup > NAT > IP Address Mapping to open the following screen. Figure 38 Advanced Setup > NAT > IP Address Mapping The following table describes the fields in this screen.
-
Page 71: Nat Technical Reference
Chapter 10 Network Address Translation (NAT) Table 25 Network > NAT > Address Mapping (continued) LABEL DESCRIPTION Public End IP This is the ending public IP address. This field is N/A for One-to-One, Many-to-One and Server mapping types. Address Mapping List Rule This is the rule’s index number. -
Page 72: What Nat Does
Chapter 10 Network Address Translation (NAT) when the packet is still in the local network, while an inside public address is the IP address of the same inside host when the packet is on the WAN side. The following table summarizes this information. - Page 73 Chapter 10 Network Address Translation (NAT) Figure 39 How NAT Works NAT Table Inside Local Inside Public IP Address IP Address 192.168.1.10 192.168.1.13 192.168.1.11 192.168.1.12 192.168.1.13 192.168.1.12 192.168.1.10 Inside Local Inside Public Address Address 192.168.1.11 192.168.1.10 AMG1001-T/AMG1011-T Series User’s Guide...
-
Page 74: Quality Of Service (Qos)
HAPTER Quality of Service (QoS) 11.1 Overview Use the QoS screen to set up your AMG1001-T/AMG1011-T to use QoS for traffic management. Quality of Service (QoS) refers to both a network’s ability to deliver data with minimum delay, and the networking methods used to control bandwidth. QoS allows the AMG1001-T/AMG1011-T to group and prioritize application traffic and fine-tune network performance. -
Page 75: What You Need To Know About Qos
Chapter 11 Quality of Service (QoS) • Use t he QoS Settings Summary screen (Section 11.2.1 on page 78) to check the summary of QoS rules and actions you configured for the AMG1001-T/AMG1011-T. 11.1.2 What You Need to Know About QoS 802.1p QoS is used to prioritize source-to-destination traffic flows. -
Page 76: The Qos Screen
Chapter 11 Quality of Service (QoS) 11.2 The QoS Screen Use this screen to enable or disable QoS and have the AMG1001-T/AMG1011-T assign priority levels to traffic according to the port range, IEEE 802.1p priority level and/or IP precedence. Click Advanced Setup > QoS to open the screen as shown next. Figure 41 Advanced Setup >... - Page 77 Chapter 11 Quality of Service (QoS) The following table describes the labels in this screen. Table 27 Advanced Setup > QoS LABEL DESCRIPTION Quality of Service Use this field to activate QoS to improve your network performance. You can give priority to traffic that the AMG1001-T/AMG1011-T forwards out through the WAN interface.
-
Page 78: The Qos Settings Summary Screen
Chapter 11 Quality of Service (QoS) Table 27 Advanced Setup > QoS LABEL DESCRIPTION IP Precedence Select from 0 to 7 to re-assign IP precedence to matched traffic. Zero is the lowest priority Remarking and seven is the highest. Type of Service Select a type of service to re-assign the priority level to matched traffic. -
Page 79: Qos Technical Reference
Chapter 11 Quality of Service (QoS) Table 28 Advanced Setup > QoS > QoS Settings Summary (continued) LABEL DESCRIPTION VLAN ID This is the VLAN ID associated with the rule. IPP/TOS (DSCP) This shows the IPP/TOS or DSCP settings. 802.1p This is the 802.1p priority level. -
Page 80: Automatic Priority Queue Assignment
Chapter 11 Quality of Service (QoS) 11.3.3 Automatic Priority Queue Assignment If you enable QoS on the AMG1001-T/AMG1011-T, the AMG1001-T/AMG1011-T can automatically base on the IEEE 802.1p priority level, IP precedence and/or packet length to assign priority to traffic which does not match a class. The following table shows you the internal layer-2 and layer-3 QoS mapping on the AMG1001-T/ AMG1011-T. -
Page 81: Adsl
HAPTER ADSL 12.1 Overview This chapter contains information about configuring the ADSL settings for your AMG1001-T/ AMG1011-T. 12.2 The ADSL Screen Use this screen to select the ADSL mode and type for your AMG1001-T/AMG1011-T. Click Advanced Setup > ADSL to open the following screen. Figure 43 Advanced Setup >... -
Page 82: Firewall
HAPTER Firewall 13.1 Overview This chapter shows you how to enable the AMG1001-T/AMG1011-T firewall. Use the firewall to protect your AMG1001-T/AMG1011-T and network from attacks by hackers on the Internet and control access to it. By default the firewall: • allows traffic that originates from your LAN computers to go to all other networks. •... -
Page 83: The Firewall Screen
Chapter 13 Firewall LAND Attack In a LAND attack, hackers flood SYN packets into the network with a spoofed source IP address of the target system. This makes it appear as if the host computer sent the packets to itself, making the system unavailable while the target system tries to respond to itself. -
Page 84: Access Control
HAPTER Access Control 14.1 Access Control Overview Access Control allows you to de termine which application can access which AMG1001-T/AMG1011-T interface from which computers. The following figure shows access to the AMG1001-T/AMG1011-T from the WAN being limited to HTTP (web) and Telnet only. Figure 45 Access Control HTTP Telnet... -
Page 85: Configuring The Access Control Setup Screen
Chapter 14 Access Control longer than this timeout period. The management session does not time out when a statistics screen is polling. 14.1.4 Configuring the Access Control Setup Screen Click Access Management > ACL to open the following screen. Figure 46 Access Management > ACL The following table describes the fields in this screen. - Page 86 Chapter 14 Access Control Table 33 Access Management > ACL (continued) LABEL DESCRIPTION SAVE Click this so save your changes. DELETE Select an access control rule index number and click this to remove it. CANCEL Click this to restore your previously saved settings. AMG1001-T/AMG1011-T Series User’s Guide...
-
Page 87: Filters
HAPTER Filters 15.1 Overview This chapter introduces three types of filters supported by the AMG1001-T/AMG1011-T. You can configure rules to restrict traffic by IP addresses, MAC addresses, application types and/or URLs. 15.1.1 What You Can Do in the Filter Screens •... -
Page 88: The Ip/Mac Filter Screen
Chapter 15 Filters 15.2 The IP/MAC Filter Screen Use this screen to create and apply IP/MAC filters. Click Access Management > Filter and select IP/MAC Filter in the Filter Type Selection field. The screen appears as shown. Figure 47 Access Management > Filter (IP/MAC) The following table describes the labels in this screen. - Page 89 Chapter 15 Filters Table 34 Access Management > Filter (IP/MAC) (continued) LABEL DESCRIPTION Rule Type Select IP or MAC type to configure the rule. Use the IP Filter to block traffic by IP addresses. Use the MAC Filter to block traffic by MAC address. Active Use this field to enable or disable the rule.
-
Page 90: The Application Filter Screen
Chapter 15 Filters 15.3 The Application Filter Screen Use this screen to allow or deny traffic for certain types of applications. The application filter provides a convenient way to manage the use of various applications on the network. Click Access Management > Filter and select Application Filter in the Filter Type Selection field. -
Page 91: The Url Filter Screen
Chapter 15 Filters 15.4 The URL Filter Screen Use this screen to block websites by URL. Click Access Management > Filter and select URL Filter in the Filter Type Selection field. The screen appears as shown. Figure 49 Access Management > Filter (URL) The following table describes the labels in this screen. -
Page 92: Snmp
HAPTER SNMP 16.1 Overview Simple Network Management Protocol (SNMP) is a protocol used for exchanging management information between network devices. SNMP is a member of the TCP/IP protocol suite. Your AMG1001-T/AMG1011-T supports SNMP agent functionality, which allows a manager station to manage and monitor the AMG1001-T/AMG1011-T through the network. -
Page 93: Supported Mibs
Chapter 16 SNMP SNMP itself is a simple request/response protocol based on the manager/agent model. The manager issues a request and the agent returns responses using the following protocol operations: • Get - Allows the manager to retrieve an object variable from the agent. •... -
Page 94: Universal Plug-And-Play (Upnp)
HAPTER Universal Plug-and-Play (UPnP) 17.1 Overview Universal Plug and Play (UPnP) is a distributed, open networking standard that uses TCP/IP for simple peer-to-peer network connectivity between devices. A UPnP device can dynamically join a network, obtain an IP address, convey its capabilities and learn about other devices on the network. In turn, a device can leave a network smoothly and automatically when it is no longer in use. -
Page 95: The Upnp Screen
Chapter 17 Universal Plug-and-Play (UPnP) When a UPnP device joins a network, it announces its presence with a multicast message. For security reasons, the AMG1001-T/AMG1011-T allows multicast messages on the LAN only. All UPnP-enabled devices may communicate freely with each other without additional configuration. Disable UPnP if this is not your intention. -
Page 96: Installing Upnp In Windows Example
Chapter 17 Universal Plug-and-Play (UPnP) 17.3 Installing UPnP in Windows Example This section shows how to install UPnP in Windows Me and Windows XP. Installing UPnP in Windows Me Follow the steps below to install the UPnP in Windows Me. Click Start and Control Panel. - Page 97 Chapter 17 Universal Plug-and-Play (UPnP) In the Communications window, select the Universal Plug and Play check box in the Components selection box. Figure 54 Add/Remove Programs: Windows Setup: Communication: Components Click OK to go back to the Add/Remove Programs Properties window and click Next. Restart the computer when prompted.
- Page 98 Chapter 17 Universal Plug-and-Play (UPnP) The Windows Optional Networking Components Wizard window displays. Select Networking Service in the Components selection box and click Details. Figure 56 Windows Optional Networking Components Wizard In the Networking Services window, select the Universal Plug and Play check box. Figure 57 Networking Services AMG1001-T/AMG1011-T Series User’s Guide...
-
Page 99: Using Upnp In Windows Xp Example
Chapter 17 Universal Plug-and-Play (UPnP) Click OK to go back to the Windows Optional Networking Component Wizard window and click Next. 17.4 Using UPnP in Windows XP Example This section shows you how to use the UPnP feature in Windows XP. You must already have UPnP installed in Windows XP and UPnP activated on the AMG1001-T/AMG1011-T. - Page 100 Chapter 17 Universal Plug-and-Play (UPnP) In the Internet Connection Properties window, click Settings to see the port mappings there were automatically created. Figure 59 Internet Connection Properties AMG1001-T/AMG1011-T Series User’s Guide...
- Page 101 Chapter 17 Universal Plug-and-Play (UPnP) You may edit or delete the port mappings or click Add to manually add port mappings. Figure 60 Internet Connection Properties: Advanced Settings Figure 61 Internet Connection Properties: Advanced Settings: Add When the UPnP-enabled device is disconnected from your computer, all port mappings will be deleted automatically.
- Page 102 Chapter 17 Universal Plug-and-Play (UPnP) Select Show icon in notification area when connected option and click OK. An icon displays in the system tray. Figure 62 System Tray Icon Double-click on the icon to display your current Internet connection status. Figure 63 Internet Connection Status Web Configurator Easy Access With UPnP, you can access the web-based configurator on the AMG1001-T/AMG1011-T without...
- Page 103 Chapter 17 Universal Plug-and-Play (UPnP) Figure 64 Network Connections An icon with the description for each UPnP-enabled device displays under Local Network. AMG1001-T/AMG1011-T Series User’s Guide...
- Page 104 Chapter 17 Universal Plug-and-Play (UPnP) Right-click on the icon for your AMG1001-T/AMG1011-T and select Invoke. The web configurator login screen displays. Figure 65 Network Connections: My Network Places Right-click on the icon for your AMG1001-T/AMG1011-T and select Properties. A properties window displays with basic information about the AMG1001-T/AMG1011-T.
-
Page 105: Dynamic Dns Setup
HAPTER Dynamic DNS Setup 18.1 Overview Dynamic DNS allows you to update your current dynamic IP address with one or many dynamic DNS services so that anyone can contact you (in NetMeeting, CU-SeeMe, etc.). You can also access your FTP server or Web site on your own computer using a domain name (for instance myhost.dhs.org, where myhost is a name of your choice) that will never change instead of using an IP address that changes each time you reconnect. -
Page 106: The Dynamic Dns Screen
Chapter 18 Dynamic DNS Setup 18.2 The Dynamic DNS Screen Use this screen to change your AMG1001-T/AMG1011-T’s DDNS. Click Access Management > DDNS. The screen appears as shown. Figure 67 Access Management > DDNS The following table describes the fields in this screen. Table 39 Advanced >... -
Page 107: Cwmp
HAPTER CWMP 19.1 Overview The AMG1001-T/AMG1011-T supports TR-069 Amendment 1 (CPE WAN Management Protocol Release 2.0) and TR-069 Amendment 2 (CPE WAN Management Protocol v1.1, Release 3.0). TR-069 is a protocol that defines how your AMG1001-T/AMG1011-T (ZD) can be managed via a management server (MS) such as ZyXEL’s Vantage Access. -
Page 108: The Cwmp Setup Screen
Chapter 19 CWMP 19.2 The CWMP Setup Screen Use this screen to configure your AMG1001-T/AMG1011-T to be managed by a management server. Click Access Management > CWMP to display the following screen. Figure 69 Access Management > CWMP The following table describes the fields in this screen. Table 40 Access Management >... - Page 109 Chapter 19 CWMP Table 40 Access Management > CWMP (continued) LINK DESCRIPTION Port The default port for access to the AMG1001-T/AMG1011-T from the management server is the HTTP port, port 80. If you change it, make sure it does not conflict with another port on your network and it is recommended to use a port number above 1024 (not a commonly used port).
-
Page 110: Administrator Settings
HAPTER Administrator Settings 20.1 Overview This chapter shows you how to change the system password. 20.2 The Administrator Screen Use this screen to set a new password for your AMG1001-T/AMG1011-T. Click Maintenance > Administration to open the following screen. Figure 70 Maintenance > Administration The following table describes the labels in this screen. -
Page 111: Time Zone
HAPTER Time Zone 21.1 Overview This chapter contains information about configuring your AMG1001-T/AMG1011-T’s time settings. 21.2 The Time Zone Screen Use this screen to configure the AMG1001-T/AMG1011-T’s time based on your local time zone. To change your AMG1001-T/AMG1011-T’s time and date, click Maintenance > Time Zone. The screen appears as shown. - Page 112 Chapter 21 Time Zone Table 42 Maintenance > Time Zone (continued) LABEL DESCRIPTION Daylight Saving Daylight saving is a period from late spring to early fall when many countries set their clocks ahead of normal local time by one hour to give more daytime light in the evening. Select Enabled if you use Daylight Saving Time.
-
Page 113: Firmware
HAPTER Firmware 22.1 Overview This chapter explains how to upload new firmware and manage configuration files. Use the instructions in this chapter to change the device’s configuration file or upgrade its firmware. After you configure your device, you can backup the configuration file to a computer. That way if you later misconfigure the device, you can upload the backed up configuration file to return to your previous settings. -
Page 114: Before You Begin
Chapter 22 Firmware T/AMG1011-T, that is, on your computer, local network or FTP site and so the name (but not the extension) may vary. After uploading new firmware, see the Status screen to confirm that you have uploaded the correct firmware version. Table 43 Filename Conventions INTERNAL FILE TYPE... - Page 115 Chapter 22 Firmware Restore Using FTP Session Example Figure 72 Restore Using FTP Session Example ftp> put config.rom rom-0 200 Port command okay 150 Opening data connection for STOR rom-0 226 File received OK 221 Goodbye for writing flash ftp: 16384 bytes sent in 0.06Seconds 273.07Kbytes/sec. ftp>quit Refer to Section 22.1.1 on page 113...
- Page 116 Chapter 22 Firmware FTP Session Example of Firmware File Upload Figure 73 FTP Session Example of Firmware File Upload 331 Enter PASS command Password: 230 Logged in ftp> bin 200 Type I OK ftp> put firmware.bin ras 200 Port command okay 150 Opening data connection for STOR ras 226 File received OK ftp: 1103936 bytes sent in 1.10Seconds 297.89Kbytes/sec.
- Page 117 Chapter 22 Firmware Where “i” specifies binary image transfer mode (use this mode when transferring binary files), “host” is the device’s IP address, “put” transfers the file source on the computer (firmware.bin – name of the firmware on the computer) to the file destination on the remote host (ras - name of the firmware on the device).
-
Page 118: The Firmware Screen
Chapter 22 Firmware Configuration Backup Using GUI-based FTP Clients The following table describes some of the commands that you may see in GUI-based FTP clients. Table 44 General Commands for GUI-based FTP Clients COMMAND DESCRIPTION Host Address Enter the address of the host server. Login Type Anonymous. - Page 119 Chapter 22 Firmware Figure 75 Maintenance > Firmware The following table describes the labels in this screen. Table 45 Maintenance > Firmware LABEL DESCRIPTION Current Firmware Version This is the present firmware version and the date created. New Firmware Location Click Browse...
-
Page 120: System Restart
HAPTER System Restart 23.1 Overview This chapter shows you how to restart your AMG1001-T/AMG1011-T. 23.2 The System Restart Screen System restart allows you to reboot the AMG1001-T/AMG1011-T remotely without turning the power off. You may need to do this if the AMG1001-T/AMG1011-T hangs, for example. Click Maintenance >... -
Page 121: Diagnostic
HAPTER Diagnostic 24.1 Overview These read-only screens display information to help you identify problems with the AMG1001-T/ AMG1011-T. 24.2 The Diagnostic Screen Use this screen to test your connection and ping an IP address. Select the virtual circuit you want to check from the drop-down list box. -
Page 122: Troubleshooting
HAPTER Troubleshooting This chapter offers some suggestions to solve problems you might encounter. The potential problems are divided into the following categories. • Power, Hardware Connections, and LEDs • AMG1001-T/AMG1011-T Access and Login • Internet Access 25.1 Power, Hardware Connections, and LEDs The AMG1001-T/AMG1011-T does not turn on. -
Page 123: Amg1001-T/Amg1011-T Access And Login
Chapter 25 Troubleshooting 25.2 AMG1001-T/AMG1011-T Access and Login I forgot the IP address for the AMG1001-T/AMG1011-T. The default IP address is 192.168.1.1. If you changed the IP address and have forgotten it, you might get the IP address of the AMG1001- T/AMG1011-T by looking up the IP address of the default gateway for your computer. -
Page 124: Internet Access
Chapter 25 Troubleshooting If the problem continues, contact the network administrator or vendor, or try one of the advanced suggestions. Advanced Suggestions • Try to access the AMG1001-T/AMG1011-T using another service, such as Telnet. If you can access the AMG1001-T/AMG1011-T, check the remote management settings and firewall rules to find out why the AMG1001-T/AMG1011-T does not respond to HTTP. - Page 125 Chapter 25 Troubleshooting Make sure you entered your ISP account information correctly in the wizard and/or the Internet screen. These fields are case-sensitive, so make sure [Caps Lock] is not on. Disconnect all the cables from your device, and follow the directions in the Quick Start Guide again. If the problem continues, contact your ISP.
-
Page 126: Appendix A Setting Up Your Computer's Ip Address
PP EN D I X Setting Up Your Computer’s IP Address Note: Your specific AMG1001-T/AMG1011-T may not support all of the operating systems described in this appendix. See the product specifications for more information about which operating systems are supported. This appendix shows you how to configure the IP settings on your computer in order for it to be able to communicate with the other devices on your network. - Page 127 Appendix A Setting Up Your Computer’s IP Address In the Control Panel, click the Network Connections icon. Right-click Local Area Connection and then select Properties. On the General tab, select Internet Protocol (TCP/IP) and then click Properties. AMG1001-T/AMG1011-T Series User’s Guide...
- Page 128 Appendix A Setting Up Your Computer’s IP Address The Internet Protocol TCP/IP Properties window opens. AMG1001-T/AMG1011-T Series User’s Guide...
- Page 129 Appendix A Setting Up Your Computer’s IP Address Select Obtain an IP address automatically if your network administrator or ISP assigns your IP address dynamically. Select Use the following IP Address and fill in the IP address, Subnet mask, and Default gateway fields if you have a static IP address that was assigned to you by your network administrator or ISP.
- Page 130 Appendix A Setting Up Your Computer’s IP Address Windows Vista This section shows screens from Windows Vista Professional. Click Start > Control Panel. In the Control Panel, click the Network and Internet icon. Click the Network and Sharing Center icon. Click Manage network connections.
- Page 131 Appendix A Setting Up Your Computer’s IP Address Right-click Local Area Connection and then select Properties. Note: During this procedure, click Continue whenever Windows displays a screen saying that it needs your permission to continue. Select Internet Protocol Version 4 (TCP/IPv4) and then select Properties. AMG1001-T/AMG1011-T Series User’s Guide...
- Page 132 Appendix A Setting Up Your Computer’s IP Address The Internet Protocol Version 4 (TCP/IPv4) Properties window opens. AMG1001-T/AMG1011-T Series User’s Guide...
- Page 133 Appendix A Setting Up Your Computer’s IP Address Select Obtain an IP address automatically if your network administrator or ISP assigns your IP address dynamically. Select Use the following IP Address and fill in the IP address, Subnet mask, and Default gateway fields if you have a static IP address that was assigned to you by your network administrator or ISP.
- Page 134 Appendix A Setting Up Your Computer’s IP Address Windows 7 This section shows screens from Windows 7 Enterprise. Click Start > Control Panel. In the Control Panel, click View network status and tasks under the Network and Internet category. Click Change adapter settings. Double click Local Area Connection and then select Properties.
- Page 135 Appendix A Setting Up Your Computer’s IP Address Note: During this procedure, click Continue whenever Windows displays a screen saying that it needs your permission to continue. Select Internet Protocol Version 4 (TCP/IPv4) and then select Properties. AMG1001-T/AMG1011-T Series User’s Guide...
- Page 136 Appendix A Setting Up Your Computer’s IP Address The Internet Protocol Version 4 (TCP/IPv4) Properties window opens. AMG1001-T/AMG1011-T Series User’s Guide...
- Page 137 Appendix A Setting Up Your Computer’s IP Address Select Obtain an IP address automatically if your network administrator or ISP assigns your IP address dynamically. Select Use the following IP Address and fill in the IP address, Subnet mask, and Default gateway fields if you have a static IP address that was assigned to you by your network administrator or ISP.
- Page 138 Appendix A Setting Up Your Computer’s IP Address Mac OS X: 10.3 and 10.4 The screens in this section are from Mac OS X 10.4 but can also apply to 10.3. Click Apple > System Preferences. In the System Preferences window, click the Network icon. AMG1001-T/AMG1011-T Series User’s Guide...
- Page 139 Appendix A Setting Up Your Computer’s IP Address When the Network preferences pane opens, select Built-in Ethernet from the network connection type list, and then click Configure. For dynamically assigned settings, select Using DHCP from the Configure IPv4 list in the TCP/IP tab.
- Page 140 Appendix A Setting Up Your Computer’s IP Address For statically assigned settings, do the following: • From t he Configure IPv4 list, select Manually. • In t he IP Address field, type your IP address. • In t he Subnet Mask field, type your subnet mask. •...
- Page 141 Appendix A Setting Up Your Computer’s IP Address Figure 78 Mac OS X 10.4: Network Utility Mac OS X: 10.5 and 10.6 The screens in this section are from Mac OS X 10.5 but can also apply to 10.6. Click Apple > System Preferences. In System Preferences, click the Network icon.
- Page 142 Appendix A Setting Up Your Computer’s IP Address When the Network preferences pane opens, select Ethernet from the list of available connection types. From the Configure list, select Using DHCP for dynamically assigned settings. For statically assigned settings, do the following: •...
- Page 143 Appendix A Setting Up Your Computer’s IP Address • In t he IP Address field, enter your IP address. • In t he Subnet Mask field, enter your subnet mask. • In t he Router field, enter the IP address of your AMG1001-T/AMG1011-T. Click Apply and close the window.
- Page 144 Appendix A Setting Up Your Computer’s IP Address Figure 79 Mac OS X 10.5: Network Utility Linux: Ubuntu 8 (GNOME) This section shows you how to configure your computer’s TCP/IP settings in the GNU Object Model Environment (GNOME) using the Ubuntu 8 Linux distribution. The procedure, screens and file locations may vary depending on your specific distribution, release version, and individual configuration.
- Page 145 Appendix A Setting Up Your Computer’s IP Address In the Authenticate window, enter your admin account name and password then click the Authenticate button. In the Network Settings window, select the connection that you want to configure, then click Properties. AMG1001-T/AMG1011-T Series User’s Guide...
- Page 146 Appendix A Setting Up Your Computer’s IP Address The Properties dialog box opens. • In t he Configuration list, select Automatic Configuration (DHCP) if you have a dynamic IP address. • In t he Configuration list, select Static IP address if you have a static IP address. Fill in the IP address, Subnet mask, and Gateway address fields.
- Page 147 Appendix A Setting Up Your Computer’s IP Address Click the Close button to apply the changes. Verifying Settings Check your TCP/IP properties by clicking System > Administration > Network Tools, and then selecting the appropriate Network device from the Devices tab. The Interface Statistics column shows data if your connection is working properly.
- Page 148 Appendix A Setting Up Your Computer’s IP Address Figure 80 Ubuntu 8: Network Tools Linux: openSUSE 10.3 (KDE) This section shows you how to configure your computer’s TCP/IP settings in the K Desktop Environment (KDE) using the openSUSE 10.3 Linux distribution. The procedure, screens and file locations may vary depending on your specific distribution, release version, and individual configuration.
- Page 149 Appendix A Setting Up Your Computer’s IP Address When the Run as Root - KDE su dialog opens, enter the admin password and click OK. When the YaST Control Center window opens, select Network Devices and then click the Network Card icon. AMG1001-T/AMG1011-T Series User’s Guide...
- Page 150 Appendix A Setting Up Your Computer’s IP Address When the Network Settings window opens, click the Overview tab, select the appropriate connection Name from the list, and then click the Configure button. When the Network Card Setup window opens, click the Address tab AMG1001-T/AMG1011-T Series User’s Guide...
- Page 151 Appendix A Setting Up Your Computer’s IP Address Figure 81 openSUSE 10.3: Network Card Setup Select Dynamic Address (DHCP) if you have a dynamic IP address. Select Statically assigned IP Address if you have a static IP address. Fill in the IP address, Subnet mask, and Hostname fields.
- Page 152 Appendix A Setting Up Your Computer’s IP Address Click Finish to save your settings and close the window. Verifying Settings Click the KNetwork Manager icon on the Task bar to check your TCP/IP properties. From the Options sub-menu, select Show Connection Information. Figure 82 openSUSE 10.3: KNetwork Manager When the Connection Status - KNetwork Manager window opens, click the Statistics tab to see if your connection is working properly.
- Page 153 Appendix A Setting Up Your Computer’s IP Address Figure 83 openSUSE: Connection Status - KNetwork Manager AMG1001-T/AMG1011-T Series User’s Guide...
-
Page 154: Appendix B Ip Addresses And Subnetting
PP EN D I X IP Addresses and Subnetting This appendix introduces IP addresses and subnet masks. IP addresses identify individual devices on a network. Every networking device (including computers, servers, routers, printers, etc.) needs an IP address to communicate across the network. - Page 155 Appendix B IP Addresses and Subnetting Figure 84 Network Number and Host ID How much of the IP address is the network number and how much is the host ID varies according to the subnet mask. Subnet Masks A subnet mask is used to determine which bits are part of the network number, and which bits are part of the host ID (using a logical AND operation).
- Page 156 Appendix B IP Addresses and Subnetting Subnet masks are expressed in dotted decimal notation just like IP addresses. The following examples show the binary and decimal notation for 8-bit, 16-bit, 24-bit and 29-bit subnet masks. Table 48 Subnet Masks BINARY DECIMAL 4TH OCTET OCTET...
- Page 157 Appendix B IP Addresses and Subnetting Table 50 Alternative Subnet Mask Notation (continued) ALTERNATIVE LAST OCTET LAST OCTET SUBNET MASK NOTATION (BINARY) (DECIMAL) 255.255.255.224 1110 0000 255.255.255.240 1111 0000 255.255.255.248 1111 1000 255.255.255.252 1111 1100 Subnetting You can use subnetting to divide one network into multiple sub-networks. In the following example a network administrator creates two sub-networks to isolate a group of servers from the rest of the company network for security reasons.
- Page 158 Appendix B IP Addresses and Subnetting Figure 86 Subnetting Example: After Subnetting In a 25-bit subnet the host ID has 7 bits, so each sub-network has a maximum of 2 – 2 or 126 possible hosts (a host ID of all zeroes is the subnet’s address itself, all ones is the subnet’s broadcast address).
- Page 159 Appendix B IP Addresses and Subnetting Table 52 Subnet 2 LAST OCTET BIT IP/SUBNET MASK NETWORK NUMBER VALUE IP Address 192.168.1. IP Address (Binary) 11000000.10101000.00000001. 01000000 Subnet Mask (Binary) 11111111.11111111.11111111. 11000000 Subnet Address: Lowest Host ID: 192.168.1.65 192.168.1.64 Broadcast Address: Highest Host ID: 192.168.1.126 192.168.1.127 Table 53 Subnet 3...
- Page 160 Appendix B IP Addresses and Subnetting Table 55 Eight Subnets (continued) SUBNET LAST BROADCAST SUBNET FIRST ADDRESS ADDRESS ADDRESS ADDRESS Subnet Planning The following table is a summary for subnet planning on a network with a 24-bit network number. Table 56 24-bit Network Number Subnet Planning NO.
- Page 161 Appendix B IP Addresses and Subnetting Configuring IP Addresses Where you obtain your network number depends on your particular situation. If the ISP or your network administrator assigns you a block of registered IP addresses, follow their instructions in selecting the IP addresses and the subnet mask. If the ISP did not explicitly give you an IP network number, then most likely you have a single user account and the ISP will assign you a dynamic IP address when the connection is established.
- Page 162 Appendix B IP Addresses and Subnetting Conflicting Computer IP Addresses Example More than one device can not use the same IP address. In the following example computer A has a static (or fixed) IP address that is the same as the IP address that a DHCP server assigns to computer B which is a DHCP client.
- Page 163 Appendix B IP Addresses and Subnetting Figure 89 Conflicting Computer and Router IP Addresses Example AMG1001-T/AMG1011-T Series User’s Guide...
-
Page 164: Appendix C Pop-Up Windows, Javascripts And Java Permissions
PP EN D I X Pop-up Windows, JavaScripts and Java Permissions In order to use the web configurator you need to allow: • Web browser pop-up windows from your device. • JavaScripts (enabled by default). • Java permissions (enabled by default). Note: The screens used below belong to Internet Explorer version 6, 7 and 8. - Page 165 Appendix C Pop-up Windows, JavaScripts and Java Permissions Figure 91 Internet Options: Privacy Click Apply to save this setting. Enable Pop-up Blockers with Exceptions Alternatively, if you only want to allow pop-up windows from your device, see the following steps. In Internet Explorer, select Tools, Internet Options and then the Privacy tab.
- Page 166 Appendix C Pop-up Windows, JavaScripts and Java Permissions Figure 92 Internet Options: Privacy Type the IP address of your device (the web page that you do not want to have blocked) with the prefix “http://”. For example, http://192.168.167.1. Click Add to move the IP address to the list of Allowed sites. Figure 93 Pop-up Blocker Settings AMG1001-T/AMG1011-T Series User’s Guide...
- Page 167 Appendix C Pop-up Windows, JavaScripts and Java Permissions Click Close to return to the Privacy screen. Click Apply to save this setting. JavaScripts If pages of the web configurator do not display properly in Internet Explorer, check that JavaScripts are allowed. In Internet Explorer, click Tools, Internet Options and then the Security tab.
- Page 168 Appendix C Pop-up Windows, JavaScripts and Java Permissions Figure 95 Security Settings - Java Scripting Java Permissions From Internet Explorer, click Tools, Internet Options and then the Security tab. Click the Custom Level... button. Scroll down to Microsoft VM. Under Java permissions make sure that a safety level is selected. Click OK to close the window.
- Page 169 Appendix C Pop-up Windows, JavaScripts and Java Permissions Figure 96 Security Settings - Java JAVA (Sun) From Internet Explorer, click Tools, Internet Options and then the Advanced tab. Make sure that Use Java 2 for <applet> under Java (Sun) is selected. Click OK to close the window.
- Page 170 Appendix C Pop-up Windows, JavaScripts and Java Permissions Mozilla Firefox Mozilla Firefox 2.0 screens are used here. Screens for other versions may vary slightly. The steps below apply to Mozilla Firefox 3.0 as well. You can enable Java, Javascripts and pop-ups in one screen. Click Tools, then click Options in the screen that appears.
- Page 171 Appendix C Pop-up Windows, JavaScripts and Java Permissions Opera Opera 10 screens are used here. Screens for other versions may vary slightly. Allowing Pop-Ups From Opera, click Tools, then Preferences. In the General tab, go to Choose how you prefer to handle pop-ups and select Open all pop-ups.
- Page 172 Appendix C Pop-up Windows, JavaScripts and Java Permissions Figure 101 Opera: Enabling Java To customize JavaScript behavior in the Opera browser, click JavaScript Options. Figure 102 Opera: JavaScript Options Select the items you want Opera’s JavaScript to apply. AMG1001-T/AMG1011-T Series User’s Guide...
-
Page 173: Appendix D Common Services
PP EN D I X Common Services The following table lists some commonly-used services and their associated protocols and port numbers. For a comprehensive list of port numbers, ICMP type/code numbers and services, visit the IANA (Internet Assigned Number Authority) web site. •... - Page 174 Appendix D Common Services Table 58 Commonly Used Services (continued) NAME PROTOCOL PORT(S) DESCRIPTION HTTPS HTTPS is a secured http session often used in e- commerce. ICMP User-Defined Internet Control Message Protocol is often used for diagnostic or routing purposes. 4000 This is a popular Internet chat program.
- Page 175 Appendix D Common Services Table 58 Commonly Used Services (continued) NAME PROTOCOL PORT(S) DESCRIPTION SQL-NET 1521 Structured Query Language is an interface to access data on many different types of database systems, including mainframes, midrange systems, UNIX systems and network servers. TCP/UDP Secure Shell Remote Login Program.
-
Page 176: Appendix E Legal Information
The contents of this publication may not be reproduced in any part or as a whole, transcribed, stored in a retrieval system, translated into any language, or transmitted in any form or by any means, electronic, mechanical, magnetic, optical, chemical, photocopying, manual, or otherwise, without the prior written permission of ZyXEL Communications Corporation. Published by ZyXEL Communications Corporation. All rights reserved. - Page 177 Appendix E Legal Information Open Source Licenses This product contains in part some free software distributed under GPL license terms and/or GPL like licenses. Open source licenses are provided with the firmware package. You can download the latest firmware at www.zyxel.com. To obtain the source code covered under those Licenses, please contact support@zyxel.com.tw to get it.
- Page 178 Appendix E Legal Information RoHS ENGLISH DEUTSCH ESPAÑOL FRANÇAIS Green Product Declaration Grünes Produkt Erklärung Declaración de Producto Ecológico Déclaration de Produit Vert RoHS Directive 2011/65/EU RoHS Richtlinie 2011/65/EU Directiva RoHS 2011/65/UE Directive RoHS 2011/65/UE WEEE Directive 2002/96/EC ElektroG Richtlinie 2002/96/EG Directiva RAEE 2002/96/CE Directive DEEE 2002/96/CE (WEEE: Waste Electrical and Electronic...
-
Page 179: Index
Index Index Numbers 802.1p 77, 79 42, 52 certifications notices viewing Command Line Interface, see CLI access control configuration activation access control configuration backup service type 117, 118 CWMP activation DHCP access control file CWMP firewalls DHCP IP precedence IP/MAC filter dynamic DNS DYNDNS wildcard port forwarding... - Page 180 Index DHCP LAND attack 54, 55, 57 Ping of Death diagnostic SYN attack DiffServ Code Point, see DSCP firmware disclaimer upgrading forwarding ports 65, 67 activation configuration 54, 57 example documentation related backing up configuration Domain Name System, see DNS limitations restoring configuration 114, 115...
- Page 181 Index example global inside local configuration outside DHCP 54, 55, 57 port forwarding 65, 67 54, 57 configuration IGMP 54, 59 example IP address 53, 58 status multicast 54, 55, 59 54, 59 virtual server status example subnet mask 53, 58 Network Address Translation, see NAT LAND attack LEDs...
- Page 182 Index IP precedence static route 78, 79 priority queue configuration example Quality of Service, see QoS metric status 22, 27 ADSL registration traffic statistics product related documentation remote management subnet SNMP subnet mask 53, 58, 155 system timeout subnetting reset Sustain Cell Rate, see SCR restart SYN attack...
- Page 183 Index multicast 40, 43, 45, 47 multiplexing 43, 44, 46, 48, 50 43, 44, 47, 55 42, 52 setup unicast status Universal Plug and Play, see UPnP TCP MSS upgrading firmware 42, 50 UPnP 42, 50 activation warranty cautions note example web configurator 12, 21...
Need help?
Do you have a question about the AMG1001-T Series and is the answer not in the manual?
Questions and answers