Table of Contents
Advertisement
Instructions for use
OVEN
C o n t e n t s
EN
S te a m c o o k i n g
English
W h a t yo u r ove n l o o ks l i ke
A c c e s s o r i e s
I n s t a l l i n g yo u r ove n
E l e c t r i c a l c o n n e c t i o n
Fi t t i n g
U s i n g yo u r ove n
S et t i n g t h e c l o c k
D i s p l ay l o c k
D i s p l ay s t a n d - by m o d e
P r o g r a m m i n g fo r i m m e d i a t e c o o k i n g
Wa te r m a n a g e m e n t
P ro g r a m m i n g c o o k i n g w i t h a d e l aye d s t a r t
U s i n g t h e t i m e r
D e s c r i p t i o n o f t h e f u n c t i o n s
C o o k i n g c h a r t
C a r i n g fo r yo u r ove n
C h a n g i n g t h e b u l b
W h a t t o d o i n t h e eve n t o f p r o b l e m s
Im por tant safety instr uctions.
Read carefully and retain for future use.
Advertisement
Table of Contents

Related Manuals for Ariston Hotpoint


Summary of Contents for Ariston Hotpoint
-
Page 1: Instructions For Use
Instructions for use OVEN C o n t e n t s S te a m c o o k i n g English W h a t yo u r ove n l o o ks l i ke A c c e s s o r i e s I n s t a l l i n g yo u r ove n E l e c t r i c a l c o n n e c t i o n... -
Page 2: Installing Your Appliance
Installing your appliance 550 mini CHOICE OF LOCATION The above diagrams show the dimensions required for a cabinet Note to contain your oven. The oven may be installed either under a worktop or in a full-height We cannot be held responsible for any accident unit (open or closed) that has the appropriate dimensions for resulting from a non-existent, defective or built-in installation. -
Page 3: Electrical Connection
Installing your appliance Single-phase 20A Meter 220-240 V ~ 220-240V ~ 50 Hz single-phase line 10A fuse or residual current circuit breaker Electrical socket 2 pin + earth to IEC 60083 standard Power supply cable length 1.50 m approx. ELECTRICAL CONNECTION The appliance must be fitted correctly to ensure electrical safety. -
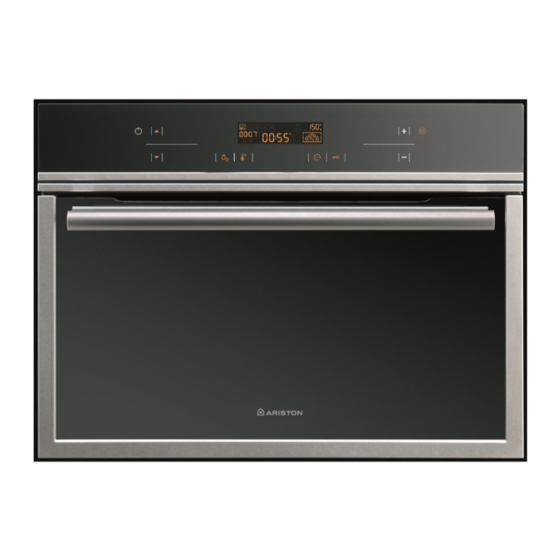
Page 4: Description Of The Appliance
Description of the appliance Overview Control Display panel Water intake tube Tank Steam generator Gutter l che START/ + button DISPLAY arrow Haut AFFICHEUR Touche + STOP l c e Down Time Temperature – button Réglage églage Touche - ON/OFF arrow setting setting... - Page 5 Accessories • ACCESSORIES • Food dish (fig.1) Perforated stainless steel dish preventing contact between the food and fig.1 condensation water. • Condensate dish (fig.2) Stainless steel dish for the recovery of condensation water. When cooking, place the dish in fig. 1 on the dish in fig.2 fig.2 counter to each other, so that that they do not nest (see diagram opposite).
-
Page 6: Steam Cooking
Steam cooking General There are only advantages to steam cooking, if you follow the Steam is also appropriate for blanching, defrosting and instructions for use. Healthy and natural, steam cooking reheating or even keeping foods warm, especially sauces. preserves the full flavour of foods. A delicate sauce or First use a very small amount of fat to heat meats like poultry, aromatic herb seasoning adds that something extra that veal and pork so that they take on an appetising browned... -
Page 7: Information For The User
Information for the user — Intensive and prolonged use of the appliance may give Important rise to the need for additional ventilation, by opening a Keep this user guide with your appliance. If window, or by increasing the power of the mechanical the appliance is ever sold or transferred to fan. -
Page 8: Caring For The Environment
Information for the user CARING FOR THE ENVIRONMENT — This appliance’s packing materials are recyclable. Please recycle the packaging and help protect the environment by depositing it in municipal containers provided for the purpose. — Your appliance also contains various recyclable materials. - Page 9 Getting started and using your oven Child safety function Prolonged pressure on the - and + buttons causes The child safety function can be used to lock the oven the display to scroll quickly through the set lists and values. controls.
-
Page 10: Immediate Cooking
Getting started & and using your oven Immediate cooking Automatic defrosting MANUAL cooking programme In MANUAL mode, it is possible to adjust the cooking time Press the button: 55°C, pre-programmed time: 30 min as well as the temperature (from 100° to 50°). Min. -
Page 11: Cancelling Cooking In Progress
Setting a cooking programme with delayed start Cancelling cooking in progress Changing the cooking temperature You can stop the cooking at any time by pressing “ ” (for Press the button. approximately 1 second). Adjust by pressing the + and – buttons. If steam generation has not yet begun (approximately one Save your selection by pressing the “... -
Page 12: Precautions And Recommendations
Precautions and recommendations FUNCTIONS Temperature COOKING COOKING EXAMPLES °C Steam cooking mode most Vegetables and meats. often used For cooking Delicate whole fish (trout). fragile food Meat has a sheen to it, Cooking delicate fish the collagen is not apparent. (sardine fillets, red mullet). -
Page 13: Cooking Chart
Cooking chart °C Time Preparations Notes Food 40 to 45 min. placed upside down in the dish • These times depend on the Artichokes (small) 35 to 40 min. for tips only, decrease cooking time type, size and freshness of Asparagus 18 min. -
Page 14: Cleaning And Maintenance
Cleaning and Maintenance Maintenance • Cavity (after each use) Wipe the cavity with a dry cloth after the steam generator has cooled or let the cavity air-dry by leaving the door open. • Water intake tube Remove the water intake tube by unscrewing it. Remove any hard-water deposits that may be inside (using a thin, pointed object such as a thin skewer or a knitting needle). -
Page 15: Cleaning The Outer Surfaces
Cleaning and Maintenance CLEANING THE OUTER SURFACES To clean both the electronic programmer window and the oven door, use a window cleaning product applied with a soft cloth. Do not use abrasive creams or scouring pads. Changing the bulb The bulb is located at the back right of your oven’s cavity. -
Page 16: Service Calls
What to do in the event of problems YOU NOTICE THAT POSSIBLE WHAT SHOULD CAUSES YOU DO? - Check that the Oven not connected appliance is receiving to a power source. Display does not light. electricity (fuse OK). Electronic board not - Call the After-Sales functioning.