Table of Contents
Advertisement
INSTALLATION AND OPERATION MANUAL
Free-Standing
EPA Certified
Wood-Burning Stoves
Save These Instructions
For Future Reference
P/N 506031-01, Rev. F, 07/2013
P506031-01
A French manual is available upon request. Order P/N 506223-28.
Ce manuel d'installation est disponible en francais, simplement en faire la demande. Numéro de la
pièce 506223-28.
4002589
• Hot! Do not touch! The glass and surfaces of this appliance will
• Carefully supervise children in the same room as appliance.
This appliance must be properly installed and operated in order to prevent the
possibility of a house fire. Please read this entire installation and operation
manual before installing and using your wood stove. Failure to follow these
instructions could result in property damage, bodily injury or even death.
Contact your local building or fire officials to obtain a permit and
information on any installation requirements and inspection
requirements in your area.
be hot during operation and will retain heat for a while after
shutting off the appliance. Severe burns may result.
Wood-Burning Stoves
Models Grandview™
GV230 and GV300
With Innovative Thermal Fin Technology (TFT™)
WARNING
Advertisement
Table of Contents

Subscribe to Our Youtube Channel
Related Manuals for Lennox Grandview GV230


Summary of Contents for Lennox Grandview GV230
-
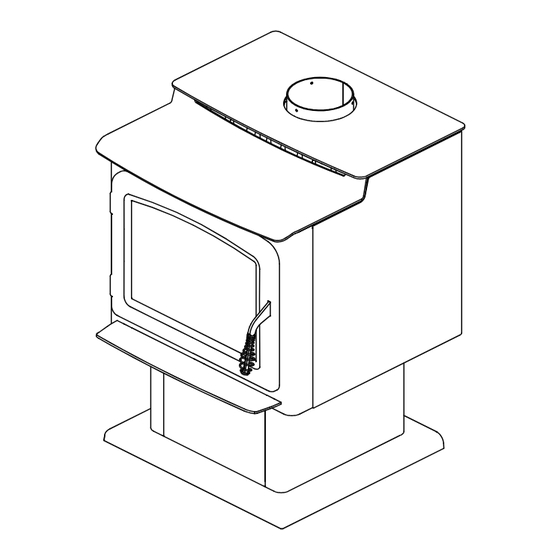
Page 1: Epa Certified
P/N 506031-01, Rev. F, 07/2013 Wood-Burning Stoves P506031-01 Models Grandview™ GV230 and GV300 With Innovative Thermal Fin Technology (TFT™) A French manual is available upon request. Order P/N 506223-28. Ce manuel d’installation est disponible en francais, simplement en faire la demande. Numéro de la pièce 506223-28. -
Page 2: Table Of Contents
Post Installation Checks ............... 20 Paint Curing ................. 21 Thank you for selecting a Lennox Hearth Products wood stove as the answer to your home supplemental heating needs. Burn-In Period ................21 Operating Hints ................ -
Page 3: Important Safety Information
ing season to check for soot and creosote accumulations. IMPORTANT SAFETY AND WARNING Any accumulations over 1/8” thick should be removed by INFORMATION a professional chimney sweep. Do not attempt to burn out heavy creosote accumulations with a hot fire. If large ac- cumulations are occurring, review your burning procedures. -
Page 4: Testing Information
TESTING INFORMATION SELECTING THE PROPER VENTING SYSTEM The appliance is merely one component of a larger system. The other This manual describes the installation and operation of the Grandview™ equally important component is the venting system. This is necessary for 230 and Grandview 300 non-catalytic wood heaters. -
Page 5: Chimney Height Requirements
2’ (610 mm) Min. connected to the appliance probably will not resolve such a problem as the stove or fireplace insert is not the source of negative pressure. Lennox 3' (914 mm) Hearth Products accepts no liability for damages resulting from negative Min. -
Page 6: Clearances To Combustibles - Gv230
GV230 and GV300 - 72” (1829 mm) Components Required For Installations Thermal Floor Protection Legs OR Pedestal Assembly. GV230 - Thermal floor protection is only required where the stove is installed into an alcove. Use all required components specified for this appliance. Do not substitute. - Page 7 Protection Stove Floor Protection Top View † See note 8 Canada Top View Side View Figure 2 - GV230 Figure 3 - GV230 Figure 4 - GV230 - inches (millimeters) PIPE INSTALLATION A (3) B (1) C (3) D (1)
- Page 8 Grandview™ GV300 INSTALLATION CLEARANCES - REFER TO FIGURES 5, 6 AND 7 Alcove or Parallel Installation Corner Installation Alcove or Parallel Installation Alcove Depth 48" (1219mm) MAX. Combustible Wall Combustible Wall † Elbow Stove Floor Protection Stove Floor † † Protection Stove Floor...
-
Page 9: Alcove, Floor Protection - Gv230
Marble ~.09 11.70" (11-3/4") material (T of listed material (k material (T Table 1 - USA AND CANADA REQUIREMENTS - GV230 (inches) *.47 ** If the hearth extension material(s) that is intended to be used is NOT (inches) *.35 .50"... -
Page 10: Floor Protection
Grandview™ GV300 FLOOR PROTECTION The Grandview™ 300 floor protection must be a thermally rated non- Using the r formula: combustible floor protector meeting or exceeding a thermal rating of k=.47 or equivalent with a listed thickness of 1-1/2" (38.1mm) minimum Minimum r-value (per Inch) Specified min. -
Page 11: Specifications
The Grandview™ Models GV230 and GV300 woodstoves are safety listed with the following Pedestal - J Olympic Legs - K... -
Page 12: Typical Installation Figures
Single Wall Pipe STAINLESS STEEL LINER Using 6” Diameter Single Wall Connector Pipe Using 6” Diameter Rigid Stainless Steel Liner INSTALL VENTING SYSTEM PER VENT MANUFACTURERS INSTALL VENTING SYSTEM PER VENT MANUFACTURERS INSTRUCTIONS! INSTRUCTIONS! Chimney Chimney Termination Termination Rain Cap Storm Flashing Collar... -
Page 13: Chimney Installation
3 sheet metal screws. Manufactured Home Installations (GV230 ONLY) (ref. Figure 11) All mobile home DVL Close Model GV230 woodstove is approved for installation into a manu- Minimum of installations require Clearance an outside air kit (see 12-15’ (3.7-4.6M) factured (mobile) home. -
Page 14: Chimney - Wall Pass-Through Requirements
Chimney Connector Systems and Clearances from Combustible System A Walls for Residential Heating Appliances (NFPA 211) Refer to Minimum chimney clearance to brick Figure 12. and combustibles 2 in. (51mm) System A. Minimum 3.5 in. (90 mm) thick brick masonry wall Minimum clearance 12 in. -
Page 15: Leg Installation
If there is hidden damage, notify your for any damaged or missing parts. If there is hidden damage, notify your freight company or Lennox Hearth Products dealer immediately. freight company or Lennox Hearth Products dealer immediately. -
Page 16: Attaching Stove To Manufactured Home Floor - Gv230
ATTACHING STOVE TO MANUFACTURED HOME FLOOR - Stove Back GV230 WOODSTOVE ONLY Leg Tie Down Kits (Manufactured [mobile] Homes) Order: H7665 Leg Tie Down Kit, Coastal and Lakeview Legs H5308 Leg Tie Down Kit, Olympic Legs ATTACHING STOVE TO MANUFACTURED HOME FLOOR... -
Page 17: Outside Combustion Air Kit Installation
- Attach the duct to the coupler on stove (see Figure 19). Using the aluminium tape provided, wrap the tape around the joint between the tion (refer to Figure 21) - Model GV230 wood stove only. flexible duct and the air inlet. -
Page 18: Brick And Baffle Board Installation - Gv230
Figure 22 - GV230 Brick Diagram Front Baffle Board Back Baffle Board 6.5” Back Baffle Board (165mm) 7.7” Front Baffle Board (196mm) Figure 23 - GV230 Baffle Boards Installed Figure 24 - GV230 Baffle Boards NOTE: DIAGRAMS & ILLUSTRATIONS ARE NOT TO SCALE. -
Page 19: Brick And Baffle Board Installation - Gv300
Grandview™ GV300 BRICK AND BAFFLE INSTALLATION CAUTION: Wear gloves during brick installation in case of 1. Install brick #1-26 in the numbered sequence shown in Figure 25. sharp edges inside the stove. WARNING: IF THE BRICKS ARE NOT INSTALLED EXACTLY AS 2. -
Page 20: For Mobile Home Installs
POST INSTALLATION CHECKS FOR MOBILE HOME INSTALLS Be sure the stove is properly grounded Check that all chimney pipe joints are secured and installed according to the Be sure the stove is properly securely manufacturers instruction. fastened to the floor If used, make sure the outside air kit is Be sure the outside air vent is free of properly installed and unobstructed. -
Page 21: Paint Curing
(cat. damaged, they must be replaced with factory original no. H8159), available from all Lennox Hearth Products dealers. parts before heater can be safely operated. Use only components provided by the manufacturer as replace- BURN-IN PERIOD ment parts. -
Page 22: Starting And Maintaining A Fire
DO NOT LEAVE THE STOVE UNATTENDED WHILE THE FRONT STARTING AND MAINTAINING A FIRE DOOR IS SLIGHTLY OPEN. NEVER USE FLAMMABLE LIqUIDS TO START OR REKINDLE CAUTION: Do Not alter the adjustment range of the draft control for increased firing for any reason. A SOLID FUEL FIRE!! 2. -
Page 23: Fuel
Standard Cord of 8 Ft. Wood (2.4M) 4 Ft. (1.2M) 4 Ft. (1.2M) Figure 33 What does “Well-Seasoned” mean? When a tree is cut down, the wood is green, full of sap and moisture. This moisture content can exceed 80%, which must be reduced to less than 20%. -
Page 24: Getting The Most Out Of Your Stove
At this point, you may need to burn the efficiency in a wood-burning appliance is a combination of combustion stove with the draft open for a few minutes to ignite the wood. All Lennox efficiency and heat transfer efficiency. Whether heating your entire home or... -
Page 25: Blower Operation (Optional Kit)
In the event that you remove the blower for any reason, blower speed or stoke the fire to build up more heat. make sure a cover plate (available from Lennox Hearth NOTE: Turn blower off before opening the door to load the fuel. -
Page 26: Do's And Don'ts
DO’S AND DON’TS DO NOT: Install or operate the stove or fireplace insert before reading this manual. DO NOT: Close the draft beyond the point at which the flames are completely extinguished. DO NOT: Open the stove or fireplace insert door without fully opening the draft first. DO NOT: Burn driftwood or wood that has been in salt water. -
Page 27: Maintenance
DOOR HINGES: If door hinges need lubricating, use an anti-seize com- • Do not use chemical glass cleaners as they may damage the gaskets pound (never use oil) available from your Lennox Hearth Products dealer. or painted surfaces. DOOR LATCH: Adjustment Instructions - Remove the right side heat TIPS FOR KEEPING THE GLASS CLEAN shield by loosening the 3 screws located on the back of the stove. -
Page 28: Troubleshooting
TROUBLESHOOTING Problem Solution POOR DRAFT: Extend chimney in length or have the chimney realigned to the proper size flue. Oversized chimneys normally have poor drafts. Remember, the stove or fireplace inserts’ draft depends solely on the natural draft of the chimney (See Draft Requirements on Page 4). -
Page 29: Replacement Parts Lists
Description GV230 GV300 Blower Snap Switch H8374 Contact an Lennox Hearth Products dealer to obtain any of these Blower Blade H8375 parts. Never use substitute materials. Use of non-approved parts can result in poor performance and safety hazards. Blower Cover... - Page 30 REPLACEMENT PARTS - MODELS GRANDVIEW™ 230 AND 300 NOTE: DIAGRAMS & ILLUSTRATIONS ARE NOT TO SCALE.
-
Page 31: Accessories
ACCESSORIES - MODELS GRANDVIEW™ 230 AND 300 DOOR TRIM Item # Model Description GV230 GV300 DRTRM-GV230-NKL Door Trim, Nickel H8346 PEDESTAL (REqUIRED) DRTRM-GV230-BRNKL Door Trim, Brushed Nickel H8347 Item # Model Description GV230 GV300 BLOWER PED-GV Pedestal, Black H8343 BLWR-GV-700-SS... -
Page 32: Product Reference Information
The Date On Which Your Appliance Was Installed __________________________ Your Dealer's Name _________________________________________________ Lennox Hearth Products reserves the right to make changes at any time, without notice, in design, materials, specifications, and prices, and also to discontinue colors, styles, and products.
Need help?
Do you have a question about the Grandview GV230 and is the answer not in the manual?
Questions and answers