
Related Manuals for Murphy EVS-2


Summary of Contents for Murphy EVS-2
- Page 1 EVS-2 Electronic Vibration Switch Installation and Operations Manual 00-02-0841 2013-01-14 Section 20...
- Page 2 Good engineering practices, electrical codes, and insurance regulations require that you use independent external protective devices to prevent potentially dangerous or unsafe conditions. Assume that the Murphy EVS-2 system can fail with outputs full on, outputs full off, or that other unexpected conditions can occur.
-
Page 3: Table Of Contents
Table of Contents Product Information ........................1 Murphy EVS-2 Overview ....................1 EVS-2 Characteristics and Orientation .................2 Installation ........................... 3 Mounting ........................3 Mounting Options ......................4 Bracket Proposals ......................5 Mounting Examples ......................5 Plug Options .........................6 Wiring ...........................6 Settings ............................10 Setting the Set-Point in Inches Per Second (IPS) Peak ..........10 Setting of Alarms ...................... - Page 4 THIS PAGE INTENTIONALLY LEFT BLANK...
-
Page 5: Product Information
The EVS-2 can be connected to Murphy’s TTD annunciator, Centurion , Centurion PLUS or any third- party controller that accepts a switch input or 4- 20mA signal for increased functionality. -
Page 6: Evs-2 Characteristics And Orientation
EVS-2 Characteristics and Orientation To prevent damage to the EVS-2 vibration switch, the following vibrations may not be exceeded: Vibration 15 g Shock 150 g Two-Channel LED Indicators Two independent, adjustable level detectors with selectable delay times are equipped with corresponding relays which are typically used for Alarm and Shutdown. -
Page 7: Installation
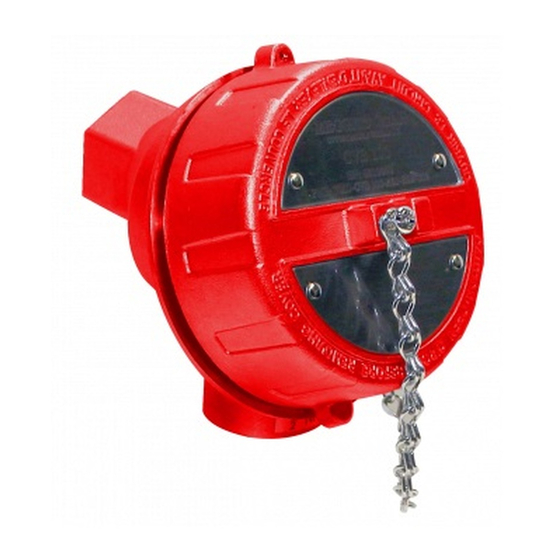
Installation Mounting The Murphy EVS-2 must be mounted and set in accordance with the guidelines in this manual to obtain the desired and specified performance and equipment protection. Mounting occurs via a ½” NPT thread, the tightening torque is hand tight plus 2 to 3 turns. -
Page 8: Mounting Options
Mounting Options The following diagrams illustrate example mounting options for the EVS-2 using a simple pipe plug welded to the machine surface or a bracket with the special adapter provided for drilled and tapped surface mount. NOTE: The special adapter is available for sale. Also note that a hollow pipe close nipple is NOT recommended for installations. -
Page 9: Bracket Proposals
Bracket Proposals Mounting Examples Legend: C=Compressor, E=Engine Compressor Engine Cx (Compressor) = Crankshaft endplay Ex (Engine) = Crankshaft endplay Cy = Main Bearings, Rod Bearings Ey = Main Bearings Cz = Main Bearings Ez = Main Bearings, Detonation, Rod Bearings Section 20 00-02-0841 2013-01-14... -
Page 10: Plug Options
4-20 mA wiring should use shielded cable in EMI proof conduit, separate from any power wiring except the DC power for the EVS-2. AWG 16-26 wire can be used. NOTE: It is strongly recommended that this cabling be installed using the method defined in the Shipboard Cable/Cord Installation document (00- 02-0725 rev 08/2010). - Page 11 The power supply +24 VDC voltage is connected via terminals 1 and 2. NOTE: Minimum voltage acceptable for normal operation is 20-30 VDC. A DC to DC converter can be used for 12V systems. Murphy recommends the Phoenix Contact MINI-PS-12-24DC/24DC/1 or equivalent.
- Page 12 Figure 3 - EVS-2 Hook-up (showing only how to wire Channel 1 {K1}) Section 20 00-02-0841 2013-01-14 - 8 -...
- Page 13 Figure 3 - EVS-2 Hook-up (continued) Section 20 00-02-0841 2013-01-14 - 9 -...
-
Page 14: Settings
NOTE: The unit must be set per the application upon installation. Factory Settings: - 1.5 IPS - 1 sec. time delay - 50% limit value Figure 4 – EVS-2 Detail for setting IPS and Delay Set-points Section 20 00-02-0841 2013-01-14 - 10 -... - Page 15 If start-up vibrations exceed the established threshold limits and trigger the alarm at the desired delay set-point, wire the EVS-2 to a “Class B” input timer on a Murphy annunciator or controller. If used with a PLC system, the input can be timed out for startup.
- Page 16 DIP switches 2 through 4. These pots adjust to a percentage of the scale (range) chosen. If 0 to 1.5 IPS is selected as the range, then a pot setting of 50% would cause the EVS-2 to trip at a vibration of 0.75 IPS. Figures 5 and 6 illustrate these pot settings for the EVS-2.
-
Page 17: Setting Of Alarms
Setting of Alarms The alarm values may vary considerably, up or down, for different machines. The values chosen will normally be set relative to a baseline value determined from experience for the measurement position or direction for that particular machine. As shown in Figure 7, it is recommended that the alarm value be set higher than the baseline by an amount equal to 25% of the upper limit for Zone B. -
Page 18: Vibration Limits Based On Class Of Equipment Based On Iso 10816-3
Vibration Limits Based on Class of Equipment Based on ISO 10816-3 Figure 7 – Vibration Limits Section 20 00-02-0841 2013-01-14 - 14 -... - Page 19 Typical Vibration Alarm Settings of Various Installations THE VALUES LISTED BELOW ARE GUIDELINES ONLY – Actual vibration limits must be related to stress levels, which can be measured with strain gage equipment. In general, if vibration levels are below the guidelines mentioned below, the stress levels are well below the fatigue level of the equipment.
-
Page 20: Equipment Manufacturer Recommended Settings
Equipment Manufacturer Recommended Settings ARIEL: SKID, FRAMES, CYLINDERS (provided by Ariel) MICROLOG CMVA60 SETUP: Velocity ins/sec, zero to peak If a vibration problem is perceived, a spectral analysis should be performed on the unit by a qualified vibration specialist. The following chart indicates overall average limits for various models of Ariel equipment. THESE VALUES ARE GUIDELINES ONLY - Actual vibration limits must be related to stress levels, which can be measured with strain gage equipment. -
Page 21: Specifications
Specifications Performance Vibration Range (Adjust Jumper S1): 0.75, 1.50 or 3.00 IPS/peak Frequency Range: 5 to 1000 Hz ): 4 to 20 mA ≤ 500 Ω Analog Output (R load ): 100 mV/g (offset + 5VDC) ≤ 20 kΩ Raw Signal (R load Environment Operating Temperature: -22°F to +185°F (-30C to +85C) - Page 22 THIS PAGE INTENTIONALLY LEFT BLANK...
- Page 23 THIS PAGE INTENTIONALLY LEFT BLANK...
Need help?
Do you have a question about the EVS-2 and is the answer not in the manual?
Questions and answers