Table of Contents
Advertisement
Instructions for use
MWH434AX
EN
English
Contents
Installation, 4
Description, 6
Use, 10
Troubleshooting, 24
E ciency test, 25
EN
1
Advertisement
Table of Contents

Related Manuals for Hotpoint MWH434AX


Summary of Contents for Hotpoint MWH434AX
-
Page 1: Table Of Contents
Instructions for use MWH434AX Contents Information for the user, 2 English Installation, 4 Description, 6 Use, 10 Maintenance and cleaning, 23 Troubleshooting, 24 E ciency test, 25... -
Page 2: Information For The User
Information for the user T T h h a a n n k k y y o o u u f f o o r r c c h h o o o o s s i i n n g g a a H H O O T T P P O O I I N N T T c c o o m m b b i i n n a a t t i i o o n n m m i i c c r r o o w w a a v v e e . . M M a a k k i i n n g g t t h h i i s s p p r r o o d d u u c c t t e e a a s s y y t t o o u u s s e e a a n n d d s s i i m m p p l l e e t t o o o o p p e e r r a a t t e e w w a a s s t t h h e e m m a a i i n n f f a a c c t t o o r r c c o o n n s s i i d d e e r r e e d d i i n n i i t t s s d d e e v v e e l l o o p p m m e e n n t t . -
Page 3: Safety Information
Information for the user Warning: When heating food in plastic or paper containers, Keep this manual with the appliance. If this keep an eye on the oven due to the risk of fire. appliance is sold or given away, make sure the It is not recommended to use metallic cookware, manual is given to the new owner. -
Page 4: Installation
Installation Before connection W W a a r r n n i i n n g g : : E E n n s s u u r r e e t t h h a a t t y y o o u u r r a a p p p p l l i i a a n n c c e e h h a a s s n n o o t t b b e e e e n n In order to easily locate the reference information d d a a m m a a g g e e d d d d u u r r i i n n g g t t r r a a n n s s p p o o r r t t ( ( b b r r o o k k e e n n s s e e a a l l o o r r d d o o o o r r , , for your appliance, we recommend that you make... - Page 5 Installation Flush fitting The appliance may be installed under a worktop or in a column of cabinetry (open or closed) that has the appropriate dimensions for built-in installation (Fig. 02). Never use the appliance immediately after moving it from a cold place to a warm place (wait 1 to 2 hours) because the condensation could cause a malfunction.
-
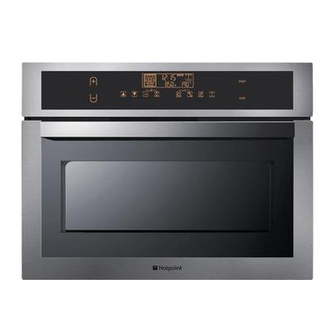
Page 6: Description
Description Appliance Fig. 03 Turntable Control panel Cavity Door handle Turntable: for even cooking of foods with no handling required. It rotates in both directions. If the turntable does not rotate, ensure that all components are positioned correctly. Do not try to rotate it manually as this may risk damaging the turning gear. - Page 7 Description Accessories The shelf (Fig. 05): allows you to brown or grill food. The shelf should not, under any circumstances, be used with other metal Fig. 05 cookware on the microwave, grill + microwave or fan + microwave settings. However, you can heat food in an aluminium tray providing this is separated from the shelf by a plate.
-
Page 8: Control Panel
Description Control panel Fig. 10 + + a a n n d d - - b b u u t t t t o o n n s s : : Used for setting the time, the cooking time, the temperature and the power level. C C o o o o k k i i n n g g m m o o d d e e b b u u t t t t o o n n s s : : Used for scrolling through the various cooking modes. - Page 9 Description Display Fig. 11 The display guides you through programming the various settings: Cooking modes display Microwave power level (Watts) Food weight (grammes) Temperature Automatic programmes Time Programme time Auto defrost indicator...
-
Page 10: Use
Setting/changing the time After connecting your appliance or after an extended power outage, 12:00 flashes on the display. To set the time Display Press the +/- buttons to set the time, e.g 6:30. Confirm by pressing the CLOCK button. There is a beep to confirm that the time has been set. To change the time Display Press the clock button. -
Page 11: Using The Power Levels
Programming Your appliance is now connected and the correct time is set. Use the handle to open the door. Put the food inside and close the door. If the door is not closed properly, the appliance will not work. If the door is opened during a programme, it is not cancelled, just interrupted. To restart the oven, close the door and press the START button again. -
Page 12: Microwave Function
Microwave function P P r r o o g g r r a a m m m m i i n n g g b b y y p p o o w w e e r r l l e e v v e e l l D D i i s s p p l l a a y y Use the selection keys to choose the microwave... -
Page 13: Automatic Cooking Functions
Heating on 2 levels For better results when heating up 2 dishes at the same time, use the microwave function on 500 watts. Put one plate on the turntable and another on the shelf positioned at level 3. Recommendations: Cover the plates with cling film or another plate upside down. The times indicated below apply if you are heating refrigerated food or food stored at room temperature. -
Page 14: Automatic Functions Guide
Automatic functions guide This function is used for reheating chilled, cooked dishes (lasagna, dauphinoise potatoes, shepherd’s pie, fish pie, etc.) between 100 g and 1,000 g. Dishes are reheated on the microwave setting. Remove the product from its packaging and put it in a heat-resistant dish of similar size to the microwave. -
Page 15: Defrosting
Defrosting Defrosting frozen vegetables in your microwave oven saves you a great deal of time. To defrost food, use the AUTO DEFROST function or the MICROWAVE function with the power set to 200 W. Tips: Small pieces of meat or fish can be cooked straight after defrosting. Larger pieces such as meat joints or whole fish will still be slightly frozen after the defrost programme. -
Page 16: Defrost Function
Defrost function Auto defrost Display Select the “auto defrost” button and 100 g and the defrost indicator appear on the display. Press the + + button to select the food weight, e.g. 700 g. Confirm by pressing START. The required time is calculated automatically. The programme time appears on the display and the defrost programme starts. -
Page 17: Grill Function
Grill function This function is used for cooking and browning food such as gratins or meat. It can be used before or after cooking according to the recipe. W W a a r r n n i i n n g g : : T T h h e e a a c c c c e e s s s s i i b b l l e e a a r r e e a a s s o o f f t t h h e e o o v v e e n n m m a a y y b b e e c c o o m m e e h h o o t t w w h h e e n n t t h h e e g g r r i i l l l l i i s s u u s s e e d d . - Page 18 Microwave + grill function This function allows you to use the grill and microwave modes at the same time, making cooking quicker. You can use either of the two grill levels with one of the microwave power levels up to 700 W. Programming the GRILL + MICROWAVE function Display Press the...
- Page 19 Fan oven function The fan oven function lets you cook and brown food like in a traditional oven. Programming the FAN OVEN function Display Select the FAN OVEN function. 200° flashes on the display so you can select the required cooking temperature.
- Page 20 Cooking guide for fan oven mode Food Temperature Insertion level Time Meat Roast pork (1 kg) 160°C On the shelf at level 2 90 min Roast veal (1 kg) 180°C On the shelf at level 2 70 - 75 min Roast beef (1 kg) 220°C* On the shelf at level 2...
-
Page 21: Fan Oven + Microwave Cooking Function
Fan oven + microwave cooking function The fan + microwave function lets you combine microwave cooking with fan oven cooking, saving you a great deal of time. The following microwave power levels are available: 100-200-300-400-500 W. The cooking time can be adjusted from 50°C to 250°C in increments of 10°C. The cooking time can be set from 0 to 60 minutes. -
Page 22: Child Lock
Cooking guide for fan + microwave setting Use a microwave-proof, heat-resistant dish, preferably made of terracotta (less spattering than with a glass dish). If possible, cook joints without bards to prevent smoke and spatters of fat. After cooking, season the joint, wrap it in aluminium foil and leave it for 10 minutes. This will help the meat fibres to relax and the joint will be more succulent. -
Page 23: Maintenance And Cleaning
Maintenance & Cleaning We recommend that you clean the oven The turntable can be removed for easy regularly and remove any deposits of food cleaning. To remove it, pick it up using the inside and outside of the appliance. Use a access zones provided for this purpose. -
Page 24: Troubleshooting
Troubleshooting If you have any doubts about operation of your appliance, it does not necessarily mean that there is a fault. In any case, check the following: You notice that Solution Check that your appliance is connected correctly. The appliance does not come on. Check that the oven door is closed properly. -
Page 25: E Ciency Test
Efficiency test Methods for measuring suitability for use in accordance with standards IEC/EN/NF EN 60705; The International Electrotechnical Commission, SC.59K, has drawn up a standard relating to the comparative performance checks carried out on different microwave ovens. We recommend the following for this appliance: Approx.
Need help?
Do you have a question about the MWH434AX and is the answer not in the manual?
Questions and answers