
Subscribe to Our Youtube Channel
Related Manuals for movistar RTA01N


Summary of Contents for movistar RTA01N
- Page 1 Wireless ADSL Router RTA01N User’s Manual Wireless ADSL Router RTA01N User´s Manual...
- Page 2 Wireless ADSL Router RTA01N User’s Manual WEEE Directive & Product Disposal At the end of its serviceable life, this product should not be treated as household or general waste. It should be handed over to the applicable collection point for the recycling of electrical and electronics equipment, or returned to the supplier for disposal.
-
Page 3: Table Of Contents
Wireless Connection............31 Getting Started with the Web pages ....33 Accessing the Web pages ..........33 Testing your Setup............... 36 Default device settings ............36 Overview............. 39 Internet access settings ............41 About Wireless ADSL Router RTA01N ......41... - Page 4 Wireless ADSL Router RTA01N User’s Manual Status ..............42 Device Info ................42 ADSL ..................44 Statistics ................45 Wizzard ............... 46 Wizzard ................. 46 WAN Connection Setting - PPPoE DSL connection ................ 47 WAN Connection Setting - PPPoA DSL connection ................
- Page 5 Wireless ADSL Router RTA01N User’s Manual Basic Settings ..............80 Security ................. 82 WEP + Encryption Key ..........84 WEP + Use 802.1x Authentication ......85 WPA/WPA2/WPA2 Mixed + Personal (Pre-Shared Key) ............85 WPA/WPA2/WPA2 Mixed + Enterprise (RADIUS) ..............87 Wireless Multiple BSSID Settings........
- Page 6 Wireless ADSL Router RTA01N User’s Manual Configuring ALG ..............134 ALG..............135 Configuring ALG ..............135 NAT Exclude IP ..........136 Configuring NAT Exclude IP ..........136 Port Trigger ............137 Configuring Port Trigger ............ 137 FTP ALG Port ........... 138 Configuring Port Trigger ............
- Page 7 Wireless ADSL Router RTA01N User’s Manual SNMP ............... 161 SNMP ................. 161 DNS Configuration ........... 162 DHCP Server Configuration - Attain DNS Automatically ..............162 DHCP Server Configuration - Set DNS Manually ................163 IPv6 DNS ................164 Dynamic DNS Configuration......165 Overview of Dynamic DNS ..........
- Page 8 Wireless ADSL Router RTA01N User’s Manual Reboot ................190 Resetting to Defaults ............190 Time Zone ............192 SNTP Server and SNTP Client Configuration settings ............ 192 Log ..............198 Log ..................198 Diagnostic ............199 Ping ..................199 Ping6 ................... 200 Traceroute ................
-
Page 9: Introduction
Wireless ADSL Router RTA01N User’s Manual Introduction Congratulations on becoming the owner of the Wireless ADSL Router RTA01N. You will now be able to access the Internet using your high-speed DSL connection. This User Guide will show you how to connect your Wireless ADSL Router RTA01N, and how to customize its configuration to get the most out of your new product. -
Page 10: Using This Document
Acronyms are defined the first time they appear in the text and also in the glossary. For brevity, the Wireless ADSL Router RTA01N is referred to as “the device”. The term LAN refers to a group of Ethernet-connected computers at one site. -
Page 11: Getting To Know The Device
Wireless ADSL Router RTA01N User’s Manual Getting to know the device Computer / System requirements 1. Pentium 200MHZ processor or above 2. Windows 98SE, Windows Me, Windows 2000, Windows XP, Windows Vista and Windows 7 3. 64MB of RAM or above ... -
Page 12: Installation & Setup
“DSL” port of the splitter and connect the other end of this cable to the “LINE” port of your Wireless ADSL Router RTA01N. (If there is no option Splitter, please connect the supplied RJ11 telephone cable from your home's telephone jack to the “LINE” port of your Wireless ADSL Router RTA01N.) -
Page 13: Led Meanings & Activations
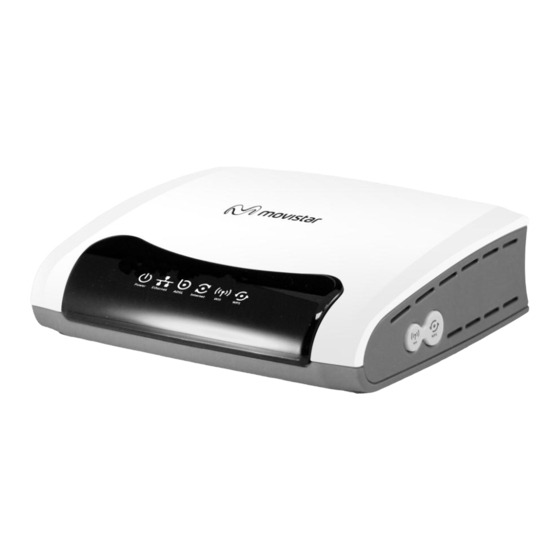
Wireless ADSL Router RTA01N User’s Manual LED meanings & activations Your Wireless ADSL Router RTA01N has indicator lights on the front side. Please see below for an explanation of the function of each indicator light. Power indicator Internet Active indicator... -
Page 14: Back Panel Connectors
Power ON/OFF Switch Ethernet RJ-45 Jack (Ethernet Cable) connection to your PC, or HUB Reset button. RESET the Wireless ADSL Router RTA01N to its default settings. Reset Press this button for at least 5 full seconds to start to reset it to its default settings. -
Page 15: Computer Configurations Under Different Os, To Obtain Ip Address Automatically
Wireless ADSL Router RTA01N User’s Manual Computer configurations under different OS, to obtain IP address automatically Before starting the Wireless ADSL Router RTA01N configuration, please kindly configure the PC computer as below, to have automatic IP address / DNS Server. - Page 16 Wireless ADSL Router RTA01N User’s Manual 3. Double click on "Internet Protocol (TCP/ IP)". 4. Check "Obtain an IP address automatically" and “Obtain DNS server address automatically” then click on "OK" to continue. 5. Click "Show icon in notification area when connected" (see screen...
- Page 17 Wireless ADSL Router RTA01N User’s Manual For Windows Vista-32/64 1. Click on “Start” -> “Control Panel” -> “View network status and tasks”. 2. In the Manage network connections, click on “Manage network connections” to continue.
- Page 18 Wireless ADSL Router RTA01N User’s Manual 3. Single RIGHT click on “Local Area connection", then click "Properties". 4. The screen will display the information “User Account Control” and click “Continue” to continue. 5. Double click on "Internet Protocol Version 4 (TCP/IPv4)".
- Page 19 Wireless ADSL Router RTA01N User’s Manual 6. Check "Obtain an IP address automatically" and “Obtain DNS server address automatically” then click on "OK" to continue. For Windows 7-32/64 1. Click on “Start” -> “Control Panel” (in Category View) -> “View network...
- Page 20 Wireless ADSL Router RTA01N User’s Manual 2. In the Control Panel Home, click on “Change adapter settings” to continue. 3. Single RIGHT click on “Local Area connection", then click "Properties".
- Page 21 Wireless ADSL Router RTA01N User’s Manual 4. Double click on "Internet Protocol Version 4 (TCP/IPv4)".
- Page 22 Wireless ADSL Router RTA01N User’s Manual 5. Check "Obtain an IP address automatically" and “Obtain DNS server address automatically” then click on "OK" to continue.
-
Page 23: Configure The Device
Wireless ADSL Router RTA01N User’s Manual Configure the device Connecting the Hardware This section describes how to connect the device to the wall phone port, the power outlet and your computer(s) or network. 1. Launch your web browser, type the following URL in the... -
Page 24: Wan Connection Setting - Pppoe Dsl Connection
Wireless ADSL Router RTA01N User’s Manual WAN Connection Setting - PPPoE DSL connection 1. Enter VCI and VPI setting determined by your ISP. 2. Select the Encapsulation determined by your ISP. 3. From the Connection Mode ratio, select PPPoE setting. -
Page 25: Wan Connection Setting - Pppoa Dsl Connection
Wireless ADSL Router RTA01N User’s Manual WAN Connection Setting - PPPoA DSL connection 6. Enter VCI and VPI setting determined by your ISP. 7. Select the Encapsulation determined by your ISP. 8. From the Connection Mode ratio, select PPPoA setting. -
Page 26: Wan Connection Setting - Bridged Dsl Connection
Wireless ADSL Router RTA01N User’s Manual WAN Connection Setting - Bridged DSL connection 11. Enter VCI and VPI setting determined by your ISP. 12. Select the Encapsulation determined by your ISP. 13. From the Connection Mode ratio, select 1483 Bridged setting. -
Page 27: Wan Connection Setting - 1483 Mer By Dhcp
Wireless ADSL Router RTA01N User’s Manual WAN Connection Setting - 1483 MER by DHCP 17. Enter VCI and VPI setting determined by your ISP. 18. Select the Encapsulation determined by your ISP. 19. From the Connection Mode ratio, select 1483 MER setting. -
Page 28: Wan Connection Setting - 1483 Mer By Fixed Ip
Wireless ADSL Router RTA01N User’s Manual WAN Connection Setting - 1483 MER by Fixed IP 22. Enter VCI and VPI setting determined by your ISP. 23. Select the Encapsulation determined by your ISP. 24. From the Connection Mode ratio, select 1483 MER setting. -
Page 29: Wlan Connection Setting
Wireless ADSL Router RTA01N User’s Manual WLAN Connection Setting 30. Please configure the Wireless Network, Band, SSID if you want to change. (Recommended to use default settings, Wireless Network = Enable, Default Band = 2.4GHz (B+G+N), SSID = WLAN_xxxx). Here xxxx is the last 4 digit of MAC Address. -
Page 30: Save Settings
Wireless ADSL Router RTA01N User’s Manual Save Settings 33. If you are happy with your settings, click Apply Changes. 34. Now, the Wireless ADSL Router RTA01N has been configured completely, and suitable for Wireless and Internet Connections. -
Page 31: Wireless Connection
Wireless ADSL Router RTA01N User’s Manual Wireless Connection For easy installation it is saved to keep the settings. You can later change the wireless settings via the wireless configuration menu. (see user manual on the CD – Chapter 13 and other). - Page 32 Wireless ADSL Router RTA01N User’s Manual 37. If the wireless network isn’t encrypted, click on "Connect Anyway" to connect. 38. If the wireless network is encrypted, enter the network key that belongs to your authentication type and key. (the default settings Security Mode = WPA (TKIP + AES)).
-
Page 33: Getting Started With The Web Pages
Wireless ADSL Router RTA01N User’s Manual Getting Started with the Web pages The Wireless ADSL Router RTA01N includes a series of Web pages that provide an interface to the software installed on the device. It enables you to configure the device settings to meet the needs of your network. - Page 34 Wireless ADSL Router RTA01N User’s Manual...
- Page 35 Wireless ADSL Router RTA01N User’s Manual Figure 1: Homepage The first time that you click on an entry from the left- hand menu, a login box is displayed. You must enter your username and password to access the pages. A login screen is displayed:...
-
Page 36: Testing Your Setup
Wireless ADSL Router RTA01N User’s Manual Testing your Setup Once you have connected your hardware and configured your PCs, any computer on your LAN should be able to use the device’s DSL connection to access the Internet. To test the connection, turn on the device, wait for 30 seconds and then verify that the LEDs are illuminated as follows: Table 1. - Page 37 See LAN. Subnet mask: 255.255.255.0 DHCP (Dynamic DHCP server enabled with the The Wireless ADSL Router RTA01N maintains a pool Host Configuration following pool of addresses: of private IP addresses for dynamic assignment to Protocol) your LAN computers. To use this service, you must 192.168.1.33...
-
Page 39: Overview
Wireless ADSL Router RTA01N User’s Manual Overview The Overview page displays useful information about the setup of your device, including: details of the device’s Internet access settings version information about your device To display this page: From the head menu, click on Status. The following page is... - Page 40 Wireless ADSL Router RTA01N User’s Manual...
-
Page 41: Internet Access Settings
Wireless ADSL Router RTA01N User’s Manual Figure 3: Overview page The information displayed on this page is explained in detail in the following sections. Internet access settings This section displays details of the settings that allow your device to access the Internet. These details include:... -
Page 42: Status
Wireless ADSL Router RTA01N User’s Manual Status You can view statistics on the processing of IP packets on the networking interfaces. You will not typically need to view this data, but you may find it helpful when working with your ISP to diagnose network and Internet data transmission problems. - Page 43 Wireless ADSL Router RTA01N User’s Manual...
-
Page 44: Adsl
Wireless ADSL Router RTA01N User’s Manual ADSL This page shows the ADSL line statistic information. 3. From the head Status menu, click on ADSL The following page is displayed: 4. To display updated statistics showing any new data since you opened this page, click Refresh. -
Page 45: Statistics
Wireless ADSL Router RTA01N User’s Manual Statistics This page shows the packet statistics for transmission and reception regarding to network interface. 5. From the head Status menu, click on Statistics The following page is displayed: 6. To display updated statistics showing any new data since... -
Page 46: Wizzard
Wireless ADSL Router RTA01N User’s Manual Wizzard The wizzard will help you do some basic configurations step by step. Step 1: WAN Connection Setting Step 2: WLAN Connection Setting Step 3: Save Setting Wizzard This page shows the current status and some basic settings of the device. -
Page 47: Wan Connection Setting - Pppoe Dsl Connection
Wireless ADSL Router RTA01N User’s Manual WAN Connection Setting - PPPoE DSL connection 1. Enter VCI and VPI setting determined by your ISP. 2. Select the Encapsulation determined by your ISP. 3. From the Connection Mode ratio, select PPPoE setting. -
Page 48: Wan Connection Setting - Pppoa Dsl Connection
Wireless ADSL Router RTA01N User’s Manual WAN Connection Setting - PPPoA DSL connection 1. Enter VCI and VPI setting determined by your ISP. 2. Select the Encapsulation determined by your ISP. 3. From the Connection Mode ratio, select PPPoA setting. -
Page 49: Wan Connection Setting - Bridged Dsl Connection
Wireless ADSL Router RTA01N User’s Manual WAN Connection Setting - Bridged DSL connection 1. Enter VCI and VPI setting determined by your ISP. 2. Select the Encapsulation determined by your ISP. 3. From the Connection Mode ratio, select 1483 Bridged setting. -
Page 50: Wan Connection Setting - 1483 Mer By Dhcp
Wireless ADSL Router RTA01N User’s Manual WAN Connection Setting - 1483 MER by DHCP 1. Enter VCI and VPI setting determined by your ISP. 2. Select the Encapsulation determined by your ISP. 3. From the Connection Mode ratio, select 1483 MER setting. -
Page 51: Wan Connection Setting - 1483 Mer By Fixed Ip
Wireless ADSL Router RTA01N User’s Manual WAN Connection Setting - 1483 MER by Fixed IP 1. Enter VCI and VPI setting determined by your ISP. 2. Select the Encapsulation determined by your ISP. 3. From the Connection Mode ratio, select 1483 MER setting. -
Page 52: Wlan Connection Setting
Wireless ADSL Router RTA01N User’s Manual WLAN Connection Setting 9. Please configure the Wireless Network, Band, SSID if you want to change. (Recommended to use default settings, Wireless Network = Enable, Default Band = 2.4GHz (B+G+N), SSID = MOVISTAR_XXXX). Here XXXX is the last 4 digit of MAC Address. -
Page 53: Save Settings
Wireless ADSL Router RTA01N User’s Manual Save Settings 12. If you are happy with your settings, click Apply Changes. 13. Now, the Wireless ADSL Router RTA01N has been configured completely, and suitable for Wireless and Internet Connections. -
Page 54: Internet Access
Wireless ADSL Router RTA01N User’s Manual Internet Access This chapter describes how to configure the way that your device connects to the Internet. Your ISP determines what type of Internet access you should use and provides you with any information that you need in order to configure the Internet access to your device. -
Page 55: Types Of Internet Access
Wireless ADSL Router RTA01N User’s Manual Connect on demand. Enter the minutes after which the session must be disconnected, if no activity takes place. Manual. Enter the minutes after which the session must be disconnected, if no activity takes place. -
Page 56: Configuring Your Pppoe Dsl Connection
Wireless ADSL Router RTA01N User’s Manual Configuring your PPPoE DSL connection If your ISP’s Internet service uses PPPoE you need to set up a PPP login account. The first time that you login to the Internet, your ISP will ask you to enter a username and password so they can check that you are a legitimate, registered Internet service user. - Page 57 Wireless ADSL Router RTA01N User’s Manual 1. From the head Setup menu, click on WAN. The following page is displayed: 2. Enter VCI and VPI setting determined by your ISP. 3. Select the Encapsulation determined by your ISP. 4. From the Channel Mode drop-down list, select PPPoE setting.
-
Page 58: Configuring Your Pppoa Dsl Connection
Wireless ADSL Router RTA01N User’s Manual Configuring your PPPoA DSL connection If your ISP’s Internet service uses PPPoA you need to set up a PPP login account. The first time that you login to the Internet, your ISP will ask you to enter a username and password so they can check that you are a legitimate, registered Internet service user. - Page 59 Wireless ADSL Router RTA01N User’s Manual 1. From the head Setup menu, click on WAN. The following page is displayed: 2. Enter VCI and VPI setting determined by your ISP. 3. Select the Encapsulation determined by your ISP. 4. From the Channel Mode drop-down list, select PPPoA setting.
-
Page 60: Configuring Your Bridged Dsl Connection
Wireless ADSL Router RTA01N User’s Manual Configuring your Bridged DSL connection 1. From the head Setup menu, click on WAN. The following page is displayed: 2. Enter VCI and VPI setting determined by your ISP. 3. Select the Encapsulation determined by your ISP. -
Page 61: Configuring Your 1483 Mer By Dhcp
Wireless ADSL Router RTA01N User’s Manual Configuring your 1483 MER by DHCP 1. From the head Setup menu, click on WAN. The following page is displayed: 2. Enter VCI and VPI setting determined by your ISP. 3. Select the Encapsulation determined by your ISP. -
Page 62: Configuring Your 1483 Mer By Fixed Ip
Wireless ADSL Router RTA01N User’s Manual Configuring your 1483 MER by Fixed IP 1. From the head Setup menu, click on WAN. The following page is displayed: 2. Enter VCI and VPI setting determined by your ISP. 3. Select the Encapsulation determined by your ISP. -
Page 63: Atm Settings
Wireless ADSL Router RTA01N User’s Manual 10. From the head Service menu, click on DNS. 11. Check on Set DNS Manually ratio. 12. Enter DNS setting determined by your ISP. 13. Click Apply Changes button. 14. Your configuration is complete. - Page 64 Wireless ADSL Router RTA01N User’s Manual Field Description Virtual Path Identifier. This is read-only field and is selected on the Select column in the Current ATM VC Table. Virtual Channel Identifier. This is read-only field and is selected on the Select column in the Current ATM VC Table.
-
Page 65: Adsl Settings
Wireless ADSL Router RTA01N User’s Manual ADSL Settings The ADSL setting page allows you to select any combination of DSL training modes. 1. From the left-hand WAN menu, click on ADSL Settings. The following page is displayed:... - Page 66 Wireless ADSL Router RTA01N User’s Manual Field Description ADSL modulation Choose prefered xdsl standard protocols. G.lite : G.992.2 Annex A G.dmt : G.992.1 Annex A T1.413 : T1.413 issue #2 ADSL2 : G.992.3 Annex A ADSL2+ : G.992.5 Annex A AnnexL Option Enable/Disable ADSL2/ADSL2+ Annex L capability.
-
Page 67: Local Network Configuration
User’s Guide Configuring your Computers Local Network Configuration The Addressing page displays information about your LAN IP address and allows you to change the address and subnet mask assigned to your device. You should only change the addressing details if your ISP asks you to, or if you are familiar with network configuration. - Page 68 User’s Guide Configuring your Computers...
- Page 69 User’s Guide Configuring your Computers 3. From the left-hand LAN menu, click on DHCP Settings.
- Page 70 User’s Guide Configuring your Computers 4. Change the IP Pool Range and then click Apply Changes button.
- Page 71 User’s Guide Configuring your Computers 5. From the left-hand LAN menu, click on LAN. 6. Type a new IP Address and Subnet Mask. 7. Click Apply Changes. 8. Please click 10.0.0.2 to continue configuration. 9. The primary IP address is being changed to 10.0.0.2 netmask 255.255.255.0.
-
Page 72: Adding The Secondary Lan Ip Address And Subnet Mask
User’s Guide Configuring your Computers Linux a. Bring up a shell. b. Type pump -r to release the lease. c. Type pump to renew the lease. If you change the LAN IP address of the device while connected through your Web browser, you will be disconnected. You must open a new connection by entering your new LAN IP address as Note the URL. -
Page 73: Dhcp Settings
User’s Guide Configuring your Computers DHCP Settings You can configure your network and DSL device to use the Dynamic Host Configuration Protocol (DHCP). This page provides DHCP instructions for implementing it on your network by selecting the role of DHCP protocol that this device wants to play. - Page 74 User’s Guide Configuring your Computers Field Description IP Pool Range Specify the lowest and highest addresses in the pool. Max Lease Time The Lease Time is the amount of time that a network user is allowed to maintain a network connection to the device using the current dynamic IP address.
-
Page 75: Dhcp Relay Configuration
User’s Guide Configuring your Computers DHCP Relay Configuration 1. From the left-hand LAN menu, click on DHCP Settings. 2. From Services check ratio, click on DHCP Relay Mode. 3. Type DHCP server IP Addresses for DHCP Relay. 4. Click on Apply Changes. Field Description Specify the IP address of your ISP’s DHCP server. - Page 76 User’s Guide Configuring your Computers 5. You need to renew your DHCP lease: Windows 95/98 a. Select Run... from the Start menu. b. Enter winipcfg and click OK. c. Select your ethernet adaptor from the pull-down menu d. Click Release All and then Renew All. e.
-
Page 77: Dhcp None Configuration
User’s Guide Configuring your Computers DHCP None Configuration 1. From the left-hand Services menu, click on DHCP Settings. 2. From Services check ratio, click on None Mode. 3. Click on Apply Changes. Function Button Description Apply Changes Set new DHCP server configuration. New parameters will take effect after save into flash memory and reboot the system. -
Page 78: Dhcp Static Configuration
User’s Guide Configuring your Computers DHCP Static Configuration This page lists the fixed IP/MAC address on your LAN. The device distributes the number configured to hosts on your network as they request Internet access. DHCP Static Configuration 1. From the left-hand LAN menu, click on DHCP Static. 2. -
Page 79: Lan Ipv6 Configuration
User’s Guide Configuring your Computers LAN IPv6 Configuration This page is used to configurate ipv6 lan setting. User can set lan RA server work mode and lan DHCPv6 server work mode. DHCP Static Configuration 1. From the left-hand LAN menu, click on LAN IPv6. -
Page 80: Wireless Network
User’s Guide Configuring your Computers Wireless Network This chapter assumes that you have already set up your Wireless PCs and installed a compatible Wireless card on your device. See Configuring Wireless PCs. Basic Settings This page contains all of the wireless basic settings. Most users will be able to configure the wireless portion and get it working properly using the setting on this screen. - Page 81 User’s Guide Configuring your Computers Field Description Disable Wireless Enable/Disable the Wireless LAN Interface. LAN Interface Band Select the appropriate band from the list provided to correspond with your network setting. Mode Configure the Wireless LAN Interface to AP or AP + WDS mode SSID Specify the network name.
-
Page 82: Security
User’s Guide Configuring your Computers Security This page allows you setup the wireless security. Turn on WEP or WPA by using Encryption Keys could prevent any unauthorized access to your wireless network. To access the Wireless Network Security page: From the left-hand WLAN menu, click on Security. The following page is displayed:... - Page 83 User’s Guide Configuring your Computers Field Description SSID TYPE Select the SSID Encryption There are 4 types of security to be selected. To secure your WLAN, it’s strongly recommended to enable this feature. WEP: Make sure that all wireless devices on your network are using the same encryption level and key.
-
Page 84: Wep + Encryption Key
User’s Guide Configuring your Computers Function Button Description Apply Changes Click to save the rule entry to the configuration. WEP + Encryption Key WEP aims to provide security by encrypting data over radio waves so that it is protected as it is transmitted from one end point to another. -
Page 85: Wep + Use 802.1X Authentication
User’s Guide Configuring your Computers Wlan is restarting! Please wait... WEP + Use 802.1x Authentication WEP aims to provide security by encrypting data over radio waves so that it is protected as it is transmitted from one end point to another. However, it has been found that WEP is not as secure as once believed. - Page 86 User’s Guide Configuring your Computers In the "Personal" mode, the most likely choice for homes and small offices, a pass phrase is required that, for full security, must be longer than the typical 6 to 8 character passwords users are taught to employ. 5.
-
Page 87: Wpa/Wpa2/Wpa2 Mixed + Enterprise (Radius)
User’s Guide Configuring your Computers WPA/WPA2/WPA2 Mixed + Enterprise (RADIUS) Wi-Fi Protected Access (WPA) is a class of systems to secure wireless (Wi-Fi) computer networks. WPA/WPA2 implements the full standard, but will not work with some older network cards. Both provide good security, with two significant issues: ... -
Page 88: Wireless Multiple Bssid Settings
User’s Guide Configuring your Computers Wireless Multiple BSSID Settings This page allows you to set Virtual Access Points (VAP). Here you can enable/disable virtual APs and set the SSID and authentication type. Click "Apply Changes" for these settings to take effect. To access the MBSSID Settings page: From the left-hand WLAN menu, click on MBSSID. -
Page 89: Access Control
User’s Guide Configuring your Computers Access Control For security reason, using MAC ACL's (MAC Address Access List) creates another level of difficulty to hacking a network. A MAC ACL is created and distributed to AP so that only authorized NIC's can connect to the network. While MAC address spoofing is a proven means to hacking a network this can be used in conjunction with additional security measures to increase the level of complexity of the network security... -
Page 90: Allow Listed
User’s Guide Configuring your Computers Allow Listed If you choose 'Allowed Listed', only those clients whose wireless MAC addresses are in the access control list will be able to connect to your Access Point. 9. From the Wireless Access Control Mode drop-down list, select Allowed Listed setting. -
Page 91: Deny Listed
User’s Guide Configuring your Computers Deny Listed When 'Deny Listed' is selected, these wireless clients on the list will not be able to connect the Access Point. 15. From the Wireless Access Control Mode drop-down list, select Deny Listed setting. 16. -
Page 92: Advanced Settings
User’s Guide Configuring your Computers Advanced Settings These settings are only for more technically advanced users who have a sufficient knowledge about wireless LAN. These settings should not be changed unless you know what effect the changes will have on your Access Point. To access the Wireless Network Advanced Settings page: From the left-hand WLAN menu, click on Advanced. - Page 93 User’s Guide Configuring your Computers Field Description Authentication Open System: Open System authentication is not Type required to be successful while a client may decline to authenticate with any particular other client. Shared Key: Shared Key is only available if the WEP option is implemented.
- Page 94 User’s Guide Configuring your Computers Field Description Broadcast SSID Broadcast or Hide SSID to your Network. Default: Enabled Relay Blocking Disable or Enable Relay Blocking Ethernet to Disable or Enable Ethernet to Wireless Blocking Wireless Blocking Wifi Multicast to Disable or Enable Wifi Multicast to Unicast Unicast Aggregation Disable or Enable Aggregation...
-
Page 95: Wps
User’s Guide Configuring your Computers Introduction of WPS Although home Wi-Fi networks have become more and more popular, users still have trouble with the initial set up of network. This obstacle forces users to use the open security and increases the risk of eavesdropping. Therefore, WPS is designed to ease set up of security-enabled Wi-Fi networks and subsequently network management (Wi-Fi Protected Setup Specification 1.0h.pdf, p. -
Page 96: Ap Mode
User’s Guide Configuring your Computers AP mode For AP mode, Wireless Gateway supports three roles, registrar, proxy, and enrollee in registration protocol. At different scenarios, Wireless Gateway will automatically switch to an appropriate role depending on the other device’s role or a specific configuration. -
Page 97: Instructions Of Ap's And Client's Operations
User’s Guide Configuring your Computers Instructions of AP’s and Client’s operations At this state, AP is transparent to users. If users want to configure a station or any device that is capable of being an enrollee, they have to enter device’s PIN into an external registrar and choose an appropriate wireless profile. - Page 98 User’s Guide Configuring your Computers Field Description Disable WPS Check to disable the Wi-Fi protected Setup. When AP’s settings are factory default (out of box), it is WPS Status set to open security and un-configured state. “WPS Status” will display it as “UnConfigured”. If it already shows “Configured”, some registrars such as Vista WCN will not configure AP.
-
Page 99: Operations Of Ap - Ap Being An Enrollee
User’s Guide Configuring your Computers Operations of AP - AP being an enrollee In this case, AP will be configured by any registrar either through in-band EAP or UPnP. Here, users do not need to do any action on AP side. They just need AP’s device PIN and enter it into registrar. - Page 100 User’s Guide Configuring your Computers 3. Plug the Ethernet cable into AP’s LAN port and make sure the IP connection is valid with Vista. 4. Make sure WCN is enabled. Users may need to enable it at the first time. They could open the “Control Panel”, click “Classic View“, open “Administrative Tools”, double click “Services”, ”, a User Account Control pop up and click “Continue“, edit properties of “Windows Connect Now”,...
- Page 101 User’s Guide Configuring your Computers 5. If the previous steps are done, open Windows Explorer. Go to the Network section. 6. Click on “Network discovery and file sharing are turned off. Network computers and devices are not visible. Click to Change…“...
- Page 102 User’s Guide Configuring your Computers 7. Click on “Turn on network discovery and file sharing“ 8. Click on “No, make the network that I am connected to a private network“...
- Page 103 User’s Guide Configuring your Computers 9. AP’s icon will show up. Double click on it. 10. Users could also Click “Add a wireless device” if the icon is not there. Click “next”.
- Page 104 User’s Guide Configuring your Computers 11. Enter AP’s Self-PIN Number and click “next”.
- Page 105 User’s Guide Configuring your Computers 12. Choose a name that people who connect to your network will recognize.
- Page 106 User’s Guide Configuring your Computers 13. Enter the Passphrase and then click Next.
- Page 107 User’s Guide Configuring your Computers 14. A User Account Control screen pops up, click Continue. 15. AP is successfully configured by WCN.
- Page 108 User’s Guide Configuring your Computers 16. Finally, AP will become configured (see WPS Status). The authentication algorithm, encryption algorithm, and key assigned by WCN will be displayed below “Current Key Info”.
- Page 109 User’s Guide Configuring your Computers 17. The SSID field of Wireless Basic Settings page will also be modified with the value assigned by WCN.
-
Page 110: Operations Of Ap - Ap Being A Registrar
User’s Guide Configuring your Computers Operations of AP - AP being a registrar AP mode Whenever users enter station’s PIN into AP’s Wi-Fi Protected Setup page and click “Start PIN”, AP will become a registrar. Users must start the PIN method on the station side within two minutes. - Page 111 User’s Guide Configuring your Computers 5. Users must start the PIN method on the station side within two minutes. 6. Users must start the PIN method on the station side within two minutes.
- Page 112 User’s Guide Configuring your Computers 7. If the device PIN is correct and the WPS handshake is successfully done on the station side, User’s Wi-Fi Protected status will be shown as below.
- Page 113 User’s Guide Configuring your Computers 8. If the device PIN is correct and the WPS handshake is successfully done, AP’s Wi-Fi Protected Setup page will be shown as below. Other pages such as Wireless Basic Settings page and Wireless Security Setup page will also be updated appropriately as described in previous sections.
-
Page 114: Push Button Method
User’s Guide Configuring your Computers Push Button method Wireless Gateway supports a virtual button “Start PBC” on the Wi-Fi Protected Setup page for Push Button method. If users push a virtual button “Start PBC”, AP will initiate a WPS session and wait for any station to join. - Page 115 User’s Guide Configuring your Computers 13. Users must start the PBC method on the station side within two minutes.
- Page 116 User’s Guide Configuring your Computers 14. If the device PCB and the WPS handshake is successfully done on the station side, User’s Wi-Fi Protected status will be shown as below.
- Page 117 User’s Guide Configuring your Computers 15. If the device PIN is correct and the WPS handshake is successfully done, AP’s Wi-Fi Protected Setup page will be shown as below. Other pages such as Wireless Basic Settings page and Wireless Security Setup page will also be updated appropriately as described in previous sections.
-
Page 118: Routing
User’s Guide Configuring your Computers Routing The Routing page enables you to define specific route for your Internet and network data. Most users do not need to define routes. On a typical small home or office LAN, the existing routes that set up the default gateways for your LAN hosts and for the DSL device provide the most appropriate path for all your Internet traffic. - Page 119 User’s Guide Configuring your Computers Fields on the Description first setting block Enable Check to enable the selected route or route to be added. Destination The network IP address of the subnet. The destination can be specified as the IP address of a subnet or a specific host in the subnet.
-
Page 120: Ipv6 Static Route
User’s Guide Configuring your Computers IPv6 Static Route This page is used to configure the ipv6 routing information. Here you can add/delete IPv6 routes. 1. From the head Advance menu, click on Route -> IPv6 Static Route. The following page is displayed: Fields on the Description first setting... -
Page 121: Rip
User’s Guide Configuring your Computers RIP is an Internet protocol you can set up to share routing table information with other routing devices on your LAN, at your ISP’s location, or on remote networks connected to your network via the ADSL line. Most small home or office networks do not need to use RIP;... - Page 122 User’s Guide Configuring your Computers Fields on the Description first setting block Enable/disable RIP feature. Fields on the Description second setting block: Interface The name of the interface on which you want to enable RIP. Receive Mode Indicate the RIP version in which information must be passed to the DSL device in order for it to be accepted into its routing table.
-
Page 123: Dmz
User’s Guide Configuring your Computers A demilitarized zone (DMZ) is a host or small network that acts as neutral ground between the inside and outside network. It contains information that is useful to users of both the inside and outside network. For example, a company may wish to provide software patches to customers via an FTP server. - Page 124 User’s Guide Configuring your Computers 3. From the DMZ Host check ratio, check on Enable 4. Type the IP Address in the DMZ Host IP Address field. 5. Click Apply Changes...
-
Page 125: Virtual Server
User’s Guide Configuring your Computers Virtual Server Your device has built in advanced Security features that protect your network by blocking unwanted traffic from the Internet. If you simply want to connect from your local network to the Internet, you do not need to make any changes to the default Security configuration. -
Page 126: Configuring Custom Applications
User’s Guide Configuring your Computers Application Trigger port port required? number number 51200 true 51201 false Telnet false Secure shell (SSH) false Windows Media Services 1755 1755 false Gnutella 6346 false Kazaa 1214 false Windows Terminal Server 3389 false false PPTP 1723 1723... -
Page 127: Virtual Server For Ftp
User’s Guide Configuring your Computers Virtual Server for FTP In this example configuration, a custom application called FTP Server using TCP port 21 is created. 1. From the head Setup -> NAT menu, click on Virtual Server. The following page is displayed:... - Page 128 User’s Guide Configuring your Computers 2. Select FTP from the Usual Service Name drop-down list. 3. Select TCP from the Protocol drop-down list. 4. Select Interface from the WAN Setting drop-down list. 5. Select proper Interface from the WAN Interface drop-down list.
- Page 129 User’s Guide Configuring your Computers Function Button Description Apply Changes Click to change the setting of default actions to the configuration. Delete Delete the selected port forwarding rules from the forwarding table. You can click the checkbox at the Select column to select the forwarding rule. Disable Disable forwarding rules from the forwarding table.
-
Page 130: Port Forwarding For Http
User’s Guide Configuring your Computers Port Forwarding for HTTP In this example configuration, a custom application called HTTP Server using TCP port 80 is created. 1. From the head Setup -> NAT menu, click on Virtual Server. The following page is displayed:... - Page 131 User’s Guide Configuring your Computers 2. Select WEB from the Usual Service Name drop-down list. 3. Select TCP from the Protocol drop-down list. 4. Select Interface from the WAN Setting drop-down list. 5. Select proper Interface from the WAN Interface drop-down list.
- Page 132 User’s Guide Configuring your Computers Fields on the Description first setting block Usual Service The usual Service is listed here. Name User-defined To define the Service Name manually. Service Name Protocol There are 2 options available: TCP, UDP. WAN Setting Select the proper WAN Setting WAN Interface Select the proper WAN Interface...
-
Page 133: Deleting Custom Applications
User’s Guide Configuring your Computers Deleting custom applications 1. From the head Setup -> NAT menu, click on Virtual Server. The following page is displayed: 2. Click Delete. 3. The Port Forwarding setting has been deleted completely. -
Page 134: Nat Forwarding
User’s Guide Configuring your Computers NAT Forwarding Entries in this table allow you to automatically redirect common network services to a specific machine behind the NAT firewall. These settings are only necessary if you wish to host some sort of server like a web server or mail server on the private local network behind your Gateway's NAT firewall. -
Page 135: Alg
User’s Guide Configuring your Computers To setup NAT ALG and Pass-Through configuration Configuring ALG 2. From the head Advanced menu, click on NAT -> ALG. The following page is displayed:... -
Page 136: Nat Exclude Ip
User’s Guide Configuring your Computers NAT Exclude IP This page is used to config some source ip address which use the purge route mode when access internet through the specified interface. Configuring NAT Exclude IP 1. From the head Advanced menu, click on NAT -> NAT Exclude IP. -
Page 137: Port Trigger
User’s Guide Configuring your Computers Port Trigger Entries in this table are used to restrict certain types of data packets from your local network to Internet through the Gateway. Use of such filters can be helpful in securing or restricting your local network. Configuring Port Trigger 1. -
Page 138: Ftp Alg Port
User’s Guide Configuring your Computers FTP ALG Port This page is used to configure FTP Server ALG and FTP Client ALG ports. Configuring Port Trigger 1. From the head Advanced menu, click on NAT -> FTP ALG Port. The following page is displayed:... -
Page 139: Nat Ip Mapping
User’s Guide Configuring your Computers Nat IP Mapping Entries in this table allow you to config one IP pool for specified source ip address from lan,so one packet which's source ip is in range of the specified address will select one IP address from pool for NAT. -
Page 140: Qos
User’s Guide Configuring your Computers Priority Queue Configuration, Maximum 4 queues for one wan interface. 1. Click Add button to add a queue. 2. Click Remove button to delete selected queue. 3. Click Save button to change the state of selected queue. IP QoS 1. -
Page 141: Ip Qos
User’s Guide Configuring your Computers IP QoS Entries in this table are used to assign the precedence for each incoming packet based on specified policy. Config Procedure: 1: config stream rule. 2: assign the precedence or add marker for different stream. Attention: only when IP QoS is disabled, traffic shaping will take effect. - Page 142 User’s Guide Configuring your Computers Fields on the Description first setting block IP QoS Enable/disable the IP QoS function. Source IP The IP address of the traffic source. Source Netmask The source IP netmask. This field is required if the source IP has been entered.
-
Page 143: Traffic Shaping
User’s Guide Configuring your Computers Traffic Shaping Entries in this table are used for traffic control. It only takes effect when ip qos is disabled. 2. From the head Advance menu, click on QoS. The following page is displayed:... -
Page 144: Cwmp Config
User’s Guide Configuring your Computers CWMP Config CWMP is a protocol for communication between a CPE and Auto-Configuration Server (ACS). The CPE TR-069 configuration should be well defined to be able to communicate with the remote ACS. CWMP Configuration 1. From the head Advanced menu, click on CWMP. The following page is displayed: Figure 5: TR-069 Configuration page... - Page 145 User’s Guide Configuring your Computers ACS Field Description ACS URL. For example, http://10.0.0.1:80 https://10.0.0.1:443 User Name The username the DSL device should use when connecting to the ACS. Password The password the DSL device should use when connecting to the ACS. Periodic Inform When this field is enabled, the DSL device will send an Enable...
-
Page 146: Port Mapping
User’s Guide Configuring your Computers Port Mapping The DSL device provides multiple interface groups. Up to five interface groups are supported including one default group. The LAN and WAN interfaces could be included. Traffic coming from one interface of a group can only be flowed to the interfaces in the same interface group. - Page 147 User’s Guide Configuring your Computers...
- Page 148 User’s Guide Configuring your Computers Fields on the Description first setting block Enabled/Disabled Radio buttons to enable/disable the interface group feature. If disabled, all interfaces belong to the default group. Interface groups To manipulate a mapping group: 1.Select a group from the table. 2.Select interfaces from the available/grouped interface list and add it to the grouped/available interface list using the arrow buttons to manipulate the...
-
Page 149: Bridging
User’s Guide Configuring your Computers Bridging You can enable/disable Spanning Tree Protocol and set MAC address aging time in this page. Bridging 1. From the head Advance menu, click on Others. The following page is displayed: Fields on the Description first setting block Ageing Time... -
Page 150: Client Limit
User’s Guide Configuring your Computers Client Limit This page is used to limit the number of clients that can access the Internet through the modem router. Client Limit 1. From the head Advance menu, click on Others -> Client Limit. The following page is displayed:... -
Page 151: Tunnel Configuration
User’s Guide Configuring your Computers Tunnel Configuration This page is used to config tunnels to connect IPv4 and IPv6 networks. Tunnel Configuration 1. From the head Advance menu, click on Others -> Client Limit. The following page is displayed:... -
Page 152: Others
User’s Guide Configuring your Computers Others Here you can set other miscellaneous advanced settings. When Half Bridge is enabled, the connection type will be set to continuous. Others 1. From the head Advance menu, click on Others -> Others. The following page is displayed:... -
Page 153: Igmp Proxy
User’s Guide Configuring your Computers IGMP Proxy IGMP proxy enables the system to issue IGMP host messages on behalf of hosts that the system discovered through standard IGMP interfaces. The system acts as a proxy for its hosts when you enable it by doing the follows: . -
Page 154: Mld Proxy
User’s Guide Configuring your Computers MLD Proxy MLD Proxy and Snooping can be configured here. MLD Proxy 1. From the head Service menu, click on MLD Proxy. The following page is displayed:... -
Page 155: Upnp
User’s Guide Configuring your Computers UPnP UPnP is an architecture for pervasive peer-to-peer network connectivity of intelligent appliances, Wireless devices, and PCs of all form factors. It is designed to bring easy-to-use, flexible, standards-based connectivity to ad-hoc or unmanaged networks whether in the home, in a small business, public spaces, or attached to the Internet. -
Page 156: Configuring Upnp
User’s Guide Configuring your Computers From the web page you can enable or disable UPnP. Configuring UPnP 1. From the head Services menu, click on UPnP. The following page is displayed: Fields on the Description first setting block UPnP Daemon Enable/disable UPnP feature. -
Page 157: Upnp Control Point Software On Windows Me
User’s Guide Configuring your Computers UPnP Control Point Software on Windows ME To install the control point software on Windows ME: 1. In the Control Panel, select "Add/Remove Programs". 2. In the "Add/Remove Programs Properties" dialog box, select the "Windows Setup" tab. In the "Components" list, double click on the "Communications"... -
Page 158: Ssdp Requirements
User’s Guide Configuring your Computers SSDP requirements You must have SSDP Discovery Service enabled on your Windows XP system to use the UPnP Control point software. SSDP Discovery Service is enabled on a default installation of Windows XP. To check if it is enabled on your system, look in Control Panel >... - Page 159 User’s Guide Configuring your Computers Installation procedure To install the Control point software on Windows XP, follow the steps below: 1. In the Control Panel, select "Add/Remove Programs". 2. In the "Add or Remove Programs" dialog box, click the "Add / Remove Windows Components"...
- Page 160 User’s Guide Configuring your Computers 5. Select the following entries from the “Networking Services” window and then click "OK": If you are using Windows XP, select: • "Universal Plug and Play". If you are using Windows XP SP1, select: • "Internet Gateway Device discovery and Control Client". •...
-
Page 161: Snmp
User’s Guide Configuring your Computers SNMP Simple Network Management Protocol (SNMP) is a troubleshooting and management protocol that uses the UDP protocol on port 161 to communicate between clients and servers. The DSL device can be managed locally or remotely by SNMP protocol. -
Page 162: Dns Configuration
User’s Guide Configuring your Computers DNS Configuration This page is used to configure the DNS server ip addresses for DNS Relay. DHCP Server Configuration - Attain DNS Automatically 1. From the head Services menu, click on DNS. 2. From check ratio, click on Attain DNS Automatically. 3. -
Page 163: Dhcp Server Configuration - Set Dns Manually
User’s Guide Configuring your Computers DHCP Server Configuration - Set DNS Manually 1. From the head Services menu, click on DNS -> DNS Server. 2. From check ratio, click on Set DNS Manually. 3. Enter the IP Address of DNS. 4. -
Page 164: Ipv6 Dns
User’s Guide Configuring your Computers IPv6 DNS This page is used to configure the DNS server ipv6 addresses. -
Page 165: Dynamic Dns Configuration
User’s Guide Configuring your Computers Dynamic DNS Configuration Overview of Dynamic DNS If some host has a dynamic IP address that keeps changing frequently, it is difficult to keep updating the IP record that is associated with the domain name of this host in the zone files. This will result in non-accessibility of this host on the Internet. - Page 166 “system config save“ periodically to save this IP address on Flash. Registering With Dynamic DNS Service Provider Currently, Wireless ADSL Router RTA01N supports two Dynamic DNS service providers, www.tzo.com and www.dyndns.com. To use their Dynamic DNS service, you first need to visit the Web site of a service provider and register.
-
Page 167: Dynamic Dns Configuration - Dyndns.org
User’s Guide Configuring your Computers Dynamic DNS Configuration – DynDNS.org 1. From the head Services menu, click on DDNS. 2. From DDNS provider drop-down list, select DynDNS.org. 3. Enter the Hostname. 4. From Interface drop-down list, select proper one. 5. Check the Enable check box. 6. - Page 168 User’s Guide Configuring your Computers Field Description Enable Check this item to enable this registration account for the DNS server. DDNS provider There are two DDNS providers to be selected in order to register your device with: DynDNS and TZO. A charge may occur depends on the service you select.
-
Page 169: Dynamic Dns Configuration - Tzo
User’s Guide Configuring your Computers Dynamic DNS Configuration – TZO 1. From the left-hand Services menu, click on DNS -> Dynamic DNS. 2. From DDNS provider drop-down list, select TZO. 3. Enter the Hostname. 4. From Interface drop-down list, select proper one. 5. - Page 170 User’s Guide Configuring your Computers Field Description Enable Check this item to enable this registration account for the DNS server. DDNS provider There are two DDNS providers to be selected in order to register your device with: DynDNS and TZO. A charge may occurs depends on the service you select.
-
Page 171: Mac Filtering
User’s Guide Configuring your Computers MAC Filtering The MAC filtering feature allows you to define rules to allow or deny frames through the device based on source MAC address, destination MAC address, and traffic direction. Configuring MAC filtering to Deny for outgoing access 1. - Page 172 User’s Guide Configuring your Computers Fields on the Description first setting block Outgoing Default Specify the default action on the LAN to WAN Action bridging/forwarding path. Incoming Default Specify the default action on the WAN to LAN Action bridging/forwarding path. Function Button Description Apply Changes Click to change the setting of default actions to the...
-
Page 173: Ip/Port Filtering
User’s Guide Configuring your Computers IP/Port Filtering Firewall contains several features that are used to deny or allow traffic from passing through the device. The IP/Port filtering feature allows you to deny/allow specific services or applications in the forwarding path. IP/Port Filtering 1. - Page 174 User’s Guide Configuring your Computers Fields on the Description second setting block Rule Action Deny or allow traffic when matching this rule. Direction Traffic forwarding direction. Protocol There are 3 options available: TCP, UDP and ICMP. Source IP The source IP address assigned to the traffic on which Address filtering is applied.
-
Page 175: Ipv6/Port Filtering
User’s Guide Configuring your Computers IPv6/Port Filtering Firewall contains several features that are used to deny or allow traffic from passing through the device. The IP/Port filtering feature allows you to deny/allow specific services or applications in the forwarding path. IPv6/Port Filtering 1. - Page 176 User’s Guide Configuring your Computers Fields on the Description second setting block Rule Action Deny or allow traffic when matching this rule. Direction Traffic forwarding direction. Protocol There are 3 options available: TCP, UDP and ICMP. Source IP The source IP address assigned to the traffic on which Address filtering is applied.
-
Page 177: Url Filter
User’s Guide Configuring your Computers URL Filter The URL Filter is the web filtering solution. The firewall includes the ability to block access to specific web URLs based on string matches. This can allow large numbers of URLs to be blocked by specifying a Keyword. - Page 178 User’s Guide Configuring your Computers 2. From the URL Blocking check ratio, check on Enable 3. Click Apply Changes 4. Type the Keyword in the Keyword field. 5. Click AddKeyword 6. Configure URL Blocking of Keyword setting successfully!
-
Page 179: Acl Configuration
User’s Guide Configuring your Computers ACL Configuration You can specify which services are accessable form LAN or WAN side. Entries in this ACL table are used to permit certain types of data packets from your local network or Internet network to the Gateway. -
Page 180: Ipv6 Acl Configuration
User’s Guide Configuring your Computers IPv6 ACL Configuration You can specify which services are accessable form LAN or WAN side. Entries in this ACL table are used to permit certain types of data packets from your local network or Internet network to the Gateway. -
Page 181: Dos
User’s Guide Configuring your Computers A "denial-of-service" (DoS) attack is characterized by an explicit attempt by hackers to prevent legitimate users of a service from using that service. DoS Config 2. From the head Firewall menu, click on DoS. The following page is displayed:... -
Page 182: Remote Control Config
User’s Guide Configuring your Computers Remote Control Config Remote Control Config 1. From the head Firewall menu, click on Rmt Control. The following page is displayed:... -
Page 183: Firmware Update
User’s Guide Configuring your Computers Firmware Update The Firmware Update page allows you to: manually download the latest firmware version from website and manually update your firmware. See Manually updating firmware. About firmware versions Firmware is a software program. It is stored as read-only memory on your device. - Page 184 User’s Guide Configuring your Computers 3. Once you have selected the file to be installed, click Open. The file’s directory path is displayed in the Select File: text box. 4. Click Upload. The device checks that the selected file contains an updated version of firmware. A screen pops up, please click OK.
-
Page 185: Backup/Restore
User’s Guide Configuring your Computers Backup/Restore You can save the current configuration of your Router to a file on your computer. This is highly recommended before you change any configuration settings on the Router or before you upgrade your firmware. Backup settings 1. -
Page 186: Restore Settings
User’s Guide Configuring your Computers Restore settings 1. From the head Maintenance menu, click on Update -> Backup/Restore. The following page is displayed: 2. Click Browse... and browse to the location of your backup file 3. Click Upload Figure 10: Backup &... -
Page 187: Password
User’s Guide Configuring your Computers Password You can restrict access to your device’s web pages using password protection. With password protection enabled, users must enter a username and password before gaining access to the web pages. By default, password protection is enabled on your device, and the username and password set are as follows: Username: 1234 Password: 1234... - Page 188 User’s Guide Configuring your Computers 3. If you are happy with these settings, click Add/Modify. You will see following page that the new user has been displayed on the Currently Defined Users. You need to login to the web pages using your new username and new password.
-
Page 189: Commit/Reboot
User’s Guide Configuring your Computers Commit/Reboot Whenever you use the web console to change system settings, the changes are initially placed in temporary storage. To save your changes for future use, you can use the Commit/Reboot function. This function saves your changes from RAM to flash memory and reboot the system. -
Page 190: Reboot
User’s Guide Configuring your Computers Reboot 1. From the head Maintenance menu, click on Reboot. The following page is displayed: Reboot 2. Click on 3. The System is Restarting ... Resetting to Defaults This page allows you to reset your device to its default factory settings. - Page 191 User’s Guide Configuring your Computers Software Reset: 1. From the head Maintenance menu, click on Reboot. The following page is displayed: Factory Default 2. From the Reboot from drop-down list, select Configuration Commit Changes 3. Click on 4. Please wait for 64 seconds to let the system reboot.
-
Page 192: Time Zone
User’s Guide Configuring your Computers Time Zone Certain systems may not have a date or time mechanism or may be using inaccurate time/day information. the Simple Network Time Protocol feature provides a way to synchronize the device’s own time of day setting with a remote time server as described in RFC 2030 (SNTP) and RFC 1305 (NTP). - Page 193 User’s Guide Configuring your Computers Fields Description System Time The current time of the specified time zone. You can set the current time by yourself or configured by SNTP. DayLight Select the Day Light State Enable the SNTP client to update the system clock. Server The IP address or the host name of the first SNTP server.
- Page 194 User’s Guide Configuring your Computers 2. Check on Enable of State. 3. Add NTP Server using IP Address. 4. Select proper Time Zone from Time Zone drop-down list. 5. Click on Apply Changes. Figure 13: SNTP Server Configuration page...
- Page 195 User’s Guide Configuring your Computers Time GMT +/- Description Daylight Saving Daylight Saving Start Zone offset IDLW -1200 International Date Line West Not applicable Not applicable -1100 Nome Not applicable Not applicable -1000 Hawaii Standard Not applicable Not applicable AKST -900 Alaska Standard First Sunday of April...
- Page 196 User’s Guide Configuring your Computers Time GMT +/- Description Daylight Saving Daylight Saving Start Zone offset +100 Central European Last Sunday March at Last Sunday 2:00am October at 2:00am +100 Middle European Last Sunday March at Last Sunday 2:00am October at 2:00am MEWT +100 Middle European Winter...
- Page 197 User’s Guide Configuring your Computers Time GMT +/- Description Daylight Saving Daylight Saving Start Zone offset +900 Korean Standard Not applicable Not applicable +900 Japan Standard Not applicable Not applicable CAST +930 Central Australian Standard Last Sunday October Last Sunday March at 2:00am at 2:00am +1000...
-
Page 198: Log
User’s Guide Configuring your Computers This ARP Table shows a list of learned MAC addresses. 1. From the head Maintenance menu, click on Log. The following page is displayed:... -
Page 199: Diagnostic
User’s Guide Configuring your Computers Diagnostic The DSL device supports some useful diagnostic tools. Ping Once you have your DSL device configured, it is a good idea to make sure you can ping the network. A ping command sends a message to the host you specify. -
Page 200: Ping6
User’s Guide Configuring your Computers 4. Now you could see the result below: Ping6 Once you have your DSL device configured, it is a good idea to make sure you can ping the network. A ping command sends a message to the host you specify. If the host receives the message, it sends messages in reply. -
Page 201: Traceroute
User’s Guide Configuring your Computers Traceroute Traceroute Diagnostic. 1. From the head Maintenance menu, click on Diagnostic -> Tracert. The following page is displayed: ATM Loopback In order to isolate the ATM interface problems, you can use ATM OAM loopback cells to verify connectivity between VP/VC endpoints, as well as segment endpoints within the VP/VC. - Page 202 User’s Guide Configuring your Computers 2. From the head Maintenance menu, click on Diagnostic -> OAM Loopback. The following page is displayed:...
-
Page 203: Adsl Diagnostic
User’s Guide Configuring your Computers ADSL Diagnostic This page displays the ADSL Tone Diagnostic performance. Click Start button to start the ADSL diagnostic. 1. From the head Maintenance menu, click on Diagnostic -> ADSL Diagnostic. The following page is displayed: 2. -
Page 204: Diagnostic Test
User’s Guide Configuring your Computers Diagnostic Test The Diagnostic Test page shows the test results for the connectivity of the physical layer and protocol layer for both LAN and WAN sides. 1. From the head Maintenance menu, click on Diagnostic -> Diag-Test. - Page 205 User’s Guide Configuring your Computers Fields Description Select the The available WAN side interfaces are listed. You Internet have to select one for the WAN side diagnostic. Connection Function Description buttons RUN Diagnostic To start the RUN Diagnostic Test Test...
-
Page 206: Configuring Your Computers
In some cases, you may want to assign Internet information manually to some or all of your computers rather than allow the Wireless ADSL Router RTA01N to do so. See Assigning static Note Internet information to your PCs for instructions. - Page 207 7. If prompted, click OK to restart your computer with the new settings. Next, configure the PCs to accept IP information assigned by the Wireless ADSL Router RTA01N: 8. In the Control Panel, double-click the Network and Dial-up Connections icon.
-
Page 208: Windows Me Pcs
8. If prompted, click OK to restart your computer with the new settings. Next, configure the PCs to accept IP information assigned by the Wireless ADSL Router RTA01N: 9. In the Control Panel, double-click the Network and Dial-up Connections icon. -
Page 209: Windows Nt 4.0 Workstations
7. Click OK to restart the PC and complete the TCP/IP installation. Next, configure the PCs to accept IP information assigned by the Wireless ADSL Router RTA01N: 8. Open the Control Panel window, and then click the Network icon. 9. Select the network component labeled TCP/IP, and then click Properties. -
Page 210: Assigning Static Internet Information To Your Pcs
In some cases however, you may want to assign Internet information to some or all of your PCs directly (often called “statically”), rather than allowing the Wireless ADSL Router RTA01N to assign it. This option may be desirable (but not required) if: ... -
Page 211: Ip Addresses, Network Masks, And Subnets
User’s Guide IP Addresses, Network Masks, and Subnets IP Addresses, Network Masks, and Subnets IP Addresses This section refers only to IP addresses for IPv4 (version 4 of the Internet Protocol). IPv6 addresses are not covered. This section assumes basic knowledge of binary numbers, bits, Note and bytes. -
Page 212: Subnet Masks
User’s Guide IP Addresses, Network Masks, and Subnets scope of this discussion.) These classes have different uses and characteristics. Class A networks are the Internet's largest networks, each with room for over 16 million hosts. Up to 126 of these huge networks can exist, for a total of over 2 billion hosts. - Page 213 User’s Guide IP Addresses, Network Masks, and Subnets 255.255.255.192 or 11111111. 11111111. 11111111.11000000 The two extra bits in field4 can have four values (00, 01, 10, 11), so there are four subnets. Each subnet uses the remaining six bits in field4 for its host IDs, ranging from 1 to 62. Sometimes a subnet mask does not specify any additional network ID bits, and thus no subnets.
-
Page 214: Troubleshooting
Troubleshooting This appendix suggests solutions for problems you may encounter in installing or using the Wireless ADSL Router RTA01N, and provides instructions for using several IP utilities to diagnose problems. Contact Customer Support if these suggestions do not resolve the problem. - Page 215 DNS server be assigned dynamically from a server, then verify with your ISP that the address configured on the Wireless ADSL Router RTA01N is correct, then You can use the ping utility, to test connectivity with your ISP’s DNS server.
-
Page 216: Diagnosing Problem Using Ip Utilities
If the target computer cannot be located, you will receive the message Request timed out. Using the ping command, you can test whether the path to the Wireless ADSL Router RTA01N is working (using the preconfigured default LAN IP address 192.168.1.1) or another address you assigned. -
Page 217: Nslookup
User’s Guide Troubleshooting nslookup You can use the nslookup command to determine the IP address associated with an Internet site name. You specify the common name, and the nslookup command looks up the name in on your DNS server (usually located with your ISP). If that name is not an entry in your ISP’s DNS table, the request is then referred to another higher-level server, and so on, until the entry is found. -
Page 218: Glossary
Bridging contrasts with routing, which can add more intelligence to data transfers by using network addresses instead. The Wireless ADSL Router RTA01N can perform both routing and bridging. Typically, when both functions are enabled, the device routes IP data and bridges all other types of data. - Page 219 A DHCP relay is a computer that forwards DHCP data between computers that request IP addresses and the DHCP server that assigns the addresses. Each of the Wireless ADSL Router RTA01N's interfaces can be configured as a DHCP relay. See DHCP. DHCP server...
- Page 220 Light Emitting Diode An electronic light-emitting device. The indicator lights on the front of the Wireless ADSL Router RTA01N are LEDs. MAC address Media Access Control address The permanent hardware address of a device, assigned by its manufacturer.
- Page 221 A protocol for serial data transmission that is used to carry IP (and other protocol) data between your ISP and your computer. The WAN interface on the Wireless ADSL Router RTA01N uses two forms of PPP called PPPoA and PPPoE. See PPPoA, PPPoE. PPPoA...
- Page 222 User’s Guide Glossary machines, modems, etc. to a telephone port. It is a 6-pin connector usually containing four wires. RJ-45 Registered Jack Standard-45 The 8-pin plug used in transmitting data over phone lines. Ethernet cabling usually uses this type of connector. routing Forwarding data between your network and the Internet on the most efficient route, based on the data’s destination IP...
- Page 223 Wide Area Network Any network spread over a large geographical area, such as a country or continent. With respect to the Wireless ADSL Router RTA01N, WAN refers to the Internet. Web browser A software program that uses Hyper-Text Transfer Protocol...
- Page 224 User’s Guide Glossary World Wide Web Also called (the) Web. Collective term for all web sites anywhere in the world that can be accessed via the Internet.
Need help?
Do you have a question about the RTA01N and is the answer not in the manual?
Questions and answers