
Related Manuals for Yamaha YAS-101


Summary of Contents for Yamaha YAS-101
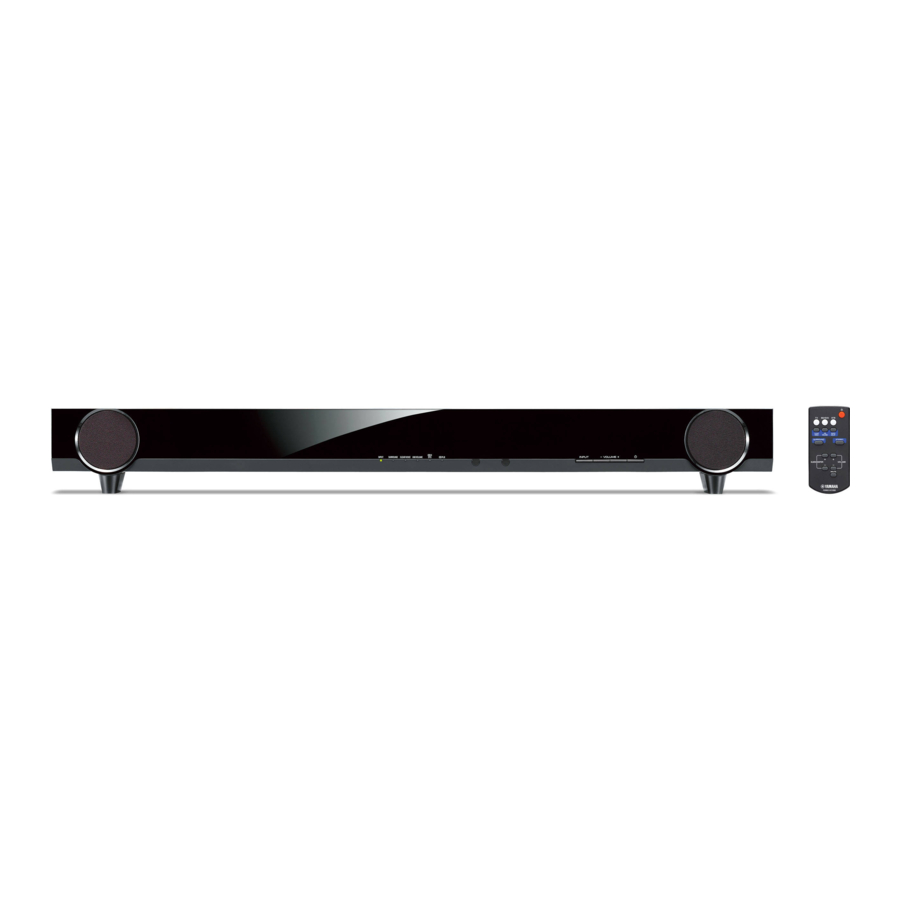
- Page 1 Front Surround System YAS-101 OWNER’S MANUAL MANUAL DE INSTRUCCIONES ИНСТРУКЦИЯ ПО ЭКСПЛУАТАЦИИ...
- Page 2 Rear: 5 cm (2 in) 21 Secure placement or installation is the owner’s Sides: 1 cm (3/8 in) responsibility. Yamaha shall not be liable for any accident Locate this unit away from other electrical appliances, caused by improper placement or installation of speakers.
-
Page 3: Table Of Contents
CONTENTS Supplied items ..........2 Enjoying sound with your preference ..7 Front panel ..........2 Additional Information ........ 8 Placing............3 Operation indicators of the unit ....11 Connection ..........4 Troubleshooting ........12 Operation............6 Specification..........14 What you can do with this unit •... -
Page 4: Supplied Items
Supplied items Before assembly and connecting, make sure you have received all of the following items. Main unit × 1 Optical cable × 1 Battery × 2 (1.5 m (4.9 ft)) (AAA, R03, UM4) Remote control × 1 Mounting template × 1 Spacer ×... -
Page 5: Placing
Improper or inadequate installation • After attaching the unit, check that the unit is fixed could cause the unit to fall, resulting in securely. Yamaha will bear no responsibility for any personal injury. accidents caused by improper installations. -
Page 6: Connection
Connection • Do not connect the power cable until all connections are completed. • Do not use excessive force when inserting the cable plug. Doing so may damage the cable plug and/or terminal. Connecting a TV The unit plays the audio output from your TV. Connect input components such as a BD player, etc., to your TV first and check the components play properly before connecting to the unit. - Page 7 CONNECTOR OPTICAL OUTPUT Optical cable (sold separately) Audio digital pin cable COAXIAL (sold separately) OUTPUT * If connecting an external Yamaha subwoofer, use the cable supplied with the subwoofer to enable synchronous on/ off switching of the unit and subwoofer.
-
Page 8: Operation
Operation Once you have finished all cable connections and remote control operation, follow the procedure below to start basic playback operation. Remote control Installing the batteries Before installing batteries or using the remote control, make sure that you read precautions on the remote control and batteries in “Notes on remote controls and batteries”... -
Page 9: Enjoying Sound With Your Preference
Switching stereo/surround sound Automatic volume level adjustment (UniVolume) Playback in surround sound: You can enjoy a realistic sound effect using Yamaha’s exclusive AIR While watching the TV, compensate the excessive SURROUND XTREME. volume differences to make it easier to hear during the Playback in stereo sound: An extended sound is following cases. -
Page 10: Additional Information
Additional Information Adjust the volume level Audio delay control You can use this function to delay sound to synchronize Press VOLUME +/– to adjust the volume with a lagging video image. level. Press and hold AUDIO DELAY more than 3 seconds to enter adjustment mode. - Page 11 Additional Information Press both the VOLUME + button and Operation by the TV remote control is button of the main unit, release the difficult (with unit beneath/under TV) button first, then release the VOLUME + button. TV remote control operation may be difficult if the unit The unit is turned on when switching the TV remote hides the sensor of your TV when beneath or under the control signal transmission function on/off.
- Page 12 Additional Information Press the button below of the main unit to Notes select the operation you want the unit to • The unit will automatically set to standby mode if the unit learn. in the remote control learning mode is left turned on for 5 minutes without any operation being performed.
-
Page 13: Operation Indicators Of The Unit
Operation indicators of the unit The six indicators are placed in the above order, and their color and appearance are symbolically represented as below. : Lights up in green : Lights up in red : Lights up in orange : No light : Flashes in green : Flashes in red Indication immediately after turning on the unit... -
Page 14: Troubleshooting
AC power supply cable, and contact the nearest authorized Yamaha dealer or service center. Check the below first. 1 The AC power supply cable of the unit, TV and external components (such as BD player) are firmly connected to the AC wall outlet. - Page 15 The unit is too close to your CRT TV. Move the unit away from your TV. — screen becomes blurred or distorted. Contact your nearest authorized Yamaha dealer or service center if the following problem occurs. Problem Cause Solution page The power of the unit The protection circuit is activated.
-
Page 16: Specification
7-channel surround sound with trademarks of DTS, Inc. only front speakers, and without using wall reflections. “UniVolume” is a trademark of Yamaha Corporation. Manufactured under license from Dolby Laboratories. Dolby, Pro Logic and the double-D symbol are trademarks of Dolby... - Page 17 Utilizar el aparato con una tensión superior a la especificada resulta peligroso y puede producir un incendio, daños en el aparato y/o lesiones a las personas. Yamaha no se hará responsable de ningún daño debido al uso de este aparato con una tensión diferente de la especificada.
- Page 18 ÍNDICE Elementos suministrados ......2 Disfrutar del sonido según sus Panel frontal ..........2 preferencias ..........7 Colocación..........3 Información adicional ......... 8 Conexión ............4 Indicadores de funcionamiento de la Funcionamiento ..........6 unidad ............11 Solución de problemas......12 Especificaciones ........14 Qué puede hacer con esta unidad •...
-
Page 19: Panel Frontal
Elementos suministrados Antes de realizar las conexiones y el montaje, asegúrese de que ha recibido los siguientes elementos. Unidad principal × 1 Cable óptico × 1 Pilas × 2 (1,5 m) (AAA, R03, UM4) Mando a distancia × 1 Plantilla de montaje × 1 Separador ×... - Page 20 • Después de fijar la unidad, compruebe que la unidad queda caída de la unidad, lo que podría causar a su bien asegurada. Yamaha no será responsable de los vez daños personales. accidentes debidos a una instalación incorrecta.
- Page 21 Conexión • No conecte el cable de alimentación hasta que todas las conexiones se hayan completado. • No emplee demasiada fuerza al insertar el conector del cable. De lo contrario, podría dañar el conector del cable y/o el terminal. Conexión de un televisor La unidad puede reproducir la salida de audio del televisor.
- Page 22 Cable de pins digital de audio COAXIAL (se vende por separado) OUTPUT * Si conecta un subwoofer externo de Yamaha, utilice el cable suministrado con el subwoofer para activar y desactivar la conmutación de sincronización entre la unidad y el subwoofer.
- Page 23 Funcionamiento Una vez finalizadas todas las conexiones de los cables y los preparativos del mando a distancia, siga este procedimiento para iniciar el funcionamiento de reproducción básico. Mando a distancia Instalación de las pilas Antes de instalar las pilas o utilizar el mando a distancia, es muy importante leer las precauciones sobre el mando a distancia y las pilas que encontrará...
- Page 24 AIR SURROUND XTREME de audición en los siguientes casos. Yamaha. • Al cambiar de canal Reproducción con sonido estéreo: se logra un • Cuando llegan los anuncios en un programa sonido ampliado para una fuente de 2 canales.
- Page 25 Información adicional Ajuste del nivel de volumen Control de retardo de audio Puede utilizar esta función para retrasar el sonido, y Pulse VOLUME +/– para ajustar el nivel de sincronizarlo así con la imagen de vídeo. volumen. Mantenga presionado AUDIO DELAY durante más de 3 segundos para acceder al Subir...
-
Page 26: Distancia Del Televisor
Información adicional La unidad se enciende al activar/desactivar la función El funcionamiento con el mando a de transmisión de señal del mando a distancia del distancia del televisor es difícil (con la televisor. unidad debajo del televisor) El indicador CLEAR VOICE se ilumina como en la siguiente ilustración. - Page 27 Información adicional Pulse el botón situado debajo de la Notas unidad principal para seleccionar la • La unidad pasará automáticamente al modo de espera si la operación que quiere que aprenda la unidad del modo de aprendizaje del mando a distancia se unidad.
- Page 28 Indicadores de funcionamiento de la unidad Los seis indicadores se sitúan en el orden descrito arriba y su color y aspecto se representan de forma simbólica del modo siguiente. : Se ilumina en verde : Se ilumina en rojo : Se ilumina en naranja : No se ilumina : Se ilumina en verde : Se ilumina en rojo...
- Page 29 CA y póngase en contacto con el distribuidor autorizado Yamaha más cercano o con un centro de servicio técnico.
- Page 30 Aleje la unidad del televisor. — CRT. televisor está borrosa o distorsionada. Póngase en contacto con el distribuidor autorizado Yamaha más cercano o con un centro de servicio técnico si tiene alguno de los siguientes problemas. Consulte Problema Causa Solución la página...
- Page 31 7 canales con sólo registradas de DTS, Inc. dos altavoces delanteros, y sin utilizar paredes como reflejos. “UniVolume” es una marca comercial de Yamaha Fabricado con licencia de Dolby Laboratories. Dolby, Pro Corporation. Logic y el símbolo de la doble D son marcas comerciales de...
- Page 33 Поставляемые компоненты ....2 Настройка звука в соответствии с Передняя панель........2 личными предпочтениями....... 7 Размещение ..........3 Дополнительная информация....8 Подключение ..........4 Индикаторы работы устройства... 11 Работа ............6 Поиск и устранение неисправностей ... 12 Технические характеристики ....14 • • • • •...
- Page 34 × × × × × × ☞ ☞ ☞...
- Page 35 ☞ Примечания • • • • • Примечания • • • • •...
- Page 36 • • OPTICAL OUTPUT SUBWOOFER OUT SYSTEM CONNECTOR SUBWOOFER OUT SYSTEM CONNECTOR • •...
- Page 37 Подключение • ☞ • ☞ SUBWOOFER OUT SYSTEM CONNECTOR SYSTEM CONNECTOR MONAURAL INPUT SUBWOOFER OUT SYSTEM CONNECTOR OPTICAL OUTPUT COAXIAL OUTPUT...
- Page 38 ☞ ☞ ☞ ☞ ☞ ☞ ☞ ☞...
- Page 39 Настройка звука в соответствии с личными предпочтениями ☞ ☞ • • •...
- Page 40 Дополнительная информация ☞ Примечание ☞ • • Примечание ☞...
- Page 41 Дополнительная информация ☞ • • Примечания • • Примечание • • •...
- Page 42 Дополнительная информация Примечания • •...
- Page 43 ☞ ☞ ☞ ☞ • •...
- Page 45 Поиск и устранение неисправностей → →...
- Page 46 • • • Ω Ω • • • Ω • Ω • • • • • × × × × × × • • Ω Ω • © 2011 Yamaha Corporation Printed in Malaysia ZA79080...
Need help?
Do you have a question about the YAS-101 and is the answer not in the manual?
Questions and answers