Table of Contents
Advertisement
Quick Links
Advertisement
Table of Contents

Subscribe to Our Youtube Channel
Related Manuals for Yamaha SXV60K

Summary of Contents for Yamaha SXV60K
- Page 1 SNOWMOBILE OWNER’S MANUAL SXV60K SXV60ERK VT60K LIT-12628-02-35 8EX-28199-11...
- Page 3 Record the frame number, engine number (Primary ID), and key number in the spaces provided for assistance when ordering spare parts from a Yamaha dealer. 1 The frame number is the seventeen-digit number stamped on the frame of the snowmobile. (See fig.
- Page 4 ESU00011 I NTRODUCTION Congratulations on your purchase of a Yamaha snowmo- bile. This model is the result of Yamaha’s vast experience in the production of fine sporting and touring snowmo- biles. It represents the high degree of craftsmanship and reliability that have made Yamaha a leader in these fields.
- Page 5 PLEASE READ AND UNDERSTAND THIS MANUAL COMPLETELY BEFORE OPERATING THE SNOWMO- BILE. NOTE: Yamaha continually seeks advancements in product design and quality. Therefore, while this manual con- tains the most current product information available at the time of printing, there may be minor discrepan- cies between your snowmobile and this manual.
-
Page 6: Table Of Contents
YAMAHA MOTOR Backrest ........5-15 CORPORATION, U.S.A. Storage compartment ....5-15 SNOWMOBILE LIMITED WARRANTY ........1-1 PRE-OPERATION CHECKS....6-1 Fuel ..........6-1 YAMAHA EXTENDED SERVICE Engine oil.........6-2 (Y.E.S.) ..........1-4 Coolant ..........6-2 Throttle lever ........6-3 Recoil starter ........6-3 LOCATION OF THE Throttle override system IMPORTANT LABELS .......2-1 (T.O.R.S.) ........6-3... - Page 7 Operation on surfaces other than WIRING DIAGRAM ......12-1 snow or ice ........7-8 Maximizing drive track life ....7-9 Driving ...........7-10 Stopping the engine.......7-11 Transporting ........7-12 PERIODIC MAINTENANCE ....8-1 Periodic maintenance chart .....8-1 Tool kit ..........8-4 Spark plug inspection ......8-4 Engine idle speed adjustment ..8-6 Throttle cable adjustment ....8-6 Oil pump cable adjustment ....8-7 Carburetor adjustment.....8-7...
-
Page 8: Yamaha Motor Corporation, U.s.a. Snowmobile Limited Warranty
ESU00004 Y AMAHA MOTOR CORPORATION, U.S.A. SNOWMOBILE LIMITED WARRANTY CW-01E... - Page 9 CW-02E...
- Page 10 CW-03E...
-
Page 11: Yamaha Extended Service (Y.e.s.)
ESU04280 YAMAHA EXTENDED SERVICE (Y.E.S.) CW-06E... -
Page 12: Location Of The Important Labels
ESU00007 L OCATION OF THE IMPORTANT LABELS Please read the following labels carefully before operat- ing this snowmobile. NOTE: Maintain or replace safety and instruction labels, as nec- essary. 1 SXV60 1 SXV60ER 1 VT60... - Page 13 3 VT60...
-
Page 14: Safety Information
1. Read the Owner’s Manual and all labels before oper- ating this snowmobile. Become familiar with all of the operating controls and their function. Consult a Yamaha dealer about any control or function you do not understand. 2. This snowmobile was not manufactured for use on public streets, roads, or highways. - Page 15 7. Do not allow anyone to stand behind the snowmobile when starting, inspecting, or adjusting the snowmo- bile. A broken track, track fittings, or debris thrown by the track could be dangerous to the operator or bystanders. 8. Handle fuel with care; it is HIGHLY FLAMMABLE. Never add fuel when the engine is running or hot.
- Page 16 Fuel may leak out from the fuel breather hose. 2. Modifications made to the snowmobile not approved by Yamaha, or the removal of original equipment may render your snowmobile unsafe for use that may cause severe personal injury. Modifications may also make the snowmobile illegal to use.
-
Page 17: Description
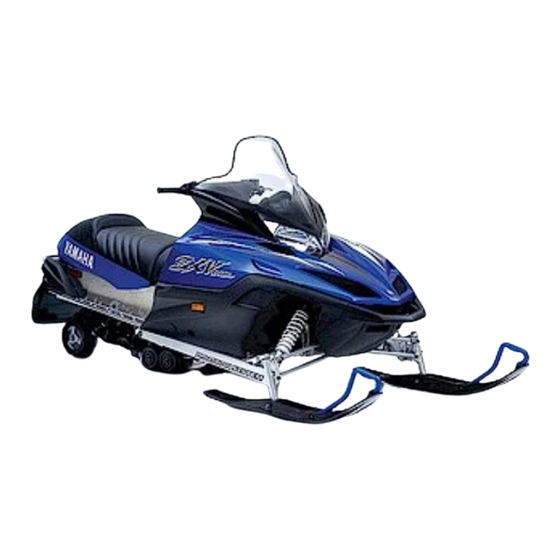
ESU00012 D ESCRIPTION 1 Windshield 2 Steering handlebar 3 Seat 4 Passenger grip warmer switch (VT60) 5 Frame 6 Slide rail suspension 7 Drive track 8 Skis 9 Headlight 0 Shroud SXV60/SXV60ER VT60... - Page 18 A Storage compartment B Tail/brake light C Snow flap D Side mirror (VT60) E Brake lever F Parking brake lever G Grip warmer adjustment switch H Headlight beam switch I Engine stop switch J Thumb warmer adjustment switch K Throttle lever L Shift lever (SXV60ER/VT60) M Starter handle N Shroud latch...
-
Page 19: Control Functions
ESU00013 C ONTROL FUNCTIONS ESU00256 Main switch The main switch controls the following items. 1 “OFF” The ignition circuit is switched off. The key can be removed only in this position. 2 “ON” The ignition circuit is switched on. The engine can be started. NOTE: The headlight, meter lights, and taillight will come on after the engine starts. -
Page 20: Starter Lever (Choke)
ESU00201 Starter lever (choke) Use the starter lever (choke) when starting and warming up a cold engine. 1 Starter lever (choke) 2 When starting a cold engine. 3 Warming up 4 When the engine is warm. NOTE: Refer the “Starting the engine” section for proper opera- tion. - Page 21 WARNING If the T.O.R.S. is activated, make sure that the cause of the malfunction has been corrected and that the engine can be operated without a prob- lem before restarting the engine. Be sure to use the specified spark plug and spark plug cap.
-
Page 22: Speedometer Unit
ESU03901 Speedometer unit The speedometer unit is equipped with the following: a digital speedometer (which shows riding speed) an odometer (which shows the total distance trav- eled) a tripmeter (which shows the distance traveled since it was last set to zero) warning indicators (which show self-diagnosis, cool- ant temperature, fuel level, and oil level warnings) a fuel meter (which shows the fuel remaining in the... -
Page 23: High Beam Indicator Light
ESU03630 High beam indicator light The high beam indicator light 1 comes on when the high beams of the headlights are switched on. (See page 5-14 for headlight beam switch operation.) ESU03821 Fuel meter and grip/thumb warmer level indica- The fuel meter and grip/thumb warmer level indicator have eight segments 1 which show the amount of fuel remaining in the fuel tank, the grip warmer level, or the thumb warmer level. -
Page 24: Fuel Level Warning Indicator
(See the table below for warning indicator, warning light and fuel meter segment flash pattern.) When this occurs, have a Yamaha dealer inspect the snowmobile as soon as possible. CA-08E Warning indicator, warning light, and fuel meter segments of the fuel meter flash pattern ·... -
Page 25: Oil Level Warning Indicator
(See the table below for warning indicator and warning light flash pattern.) When this occurs, have a Yamaha dealer inspect the snowmobile as soon as possible. CA-09E Warning indicator and warning light flash pattern ·... -
Page 26: Self-Diagnosis Warning Indicator
The self-diagnosis warning indicator 1 and warning light 2 warn the rider of the above problems by flashing continuously. If necessary, ask a Yamaha dealer for fur- ther details. (See page 5-9 for warning indicator and warning light flash patterns.) - Page 27 CA-17E Self-diagnosis warning indicator and warning light flash patterns Warning indicator and warning · · · light flash continuously in this 0.75 s pattern. 2.5 s Warning indicator and warning · · · light flash continuously in this 0.75 s pattern.
-
Page 28: Engine Stop Switch
ESU00031 Engine stop switch The engine stop switch 1 is used to stop the engine in an emergency. Simply push 2 the stop switch to stop the engine. To start the engine, pull 3 the stop switch and proceed with starting the engine. (See page 7-1 for more details.) During the first few rides, practice using the stop switch so that you can react quickly in an emergency. -
Page 29: Parking Brake Lever
ESU00035 Parking brake lever When parking the snowmobile or starting the engine, apply the parking brake by moving the brake lever 1 to the left. To release the parking brake, move the parking brake lever 1 to the right. È To apply the parking brake É... -
Page 30: Headlight Beam Switch
ESU00039 Headlight beam switch Push the headlight beam switch to change the headlight beam to high or low. 1 Headlight beam switch 2 Push 3 High beam 4 Low beam ESU00440 Passenger grip warmer switch For VT60 The passenger grip warmer switch controls the electri- cally heated passenger grips. -
Page 31: Shroud Latches
ESU00481 Shroud latches To open the shroud, unhook the shroud latches, and then slowly raise the shroud forward until it stops. When clos- ing the shroud, slowly lower it to its home position, and then hook the shroud latches. 1 Shroud latch 2 Shroud CAUTION : Make sure that all cables and wires are in place when... -
Page 32: V-Belt Holders
ESU00053 V-belt holders Keep a spare V-belt for emergency use by placing it into the V-belt holders provided. CAUTION : Make sure that the V-belt is installed securely in the holders. ESU00056 Spark plug holders Keep spare spark plugs for emergency use by placing them into the spark plug holders provided. -
Page 33: Backrest
ESU00670 Backrest For VT60 The backrest is adjustable. Pull the backrest adjusting lever 1 upward to adjust the backrest position. Turn the backrest adjusting knob 2 right or left to further adjust the backrest. WARNING Do not sit on the backrest. When riding without a passenger, the backrest can be adjusted for the rider as shown in the illustration. -
Page 34: Pre-Operation Checks
ESU00072 P RE-OPERATION CHECKS NOTE: Pre-operation checks should be made each time the snowmobile is used. WARNING The engine and muffler will be very hot after the engine has been run. Avoid touching the engine and muffler while they are still hot with any part of your body or clothing during inspection or repair. -
Page 35: Engine Oil
Consult a Yamaha dealer. Gasohol contain- ing methanol is not recommended. Make sure that snow or ice does not enter the fuel tank when refueling. Do not use alcohol deicers or water absorbing additives with oxygenated fuel. The fuel tank should be filled with straight gaso- line as specified. -
Page 36: Throttle Lever
The T.O.R.S. will operate and the engine should run between 2,800 and 3,000 r/min. WARNING If the engine does not run between 2,800 and 3,000 r/min, stop the engine by turning the main switch to the “OFF” position and consult a Yamaha dealer. -
Page 37: Brake
Do not operate the snowmobile if you find any problems in the brake system. You could lose braking ability, which could lead to an accident. Ask a Yamaha dealer to inspect and repair the brake system. CAUTION : Make sure that the brake lever end does not project out over the handlebar end. -
Page 38: Brake Fluid Leakage
Apply the brake for a few minutes. Check to see if any brake fluid leaks out from the brake hose joints or the master cylinder. WARNING If brake fluid leakage is found, ask a Yamaha dealer for immediate repairs. CAUTION : Brake fluid may deteriorate painted surfaces or plas- tic parts. -
Page 39: Drive Track
ESU00097 Drive track Check the drive track for deflection, wear, or damage. Adjust or replace if necessary. (See pages 8-23–8-25 for more details.) WARNING Do not operate the snowmobile if you find damage to the drive track, or if it has been maladjusted. Drive track damage or failure could result in loss of brak- ing ability and snowmobile control, which could cause an accident. -
Page 40: Skis And Ski Runners
Check the handlebar for excessive free play: 1. Push the handlebar up and down and back and forth. 2. Turn the handlebar slightly to the right and left. If excessive free play is noticed, consult a Yamaha dealer. ESU00105 Lights Check the lights. -
Page 41: Air Filter
NOTE: The air filter element can be removed when the ambi- ent temperature is 5 °C (41.5 °F) or higher. Before removing the air filter element, consult a Yamaha dealer. -
Page 42: Fittings And Fasteners
ESU00110 Fittings and fasteners Check the tightness of the fittings and fasteners. Tighten in proper sequence and torque if necessary. ESU01111 Tool kit and recommended equipment It is good practice to carry the tool kit, spare parts, and other necessary equipment with you while riding the snowmobile so that minor repairs can be done if neces- sary. -
Page 43: Operation
ESU00112 O PERATION ESU02811 Starting the engine WARNING Be sure to check the “SAFETY INFORMATION” section carefully before starting the engine. Make sure that the parking brake is applied. NOTE: Make sure that the engine stop switch is in the on posi- tion. -
Page 44: Emergency Engine Starting
Electric starting model For SXV60ER/VT60 2. Turn the main switch to the “START” position. After the engine starts, put the starter lever (choke) in the half-open position. Warm up the engine until it does not run roughly or begin to stall when the starter lever is returned to the closed position. - Page 45 3. Mesh the rope stopper with the edge of the primary sheave assembly. 1 Rope stopper 2 Primary sheave assembly edge 4. Wind the rope counterclockwise three turns on the primary sheave assembly. 5. Grasp the screwdriver handle and pull briskly. WARNING Do not wind the emergency starter rope around your hand.
-
Page 46: Break-In
Also avoid lugging the engine, such as laborious opera- tion in wet snow. If any abnormal condition is noticed, such as excessive vibration or noise, consult a Yamaha dealer. NOTE: To ensure proper engine break-in, use a 50:1 gasoline/oil mixture when filling the fuel tank of a new snowmobile for the first time. -
Page 47: Riding Your Snowmobile
totally familiar with the snowmobile’s han- ESU01272 Riding your snowmobile dling and performance characteristics. Getting to know your snowmobile Set the parking brake and follow the A snowmobile is a rider active vehicle, and instructions on pages 7-1–7-2 to start the your riding position and your balance are engine. -
Page 48: Turning
Turning Riding uphill For most snow surfaces, “body English” is You should practice first on gentle slopes. the key to turning. Try more difficult climbs only after you have As you approach a curve, slow down and developed your skill. As you approach a begin to turn the handlebar in the desired hill, accelerate before you start the climb, direction. -
Page 49: Riding Downhill
Riding downhill downhill leg on the seat and the foot of your uphill leg on the running board. This position will make it easier for you to shift your body weight as needed. Snow and ice are slippery, so be prepared for the possibility that your snowmobile could begin to slip sideways on the slope. -
Page 50: Hard-Packed Snow
Hard-packed snow WARNING It can be more difficult to negotiate on Drive track damage or failure could hard-packed snow as both the skis and result in loss of braking ability and drive track do not have as much traction as snowmobile control, which could cause when the snowmobile is operated on fresh an accident. -
Page 51: Maximizing Drive Track Life
Studs may catch on an object and pull out of the track, leaving tears and damage around the already weakened area. To minimize possible dam- age, consult your stud manufacturer for installation and stud pattern recommendations. Yamaha does not recommend track studding. -
Page 52: Driving
ESU00318 Driving WARNING Be sure to read the “SAFETY INFORMATION” and “Riding your snowmobile” sections carefully before operating the snowmobile. NOTE: Make sure that the engine is warmed up enough before riding. For SXV60 1. Release the parking brake by moving the parking brake lever to the right. -
Page 53: Stopping The Engine
2. Release the parking brake by moving the parking brake lever to the right. 3. Press the throttle lever slowly to move the snowmo- bile. 4. Turn the handlebar in the desired direction. 5. Squeeze the brake lever to stop the snowmobile. 6. -
Page 54: Transporting
ESU00138 Transporting When transporting your snowmobile on a trailer or in a truck, observe the following recommendations to help protect it from damage: Make sure that the fuel level in the fuel tank is lower than the bottom of the carburetors. Otherwise, the vibration and bumps from the road surface could make it possible for fuel to flow through the carbure- tors into the crankcase. -
Page 55: Periodic Maintenance
∗ Repair if necessary. system (T.O.R.S.) Check operation. Throttle lever 5-2, 6-3 ∗ Repair if necessary. Check for leakage. ∗ Exhaust system Tighten or replace gasket if necessary. ∗ It is recommended that these items be serviced by a Yamaha dealer. - Page 56 Replace bulbs if necessary. Check fluid level. Add only distilled water if nec- 6-7, 8-28 essary. Battery ∗ Check specific gravity and (SXV60ER/VT60) breather hose operation. Charge/correct if necessary. ∗ It is recommended that these items be serviced by a Yamaha dealer.
- Page 57 Tool kit and recom- Check for proper placement. mended equipment ∗ It is recommended that these items be serviced by a Yamaha dealer. NOTE: Brake fluid replacement: 1. When disassembling the master cylinder or caliper cylinder, replace the brake fluid.
-
Page 58: Tool Kit
NOTE: If you do not have a torque wrench available during a service operation requiring one, take your snowmobile to a Yamaha dealer to check the torque settings and adjust them if necessary. ESU01441 Spark plug inspection The spark plug is an important engine component and is easy to inspect. - Page 59 Specified spark plug: BR9ES (NGK) Spark plugs are produced in several different thread lengths. The thread length or reach is the distance from the spark plug gasket seat to the end of the threaded portion. If the reach is too long, overheating and engine damage may result.
-
Page 60: Engine Idle Speed Adjustment
ESU03700 Engine idle speed adjustment CAUTION : Be sure to have a Yamaha dealer make this adjustment. Make sure that the throttle lever moves smoothly. Make sure that the carburetor is synchronized first. 1. Start the engine and warm it up. -
Page 61: Oil Pump Cable Adjustment
3. Tighten the locknut. ESU01500 Carburetor adjustment CAUTION : Be sure to have a Yamaha dealer make this adjustment. Make sure that the carburetor silencer is installed during running to prevent engine damage. Under some operating conditions the carburetor setting may have to be changed due to air temperature changes, elevation changes, use of alcohol oxygenated fuels, etc.,... - Page 62 Rich Low altitude Jet needle adjustment Adjust the jet needle by changing its clip position accord- ing to the setting chart which is available at a Yamaha dealer. Standard jet needle clip 1 position: 3rd groove from upper end CD-03E...
- Page 63 Main jet replacement Replace the main jet according to the setting chart which is available at a Yamaha dealer. WARNING Never remove the drain plug or the float chamber while the engine is hot. Fuel will flow out from the float chamber which could ignite and cause injury.
-
Page 64: High Altitude Adjustments
If you plan to operate your snowmobile at an altitude different from the area where you bought it, be sure to consult a Yamaha dealer. They can tell you if there are any changes necessary for the altitude where you plan to ride. -
Page 65: Cooling System
The cooling system must be bled of air if the coolant reservoir becomes empty, if air can be seen in the cooling system, or if there is a cooling system leak. Consult a Yamaha dealer. CAUTION : Operating the engine with an improperly bled cool- ing system can cause overheating and severe engine damage. - Page 66 3. Fill the coolant reservoir with coolant to the “COLD LEVEL” mark. 4. Install the coolant reservoir cap. Check for any cool- ant leakage. NOTE: If you find any leaks, consult a Yamaha dealer. 8-12...
-
Page 67: V-Belt Replacement
Adjust the V-belt position by removing or adding a spacer 1 on each adjusting bolt. Have a Yamaha dealer make this adjustment. CAUTION : As the V-belt wears, adjustment may be necessary. To ensure proper clutch performance, the V-belt... - Page 68 3. Pull 3 the V-belt up over the secondary fixed sheave. 4. Remove the V-belt from the secondary sheave assembly and primary sheave assembly. 5. Put the new V-belt back on the secondary sheave assembly only. Do not force the V-belt between the sheaves;...
-
Page 69: Checking The Drive Chain Housing Oil Level And The Drive Chain Tension
8. Install the V-belt over the primary sheave assembly. 9. Rotate the secondary sliding sheave clockwise 6 and push 7 it so that it separates from the secondary fixed sheave. 10. Install the V-belt 8 between the secondary sliding and secondary fixed sheaves. 11. - Page 70 3. Pull up the dipstick and check that the oil is between the upper and lower levels. If not, add oil to the upper level. 2 Upper level 3 Lower level Drive chain oil: GL-3 75W or 80W È For models without reverse transmissions (SXV60) É...
-
Page 71: Checking The Brake Pads
ESU00174 Checking the brake pads Check the brake pads for wear. If the brake pads reach the wear limit, ask a Yamaha dealer to replace them. 1 Brake pad wear indicator Wear limit a: 1.5 mm (0.06 in) ESU00179 Checking the parking brake pads Check the parking brake pads for wear by measuring the thickness of the pads. -
Page 72: Checking The Brake Fluid Level
Water will significantly lower the boiling point of the fluid and may result in vapor lock. If the brake fluid level goes down, consult a Yamaha dealer. CAUTION : Brake fluid may deteriorate painted surfaces or plas- tic parts. -
Page 73: Suspension
WARNING Be sure to have a Yamaha dealer make this adjust- ment. ESU03040 Ski spring preload adjustment The spring preload can be adjusted by turning the spring preload adjuster 1. - Page 74 ESU03870 Rear suspension spring preload adjustment The rear suspension is equipped with two shock absorb- ers. One is in the front 1 and the other is in the rear 2 of the rear suspension assembly. The spring preload can be adjusted by turning the spring preload adjuster 3 on the front and rear shock absorb- ers.
- Page 75 Preload Soft Hard É Standard (rear) WARNING Be sure to have a Yamaha dealer make this adjust- ment. This shock absorber contains highly pressurized nitrogen gas. It could explode by improper handling, causing injury, or property damage. Do not tamper with or attempt to open the shock absorber.
- Page 76 Rear suspension full rate adjustment The total suspension spring rate and damping character- istics can be adjusted by changing the installed position of the shock absorber. WARNING Be sure to have a Yamaha dealer make this adjust- ment. CD-07E Installation position Spring rate and...
-
Page 77: Drive Track Adjustment
ESU03531 Drive track adjustment WARNING A broken track, track fittings or debris thrown by the drive track could be dangerous to an operator or bystanders. Observe the following precautions: Do not allow anyone to stand behind the snow- mobile when the engine is running. When the rear of the snowmobile is raised to allow the drive track to spin, a suitable stand must be used to support the rear of the snowmo-... - Page 78 Drive track adjustment WARNING Be sure to have a Yamaha dealer make this adjustment. Support the snowmobile securely on a suitable stand before working underneath the snowmo- bile. Operate the engine in a well-ventilated area. 1. Lift the rear of the snowmobile onto a suitable stand to raise the drive track off the ground.
-
Page 79: Ski Alignment
2. Check the following for ski alignment: a. Skis are facing forward. b. Ski toe-out (1 – 2) is within specification. Ski toe-out (1 – 2): 0–15 mm (0–0.59 in) 3. If the alignment is not correct, consult a Yamaha dealer. 8-25... -
Page 80: Lubrication
ESU02760 Lubrication Lubricate the following points. Lubricant: Low-temperature grease 1 Throttle cable end WARNING Apply a dab of grease onto the cable end only. Do not grease the brake or throttle cable themselves because they could become frozen, which could cause loss of control. -
Page 81: Headlight Bulb Replacement
ESU00208 Headlight bulb replacement 1. Lift up the shroud. 2. Disconnect the headlight connector. 3. Remove the bulb holder cover. 4. Remove the bulb holder by depressing and turning it counterclockwise. 1 Bulb holder cover 5. Remove the bulb. WARNING Keep flammable products or your hands away from the hot bulb until it cools down. -
Page 82: Battery
ESU00213 Battery For SXV60ER/VT60 Replenishing the battery fluid 1. Check the fluid level. The level should be between the upper and lower level marks. a “UPPER LEVEL” b “LOWER LEVEL” 2. Add only distilled water if necessary. CAUTION : Normal tap water contains minerals which are harm- ful to a battery;... -
Page 83: Fuse Replacement
2. Disconnect the negative battery lead. 3. Replace the blown fuse with one of proper amperage. 4. Connect the negative battery lead. NOTE: If the fuse immediately blows again, ask a Yamaha dealer to inspect the snowmobile. Specified fuses: 1 Main fuse: 30 A 2 “HEAD”... -
Page 84: Troubleshooting
Spark plugs are dirty with carbon or are wet ... Remove carbon or wipe the spark plugs dry; replace if necessary. Faulty ignition system ... Ask a Yamaha dealer to inspect. T.O.R.S. system malfunction ... Discon- nect the carburetor switch connectors... - Page 85 2. Drive track does not move ... Foreign times with the ignition off to expel object is caught in the drive track, or excess fuel. Ask a Yamaha dealer to slide runners have melted to the slide inspect. metal due to lack of lubrication.
- Page 86 Yamaha dealer to inspect. 3. Worn or damaged V-belt with flat spots ... Replace. 4. Worn or damaged idler wheels or shafts ... Ask a Yamaha dealer to inspect. 5. Worn or damaged drive track ... Ask a Yamaha dealer to inspect.
-
Page 87: Storage
Store it in a cool, dry place that is above system. Ask a Yamaha dealer if further 0 °C (32 °F), but less than 30 °C (90 °F). information is needed. - Page 88 For peak performance, it is recommended that you have your snowmobile checked CAUTION : and tuned by a Yamaha dealer. They have the experience and training to help you get Do not charge the battery quickly. the maximum performance and use of your Charge the battery for 10 hours at Yamaha snowmobile.
-
Page 89: Specifications
ESU00228 S PECIFICATIONS 1 1 - ESU00229 Dimensions CS-01E SXV60/SXV60ER/VT60 Overall length 2,780 mm (109.4 in): SXV60/SXV60ER 2,990 mm (117.7 in): VT60 Overall width 1,200 mm ( 47.2 in) Overall height 1,280 mm ( 50.4 in) Dry weight 222 kg ( 489 lb): SXV60 234 kg ( 516 lb): SXV60ER 258 kg ( 569 lb): VT60 Ski stance... -
Page 90: Chassis
ESU00231 Chassis CS-03E SXV60/SXV60ER/VT60 Drive track and suspension: Track Molded rubber, fiber glass rod reinforced Width 381 mm (15.0 in) Track deflection 25–30 mm (0.98–1.18 in)/ 100 N (10 kg, 22 lb) Length on ground 752 mm (29.6 in): SXV60/SXV60ER 944 mm (37.2 in): VT60 Suspension type Slide Rail Suspension... -
Page 91: Electric
ESU00232 Electric CS-04E SXV60/SXV60ER/VT60 Ignition system DC-CDI Spark plug Type BR9ES (NGK) 0.7–0.8 mm (0.028–0.031 in) Battery Capacity GM18Z-3A/12 V 20A·h: SXV60ER/VT60 Maximum charge rate 2.0 Amperes/hr for 10 hrs: SXV60ER/ VT60 Bulb × Quantity 12 V, 60/55 W × 2 Headlight Bulb ×... - Page 92 12-1...
- Page 93 12-2...
- Page 94 YAMAHA MOTOR CO., LTD. PRINTED IN JAPAN PRINTED ON RECYCLED PAPER 2004.06 - 0.3×1 CR...
Need help?
Do you have a question about the SXV60K and is the answer not in the manual?
Questions and answers