Table of Contents
Advertisement
Advertisement
Table of Contents

Subscribe to Our Youtube Channel
Related Manuals for VIETA VMD650IP


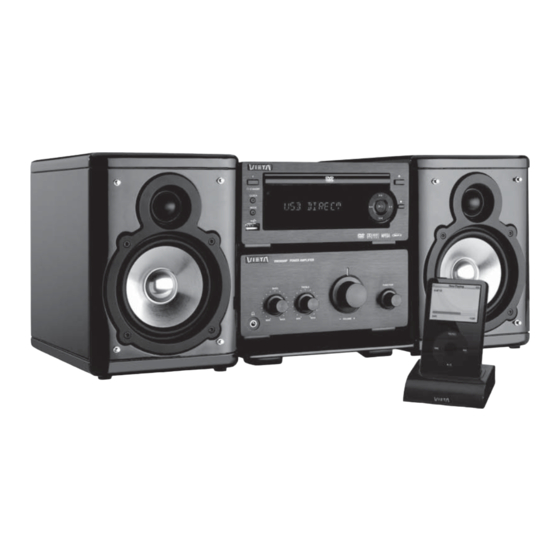
Summary of Contents for VIETA VMD650IP
-
Page 2: Table Of Contents
Table of Contents Before Connection ........................2 For your safety ..........................2 Precautions ........................... 2 Connection ..........................4 Connecting the TV ........................4 Connecting the Antenna ....................... 5 Connecting Control Cable ......................5 Connecting the Speakers ......................6 Connecting Assistance Equipment ....................6 Connecting Coaxial ........................ -
Page 3: Before Connection
Before Connection Before Connection Before Connection Before Connection Before Connection Thank you for purchasing this DVD 2.0 channel component system, in order to fully utilize this system, please read this instruction book carefully before use it. For your safety For your safety For your safety For your safety For your safety... - Page 4 6. To prevent fire or shock hazard, do not place objects filled with liquids, such as vases, on the apparatus. And don’t place lighted candles on the apparatus. 7. To prevent fire or shock hazard, do not expose this equipment to hot places, rain, moisture or dust.
-
Page 5: Connection
Connection Connection Connection Connection Connection Caution: Caution: Caution: Caution: Caution: Please turn off all the equipment power before connecting. Connecting the TV Connecting the TV Connecting the TV Connecting the TV Connecting the TV Terminal board for the DVD player 1. -
Page 6: Connecting The Antenna
Connecting the Antenna Connecting the Antenna Connecting the Antenna Connecting the Antenna Connecting the Antenna 1. Using the supplied wire Antenna. 2. Using the coaxial type connector . A 75Ohm antenna with coaxial type connector should be connected to the FM 75 ohm coaxial terminal. -
Page 7: Connecting The Speakers
Connecting the Speakers Connecting the Speakers Connecting the Speakers Connecting the Speakers Connecting the Speakers Connect the speaker cords between the terminals as shown below. Connect the cords with a gold line to the (+) (L) (R) terminals and cords with a silver line to the (-) terminals. -
Page 8: Connecting Coaxial
2. This unit also has one group of audio output terminals, you can use signal line to connect this unit’s audio output terminal and assistance equipment’s audio input terminal respectively, then you can output the outer sound sauces to other assistance equipment. Caution: Caution: Caution: Press the function select button... -
Page 9: Connecting The Headphone
Connecting the Headphone Connecting the Headphone Connecting the Headphone Connecting the Headphone Connecting the Headphone Connect a pair of headphones to the phone jack. No sound comes out of the speakers. Note: Note: Note: Be sure to turn down the volume before connecting or putting on headphones. Note: Note: Amplifier... -
Page 10: Control Section
C C C C C ontrol Section ontrol Section ontrol Section ontrol Section ontrol Section DVD Player DVD Player DVD Player DVD Player DVD Player 1..Standby Button Clock Button Mode Button USB Jack IR Sensor VFD Display Lens Fast Forward Button ( Fast Backward Button (... -
Page 11: Remote Control
Remote Control Remote Control Remote Control Remote Control Remote Control Standby Button DVD Function Button Tuner Function Button Dim Button Preset Equalizer Button Subtitle Button Title Button Setup Button Direction Button (S,T,W,X) Enter Button Clock Button Next Button ( Previous Button ( Stop Button ( Fast Backward Button ( Mode Button... -
Page 12: Normal Playing
Normal playing Normal playing Normal playing Normal playing Normal playing Use the Discs Use the Discs Use the Discs Use the Discs Use the Discs Operate the keys on the unit Operate the keys on the unit Operate the keys on the unit Operate the keys on the unit Operate the keys on the unit Press the open/close button (K) on the DVD Player to open the disc tray and place... - Page 13 USER Normal sound ROCK For rock CLASSIC : For classic JAZZ For jazz POPS Vocal sound is intensified 6. When you are playing the DVD disc, you can repeatedly press the subtitle button to select the subtitle language to display on the TV screen if available. (SUBTITLE SUBTITLE SUBTITLE...
- Page 14 13. Press the fast backward button ( once by once to select one of the variety of different speeds to fast backward play or select normal speed to play. Each time you press the button, the screen shows. Note: Note: Note: Note: Note: Press the...
- Page 15 19. This unit has a loudness function, it can automatically increase the bass sound at low volume (the higher the volume, the smaller bass increase), which improves the output sound. You only need to press the loudness button ( ) to LOUDNESS LOUDNESS LOUDNESS...
- Page 16 Note: Note: Note: Note: Note: Press the button to resume normal playback. (You can also operate the key “ ” on the panel of the DVD Player.) 28. Press the OSD button to display the playing information of the disc on the TV screen.
-
Page 17: Playing Picture Cd Disc
Playing Picture CD disc Playing Picture CD disc Playing Picture CD disc Playing Picture CD disc Playing Picture CD disc Place the picture CD on the disc tray correctly, the unit will read the disc and play it automatically, if the disc can not play automatically, press the button to play. -
Page 19: Listening To Radio Broadcasts
In power on mode, directly dock your iPod portable player on the cradle for charging. Note: For the purpose of saving power, recharging of your iPod or USB device is NOT SUPPORTED when the main set is in the STANDBY MODE. Listening to Radio Broadcasts Listening to Radio Broadcasts Listening to Radio Broadcasts... -
Page 20: Rds (Radio Data System) Reception
Press the mode button ( ) to select the Stereo or MONO channel to receive the MODE MODE MODE MODE MODE FM radio mode, it can get the best effect. (You can also operate the key “ ” on the panel of the DVD Player.) MODE MODE MODE... -
Page 21: Setting The Daily Timer
Š You can only set the clock in standby mode. Š The operating time of every step shouldn’t be longer than 10 seconds or it will return to the original display. Š If there is a power failure or the power system is turned off, the clock will lose its setting. -
Page 22: Setting The Sleep Timer
Setting the Sleep T Setting the Sleep T imer imer Setting the Sleep T Setting the Sleep Timer Setting the Sleep T imer imer Use the sleep timer button to turn the system off after some time when playing. By setting the sleep timer, you can fall asleep and know that your system will turn off by itself rather than playing all night. -
Page 23: Dvd Menu Options
DVD Menu Options DVD Menu Options DVD Menu Options DVD Menu Options DVD Menu Options Caution: The content of this chart is for reference only. If something has changed, Caution: The content of this chart is for reference only. If something has changed, Caution: The content of this chart is for reference only. -
Page 24: Audio Setup Page
Audio Setup Page Audio Setup Page Audio Setup Page Audio Setup Page Audio Setup Page Š Analog Audio Setup Analog Audio Setup Analog Audio Setup Analog Audio Setup Analog Audio Setup When the disc has Dolby Pro Logic stereo, you can choose LT/RT (Left/ Right audio) or Stereo or 3D Surround (Virtual Surround Sound) mode to play this disc. - Page 25 have connected the DVD micro system to your TV using Component video jacks. RGB --- Select this for SCART connection. Š Š Š Š Š TV Mode TV Mode TV Mode TV Mode TV Mode Selects Progressive or interlace video output mode when Pr/Cr Pb/Cb Y is selected.
-
Page 26: Preference Page
Preference Page Preference Page Preference Page Preference Page Preference Page Š Š Š Š Š TV T TV T TV Type TV T TV T PAL --- Select this if the connected TV is PAL system. It will change the video signal of a NTSC disc and output in PAL format. -
Page 27: Password Setup Page
7 NC-17 --- No children under age 17; not recommended viewing for children under age 17. 8 Adult --- Mature materials; should be viewed only by adults due to graphic sexual material, violence or language. Š Š Š Š Š Default Default Default... -
Page 28: Protect The Disc
Protect the Disc Protect the Disc Protect the Disc Protect the Disc Protect the Disc 1. To keep the disc clean, please do not touch the disc’s surface when you are holding it. You should hold the edge. 2. If the disc is dirty, it will affect the sound quality. Please use the clean and soft cloth to wipe the disc from inside to outside. -
Page 29: Specification
Specification Specification Specification Specification Specification System System System System System Power supply ..............~230V / 50 Hz Rated working power consumption ........ ≤ 55W Channel Separation ............≥ 40dB Distortion ............... ≤ 0.7% Dimensions ..............160(W) x 68(H) x 250(D) mm D V D D V D D V D... - Page 30 Accessories Accessories Accessories Accessories Accessories FM antenna ............1 Speaker connect line .......... 2 Video cable ............1 Control cable ............1 Stand ..............1 Remote control ........... 1 Instruction manual ..........1 Features and specifications are subject to change without notice. All trademarks and registered trademarks are the property of their respective owners.
Need help?
Do you have a question about the VMD650IP and is the answer not in the manual?
Questions and answers