Table of Contents
Advertisement
E3TK0FD_EN.book Page 1 Monday, March 9, 2009 10:00 AM
HDD & DVD / VIDEO CASSETTE RECORDER
RDXV49DTKF
OWNER'S MANUAL
ON/STANDBY
© 2009 Toshiba Corporation
EN
PAL
SECAM
OPEN/CLOSE
VCR REC
DUBBING
VCR
HDD
For Customer Use:
Carefully read the Model No. and Serial No. located at the
back of the unit and enter the information below. Retain
this information for future reference.
Model No. __________________________
Serial No. __________________________
1
DVD
HDD
DVD
Advertisement
Chapters
Table of Contents
Troubleshooting

Related Manuals for Toshiba RDXV49DTKF


Summary of Contents for Toshiba RDXV49DTKF
- Page 1 DUBBING For Customer Use: Carefully read the Model No. and Serial No. located at the back of the unit and enter the information below. Retain this information for future reference. Model No. __________________________ © 2009 Toshiba Corporation Serial No. __________________________...
-
Page 2: Introduction
E3TK0FD_EN.book Page 2 Monday, March 9, 2009 10:00 AM Introduction Precautions WARNING: TO REDUCE THE RISK OF FIRE OR ELECTRIC SHOCK, DO NOT EXPOSE THIS APPLIANCE TO RAIN OR MOISTURE. The lightning flash with arrowhead CAUTION symbol, within an equilateral triangle, is intended to alert the user to the presence RISK OF ELECTRIC SHOCK of uninsulated “dangerous voltage”... -
Page 3: Installation Location
E3TK0FD_EN.book Page 3 Monday, March 9, 2009 10:00 AM Installation Location A NOTE ABOUT RECYCLING This product’s packaging materials are recyclable and can For safety and optimum performance of this unit: be reused. Please dispose of any materials in accordance •... - Page 4 2 If a Video Head Cleaner does not solve the problem, Responsible for CE-marking is please consult your dealer or an authorised service centre. TOSHIBA INFORMATION SYSTEMS (U.K.) LTD, Toshiba Court, Weybridge Business Park, Addlestone Road, Note Weybridge, Surrey, KT15 2UL, United Kingdom •...
-
Page 5: Features
E3TK0FD_EN.book Page 5 Monday, March 9, 2009 10:00 AM Accessories Supplied Playback • Remote control with two R6 (AA) batteries • RF cable • Theatre surround sound: [ Page 19] • Owner’s Manual • Quick search: [ Pages 54-55] • Simple Guide •... -
Page 6: Table Of Contents
E3TK0FD_EN.book Page 6 Monday, March 9, 2009 10:00 AM Table of Contents Introduction ............2 Editing ............. 58 Precautions ................ 2 Guide to a Title List ............58 Features ................5 Editing Discs ..............59 Guide to the Owner’s Manual ..........7 Deleting Selected Titles ........... -
Page 7: Guide To The Owner's Manual
E3TK0FD_EN.book Page 7 Monday, March 9, 2009 10:00 AM Guide to the Owner’s Manual Symbols Used in the Owner’s Manual To show what recording mode or media type applies to each function, the following symbols appear at the beginning of each operating item. - Page 8 E3TK0FD_EN.book Page 8 Monday, March 9, 2009 10:00 AM Medias for Recording / Playing Media Type DVD-RW DVD-R DVD+RW DVD+R Logo Automatically Automatically Automatically Format Can be formatted in VR or video mode formatted in formatted in formatted in – video mode +VR mode +VR mode...
- Page 9 The following discs will not play back on this unit. Performance of any other discs are not guaranteed. • CD-ROM • Compact Disc-Interactive • Toshiba is not liable for any damage or loss caused (CD-I) directly or indirectly by the malfunction of this unit, • Video Single Disc (VSD) •...
-
Page 10: Functional Overview
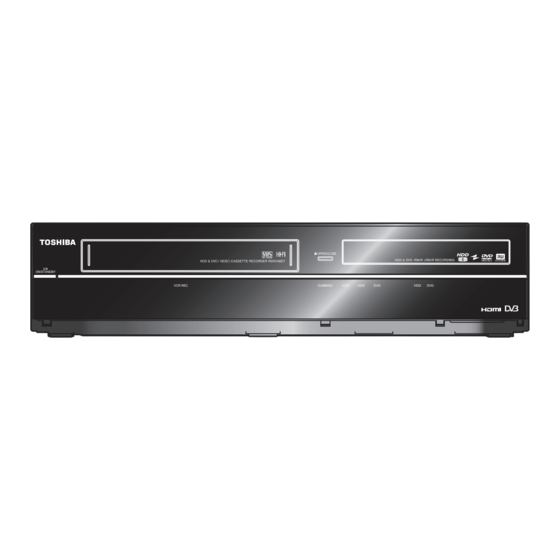
E3TK0FD_EN.book Page 10 Monday, March 9, 2009 10:00 AM Functional Overview Front Panel 3 4* OPEN/CLOSE ON/STANDBY VCR REC DUBBING VCR DVD PROGRAM HDD DVD SELECT HDD/DVD DV IN 15 13 11 9 You can also turn on the unit by pressing these buttons. ON STANDBY button 13 DUBBING VCR DVD button... - Page 11 E3TK0FD_EN.book Page 11 Monday, March 9, 2009 10:00 AM 1 OPEN CLOSE A button (DVD/VHS) Remote Control 2 INPUT SELECT button 3 Number buttons 4 SETUP button 5 TEXT button 6 VARIABLE REPLAY button (HDD/DVD) 7 TOP MENU button (HDD/DVD) 8 Direction buttons 9 DISPLAY button...
-
Page 12: Installing Batteries In The Remote Control
E3TK0FD_EN.book Page 12 Monday, March 9, 2009 10:00 AM Installing Batteries in the Remote Switching HDD / DVD / VHS mode Control Because this unit is a combination of an HDD, a DVD and a VHS recorder, you must select which component you want to Install two R6 (AA) batteries (supplied) into the remote operate first. -
Page 13: Guide To On-Screen Displays
E3TK0FD_EN.book Page 13 Monday, March 9, 2009 10:00 AM Press [DISPLAY] repeatedly while the display menu is displayed to display the following information. Guide to On-Screen Displays <Title / File Name Information> Title name information DISPLAY Menu Title Name My Title With a disc inserted into the unit, press [DISPLAY] to display the on-screen display. -
Page 14: Main Menu
E3TK0FD_EN.book Page 14 Monday, March 9, 2009 10:00 AM Main Menu While in the VHS mode, the on screen display of the VHS Press [SETUP] to display the main menu. Then use [K L] to mode is displayed. select a menu and press [ENTER OK] to display the sub Press [VCR] first. - Page 15 E3TK0FD_EN.book Page 15 Monday, March 9, 2009 10:00 AM Timer Programming DISC Playback Mode To programme a timer recording. [ Page 33] Audio CD / video CD DISC Playback Mode Title List Random Play To call up the title list. [ Page 58] Programme Play PBC (Video CD only)
-
Page 16: Front Panel Display Guide
E3TK0FD_EN.book Page 16 Monday, March 9, 2009 10:00 AM Front Panel Display Guide 1 DTV indicator : Appears when a videotape is in this unit. : Appears when the channel is in digital mode. : Appears when a disc is in this unit. 2 Title / Track and Chapter number : Appears during dubbing. -
Page 17: Connections
E3TK0FD_EN.book Page 17 Monday, March 9, 2009 10:00 AM Connections • Analogue teletext can only be output in VHS mode through AV1 (TV) out. Use TV remote control to decode the Connecting to a TV analogue teletext. • When changing the “Video Out” setting (“SCART (RGB)”, Connect the unit to a TV after considering the capabilities of “Component (Interlace)”... - Page 18 E3TK0FD_EN.book Page 18 Monday, March 9, 2009 10:00 AM Using an HDMI Compatible Port Note • Because HDMI is an evolving technology, it is possible that [HDMI CONNECTION] some devices with an HDMI input may not operate properly • HDMI outputs the video / audio signals without converting to with this unit.
-
Page 19: Connecting To An External Equipment
E3TK0FD_EN.book Page 19 Monday, March 9, 2009 10:00 AM Connecting to an External Equipment Digital Audio for Better Sound Quality This unit has three input terminals. Press Dolby Digital decoder, Digital audio [INPUT SELECT ] repeatedly to select the external input DTS decoder or input jack mode, then press [PROG. -
Page 20: Basic Setup / Tv View Operation
E3TK0FD_EN.book Page 20 Monday, March 9, 2009 10:00 AM Basic Setup / TV View Operation Note Initial Setting • After “Initial Setting”, if you need to unplug the mains cable, make sure to turn off the power first and leave it in standby When you turn on this unit for the first time, you need to follow mode for at least 1 minute before attempting to unplug. -
Page 21: Channel Setting
E3TK0FD_EN.book Page 21 Monday, March 9, 2009 10:00 AM Select “Auto Tuning” using [K L], then press [ENTER OK]. Channel Setting The unit will start storing channels available in your area. You can retune this unit or edit the channel setting with following methods. - Page 22 E3TK0FD_EN.book Page 22 Monday, March 9, 2009 10:00 AM Select “Channel” using [K L], then press [B]. Move Press [K L] to start scanning. ANALOG • The tuner will begin to search up or down automatically. When a channel is found, the unit will stop searching You can replace two channels.
-
Page 23: Tv View Operation
E3TK0FD_EN.book Page 23 Monday, March 9, 2009 10:00 AM Press [ENTER OK] to exit. • After auto tuning is completed, the lowest memorised TV View Operation DVB channels appears on the screen. • You can use [PROG. ] to change the DVB The following operations are available while viewing TV channels. - Page 24 E3TK0FD_EN.book Page 24 Monday, March 9, 2009 10:00 AM Select “Edit Channels” using [K L], then Quick Select press [ENTER OK]. • “Edit Channels” menu will appear. With “Quick Select” menu, you can select your favourite DVB channel quickly. Refer to “Edit Group Lists” on this page. Edit Channels Press [ENTER OK] while watching a DVB S.No.
- Page 25 E3TK0FD_EN.book Page 25 Monday, March 9, 2009 10:00 AM Skip Channels Delete Channels You can set the unit to skip the unwanted DVB channels when You can delete the DVB channels from the memorised DVB you use [PROG. channels. Follow steps 1 to 4 in “Edit Channels” on Follow steps 1 to 4 in “Edit Channels”...
- Page 26 E3TK0FD_EN.book Page 26 Monday, March 9, 2009 10:00 AM Edit Channel Names Digital Teletext Reception You can edit the DVB channel names as you want. Many broadcasters provide a DVB Teletext service in the form of a dedicated Teletext channel. This Digital service includes Follow steps 1 to 4 in “Edit Channels”...
- Page 27 E3TK0FD_EN.book Page 27 Monday, March 9, 2009 10:00 AM Select “EPG” using [K L], then press Subtitle [ENTER OK]. • Select the channel and TV programme using [K L { B]. Many DVB channels transmit Subtitle information along with • Press [ENTER OK] or [BLUE] to go to “Timer their DVB channels.
-
Page 28: Recording
E3TK0FD_EN.book Page 28 Monday, March 9, 2009 10:00 AM Recording Restrictions on Recording Information on DVD Recording You cannot record copy-protected video using this unit. Copy- protected video includes DVD-videos and some satellite broadcasts. Type of Discs If copy-protected material is detected, recording will pause or stop automatically and an error message appears on the This unit can record on DVD-RW/-R discs and DVD+RW/+R screen. - Page 29 E3TK0FD_EN.book Page 29 Monday, March 9, 2009 10:00 AM Making Discs Playable in Other DVD Players (Finalise) After recording, you must finalise the disc to play it back in other players. (See page 45.) You cannot finalise discs in other DVD recorders. DVD-RW Disc Type DVD-R...
-
Page 30: Formatting A Disc
E3TK0FD_EN.book Page 30 Monday, March 9, 2009 10:00 AM Make Recording Compatible Formatting a Disc DVD+RW DVD+RW DVD+RW DVD+R DVD+R DVD+R Use this feature to make the unfinalised +VR mode discs Choosing the Recording Format of a recorded on other unit recordable on this unit. When you Blank DVD-RW Disc make an additional recording on this unit with “Make Recording Compatible”... -
Page 31: Selecting The Audio Mode
E3TK0FD_EN.book Page 31 Monday, March 9, 2009 10:00 AM Select “Start” using [K L], then press Setting Auto Chapter [ENTER OK]. Video For DVD+RW, use [K L] to select “Yes”, then press DVD-RW DVD-RW DVD-RW DVD-RW DVD-RW DVD-RW DVD-R DVD-R DVD-R [ENTER OK]. -
Page 32: Recording Audio Select (Xp)
E3TK0FD_EN.book Page 32 Monday, March 9, 2009 10:00 AM Setting Bilingual Recording Audio Basic Recording and One-touch Timer Video DVD-RW DVD-RW DVD-RW DVD-R DVD-R DVD-R DVD+RW DVD+RW DVD+RW DVD+R DVD+R DVD+R Recording (OTR) You can select either “Main” or “Sub” audio to record a bilingual broadcast in video mode or +VR mode. -
Page 33: Timer Recording
E3TK0FD_EN.book Page 33 Monday, March 9, 2009 10:00 AM • When the unit reaches the specified time, it will be turned off automatically. Timer Recording • To change the recording length during One-touch Timer Recording, press [REC I] repeatedly until the desired ANALOG length appears. - Page 34 E3TK0FD_EN.book Page 34 Monday, March 9, 2009 10:00 AM Alternate recording (DVD only)... Select the digital (DVB) / analogue (ATV) mode If there is no recordable disc in the unit, if the disc does not or external input (AV1/AV2) using [K L], then have enough space to complete the recording, or if the press [B].
- Page 35 E3TK0FD_EN.book Page 35 Monday, March 9, 2009 10:00 AM Skip the Periodical Timer Recording If the Timer Programming did not Complete Correctly You can deactivate the periodical (Daily, Mon-Fri or Weekly) timer recording temporarily. The error number appears on “Timer Programming” list. In stop mode, press [TIMER PROG.].
- Page 36 E3TK0FD_EN.book Page 36 Monday, March 9, 2009 10:00 AM Priority of overlapped settings Notes for the Timer Recording The unit records programmes according to priority if the timer • If there is a power failure or the unit is unplugged for more programmes overlap.
-
Page 37: Timer Recording (Epg)
E3TK0FD_EN.book Page 37 Monday, March 9, 2009 10:00 AM Timer Recording (EPG) Satellite Link You can set the unit to start recording whenever it detects the Video DVD-RW DVD-RW DVD-RW DVD-RW DVD-RW DVD-RW DVD-R DVD-R DVD-R video scart control from the external tuner. Preparing for the satellite link timer recording: DVD+RW DVD+RW... -
Page 38: Settings For External Equipment
E3TK0FD_EN.book Page 38 Monday, March 9, 2009 10:00 AM Select “Auto”, “PAL” or “SECAM” using [K L], Note then press [ENTER OK]. • Recording picture will be distorted if the copy protection signal is being detected during satellite link timer recording. General Setting •... -
Page 39: Information On Dv Dubbing
E3TK0FD_EN.book Page 39 Monday, March 9, 2009 10:00 AM Note The following instructions are described with the • During recording, recording will be paused when a signal operations using the remote control of this unit. other than PAL or SECAM is detected. (See “Video Colour System”... -
Page 40: Dvc To Hdd / Dvd Dubbing
E3TK0FD_EN.book Page 40 Monday, March 9, 2009 10:00 AM To stop dubbing: DVC to HDD / DVD Dubbing 1) Select “Control” using [K L], then press [ENTER OK]. Video DVD-RW DVD-RW DVD-RW DVD-RW DVD-RW DVD-RW DVD-R DVD-R DVD-R 2) Select “HDD” / “DVD” using [K L] (whichever the recording component you are using), then press DVD+RW DVD+RW... - Page 41 E3TK0FD_EN.book Page 41 Monday, March 9, 2009 10:00 AM Available dubbing direction for copy-once programme: Recording Mode for Dubbing From “High” DVD-RW (VR) *1,*2 This unit is compatible with the high speed dubbing from HDD (CPRM-compatible) to DVD or VR mode DVD-RW disc to HDD. DVD-RW (VR) With the high speed dubbing, you can dub a title much faster (Not CPRM-compatible)
-
Page 42: Before Starting Dubbing
E3TK0FD_EN.book Page 42 Monday, March 9, 2009 10:00 AM Before Starting Dubbing One Touch Dubbing Video HDD to DVD / DVD to HDD DVD-RW DVD-RW DVD-RW DVD-RW DVD-RW DVD-RW DVD-R DVD-R DVD-R You can copy the contents between HDD and DVD. DVD+RW DVD+RW DVD+RW... -
Page 43: Selected Title Dubbing
E3TK0FD_EN.book Page 43 Monday, March 9, 2009 10:00 AM One Touch Dubbing from VHS to DVD Selected Title Dubbing Video DVD-RW DVD-RW DVD-RW DVD-RW DVD-RW DVD-RW DVD-R DVD-R DVD-R DVD+RW DVD+RW DVD+RW DVD+R DVD+R DVD+R If you want to record a title in the videotape, press [VCR] In stop mode, press [SETUP]. - Page 44 E3TK0FD_EN.book Page 44 Monday, March 9, 2009 10:00 AM Repeat step 5 until you register all the titles to Select “Yes” using [K L], then press be dubbed, then press [DUBBING]. [ENTER OK]. e.g.) HDD Start Dubbing? Title List If dubbing continues when timer recording starts, the next 21/ 01/ 09 07:00 22 SP 07:00 (00:30:00) 21/01/09...
-
Page 45: Auto Finalise
E3TK0FD_EN.book Page 45 Monday, March 9, 2009 10:00 AM To cancel finalising (DVD-RW disc only): At step , press [STOP C]. Select “Yes” using [K L], Setting a Disc to Protect then press [ENTER OK]. Finalising is cancelled and the unit switches to stop mode. -
Page 46: Playback
E3TK0FD_EN.book Page 46 Monday, March 9, 2009 10:00 AM Playback Press [STOP C] to stop playback. To eject the disc, press [OPEN CLOSE A] to open the Basic Playback disc tray, then remove the disc. Press [OPEN CLOSE A] to close the disc tray before turning off the unit. Note for HDD / DVD Playback Note The contents of an HDD / DVD are generally divided into titles. - Page 47 E3TK0FD_EN.book Page 47 Monday, March 9, 2009 10:00 AM Note for audio CD tracks and MP3 / JPEG files: Playing Back an Audio CD or a Disc with • Folders are shown with the icon. MP3 / JPEG / DivX ®...
- Page 48 E3TK0FD_EN.book Page 48 Monday, March 9, 2009 10:00 AM Playing Back a USB Device with MP3 / Note JPEG / DivX ® Files • The unit cannot play back a USB device at the following condition. MP3 JPEG JPEG JPEG DivX DivX DivX ®...
- Page 49 E3TK0FD_EN.book Page 49 Monday, March 9, 2009 10:00 AM ® DivX DivX®VOD Rental DivX DivX DivX ® ® This rental has views left. Do you want to use one This unit allows you to play back the files purchased or rented of your views now? from DivX...
-
Page 50: Pbc Function For Video Cds
E3TK0FD_EN.book Page 50 Monday, March 9, 2009 10:00 AM • You cannot play back the DivX ® VOD files obtained with [the Number buttons]: different registration codes on this unit. Press [TOP MENU] Selects a numbered menu option (available on certain and select other files that can be played back. -
Page 51: Special Playback
E3TK0FD_EN.book Page 51 Monday, March 9, 2009 10:00 AM Cancelling and Recalling the PBC Fast Forward / Fast Reverse Function Video DVD-V DVD-V DVD-V DVD-RW DVD-RW DVD-RW DVD-RW DVD-RW DVD-RW DVD-R DVD-R DVD-R VCD MP3 DivX DivX DivX ® ® DVD+RW DVD+RW DVD+RW... -
Page 52: Step By Step Playback
E3TK0FD_EN.book Page 52 Monday, March 9, 2009 10:00 AM Step by Step Playback Zoom Video Video DVD-V DVD-V DVD-V DVD-RW DVD-RW DVD-RW DVD-RW DVD-RW DVD-RW DVD-R DVD-R DVD-R DVD-V DVD-V DVD-V DVD-RW DVD-RW DVD-RW DVD-RW DVD-RW DVD-RW DVD-R DVD-R DVD-R VCD DivX DivX DivX... -
Page 53: Simultaneous Playback And Recording
E3TK0FD_EN.book Page 53 Monday, March 9, 2009 10:00 AM Note Note • To clear a marker, select the marker number you want to • [TIME SLIP] is not available during DVD recordings. clear, then press [CLEAR]. • If you press [TIME SLIP] when the unit is in DVD mode, the •... -
Page 54: Search
E3TK0FD_EN.book Page 54 Monday, March 9, 2009 10:00 AM Track Search Search MP3 JPEG JPEG JPEG DivX DivX DivX ® ® (PBC OFF) Title / Chapter Search Using [SKIP H G] buttons Video DVD-V DVD-V DVD-V DVD-RW DVD-RW DVD-RW DVD-RW DVD-RW DVD-RW DVD-R... -
Page 55: Repeat / Random / Programme Playback / Slide Show
E3TK0FD_EN.book Page 55 Monday, March 9, 2009 10:00 AM A-B: Time Search The A-B point will be played back repeatedly. (HDD, DVD, audio CD, video CD and DivX ® only) Video DVD-V DVD-V DVD-V DVD-RW DVD-RW DVD-RW DVD-RW DVD-RW DVD-RW DVD-R DVD-R DVD-R... -
Page 56: Selecting The Format Of Audio And Video
E3TK0FD_EN.book Page 56 Monday, March 9, 2009 10:00 AM Programme Playback Selecting the Format of Audio and Video (PBC OFF) You can select the format of audio and video to suit the You can programme the disc to play back in your desired content of the disc you are playing back. -
Page 57: Off
E3TK0FD_EN.book Page 57 Monday, March 9, 2009 10:00 AM Select a desired audio soundtrack or audio Switching Camera Angles channel using [K L], then press [ENTER OK]. With a DVD-video, VR mode DVD-RW, or DivX ® files: DVD-V DVD-V DVD-V Audio soundtrack will switch. -
Page 58: Editing
E3TK0FD_EN.book Page 58 Monday, March 9, 2009 10:00 AM Editing 1 Title name. 2 Title information, which displays recorded time, Guide to a Title List length of the title, date / month / year, recorded CH, and the recording mode. Title list allows you to check the titles recorded on the disc 3 Title list: List of titles recorded on the HDD or disc. -
Page 59: Editing Discs
E3TK0FD_EN.book Page 59 Monday, March 9, 2009 10:00 AM Deleting Titles Editing Discs Video DVD-RW DVD-RW DVD-RW DVD-RW DVD-RW DVD-RW DVD-R DVD-R DVD-R You will find editing discs is easy. This unit offers convenient edit functions. DVD+RW DVD+RW DVD+RW DVD+R DVD+R DVD+R You can edit the following from a title list. -
Page 60: Deleting Selected Titles
E3TK0FD_EN.book Page 60 Monday, March 9, 2009 10:00 AM To enter the title name, refer to “Guide to Editing Title Names” on this page. Deleting Selected Titles Edit Edit Title Name You can delete titles which you do not need anymore. A B C a b c Please be advised that the titles once deleted cannot be... -
Page 61: Adding Or Deleting Chapter Markers Manually
E3TK0FD_EN.book Page 61 Monday, March 9, 2009 10:00 AM Adding or Deleting Chapter Markers Adding or Deleting Chapter Marks at Manually once for Video Mode DVD-RW disc Video DVD-RW DVD-RW DVD-RW DVD+RW DVD+RW DVD+RW DVD+R DVD+R DVD+R DVD-RW DVD-RW DVD-RW You can add chapter marks to a title. -
Page 62: Hiding Chapters
E3TK0FD_EN.book Page 62 Monday, March 9, 2009 10:00 AM Hiding Chapters Dividing a Title DVD+RW DVD+RW DVD+RW DVD+R DVD+R DVD+R DVD+RW DVD+RW DVD+RW DVD-RW DVD-RW DVD-RW Playlist You can hide chapters from the title list. Hidden chapters are skipped during playback. You can divide a title into two new titles. -
Page 63: Combining Titles
E3TK0FD_EN.book Page 63 Monday, March 9, 2009 10:00 AM Combining Titles Note • To delete a title from the Playlist, refer to “Deleting Titles” on page 59. DVD-RW DVD-RW DVD-RW • When the number of the Playlist reaches its maximum (refer Playlist Playlist to page 29), or when the number of the total chapter marks... -
Page 64: Deleting All Titles In Hdd
E3TK0FD_EN.book Page 64 Monday, March 9, 2009 10:00 AM Deleting Parts of Titles Deleting All Titles in HDD DVD-RW DVD-RW DVD-RW You can delete a specific part of a title. Even when a title is deleted from the Playlist, the original title Press [STOP C] if you are playing back a disc. -
Page 65: Auto
E3TK0FD_EN.book Page 65 Monday, March 9, 2009 10:00 AM Function Setup The following table is the contents which you can set and the default settings. Refer to the following table for useful operation. Setup Items (highlight is the default) Contents Playback Parental Lock Set the parental level for DVD disc playback. -
Page 66: Setup
E3TK0FD_EN.book Page 66 Monday, March 9, 2009 10:00 AM Setup Items (highlight is the default) Contents Video TV Aspect 4:3 Letter Box Set a picture size according to aspect ratio of your TV. Page 71 4:3 Pan & Scan 16:9 Wide Video Out Sets the video output mode. -
Page 67: General Setting
E3TK0FD_EN.book Page 67 Monday, March 9, 2009 10:00 AM Setup Items (highlight is the default) Contents HDMI Format Set the colour space for the HDMI output. Page 72 YCbCr HDMI Audio Set whether to output the HDMI audio signal or not. Page 72 RGB Range Set the black-white contrast level for HDMI RGB output. - Page 68 E3TK0FD_EN.book Page 68 Monday, March 9, 2009 10:00 AM Playback A password is already set Enter the current password using Setup General Setting Playback [the Number buttons]. Parental Lock Password Input Audio Out Disc Menu Language Audio Language Subtitle Language Select “No”...
- Page 69 E3TK0FD_EN.book Page 69 Monday, March 9, 2009 10:00 AM Disc Menu Language (Default: French) PCM sampling (Default: 48kHz) (DVD only) Set “Disc Menu Language”. 48kHz 96kHz Disc Menu Language French 48kHz : If your amplifier / decoder is NOT compatible English Spanish with 96 kHz PCM, select “48kHz”.
- Page 70 E3TK0FD_EN.book Page 70 Monday, March 9, 2009 10:00 AM Still Mode (Default: Auto) (DVD only) Note • With discs recorded using the PAL system, a PAL signal is output for viewing on a PAL system TV. Still Mode • Discs recorded with the PAL system cannot be viewed Auto Field on an NTSC system TV.
-
Page 71: Clock Setting
E3TK0FD_EN.book Page 71 Monday, March 9, 2009 10:00 AM Select “Yes” using [{ B], then press Video [ENTER OK]. Final confirmation window will appear. Setup General Setting Video Select “Yes” using [K L], then press TV Aspect [ENTER OK] within 15 seconds. Video Out Confirm again to use progressive scan. -
Page 72: Hdmi
E3TK0FD_EN.book Page 72 Monday, March 9, 2009 10:00 AM Auto Clock Setting (Default: ON) HDMI This unit receives time signals from the analogue / DVB Setup General Setting HDMI channels, and set the clock automatically. Set the channel • Make sure that the HDMI cable is connected and the TV tuning before setting Auto Clock. -
Page 73: Maturity Lock
E3TK0FD_EN.book Page 73 Monday, March 9, 2009 10:00 AM Maturity Lock (Default: OFF) DVB Setting Setup General Setting DVB Setting You can make settings of the digital tuner from the DVB According to the age rating signal which comes with each Setting. -
Page 74: Common Procedures
E3TK0FD_EN.book Page 74 Monday, March 9, 2009 10:00 AM VHS Functions Common Procedures Basic Recording and One-touch Timer Press [ ON STANDBY] to turn on the unit. Recording (OTR) To play back a tape, turn on the TV and be sure to select the input to which the unit is connected. -
Page 75: Search
E3TK0FD_EN.book Page 75 Monday, March 9, 2009 10:00 AM DVC to VHS Dubbing One-touch Timer Recording: Press [REC I] repeatedly until the desired recording time (30 minutes to 8 hours) appears on the TV screen. This function helps you to dub the contents in the DVC (digital One-touch Timer Recording will start. -
Page 76: Other Operations
E3TK0FD_EN.book Page 76 Monday, March 9, 2009 10:00 AM Time Search Changing the Video Colour System This unit will distinguish the video colour system (SECAM, This feature allows you to go to a specific point on a tape by PAL or MESECAM) automatically according to the format of a entering the exact amount of time you want to skip in order to pre-recorded video tape during playback or the input signal reach the point. -
Page 77: Others
E3TK0FD_EN.book Page 77 Monday, March 9, 2009 10:00 AM Others Troubleshooting Before requesting service for this unit, check the table below for a possible cause of the problem you are experiencing. Some simple checks or a minor adjustment on your part may eliminate the problem and restore proper operation. Symptom Remedy The power does not turn on. - Page 78 E3TK0FD_EN.book Page 78 Monday, March 9, 2009 10:00 AM Symptom Remedy TV channels cannot be changed. • Check if the connections are made securely and correctly. • Check if the cables are damaged. • Try “Channel” setting by following the steps on pages 21-23. Changes for DVB channels such as •...
- Page 79 E3TK0FD_EN.book Page 79 Monday, March 9, 2009 10:00 AM Symptom Remedy TV aspect ratio does not match your • Check “TV Aspect” setting. (See page 71.) TV screen. • A different aspect ratio will be used when the aspect ratio specified by the disc is not supported by this unit.
-
Page 80: Troubleshooting For Error Messages
E3TK0FD_EN.book Page 80 Monday, March 9, 2009 10:00 AM Symptom Remedy Titles cannot be edited or deleted. • The titles or the disc itself may be protected. Cancel the protection by following the steps on page 62 for title protection and page 45 for disc protection. Dubbing cannot be executed. - Page 81 E3TK0FD_EN.book Page 81 Monday, March 9, 2009 10:00 AM Error message Cause Solution Recording Error • You are trying to record onto the • Delete unnecessary original titles. You cannot record more than 99 DVD-RW / -R disc on which the number (See page 59.) titles on one disc.
-
Page 82: Language Code
E3TK0FD_EN.book Page 82 Monday, March 9, 2009 10:00 AM Language Code Language Code Language Code Language Code Language Code Abkhazian 4748 French 5264 Lithuanian 5866 Sindhi 6550 Afar 4747 Frisian 5271 Macedonian 5957 Singhalese 6555 Afrikaans 4752 Galician 5358 Malagasy 5953 Siswat 6565... -
Page 83: Specifications
E3TK0FD_EN.book Page 83 Monday, March 9, 2009 10:00 AM Specifications General VHS video heads Four heads Internal 3.5 inch HDD 160 GB Power requirements 220–240 V ± 10 %, 50 Hz ± 0.5 % Power consumption 48 W Power consumption (standby) 8.0 W (When “FL Dimmer”... - Page 84 E3TK0FD_EN.book Page 84 Monday, March 9, 2009 10:00 AM 1VMN26865 / E3TK0FD ★★★★★ Printed in China...
Need help?
Do you have a question about the RDXV49DTKF and is the answer not in the manual?
Questions and answers