
Subscribe to Our Youtube Channel
Related Manuals for Sungale CyberUs ID712WTA


Summary of Contents for Sungale CyberUs ID712WTA
-
Page 1: User Manual
7" Tablet User Manual MODEL: ID712WTA For ongoing product improvement, this manual is subject to change without prior notice. -
Page 2: Table Of Contents
CONTENTS Safety Precautions Product Overview Functions of Button and Port Battery Charge Accessories Getting Started Application Introduction Status Icon Briefing Touch Screen Operation Home Screen Management Keyboard User Guide Connectivity Insert Micro SD Card Connect to PC Setting Wi-Fi Setting Language Setting Screen Rotation Sleep Mode... -
Page 3: Safety Precautions
Safety Precautions For advanced operations such as Dev tools, it is suggested to be operated by professional engineers. Images and screenshots used in this user manual may differ in appearance from the actual product. Content in this user manual may differ from the product, or from software provided by service providers or carriers, and is subject to change without prior notice. -
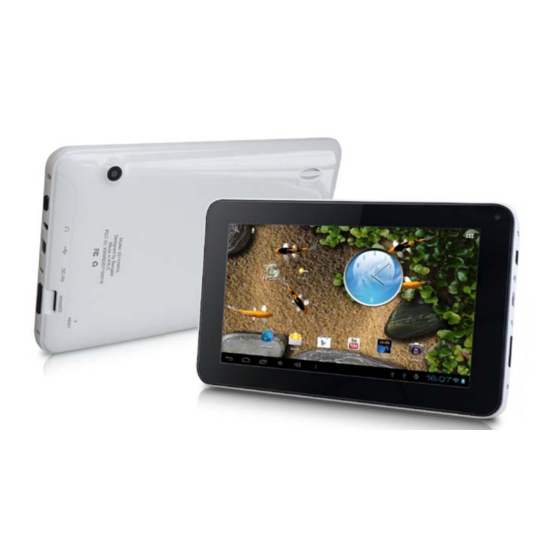
Page 4: Product Overview
Product Overview This section is to tell you functions of each button and port, battery charge. Functions of Button and Port Speaker Back Camera Front Camera Reset Micro SD card reader 3 4 5 Power on/off Volume down Earphone jack Volume up DC IN Micro USB OTG... -
Page 5: Battery Charge
Product Overview Battery Charge Use the power adapter or USB cable to charge the battery of your Cyberus. The indicator light will show blue light when charging and light off when charging finished. Accessories Accessories are listed as following:... -
Page 6: Getting Started
Getting Started This section is to introduce general application of main menu, touch screen, keyboard, etc. 1. Press and hold the power button for more than 3 seconds to boot up. The Android booting image will appear on the screen, booting needs about 45 seconds. -
Page 7: Application Introduction
Getting Started 4. Now, you can touch on the icons to enjoy your photos, music, video, ebooks, games..., Touch the icon ( ) listing on the top right screen, you can enjoy more APPs. Application Introduction Gallery: Display your favorite pictures and video. Music: Meditate in your beloved songs. -
Page 8: Touch Screen Operation
Getting Started Touch Screen Operation Touch: Simply touch an icon to select and run an item. Touch and hold: Touch and hold some items to show an alternate action. Slide: Use your finger to gently slide on the screen to up or down, right or left horizontally to change the view on some screens. - Page 9 Getting Started 4. Home screen overview: Google Search: Touch to search with Google browser. Sound recorder: Touch to turn on the sound recorder. All Apps: Touch to view the list of all Apps and Widgets installed on the tablet. Return: Touch to return to the previous screen. Home screen: Touch to return to the home scree.
-
Page 10: Keyboard User Guide
Getting Started Keyboard User Guide Tap ( ) to switch between lowercase letters and capital letters. Tap ( ) to switch to numbers and symbols. ?123 Tap ( ) to delete data. This section is to tell you about connecting with external device such as Micro SD card and computer. -
Page 11: Connect To Pc
Connectivity Connect to PC After booting up, connect the device to computer with the USB cable. When your tablet is connected, a USB icon will appear in the Notification bar. Then a dialogue box appears as following: Touch “Turn on USB storage” and then you can copy files to/from your PC or other external devices. -
Page 12: Setting
Setting This section is to tell you settings like Wi-Fi, language, screen rotation, and sleep mode. Wi-Fi Setting For networked functions, such as Browser, Map, Email, YouTube, Play Store…, you need to link to internet firstly. Please operate as follow steps to setup your networks, Starting from the main menu, touch “settings”, Turn on the wifi by slide the OFF icon to right side,... - Page 13 Setting If you did not set a password for your router, the tablet will link to internet automatically. If you have set a password for your router, the below square will appear on screen, touch on the Password bar, Soft Keyboard will appear on screen, input the password you set for your router, then, touch “Connect”.
-
Page 14: Language Setting
Setting Now, you can see your router has been connected, which means your tablet has been linked to internet. Now, you can enjoy all networked functions. Language setting In the App list page, touch “Settings” slide and touch “Language & input” touch “Language”... -
Page 15: Web
This section is to tell you some operation about Browser, Market and App store, etc. Please note that all these applications need Wi-Fi connection, for how to link to Wi-Fi, please refer to “Setting Wi-Fi Setting” section. Browser Touch the Browser icon on the Home screen to open browser. To go to a webpage, touch the Address bar at the top of the Browser screen. - Page 16 Refresh: Refresh the current webpage. Forward: Go to the next webpage. Share Page: Use Email to send the webpage URL. Find on Page: Search for content on the current page. Request desktop site: Set a webpage as the desktop site. Save for offline reading: Save the page onto the internal memory, then you can read it when the internet connection is disable.
-
Page 17: Managing Application
Touch “Delete bookmark” and touch “OK” to confirm. Managing Application Download and Install Applications In the home screen, tap “Play Store” tap “Next” to set up your google account. Sign in your Google account or create a google account and then sign in. After a few minutes, it will enter into the interface of “Android Play Store Terms of Service”. -
Page 18: Specifications
To Clear App History Date To clear App history data that have been made on your Tablet, go to “Settings” “Apps”, touch the application whose data that you want to clear tap “Clear data” and “OK” and the related data will be deleted from your device. If you want to clear all operation data, go to “Settings”... -
Page 19: Troubleshooting
Slide “off” to “on”. Please check if you have input the right password of Wi-Fi router. For more Wi-Fi related questions, please go to www.sungale.com and find Support Wi-Fi related FAQ. Q2: Why can’t I download applications from the Market? A: Please check if you have registered a Google account;... -
Page 21: Limited Warranty
LIMITED WARRANTY The limited warranty set forth below is given by the manufacturer with respect to Sungale brand Tablet players and other consumer electronics products purchased and used in the United States of America. The manufacturer warrants this product against defects in material or workmanship... - Page 22 7" Tablet...
Need help?
Do you have a question about the CyberUs ID712WTA and is the answer not in the manual?
Questions and answers