Table of Contents
Advertisement
Quick Links
Advertisement
Table of Contents

Related Manuals for Sungale Cyberus ID730WTA


Summary of Contents for Sungale Cyberus ID730WTA
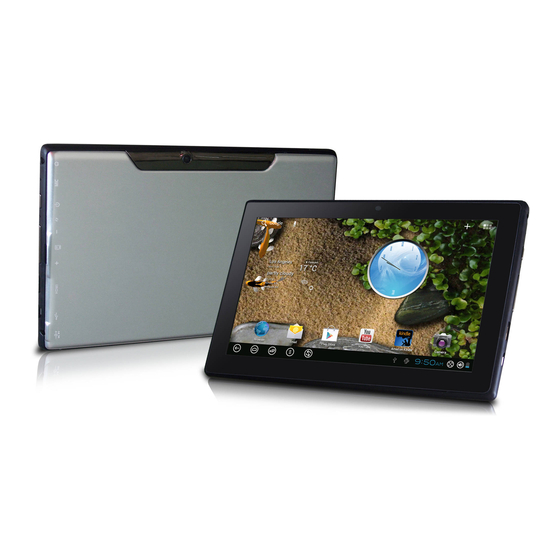
- Page 1 MODEL: ID730WTA Cyberus -- Tablet PC User Manual BEFORE OPERATING THIS PRODUCT , PLEASE READ, UNDERSTAND, AND FOLLOW THESE INSTRUCTIONS. Please retain your receipt as proof of purchase in order to validate the product warranty . *Actual product may differ from the picture shown.
-
Page 2: Table Of Contents
CONTENTS IMPORTANT SAFETY INSTRUCTIONS ............2 KNOW YOUR PRODUCT...................2 POWER BUTTON ....................3 TOUCH-SCREEN OPERATION.................3 USB flash drive....................3 USING MICRO-SD CARD..................4 GETTING STARTED..................4 DESKTOP......................5 SCREEN LOCK....................6 STATUS AND NOTIFICATION AREA..............6 APPLICATION MANAGEMENT .................7 WEATHER......................8 CLOCK.......................8 PLAY STORE.....................9 BROWSER......................9 CALENDAR......................10 CAMERA......................10 CALCULATOR....................11 MY RECORDER....................11 EMAIL.........................11 FILE BROWSER....................14 MY MUSIC......................15... -
Page 3: Important Safety Instructions
IMPORTANT SAFETY INSTRUCTIONS 1. Do not store this product at very high temperature. 2. Do not expose the product to fire, moisture or direct sunlight. 3. Do not attempt to disassemble the product on your own. 4. Do not use a supply voltage other than the one as indicated in the instruction manual. -
Page 4: Power Button
POWER BUTTON Turn On: Press the power button and hold for 2 seconds. Turn Off: Press the power button and hold for 2 seconds tap Power off tap OK. Reboot: Press the power button and hold for 2 seconds Tap restart. Force Off: If device does not respond, press and hold the power button for 5 seconds. -
Page 5: Using Micro-Sd Card
USING MICRO-SD CARD The device supports maximum 32GB micro SD card. Insert your card into the micro SD slot until it clicks into place. Then it's ready for visiting. Remove microSD Card Close all applications or documents which have been opened on the card. Tap Settings Storage SD card Unmount this storage device. -
Page 6: Desktop
DESKTOP 10 11 13 14 15 1. Google search 2. Voice search 3. Add Widgets/Apps shortcuts or setting wallpapers and more 4. Tap to view the applications screen 5. Back 6. Home 7. Recent Apps 8. Menu 9. Shift between Android 4.0 OS and Block chart OS 10. -
Page 7: Screen Lock
SCREEN LOCK Can be set to automatically lock screen or quickly press the power button to manually lock screen. The system provides four lock screen style for users. You can enter Settings Security Lock Screen to switch. Lock screen displays the following: Slide the screen from bottom to top to unlock the screen. -
Page 8: Application Management
APPLICATION MANAGEMENT Install Android Applications There are many interesting and free Android applications that can be found on the web. For example, you can launch your web browser and do a search for “Android applications”. Purchased or free Android applications that you have downloaded to your computer can be installed quickly &... -
Page 9: Weather
WEATHER Tap the Weather application icon. General setting You can set Temperature Unit ( C), Update frequency . About View software version number and relevant legal information. Add city You can add city to Weather and view the city's weather information. Select city In the list of cities, click the city to view the weather information. -
Page 10: Play Store
PLAY STORE The Play Store has many applications that you can quickly and easily download to your Tablet. Download Applications 1. Tap the Play Store application icon. The first time, it will prompt “Register” and “Login” options. If you have not yet registered an account, tap New. -
Page 11: Calendar
CALENDAR Tap the Calendar application icon. For the first time using the Calendar, you need to add an Exchange account. Enter account email address and password. Enter the system Settings Account & sync Add account. Complete the setting according to the prompts. After then you can use the calendar. -
Page 12: Calculator
Single-motion Panorama For capturing larger scenes, tap icon and switch to single-motion panorama mode. In this mode, the user starts an exposure and then slowly turns the Camera to encompass as wide as a perspective needed. The Camera assembles the full range of continuous imagery into a single panoramic photo. Note: You can tap on the top left of the interface to choose the files that are stored in the ROM, SD card or USB storage. - Page 13 6. According to the selected mailbox server, enter or select the parameter and server type, and then tap Next. 7. Optional: Enter a name for the account. 8. Enter name for outgoing message tap Done. After setup, if you are unable to connect to a free email account, check with your email provider to make sure their servers support free accounts on Post Office Protocol (POP) or Simple Mail Transfer Protocol (SMTP).
- Page 14 Edit Email Accounts 1. Tap the Email application icon. 2. On the Inbox screen, tap Settings. 3. Set your desired preferences to customize your email account. 4. Tap to return to the Inbox screen. Delete Email Accounts If you have multiple accounts, delete the account designated as the default account, the next email listed will be automatically set as the default.
-
Page 15: File Browser
FILE BROWSER Tap the File Browser application icon to view the files on all storage devices (Internal memory, SD card, USB device), and to install Android application on your tablet quickly & easily. Use the icons across the top of the screen as follows: Internal Flash (ROM) SD Card USB Storage... -
Page 16: My Music
Delete files Tap and hold a folder/file and enter into the multi-selection mode, select the folder/file as desired tap Delete OK to confirm the deletion. MY MUSIC Audio file formats supported: MP2, MP3, WAV, AAC, WMA. Play Music 1. Tap the My Music application icon. -
Page 17: My Video
Sort by title or date added In the all song interface, click the on the upper right, select sort by title in the pop-up list , then click the "alphabetical" of the right hand, the songs interface will be sorted quickly according to the first letter (including the first letter of the pinyin) in the alphabetical list. -
Page 18: My Photo
The Operation with Playlist Classification of video list In the root directory, click the album (times) on the top left to classify the video. Switch display mode in the classification folder In the classification folder, click icon to set list display mode or album display mode. -
Page 19: Screen Capture
Slide show 1.Tap the My Photo application icon. Click the photo folder. 2.click slide show. In the classification folder, users can click and classify the photo by time, color or name. SCREEN CAPTURE You can capture a screen image by tapping at any time. -
Page 20: 3G Network
3G NETWORK Please put the prepaid card into the USB 3G Dongle, insert the USB 3G Dongle into the USB host transfer cable and then insert OTG interface. It will be bright lights on the USB 3G Dongle, which indicate that it could begin to connect the 3G network. ETHERNET Before using this feature, connect the USB network card via the USB host transfer cable access to device. -
Page 21: Frequently Asked Questions
FREQUENTLY ASKED QUESTIONS Q: What Android OS version is on my Device? A: 4.0.3 Q: Do I have to charge the battery before use? A: You should charge the battery for at least 6 hours, but you can use the device while it's charging. -
Page 22: Battery Management
BATTERY MANAGEMENT The battery is not fully charged when you use the device first time, so it is recommended that you charge the battery for at least 6 hours before you use the device. The rechargeable battery is designed and manufactured to be used and recharged frequently. -
Page 23: Appendix: The Optional Parts And Models
Bora 9380 AWIT-U8 RATE EC186 CDMA2000 ZTE AC2736 SEV759 Support 1. Visit the support site. For manual download and FAQs: www.sungale.com More supports about WIFI: www.sungalewifi.com 2. Contact Sungale Support team Toll Free Call in the USA: 800-473-5156 Service email: info@sungale.com...
Need help?
Do you have a question about the Cyberus ID730WTA and is the answer not in the manual?
Questions and answers