
Related Manuals for Sharp R-640


Summary of Contents for Sharp R-640
- Page 1 800 W (IEC 60705) R-640_OM_00_FRONT_B.indd 1 R-640_OM_00_FRONT_B.indd 1 2011-03-18 08:54:10 2011-03-18 08:54:10...
- Page 2 Important: Σημαντικό: Pomembno: Dôležité: Fontos: Важливо: Svarīgi: Svarbu: Tähtis: Важно: Important: Увага: R-640_OM_00_FRONT_B.indd 2 R-640_OM_00_FRONT_B.indd 2 2011-03-18 08:54:25 2011-03-18 08:54:25...
-
Page 3: Dear Customer
Dear Customer, Congratulations on acquiring your new microwave oven with grill, which from now on will make your kitchen chores considerably easier. You will be pleasantly surprised by the kinds of things you can do with a microwave. Not only can you use it for rapid defrosting or heating up of food, you can also prepare whole meals. -
Page 4: Information On Proper Disposal
If the product is used for business purposes and you want to discard it: Please contact your SHARP dealer who will inform you about the take-back of the product. You might be charged for the costs arising from take-back and recycling. -
Page 5: Table Of Contents
CONTENTS Operation manual DEAR CUSTOMER ....................................1 INFORMATION ON PROPER DISPOSAL............................2 OVEN AND ACCESSORIES ................................4 CONTROL PANEL ....................................5 IMPORTANT SAFETY INSTRUCTIONS ............................6-8 INSTALLATION ..................................... 8 BEFORE OPERATION ..................................9 MICROWAVE POWER LEVEL ................................9 SETTING THE CLOCK ..................................10 HOW TO OPERATE YOUR OVEN ............................ -
Page 6: Oven And Accessories
• When you order accessories, please quote both the PART NAME and MODEL NUMBER to your dealer or SHARP approved service facility. The model number is located on the rating label, which is found on the right hand side when you open the door. -
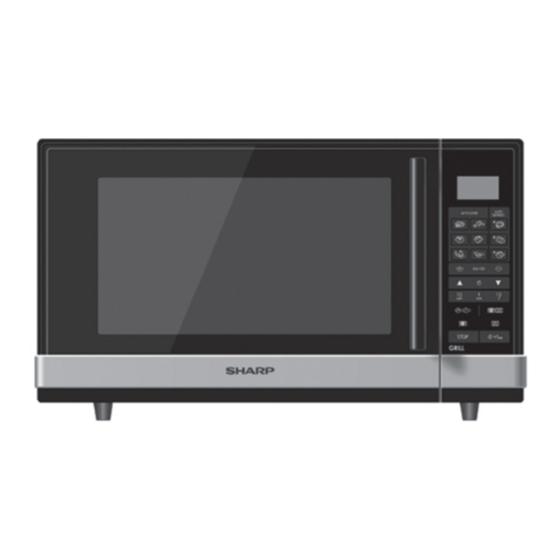
Page 7: Control Panel
CONTROL PANEL DIGITAL DISPLAY INDICATORS The indicator will flash or light up during the operation: ENTER TIMER CODE AMT (AMOUNT) COOK TIME CLOCK MICRO (MICROWAVE) GRILL DEF (DEFROST) MEM (MEMORY) G (GRAM) LOCK Keys: WEIGHT/PORTION LESS/MORE TIME TIME MIX GRILL GRILL START/ +1min STOP... -
Page 8: Important Safety Instructions
Check the settings after you start the oven to ensure call an authorised SHARP service agent. the oven is operating as desired. Do not immerse the power supply cord or plug in To avoid overheating and fire, special care must be water or any other liquid. - Page 9 To avoid burns, always test food temperature SHARP to do so. If the oven lamp fails, please consult and stir before serving and pay special atten- your dealer or an authorised SHARP service agent.
-
Page 10: Installation
4. Do not allow the power supply cord to run over oven cavity. Remove the feature sticker, if attached, any hot or sharp surfaces, such as the hot air from the outside of the door. vent area at the top rear of the oven. -
Page 11: Before Operation
BEFORE OPERATION Plug in the oven. 1. The oven display will flash: 2. Press the STOP key. 3. The display will show: Use the STOP key to: 1. Erase a mistake during programming. 2. Stop the oven temporarily during cooking. 3. -
Page 12: Setting The Clock
SETTING THE CLOCK Your oven has a 12 hour and a 24 hour clock. 1. Select the clock type required. • To select the 12 hour clock, press the KITCHEN x1 (3 seconds) TIMER/CLOCK SET key once for 3 seconds. "12H"... -
Page 13: How To Operate Your Oven
HOW TO OPERATE YOUR OVEN Opening and closing the door: Example: To cook for 2 minutes 30 seconds on 70% microwave To open the oven door, pull the door opening handle. power. Starting the oven: Close the door and press the START/ 1. - Page 14 HOW TO OPERATE YOUR OVEN MANUAL DEFROSTING Example: To defrost for 10 minutes on 30% microwave power. • Enter the defrosting time and use microwave power levels 10% or 30% to defrost (refer to page 1. I n p u t t h e p o w e r l e v e l b y p r e s s i n g t h e GB-9).
-
Page 15: Grill Cooking
GRILL COOKING You may detect smoke or a burning smell when using Example: the grill for the first time. This is normal and not a sign First time usage of grill, using GRILL key. that the oven is out of order. To avoid this problem, when first using the oven, heat 1. -
Page 16: Grill Cooking
GRILL COOKING The grill at the top of the oven cavity has one power Example: setting only. The grill is assisted by the turntable To grill for 20 minutes, using GRILL key. which rotates simultaneously to ensure even brown- ing. 1. -
Page 17: Mix Grill Cooking
MIX GRILL COOKING MIX GRILL combines microwave Example: power with the grill. MIX means to To cook for 15 minutes, using MIX GRILL, 30% time cook by Microwave power and Grill microwave power. power alternately. 1. Press the MIX GRILL key once. The combination of microwave power with the grill (Press the MIX GRILL key twice for COMBINATION reduces cooking time and provides a crisp, brown... -
Page 18: Auto Defrost
AUTO DEFROST AUTO COOK/AUTO DEFROST enables you to cook or defrost the foods listed on the control panel and the charts on pages GB-17 and GB-19. Follow the example below for details on how to operate these functions. AUTO DEFROST Example: AUTO To defrost a 1000g beef. -
Page 19: Auto Defrost
AUTO DEFROST AUTO DEFROST CHART MENU WEIGHT RANGE NOTES FOR AUTO DEFROST Meat Joint: Pork 100g - 2000g • You may need to turn food over during defrosting to ensure even results. • When action is required (example, to turn food over), the oven stops, the audiable signals sound and an indicator will Beef flash on the display. -
Page 20: Auto Cook
AUTO COOK AUTO COOK enables you to cook the foods listed on Example: the control panel. To cook two jacket potatoes (460g). AUTO COOK 1. Select the menu required by pressing the Jacket Potato key. AUTO COOK 2. Press WEIGHT UP/DOWN key to choose the reqiured number of potatoes (up to 3). - Page 21 AUTO COOK AUTO COOK CHART MENU WEIGHT RANGE FOOD CONDITION Pizza Ready prepared fresh Pizza, just reheat by microwave function 150g - 450g Fish Fresh whole Fish, cooked by microwave function 200g - 600g Jacket Potato Fresh Potato, cooked by microwave function (each 230g) 230g - 690g Chicken Breast...
-
Page 22: Other Convenient Functions
OTHER CONVENIENT FUNCTIONS 1. SEQUENCE COOKING STAGE 2 This function allows you to cook using up to 2 3. Select Grill by pressing the GRILL key once. different stages which can include Grill or Mix Grill cooking. Once programmed there is no need to interfere with the cooking operation as the oven will automatically move onto the next stage. - Page 23 OTHER CONVENIENT FUNCTIONS 3. MORE AND LESS TIME key The MORE (▲) and LESS (▼) keys enable you to: • Increase or decrease cooking/defrosting time whilst the oven is in use (manual cooking only). TO USE WHEN MANUAL COOKING: 3. Press the START/ +1min key once to start cooking.
- Page 24 OTHER CONVENIENT FUNCTIONS 4. KITCHEN TIMER Example: To set the timer for 5 minutes. Use the KITCHEN TIMER as a minute timer or to monitor the standing time for cooked/defrosted food. 1. Press the KITCHEN TIMER/CLOCK SET key once. NOTES: •...
-
Page 25: Microwave Cooking Advice
• Liquids and foods must not be heated in sealed WARNING: Follow instructions in the SHARP operation manual at all times. If you exceed recommended cooking times and use power levels that are too high, food may overheat, burn and in extreme circumstances, catch fire and damage the oven. - Page 26 MICROWAVE COOKING ADVICE Food Characteristics Composition Foods high in fat or sugar (e.g. Christmas pudding, mince pies) require less heating time. Care should be taken as overheating can lead to fire. Bones in food conduct heat, making the food cook more quickly. Care must be taken so that the food is cooked evenly.
-
Page 27: Suitable Cookware
SUITABLE COOKWARE Round/oval dishes are preferable to square/oblong To cook/defrost food in a microwave oven, the ones, as the food in the corners tends to overcook. A microwave energy must be able to pass through variety of cookware can be used as listed below. the container to penetrate the food. -
Page 28: Defrosting Advice
DEFROSTING ADVICE Defrosting food using your microwave oven is the It is a simple proccess but the following instructions quickest method of all. are essential to ensure the food is thoroughly defrosted. Rearrange Foods that are placed towards the outside of the dish will defrost quicker than foods in the centre. -
Page 29: Reheating Advice
REHEATING ADVICE For the reheating of foods, follow the advice and guidelines below to ensure food is thoroughly reheated before serving. Plated meals Remove any poultry or meat portions, reheat these separately, see below. Place smaller items of food to the centre of the plate, larger and thicker foods to the edge. -
Page 30: Cleaning And Maintenance
• The control panel must be wiped clean and dried • Do not use harsh abrasive cleaners or sharp with the door open, therefore inactivating the metal scrapers to clean the oven door glass since oven. -
Page 31: Service Call Check
Programme the grill for three minutes and start the oven. After 3 minutes does the grill heating element become red? If "NO" is the answer to any of the above questions, call your dealer or an authorised SHARP Service Agent and report the results of your check. -
Page 32: Specifications
SPECIFICATIONS AC Line Voltage ..........Single phase 230-240V, 50Hz Power Consumption: Microwave . - Page 33 R-640_OM_XX_BACK_EAST.indd 1 R-640_OM_XX_BACK_EAST.indd 1 2011-03-18 09:13:06 2011-03-18 09:13:06...
- Page 34 R-640_OM_XX_BACK_EAST.indd 2 R-640_OM_XX_BACK_EAST.indd 2 2011-03-18 09:13:09 2011-03-18 09:13:09...
Need help?
Do you have a question about the R-640 and is the answer not in the manual?
Questions and answers