NETGEAR DGN1000 User Manual
N150 wireless adsl2+ modem router
Hide thumbs
Also See for DGN1000:
- Setup manual (39 pages) ,
- Quick start manual (16 pages) ,
- Configuration manual (5 pages)

Related Manuals for NETGEAR DGN1000


Summary of Contents for NETGEAR DGN1000
- Page 1 N150 Wireless ADSL2+ Modem Router DGN1000 User M anua l 350 East Plumeria Drive San Jose, CA 95134 February 2012 202-10927-01 v1.0...
-
Page 2: Technical Support
NETGEAR, Inc. Technical Support Thank you for choosing NETGEAR. To register your product, get the latest product updates, get support online, or for more information about the topics covered in this manual, visit the Support website at: http://support.netgear.com. -
Page 3: Table Of Contents
NETGEAR Genie Setup ........ - Page 4 N150 Wireless ADSL2+ Modem Router DGN1000 Restrict Access by MAC Address......33 Wireless Security Options .
- Page 5 N150 Wireless ADSL2+ Modem Router DGN1000 Access Router Interface on Additional Port ..... . 77 Use Router as DHCP Server ....... . . 77 Reserved IP Addresses Setup .
-
Page 6: Chapter 1 Hardware Setup
G et to k now you r wireles s mo d em router The N150 Wireless ADSL2+ Modem Router DGN1000 provides you with an easy and secure way to set up a wireless home network with fast access to the Internet over a high-speed digital subscriber line (DSL). -
Page 7: Unpack Your New Router
Installation guide that explains how to cable and set up your router If any of the parts are incorrect, missing, or damaged, contact your NETGEAR dealer. Keep the carton, including the original packing materials, in case you need to return the product for repair. -
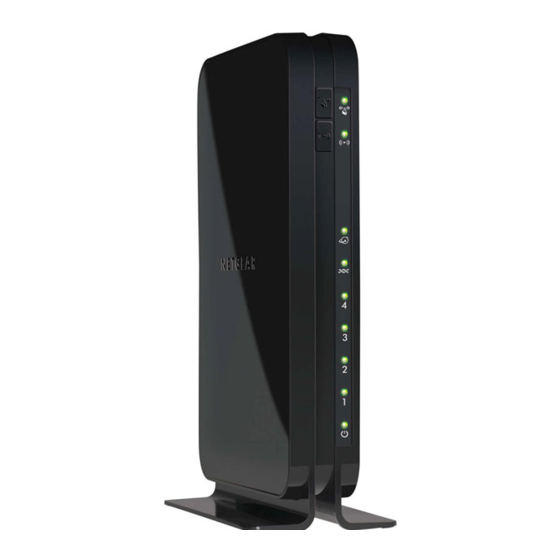
Page 8: Hardware Features
N150 Wireless ADSL2+ Modem Router DGN1000 Hardware Features Before you cable your router, take a moment to become familiar with the label and the front and back panels. Pay particular attention to the LEDs on the front panel. Label The label on the bottom of the wireless modem router shows the router’s Restore Factory Settings button, preset wireless information, MAC address, and serial number. -
Page 9: Back Panel
N150 Wireless ADSL2+ Modem Router DGN1000 Back Panel The back panel has the On/Off button and the port connections shown in the following figure: ADSL line Ethernet LAN ports Power button AC power adapter input Figure 4. Back panel port connections... -
Page 10: Front Panel
N150 Wireless ADSL2+ Modem Router DGN1000 Front Panel The following figure shows the status LEDs and icons on the wireless modem router front panel. Note that the Wireless and WPS icons are buttons. WPS On/Off button Wireless Wireless On/Off button... - Page 11 N150 Wireless ADSL2+ Modem Router DGN1000 Table 2. LAN LED icon LED Activity Description Solid green. The LAN port has detected an Ethernet link with a device. Blinking Green Data is being transmitted or received. No link is detected on this port.
-
Page 12: Position Your Wireless Router
N150 Wireless ADSL2+ Modem Router DGN1000 Table 6. WPS Button and LED Icon LED Activity Description Solid green. Indicates that wireless security is enabled. Blinking green A WPS-capable device is connecting to the device. Icon is on the WPS is not enabled. See... -
Page 13: Adsl Microfilters
N150 Wireless ADSL2+ Modem Router DGN1000 ADSL Microfilters If this is the first time you have cabled a wireless router between a DSL phone line and your computer or laptop, you might not be familiar with ADSL microfilters. If you are, you can skip... -
Page 14: Two-Line Adsl Microfilter
N150 Wireless ADSL2+ Modem Router DGN1000 Plug the router into one of the other outlets in the separate splitter. Two-Line ADSL Microfilter Use an ADSL microfilter with a built-in splitter when there is a single wall outlet that provides connectivity for both the wireless modem router and your telephone equipment. - Page 15 N150 Wireless ADSL2+ Modem Router DGN1000 Use the included phone cable with RJ-11 jacks to connect the ADSL port (A) of the wireless modem router to the ADSL port (B) of the two-line ADSL microfilter. Line CAUTION: Incorrectly connecting a filter to your wireless modem router blocks your DSL connection.
-
Page 16: Verify The Cabling
N150 Wireless ADSL2+ Modem Router DGN1000 Verify the Cabling Verify that your router is cabled correctly by checking the wireless modem router LEDs. Turn on the wireless router by pressing the On/Off button on the back. • The Power LED is green when the modem router is turned on. -
Page 17: Chapter 2 Router Internet Setup
Router Internet Setup Con n e ct to the I nternet This chapter explains three ways to set up your Internet connection: NETGEAR Genie (recommended), Setup Wizard, or manual setup. If you have already set up your router with one of these methods, the initial router setup is complete. -
Page 18: Router Setup Preparation
N150 Wireless ADSL2+ Modem Router DGN1000 Router Setup Preparation You can set up your wireless modem router with the NETGEAR Genie as described in NETGEAR Genie Setup on page 19, with the Setup Wizard as described in Setup Wizard page 24, or manually as described in Manual Setup (Basic Settings) on page 25. -
Page 19: Gather Isp Information
Host and domain names NETGEAR Genie Setup NETGEAR Genie is on the Resource CD and runs on a PC that has Microsoft Windows 7, Windows Vista, Windows XP, or Windows 2000 with Service Pack 2 or later installed. NETGEAR Genie is the easiest way to set up the router because it automates many of the steps and verifies that those steps have been successfully completed. -
Page 20: View Or Change Settings
• Log in to your router by clicking the desktop shortcut that was placed on your desktop during the NETGEAR Genie setup. The shortcut icon is put on your desktop only when you use the NETGEAR Genie setup method. •... -
Page 21: Log In To The N150 Modem Router
N150 Wireless ADSL2+ Modem Router DGN1000 Log In to the N150 Modem Router Log in to the wireless modem router to view or change settings or to set up the wireless modem router. To log in: Type http://192.168.0.1 in the address field of your browser and press Enter to display the login window. -
Page 22: Upgrade Router Firmware
N150 Wireless ADSL2+ Modem Router DGN1000 Note: If you cannot connect to the wireless router, check the Internet Protocol (TCP/IP) properties in the Network Connections section of your PC Control Panel. They should be set to obtain both IP and DNS server addresses automatically. -
Page 23: Router Interface
Chapter 6, Advanced Settings. Using this menu requires a solid understanding of networking concepts. • Web Support. Go to the NETGEAR support site to get information, help, and product documentation. These links work once you have an Internet connection. Router Internet Setup... -
Page 24: Setup Wizard
N150 Wireless ADSL2+ Modem Router DGN1000 Setup Wizard If you do not use the NETGEAR Genie, you have to log in to the modem router to set the country, language, and Internet connection. Note: If you performed the NETGEAR Genie setup, the country, language, Internet, and wireless network settings are already configured. -
Page 25: Manual Setup (Basic Settings)
N150 Wireless ADSL2+ Modem Router DGN1000 Manual Setup (Basic Settings) The Basic Settings screen displays when you select No. I want to configure the Router myself in the Setup Wizard and is also available from the router menus. It is where you view or change ISP information. - Page 26 N150 Wireless ADSL2+ Modem Router DGN1000 Click Test to test your Internet connection. If the NETGEAR website does not appear within 1 minute, see Troubleshooting on page 85. ISP does not require login ISP does require login The following descriptions explain all of the possible fields in the Basic Settings screen. Note that which fields appear in this screen depends on whether or not an ISP login is required.
- Page 27 N150 Wireless ADSL2+ Modem Router DGN1000 Password. The password that you use to log in to your ISP. Idle Timeout (In minutes). If you want to change the login timeout, enter a new value in minutes. This determines how long the wireless modem router keeps the Internet connection active after there is no Internet activity from the LAN.
-
Page 28: Dsl Settings
N150 Wireless ADSL2+ Modem Router DGN1000 address of that computer. This feature allows your wireless modem router to use your computer’s MAC address (this is also called cloning). Use Default Address. Use the default MAC address. Use Computer MAC Address. The wireless modem router will capture and use the MAC address of the computer that you are now using. -
Page 29: Unsuccessful Internet Connection
Contact your ISP to verify that you have the correct configuration information. • Read Chapter 7, Troubleshooting. If problems persist, register your NETGEAR product and contact NETGEAR Technical Support. • Check the Internet Protocol (TCP/IP) properties in the Network Connections section of your PC Control Panel. -
Page 30: Log Out Manually
N150 Wireless ADSL2+ Modem Router DGN1000 The administrator’s login to the wireless modem router configuration times out after a period of inactivity to prevent someone else from accessing the router interface when you step away. Click Apply to save your changes. -
Page 31: Chapter 3 Wireless Settings
Wireless Settings Prote ct you r net work This chapter describes how to use the Wireless Settings screens to view and change (if needed) your wireless network settings. Security features to prevent objectionable content from reaching your PCs are covered in Chapter 4, Security Settings. -
Page 32: Preset Security
Wireless Security Options on page 33. The Wireless Settings screen lets you view and change the preset security settings. However, it is important to understand that NETGEAR recommends that you not change your preset security settings. If you do decide to change your preset security settings, make a note of the new settings and store it in a safe place where you can easily find it. -
Page 33: Turn Off Wireless Connectivity
(PSK) encryption and 802.1x encryption for enterprises. This section presents an overview of the security options and provides guidance on when to use which option. Note that it is also possible to disable wireless security. NETGEAR does not recommend this. -
Page 34: Wep Encryption
• WPS-PSK + WPA2-PSK Mixed Mode is the preconfigured security mode on the wireless modem router. NETGEAR recommends mixed mode because it provides broader support for all wireless clients. WPA2-PSK clients get higher speed and security, and WPA-PSK clients get decent speed and security. The product documentation for your wireless adapter and WPA client software should have instructions about configuring their WPA settings. -
Page 35: Add Clients (Devices) To Your Network
WEP device to your network, it will not connect. You can use the WPS (Push 'N' Connect) or router interface method to add wireless devices and other equipment to your wireless network. 1. For a list of other Wi-Fi-certified products available from NETGEAR, go to http://www.wi-fi.org Wireless Settings... - Page 36 N150 Wireless ADSL2+ Modem Router DGN1000 WPS (Push Connect) Method If your wireless device supports WPS (Push 'N' Connect), you can use WPS. To use WPS: Press the WPS button on the router front panel Within 2 minutes, press the WPS button on your wireless device or follow the WPS instructions that came with the device.
-
Page 37: Wireless Settings Screen
The Wireless Settings screen lets you view or configure the wireless network configuration. If you want to make changes, note the current settings first. Once you have established basic wireless connectivity, you can enable security settings appropriate to your needs. NETGEAR recommends that you not change the Wi-Fi network name (SSID), WPA/WPA2-PAK passphrase, or security option, but if you want to change these settings, this section explains how. -
Page 38: View Or Change Wireless Settings
Name (SSID). The SSID is also known as the wireless network name. Enter a 32-character (maximum) name in this field. This field is case-sensitive. The default SSID is randomly generated, and NETGEAR strongly recommends that you not change this. Wireless Settings... - Page 39 N150 Wireless ADSL2+ Modem Router DGN1000 Region. The location where the wireless modem router is used. It might not be legal to operate the wireless modem router in a region other than the regions listed. Channel. The wireless channel used by the gateway: 1 through 13. Do not change the channel unless you experience interference (shown by lost connections or slow data transfers).
- Page 40 Wireless Security Options on page 33 for an explanation of the security options and when to use which one. Please note that NETGEAR recommends that you not change the security option or passphrase, but if you want to change these settings, this section explains how.
-
Page 41: Change Wpa Security Option And Passphrase
N150 Wireless ADSL2+ Modem Router DGN1000 Change WPA Security Option and Passphrase To change the WPA security option and passphrase: In the Security Options section, select the WPA option you want. In the Network Key field that displays when you select a WPA security option, enter the network key (passphrase) that you want to use. -
Page 42: Set Wep Encryption And Passphrase
N150 Wireless ADSL2+ Modem Router DGN1000 Set WEP Encryption and Passphrase When configuring WEP from a wireless computer, you lose your wireless connection when you click Apply. You have to either configure your wireless adapter to match the wireless modem router WEP settings or access the wireless modem router from a wired computer. -
Page 43: Chapter 4 Security Settings
Security Settings Ke ep u nwa nted c ontent out of you r net work This chapter explains how to use the basic firewall features of the wireless modem router to prevent objectionable content from reaching the PCs and other devices connected to your network. -
Page 44: Keyword Blocking Of Http Traffic
N150 Wireless ADSL2+ Modem Router DGN1000 Keyword Blocking of HTTP Traffic Use keyword blocking to prevent certain types of HTTP traffic from accessing your network. The blocking can be always or according to a scheduled. To block by keywords: Select Security >... -
Page 45: Delete A Keyword Or Domain
N150 Wireless ADSL2+ Modem Router DGN1000 Delete a Keyword or Domain To delete a keyword or domain: Select the keyword you want to delete from the list. Click Delete Keyword and click Apply to save your changes. Specify a Trusted Computer You can exempt one trusted computer from blocking and logging. - Page 46 N150 Wireless ADSL2+ Modem Router DGN1000 Source port number. 5678, which is the browser session. Destination address. The IP address of www.example.com, which your computer finds by asking a DNS server. Destination port number. 80, which is the standard port number for a web server process.
-
Page 47: Open Inbound Ports (Port Forwarding)
N150 Wireless ADSL2+ Modem Router DGN1000 Open Inbound Ports (Port Forwarding) In the preceding example, requests are sent to a remote computer by your router from a particular service port number, and replies from the remote computer to your router are directed to that port number. -
Page 48: Inbound Rules To Permit External Host Communications
N150 Wireless ADSL2+ Modem Router DGN1000 Note: Only one computer at a time can use the triggered application. Inbound Rules to Permit External Host Communications In both of the preceding examples, your computer initiates an application session with a server computer on the Internet. However, you might need to allow a client computer on the Internet to initiate a connection to a server computer on your network. -
Page 49: How Inbound Rules Differ From Outbound Rules
N150 Wireless ADSL2+ Modem Router DGN1000 How Inbound Rules Differ from Outbound Rules The following points summarize the differences between inbound rules and outbound rules: • Outbound rules can be used by any computer on your network, although only one computer can use them at a time. -
Page 50: Inbound Rules (Port Forwarding)
N150 Wireless ADSL2+ Modem Router DGN1000 • For an inbound rule, click Add under Inbound Services. To edit or delete a rule, select its button on the left side and click Edit or Delete. To change the order of precedence: a. - Page 51 N150 Wireless ADSL2+ Modem Router DGN1000 Inbound Rule Example: A Local Public Web Server If you host a public web server on your local network, you can define a rule to allow inbound web (HTTP) requests from any outside IP address to the IP address of your web server at any time of day, as shown here and described in the following figure: Figure 10.
-
Page 52: Outbound Rules (Service Blocking)
N150 Wireless ADSL2+ Modem Router DGN1000 Inbound Rule Example: Allowing Video Conferencing Create an inbound rule to allow incoming video conferencing to be initiated from a restricted range of outside IP addresses, such as from a branch office. In the following figure, CU-SeeMe connections are allowed from a specified range of external IP addresses only. - Page 53 N150 Wireless ADSL2+ Modem Router DGN1000 To set up service blocking: Select Security > Firewall Rules to display the following screen: Under Outbound Services, click Add. Fill in the settings as follows and click Apply to save your settings.
-
Page 54: Configure Services
N150 Wireless ADSL2+ Modem Router DGN1000 Always. Any traffic for this service type is logged. Match. Traffic of this type that matches the settings and action is logged. Not match. Traffic that does not match the settings and action are logged. - Page 55 N150 Wireless ADSL2+ Modem Router DGN1000 Use the following screen to define or edit a service. ‘ • Name. Enter a meaningful name for the service. • Type. Select the correct type for this service. If in doubt, select TCP/UDP. The options are TCP, UDP, TCP/UDP.
-
Page 56: Set The Time Zone
Savings Time on the first day and clear it after the last day. The wireless modem router has a list of NETGEAR NTP servers. If you would prefer to use a particular NTP server as the primary server, select the Use this NTP Server check box, and enter its IP address. -
Page 57: Schedule Firewall Services
N150 Wireless ADSL2+ Modem Router DGN1000 Schedule Firewall Services If you enabled services blocking in the Block Services screen or port forwarding in the Ports screen, you can set up a schedule for when blocking occurs or when access is not restricted. -
Page 58: Enable Security Event Email Notification
N150 Wireless ADSL2+ Modem Router DGN1000 Enable Security Event Email Notification To receive logs and alerts by email, provide your email information in the E-mail screen and specify which alerts you want to receive and how often. To enable email notification: Select Security >... - Page 59 N150 Wireless ADSL2+ Modem Router DGN1000 Send E-Mail alerts immediately. Select the corresponding check box if you would like immediate notification of a significant security event, such as a known attack, port scan, or attempted access to a blocked site.
-
Page 60: Chapter 5 Network Maintenance
Network Maintenance Ad m in i ster you r net work This chapter describes the wireless modem router settings for administering and maintaining the router and home network. This chapter contains the following sections: • Upgrade the Router Firmware • Manual Check for Firmware Upgrades •... -
Page 61: Upgrade The Router Firmware
The wireless modem router firmware (routing software) is stored in flash memory. By default, when you log in to your wireless modem router, it checks the NETGEAR website for new firmware and alerts you if there is a newer version. -
Page 62: Automatic Firmware Checking On
The upgrade process could take a few minutes. When the upload is complete, your wireless modem router restarts. Go to the DGN1000 support page at http://support.netgear.comand read the new firmware release notes to determine whether you need to reconfigure the modem router after upgrading. -
Page 63: Manual Check For Firmware Upgrades
N150 Wireless ADSL2+ Modem Router DGN1000 Manual Check for Firmware Upgrades You can use the Router Upgrade screen to manually check the NETGEAR website for newer versions of firmware for your product. WARNING: When you upload firmware to the router, do not interrupt the web browser by closing the window, clicking a link, or loading a new page. -
Page 64: Manage The Configuration File
N150 Wireless ADSL2+ Modem Router DGN1000 Manage the Configuration File The router configuration settings are stored in a configuration file (*.cfg). This file can be backed up to your computer, restored, or reverted to factory default settings. Back Up ... -
Page 65: Erase
N150 Wireless ADSL2+ Modem Router DGN1000 Erase To erase the configuration and restore to factory defaults: Under some circumstances (for example, if you move the router to a different network or if you have forgotten the password), you might want to erase the configuration and restore the factory default settings. -
Page 66: View Router Status
N150 Wireless ADSL2+ Modem Router DGN1000 View Router Status To view the router status: Select Maintenance > Router Status to display the following screen. The Router Status screen provides the status and usage information described in the following figure. - Page 67 N150 Wireless ADSL2+ Modem Router DGN1000 Gateway IP Address. The IP address used as a gateway to the Internet for computers configured to use DHCP. Domain Name Server. The wireless modem router DNS server IP addresses. These addresses are usually obtained dynamically from the ISP.
- Page 68 N150 Wireless ADSL2+ Modem Router DGN1000 Select the Show Statistics button on the Router Status screen to display a screen similar to this: Fill in the fields as follows: Port. The statistics for the WAN (Internet), LAN (local), and wireless LAN (WLAN) ports.
- Page 69 N150 Wireless ADSL2+ Modem Router DGN1000 In the Router Status screen, select the Connection Status button to display a screen similar to this: Fill in the fields as follows: Connection Time. The time elapsed since the last connection to the Internet through the DSL port.
-
Page 70: View Attached Devices
N150 Wireless ADSL2+ Modem Router DGN1000 View Attached Devices The Attached Devices screen presents a table of all IP devices that the wireless modem router has discovered on the local network. To view attached devices: Select Maintenance > Attached Devices to view the following table: Click Refresh to update the screen. -
Page 71: Run Diagnostic Utilities
N150 Wireless ADSL2+ Modem Router DGN1000 Run Diagnostic Utilities The wireless modem router has a diagnostics feature that you can use to perform the following functions: • Ping an IP address to test connectivity to see if you can reach a remote host. -
Page 72: Chapter 6 Advanced Settings
Advanced Settings Con figu re for u n ique s it uat ion s This chapter describes the advanced features of your wireless modem router. The information is for users with a solid understanding of networking concepts who want to set the router up for unique situations such as when remote access from the Internet by IP or domain name is needed. -
Page 73: Wan Setup
N150 Wireless ADSL2+ Modem Router DGN1000 WAN Setup The WAN Setup screen lets you configure a DMZ (demilitarized zone) server, change the Maximum Transmit Unit (MTU) size, and enable the wireless router to respond to a ping on the WAN (Internet) port. Select. - Page 74 N150 Wireless ADSL2+ Modem Router DGN1000 Note: For security reasons, you should avoid using the default DMZ server feature. When a computer is designated as the default DMZ server, it loses much of the protection of the firewall and is exposed to many exploits from the Internet.
-
Page 75: Dynamic Dns
N150 Wireless ADSL2+ Modem Router DGN1000 Dynamic DNS If your network has a permanently assigned IP address, you can register a domain name and have that name linked with your IP address by public Domain Name Servers (DNS). However, if your Internet account uses a dynamically assigned IP address, you do not know in advance what your IP address is, and the address can change frequently. -
Page 76: Lan Setup
N150 Wireless ADSL2+ Modem Router DGN1000 Note: If your ISP assigns a private WAN IP address such as 192.168.x.x or 10.x.x.x, the Dynamic DNS service will not work because private addresses are not routed on the Internet. LAN Setup The LAN Setup screen allows configuration of LAN IP services such as DHCP and Routing Information Protocol (RIP). -
Page 77: Access Router Interface On Additional Port
N150 Wireless ADSL2+ Modem Router DGN1000 IP Address. The LAN IP address of the wireless modem router. IP Subnet Mask. The LAN subnet mask of the wireless modem router. Combined with the IP address, the IP subnet mask allows a device to know which other addresses are local to it, and which have to be reached through a gateway or wireless modem router. -
Page 78: Reserved Ip Addresses Setup
N150 Wireless ADSL2+ Modem Router DGN1000 Reserved IP Addresses Setup When you specify a reserved IP address for a computer on the LAN, that computer always receives the same IP address each time it accesses the router’s DHCP server. Reserved IP addresses should be assigned to servers that require permanent IP settings. -
Page 79: Advanced Wireless Settings
N150 Wireless ADSL2+ Modem Router DGN1000 Advanced Wireless Settings To configure advanced wireless settings: Select Advanced > Wireless Settings to display the following screen: Note: The advanced WPS settings section is not displayed if you selected WEP as the security option. -
Page 80: Remote Management
If the Keep Existing Wireless Settings check box is not selected, the next time you use WPS to connect WPS-capable devices to your wireless network, the modem router generates a new random SSID and WPA/WPA2 passphrase. NETGEAR does not recommend this. -
Page 81: Static Routes
N150 Wireless ADSL2+ Modem Router DGN1000 • To allow access from a single IP address on the Internet, select Only This Computer and enter the IP address that is allowed access. • To allow access from a range of IP addresses on the Internet, select IP Address and enter a beginning and ending IP address to define the allowed range. -
Page 82: Configure Static Routes
N150 Wireless ADSL2+ Modem Router DGN1000 the ISP. The ISP forwards your request to the company where you are employed, and the request is likely to be denied by the company’s firewall. In this case you have to define a static route, telling your router that 134.177.0.0 should be accessed through the ISDN router at 192.168.0.100. -
Page 83: Universal Plug And Play
N150 Wireless ADSL2+ Modem Router DGN1000 b. In the Route Name field, enter a route name for this static route. This name is for identification purpose only. c. Select Private if you want to limit access to the LAN only. The static route will not be reported in RIP. - Page 84 N150 Wireless ADSL2+ Modem Router DGN1000 does not allow any device to automatically control the resources, such as port forwarding (mapping), of the wireless modem router. Advertisement Period. The advertisement period is how often the wireless modem router advertises (broadcasts) its UPnP information. This value ranges from 1 to 1440 minutes.
-
Page 85: Chapter 7 Troubleshooting
Diagnose and solve problem s This chapter provides information to help you diagnose and solve problems you might have with your wireless modem router. If you do not find the solution here, check the NETGEAR support site at http://support.netgear.comfor product and contact information. -
Page 86: Router Not On
N150 Wireless ADSL2+ Modem Router DGN1000 Router Not On When you turn the power on, the power, LAN, and DSL LEDs should light as described here. If they do not, refer to the sections that follow for help. To check the LEDs: When power is first applied, the Power LED lights. -
Page 87: Power Led Is Red
N150 Wireless ADSL2+ Modem Router DGN1000 • Check that you are using the 12-V DC power adapter supplied by NETGEAR for this product. If the error persists, you could have a hardware problem and should contact NETGEAR Technical Support. Power LED Is Red When the router is turned on, it performs a power-on self-test. -
Page 88: Internet Led Is Red
N150 Wireless ADSL2+ Modem Router DGN1000 DSL Link LED Is Green or Blinking Green You have a good DSL connection. The service provider has connected your line correctly, and your wiring is correct. DSL Link LED Is Blinking Amber Your wireless modem router is attempting to make a DSL connection with the service provider. -
Page 89: Cannot Obtain An Internet Ip Address
N150 Wireless ADSL2+ Modem Router DGN1000 Cannot Obtain an Internet IP Address If your wireless modem router cannot access the Internet, and your Internet LED is green or blinking green, check whether the wireless modem router can obtain an Internet IP address from the ISP. -
Page 90: Cannot Load An Internet Web Page
N150 Wireless ADSL2+ Modem Router DGN1000 Note: Unless you connect manually, the wireless modem router does not authenticate with PPPoE or PPPoA until data is transmitted to the network. Cannot Load an Internet Web Page If your wireless modem router can obtain an IP address, but your browser cannot load any Internet web pages: •... -
Page 91: Test The Path From Your Computer To A Remote Device
N150 Wireless ADSL2+ Modem Router DGN1000 b. If the path is working, you see this message: “Reply from < IP address >: bytes=32 time=NN ms TTL=xxx” c. If the path is not working, you see this message: “Request timed out”... -
Page 92: Cannot Log In
N150 Wireless ADSL2+ Modem Router DGN1000 Cannot Log in If you cannot log in to the wireless modem router from a computer on your local network, check the following: • The router is plugged in and it is on. •... -
Page 93: Firmware Needs To Be Reloaded
If you already have the firmware file on your PC, go directly to step 2. If you do not have the firmware file on your PC, obtain the firmware from the NETGEAR support site at http://support.netgear.comthrough another working Internet connection. Click Browse. -
Page 94: Appendix A Technical Specifications
Technical Specifications This appendix includes the factory default settings, technical specifications for the N150 Wireless ADSL2+ Modem Router DGN1000, related documents, and instructions for wall-mounting the unit. This appendix contains the following sections: • Factory Settings • Technical Specifications Factory Settings You can return the wireless modem router to its factory settings. - Page 95 N150 Wireless ADSL2+ Modem Router DGN1000 Feature Default Behavior Local Network (LAN) Lan IP 192.168.0.1 Subnet Mask 255.255.255.0 RIP Direction None RIP Version Disabled RIP Authentication None DHCP Server Enabled DHCP Starting IP Address 192.168.0.2 DHCP Ending IP Address 192.168.0.254...
- Page 96 N150 Wireless ADSL2+ Modem Router DGN1000 Feature Default Behavior Wireless Wireless Communication Enabled Wi-Fi Network Name (SSID) Can be found on the router label at the bottom of the unit WPA/WPA2-PSK Passphrase Can be found on the router label at the bottom of the unit...
-
Page 97: Technical Specifications
N150 Wireless ADSL2+ Modem Router DGN1000 Technical Specifications Network Protocol and Standards Compatibility Data and routing protocols: TCP/IP, RIP-1, RIP-2, DHCP, PPPoE or PPPoA, RFC 1483 Bridged or Routed Ethernet, and RFC 1577 Classical IP over ATM Power Adapter North America... -
Page 98: Appendix B Notification Of Compliance
EDOC in Languages of the European Community Language Statement Cesky [Czech] NETGEAR Inc. tímto prohlašuje, že tento Radiolan je ve shode se základními požadavky a dalšími príslušnými ustanoveními smernice 1999/5/ES. Dansk [Danish] Undertegnede NETGEAR Inc. erklærer herved, at følgende udstyr Radiolan overholder de væsentlige krav og øvrige relevante krav i direktiv 1999/5/EF. - Page 99 N150 Wireless ADSL2+ Modem Router DGN1000 Español [Spanish] Por medio de la presente NETGEAR Inc. declara que el Radiolan cumple con los requisitos esenciales y cualesquiera otras disposiciones aplicables o exigibles de la Directiva 1999/5/CE. Ελληνική [Greek] ΜΕ ΤΗΝ ΠΑΡΟΥΣΑ NETGEAR Inc. ∆ΗΛΩΝΕΙ ΟΤΙ Radiolan ΣΥΜΜΟΡΦΩΝΕΤΑΙ ΠΡΟΣ...
- Page 100 This transmitter must not be co-located or operating in conjunction with any other antenna or transmitter. FCC Declaration of Conformity We, NETGEAR, Inc., 350 East Plumeria Drive, San Jose, CA 95134, declare under our sole responsibility that the N150 Wireless ADSL2+ Modem Router DGN1000 complies with Part 15 Subpart B of FCC CFR47 Rules. Operation is subject to the following two conditions: •...
-
Page 101: Industry Canada
Canadian Department of Communications Radio Interference Regulations This digital apparatus (N150 Wireless ADSL2+ Modem Router DGN1000) does not exceed the Class B limits for radio-noise emissions from digital apparatus as set out in the Radio Interference Regulations of the Canadian Department of Communications. - Page 102 N150 Wireless ADSL2+ Modem Router DGN1000 Interference Reduction Table The table below shows the Recommended Minimum Distance between NETGEAR equipment and household appliances to reduce interference (in feet and meters). Household Appliance Recommended Minimum Distance (in feet and meters) Microwave ovens...
-
Page 103: Index
Index backing up erase AC power adapter input erasing access lists managing restoring accessing remote computer configuration, wireless network adapter, wireless connecting wirelessly addresses, DNS connection, Internet ADSL see also DSL content filtering statistics, viewing country setting ADSL microfilter CU-SeeMe cabling, described filter, described ADSL microfilters... - Page 104 N150 Wireless ADSL2+ Modem Router DGN1000 Internet port, no connection Internet Relay Chat (IRC) email notices Internet Service Provider (ISP), see ISP encryption keys IP address erasing configuration DHCP erasing configuration file LAN service Ethernet cable reserved IP setup, LAN...
- Page 105 N150 Wireless ADSL2+ Modem Router DGN1000 spoofing example maintenance settings ports filtering manual logout forwarding manual setup Instant Messaging manual setup, Basic Settings screen listed, back panel Maximum Transmit Unit (MTU) positioning the router menus, described power adapter, AC metric, number of routers...
- Page 106 N150 Wireless ADSL2+ Modem Router DGN1000 setting time zone settings.viewing Setup Wizard advanced setup Simple Mail Transfer Protocol (SMTP) automatic connection sites, blocking ping response settings SSID described WAN port disable default scanning SSID, product label Wi-Fi Protected Setup (WPS)
- Page 107 N150 Wireless ADSL2+ Modem Router DGN1000 WPS-PSK+ WPA2-PSK encryption wrong date or time...
Need help?
Do you have a question about the DGN1000 and is the answer not in the manual?
Questions and answers