La Crosse Technology DCF-77 Instruction Manual
Wireless 868 mhz weather station
Hide thumbs
Also See for DCF-77:
- Instruction manual (32 pages) ,
- Instruction manual (31 pages) ,
- Instruction manual (44 pages)
Table of Contents
Advertisement
Quick Links
Download this manual
See also:
Instruction Manual
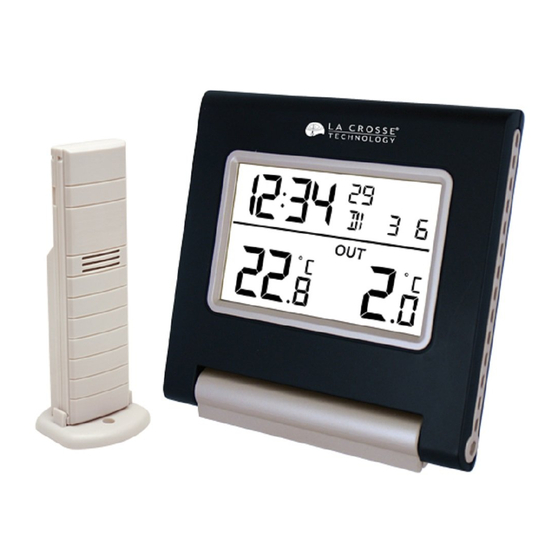
WIRELESS 868 MHz WEATHER STATION
Instruction Manual
INTRODUCTION:
Congratulations on purchasing this Weather Station with wireless 868
MHz transmission of outdoor temperature and display of indoor
temperature, weather forecast icons and weather tendency indicators. It
is further featuring a DCF-77 radio controlled clock and alarm function.
With four easy to use function keys, this innovative product is ideal for
use in the home or office.
« Instant Transmission+» is the up and coming state-of-the-art
new wireless transmission technology, exclusively designed
and developed by LA CROSSE TECHNOLOGY.
"IT +" offers you an immediate update of all your outdoor data
measured from the transmitters: follow your climatic variations
in real-time!
29
Advertisement
Table of Contents

Subscribe to Our Youtube Channel
Related Manuals for La Crosse Technology DCF-77


Summary of Contents for La Crosse Technology DCF-77
- Page 1 MHz transmission of outdoor temperature and display of indoor temperature, weather forecast icons and weather tendency indicators. It is further featuring a DCF-77 radio controlled clock and alarm function. With four easy to use function keys, this innovative product is ideal for use in the home or office.
- Page 2 Function keys Battery Display compartment cover Foldout stand DCF-77 Radio controlled time function with manual time setting options DCF time reception ON/OFF 24 hour display Alarm function with snooze Time zone +/- 12 hours Temperature display in degree Celsius (° C)
- Page 3 The Outdoor Temperature Transmitter Remote transmission of outdoor temperature to Weather station by 868 MHz signals Shower proof casing Wall mounting and table-standing SETTING UP: Note: This weather station receives only one outdoor transmitter. First, insert the batteries into the Temperature transmitter. (see “Install and replace batteries in the Temperature transmitter“).
-
Page 4: How To Install And Replace Batteries In The Temperature Transmitter
02:00 next day. If reception is successful, the received time will override the manually set time. (Please refer also to notes on “DCF-77 Radio Controlled Time” and “Manual Time Setting”). HOW TO INSTALL AND REPLACE BATTERIES IN THE WEATHER... -
Page 5: Battery Change
Remove the battery compartment cover at the back of the transmitter. Insert the batteries, observing the correct polarity (see marking). Replace the battery compartment cover on the unit. Note: In the event of changing batteries in any of the units, all units need to be reset by following the setting up procedures. -
Page 6: Lcd Screen And Settings
SET key Press the key to enter manual setting modes: Time zone, Time reception ON/OFF and Manual time Stop the alarm + key To make adjustment for various settings Stop the alarm ALARM key Enter the alarm setting mode Switch the alarm ON/ OFF Stop the alarm MIN/MAX RESET key Press and hold to reset the MIN/MAX temperature records... -
Page 7: Section 1 - Time And Alarm
Section 1 - TIME AND ALARM In normal mode display of radio controlled time A reception tower symbol will be shown indicating that the DCF-77 time signal is scanned for (flashing) or received (steady). Note: The symbol will not be shown when radio time reception is not successful or when time reception function is turned off. -
Page 8: Manual Settings
MANUAL SETTINGS: The following manual settings can be done in the setting mode: Time zone Time reception DCF ON/OFF Manual time Press and hold the SET key for about 3 seconds to advance to the setting mode: TIME ZONE SETTING: Time zone (flashing) The time zone default is "0"... -
Page 9: Manual Time Setting
Note: If the Time Reception function is turned OFF manually, the clock will not attempt any reception of the radio-controlled time (DCF time) as long as the Time Reception OFF function is activated. The Time Reception icon and the DCF icon will not be displayed on the LCD. - Page 10 To set alarm: Press and hold ALARM for about 3 seconds until the alarm time display flashes. The hour digit and the alarm icon will be flashing. Press the + key to adjust the hour. Press ALARM button once and minute digit will be flashing. User shall then press + button to set the minute.
- Page 11 For every sudden or significant change in the air pressure, the weather icons will update accordingly to represent the change in weather. If the icons do not change, then it means either the air pressure has not changed or the change has been too slow for the Weather station to register.
-
Page 12: The Weather Tendency Indicator
when really it is due to the slight change of altitude. Again, disregard weather forecasts for the next 12 to 24 hours as this will allow time for operation at a constant altitude. THE WEATHER TENDENCY INDICATOR Working together with the weather icons are the weather tendency indicators (located on the left and right hand side of the weather icons). -
Page 13: Low Battery Indicator
Note: The MIN/MAX indoor temperature range is -9ºC to + 38ºC with 1° C resolution. OUTDOOR TEMPERATURE AND MIN/MAX RECORDS The outdoor temperature and outdoor MIN/MAX records are displayed on the last section of the LCD. Outdoor reception Outdoor icon signal icon Outdoor Temperature... -
Page 14: Positioning The Weather Station
The distance of the Weather station or transmitter should be at least 1.5 to 2 meters away from any interfering sources such as computer monitors or TV sets. Avoid positioning the Weather station onto or in the immediate proximity of metal window frames. Using other electrical products such as headphones or speakers operating on the same signal frequency (868MHz) may prevent correct signal transmission and reception. - Page 15 Fix a screw (not supplied) into the desired wall, leaving the head extended out by about 5mm. Remove the stand from the Weather Station by pulling it away from the base and hang the station onto the screw. Remember to ensure that it locks into place before releasing.
-
Page 16: Care And Maintenance
To wall mount: 1. Secure the bracket onto a desired wall using the screws and plastic anchors. 2. Clip the remote temperature sensor onto the bracket. Note: Before permanently fixing the transmitter wall base, place all units in the desired locations to check that the outdoor temperature reading is receivable. -
Page 17: Specifications
Opening and tampering with the unit may invalidate their guarantee. Never touch the exposed electronic circuit of the device as there is a danger of electric shock should it become exposed. Do not expose the units to extreme and sudden temperature changes, this may lead to rapid changes in forecasts and readings and thereby reduce their accuracy. - Page 18 The unrestricted disposal of electronic waste may do harm on public health and the quality of environment. As stated on the gift box and labeled on the product, reading the “User manual” is highly recommended for the benefit of the user. This product must however not be thrown in general rubbish collection points.
Need help?
Do you have a question about the DCF-77 and is the answer not in the manual?
Questions and answers