Panasonic LUMIX DMC-FX37 Operating Instructions Manual
Digital camera model no. dmc-fx37
Hide thumbs
Also See for LUMIX DMC-FX37:
- Operating instructions manual (128 pages) ,
- Instrucciones básicas de funcionamiento (32 pages) ,
- Brochure & specs (22 pages)

Related Manuals for Panasonic LUMIX DMC-FX37


Summary of Contents for Panasonic LUMIX DMC-FX37
-
Page 1: Operating Instructions
Operating Instructions Digital Camera DMC-FX37 Model No. Before use, please read these instructions completely. Web Site: http://www.panasonic-europe.com VQT1R99... -
Page 2: Information For Your Safety
Before Use Before Use Dear Customer, We would like to take this opportunity to thank you for purchasing this Panasonic Digital Camera. Please read these Operating Instructions carefully and keep them handy for future reference. Information for Your Safety WARNING: TO REDUCE THE RISK OF FIRE, ELECTRIC SHOCK OR PRODUCT DAMAGE, •... -
Page 3: Caution For Ac Mains Lead
Before Use ∫ IMPORTANT Caution for AC mains lead The wires in this mains lead are coloured For your safety, please read the following in accordance with the following code: text carefully. Blue: Neutral, Brown: Live. This appliance is supplied with a moulded As these colours may not correspond with the coloured markings identifying the three pin mains plug for your safety and... - Page 4 Before Use Information for Users on Collection and Disposal of Old Equipment and used Batteries These symbols on the products, packaging, and/or accompanying documents mean that used electrical and electronic products and batteries should not be mixed with general household waste. For proper treatment, recovery and recycling of old products and used batteries, please take them to applicable collection points, in accordance with your national legislation and the Directives 2002/96/EC and 2006/66/...
- Page 5 Before Use ∫ About the battery pack • Do not heat or expose to flame. • Do not leave the battery(ies) in an automobile exposed to direct sunlight for a long period of time with doors and windows closed. ∫ Care of the camera •...
-
Page 6: Table Of Contents
Contents Deleting Pictures........33 • To delete a single picture....33 • To delete multiple pictures (up to 50) or all the pictures....34 Before Use Advanced (Recording pictures) Information for Your Safety....... 2 Quick Guide ..........8 Accessories ..........9 About the LCD Monitor ...... - Page 7 Most major credit and debit cards accepted. • B [AUDIO DUB.] ....... 87 • All enquiries transactions and distribution • S [COPY] ........88 facilities are provided directly by Panasonic UK Ltd. Connecting to other equipment • It couldn’t be simpler! •...
-
Page 8: Before Use
Before Use Before Use Quick Guide This is an overview of how to record and play back pictures with the camera. For each step, be sure to refer to the pages indicated in brackets. Charge the battery. (P12) • The battery is not charged when the camera is shipped. -
Page 9: Accessories
Before Use Accessories Check that all the accessories are included before using the camera. Battery Pack (Indicated as battery in the text) Charge the battery before use. Battery Charger (Indicated as charger in the text) AC Mains Lead USB Connection Cable DMW-BCE10E DE-A40A AV Cable... -
Page 10: Names Of The Components
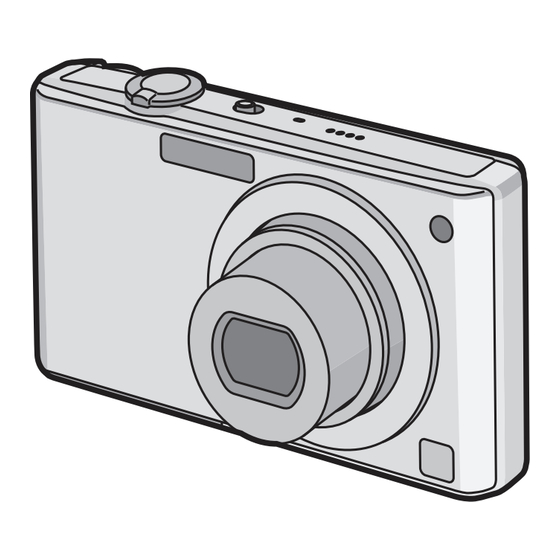
Before Use Names of the Components Flash (P37) Lens (P5, 101) Self-timer indicator (P41) AF assist lamp (P66) LCD monitor (P35, 98) Status indicator (P14, 21, 25) [MENU/SET] button (P16) [DISPLAY] button (P35) [Q.MENU] (P19)/Delete (P33) button [REC]/[PLAYBACK] selector switch (P17) 10 Cursor buttons A: 3/Exposure compensation (P42)/... - Page 11 19 [COMPONENT OUT] socket (P97) 20 [AV OUT/DIGITAL] socket (P89, 92, 96) 21 [DC IN] socket (P89, 92) • Always use a genuine Panasonic AC adaptor (DMW-AC5E; optional). • This camera cannot charge the battery even when the AC adaptor (DMW-AC5E; optional) is connected to it.
-
Page 12: Preparation
Preparation Preparation Charging the Battery • Use the dedicated charger and battery. • The battery is not charged when the camera is shipped. Charge the battery before use. • Charge the battery with the charger indoors. • Charge the battery in a temperature between 10 oC to 35 oC (50 oF to 95 oF). (The battery temperature should also be the same.) Attach the battery with attention to the direction of the battery. -
Page 13: About The Battery (Charging/Number Of Recordable Pictures)
¢ • Temperature: 23 oC (73.4 oF)/Humidity: 50% when LCD monitor is on. • Using a Panasonic SD Memory Card (32 MB). • Using the supplied battery. • Starting recording 30 seconds after the camera is turned on. (When the optical image stabilizer function is set to [AUTO].) -
Page 14: Inserting And Removing The Card (Optional)/The Battery
Inserting and Removing the Card (optional)/the Battery • Check that this unit is turned off. • We recommend using a Panasonic card. Slide the release lever in the direction of the arrow and open the card/battery door. • Always use genuine Panasonic batteries (DMW-BCE10E). -
Page 15: About The Built-In Memory/The Card
You can only use cards with SDHC logo (indicating compliance with the SD standard) if using cards with 4 GB or more capacity. • Please confirm the latest information on the following website. http://panasonic.co.jp/pavc/global/cs (This Site is English only.) VQT1R99... -
Page 16: Setting Date/Time (Clock Set)
Preparation Note • Do not turn this unit off, remove its battery or card or disconnect the AC adaptor (DMW-AC5E; optional) when the access indication is lit [when pictures are being read or deleted or the built-in memory or the card is being formatted (P23)]. Furthermore, do not subject the camera to vibration or impact. -
Page 17: Changing The Clock Setting
Preparation Changing the clock setting Select [CLOCK SET] in the [REC] or [SETUP] menu, and press 1. (P18) • It can be changed in steps to set the clock. • The clock setting is maintained for 3 months using the built-in clock battery even without the battery. -
Page 18: Setting Menu Items
Preparation ∫ Functions that cannot be set or will not work under some conditions Due to the camera’s specifications, it may not be possible to set some of the functions or some functions may not work in some of the conditions under which the camera is used. For details, refer to P105. -
Page 19: Using The Quick Menu
Preparation Press 3/4 to select [AF MODE]. • Select the item at the very bottom, and press 4 to move to the second screen. Press 1. • Depending on the item, its setting may not appear or it may be displayed in a different way. Press 3/4 to select [š]. -
Page 20: About The Setup Menu
Preparation Perform these settings if you need to. About the Setup Menu [CLOCK SET], [ECONOMY] and [AUTO REVIEW] are important items. Check their settings before using them. • In the Intelligent auto mode, only [CLOCK SET], [WORLD TIME], [TRAVEL DATE], [BEEP] and [LANGUAGE] can be set. - Page 21 Preparation These menu settings make it easier to see the LCD monitor when you are in bright places. [OFF] „ [AUTO POWER LCD]: [LCD MODE] The brightness is adjusted automatically depending on how bright it is around the camera. … [POWER LCD]: The LCD monitor becomes brighter and easier to see even when taking pictures outdoors.
- Page 22 Preparation Set the length of time that the picture is displayed after taking it. [OFF] [1SEC.] [2SEC.] o [AUTO REVIEW] [HOLD]: The pictures are displayed until one any of the buttons is pressed. [ZOOM]: The picture is displayed for 1 second and then enlarged 4k and displayed for 1 more second.
- Page 23 Preparation Set to match the colour television system in each country. (Playback mode only) | [VIDEO OUT] [NTSC]: Video output is set to NTSC system. [PAL]: Video output is set to PAL system. • This will work when the AV cable is connected. Set to match the type of TV.
-
Page 24: Selecting The [Rec] Mode
Preparation Mode switching Selecting the [REC] Mode When the [REC] mode is selected, the camera can be set to the Intelligent auto mode in which the optimal settings are established in line with the subject to be recorded and the recording conditions, or to the scene mode which enables you to take pictures that match the scene being recorded. -
Page 25: Basic
Basic ñ [REC] mode: Basic Taking pictures using the automatic function : Intelligent Auto Mode) ñ The camera will set the most appropriate settings to match the subject and the recording conditions so we recommend this mode for beginners or those who want to leave the settings to the camera and take pictures easily. -
Page 26: Scene Detection
Basic ∫ When taking pictures using the flash (P37) ∫ When taking pictures using the zoom (P30) Note • Be careful not to move the camera when you press the shutter button. • Do not cover the flash or the AF assist lamp with your fingers or other objects. •... -
Page 27: About The Flash
Basic About the flash • When [‡] is selected, [ ], [ ] or [ ] is set depending on the type of subject and brightness. • When [ ] or [ ] is set, digital red-eye correction (P38) is enabled, and the flash is activated twice. -
Page 28: Taking Pictures With Your Favourite Settings (·: Normal Picture Mode)
Basic · [REC] mode: Taking pictures with your favourite settings : Normal picture mode) · Many more menu items can be set and you can take pictures with greater freedom than when you take pictures in the Intelligent auto mode (P25). Slide the [REC]/[PLAYBACK] selector switch to [!]. -
Page 29: When The Subject Is Not In Focus (Such As When It Is Not In The Centre Of The Composition Of The Picture You Want To Take)
Basic A Focus indication B AF area (normal) C AF area (when using the digital zoom or when it is dark) D Focus range ¢ E Aperture value ¢ F Shutter speed G ISO sensitivity ¢ If correct exposure cannot be achieved, it will be displayed in red. (However, it will not be displayed in red when the flash is used.) When the subject is not in focus (such as when it is not in the centre of the composition of the picture you want to take) -
Page 30: Taking Pictures With The Zoom
Basic ñ·¿n¨ [REC] mode: Taking Pictures with the Zoom Using the Optical Zoom/Using the Extra Optical Zoom (EZ)/Using the Digital Zoom You can zoom-in to make people and objects appear closer or zoom-out to record landscapes in wide angle. To make subjects appear even closer [maximum of 8.9k], do not set the picture size to the highest setting for each aspect ratio (X/Y/W). -
Page 31: Playing Back Pictures ([Normal Play])
Basic ∫ Extra optical zoom mechanism When you set the picture size to [ ] (3 million pixels), the 10M (10.1 million pixels) CCD area is cropped to the centre 3M (3 million pixels) area, allowing a picture with a higher zoom effect. -
Page 32: Displaying Multiple Screens
Basic Displaying Multiple Screens (Multi Playback) Rotate the zoom lever towards [L] (W). 1 screen>12 screens>30 screens>Calendar screen display (P76) A Number of the selected picture and the total number of recorded pictures • Rotate the zoom lever towards [Z] (T) to return to the previous screen. -
Page 33: Switching The [Playback] Mode
Basic Switching the [PLAYBACK] mode Press [MENU/SET] during playback. Press 1. Press 3/4 to select the item and then press [MENU/SET]. [NORMAL PLAY] (P31) MENU All the pictures are played back. /SET [SLIDE SHOW] (P71) The pictures are played back in sequence. [CATEGORY PLAY] (P73) The pictures grouped together in categories are played back. -
Page 34: To Delete Multiple Pictures (Up To 50) Or All The Pictures
Basic To delete multiple pictures (up to 50) or all the pictures Press [‚]. Press 3/4 to select [DELETE MULTI] or [DELETE ALL] and then press [MENU/SET]. • [DELETE ALL] > step Press 3/4/2/1 to select the picture, and then press [DISPLAY] to set. (Repeat this step.) •... -
Page 35: Advanced (Recording Pictures)
Advanced (Recording pictures) Advanced (Recording pictures) About the LCD Monitor Press [DISPLAY] to change. A LCD monitor B [DISPLAY] button • When the menu screen appears, the [DISPLAY] button is not activated. During playback zoom (P32), while playing back motion pictures (P74) and during a slide show (P71), you can only select “Normal display F”... - Page 36 Advanced (Recording pictures) ∫ About the Histogram A histogram is a graph that displays brightness along the horizontal axis (black to white) and the number of pixels at each brightness level on the vertical axis. It allows you to easily check a picture’s exposure. 1 Dark area, mid-tone, and bright area are balanced out evenly, making it suitable to take a picture.
-
Page 37: Taking Pictures Using The Built-In Flash
Advanced (Recording pictures) ñ·¿¨ [REC] mode: Taking Pictures using the Built-in Flash A Photo flash Do not cover it with your fingers or other objects. Switching to the appropriate flash setting Set the flash to match the recording. Press 1 [‰]. Press 3/4 to select a mode. - Page 38 Advanced (Recording pictures) ∫ About the digital red-eye correction When the flash is used with the Red-eye reduction ([ ], [ ], [ ]) selected, it will automatically detect and correct the red-eye in the image data. ¢ It may not be able to correct the red-eye depending on the recording conditions. It may also correct objects other than red-eye.
- Page 39 Advanced (Recording pictures) • In [HIGH SENS.] (P48) in scene mode, the ISO sensitivity automatically switches to between [ISO1600] and [ISO6400] and the available flash range also differs. Wide: Approx. 1.15 m (3.77 feet) to approx. 15.4 m (50.5 feet) Tele: Approx.
-
Page 40: Taking Close-Up Pictures
Advanced (Recording pictures) ·n [REC] mode: Taking Close-up Pictures This mode allows you to take close-up pictures of a subject, e.g. when taking pictures of flowers. You can take pictures of a subject as close as 5 cm (0.17 feet) from the lens by rotating the zoom lever upmost to Wide (1k). -
Page 41: Taking Pictures With The Self-Timer
Advanced (Recording pictures) ñ·¿¨ [REC] mode: Taking Pictures with the Self-timer Press 2 [ë]. Press 3/4 to select a mode. • You can also press 2 [ë] to select. Press [MENU/SET]. • You can also press the shutter button halfway to finish. •... -
Page 42: Compensating The Exposure
Advanced (Recording pictures) ·¿n¨ [REC] mode: Compensating the Exposure Use this function when you cannot achieve appropriate exposure due to the difference in brightness between the subject and the background. Look at the following examples. Properly Under exposed Overexposed exposed Compensate the exposure Compensate the exposure towards positive. -
Page 43: Taking Pictures Using Auto Bracket
Advanced (Recording pictures) ·¿ [REC] mode: Taking Pictures using Auto Bracket In this mode, 3 pictures are automatically recorded in the selected exposure compensation range each time the shutter button is pressed. You can select the picture with the desired exposure from the 3 pictures with different exposures. With auto bracket d1 EV 1st picture 2nd picture... -
Page 44: Taking Pictures That Match The Scene Being Recorded (¿: Scene Mode)
Advanced (Recording pictures) ¿ [REC] mode: Taking pictures that match the scene being recorded : Scene mode) ¿ When you select a scene mode to match the subject and recording situation, the camera sets the optimal exposure and hue to obtain the desired picture. Slide the [REC]/[PLAYBACK] selector switch to [!]. -
Page 45: [Soft Skin]
Advanced (Recording pictures) + [SOFT SKIN] When taking pictures of people outdoors during the daytime, this mode enables the texture of their skin to appear even softer than with [PORTRAIT]. (It is effective when taking pictures of people from the chest up.) ∫... -
Page 46: [Scenery]
Advanced (Recording pictures) • The zoom magnification is automatically moved to Wide (1k). • The self-timer can only be set to off or 2 seconds. If it is set to 2 seconds, this setting will remain until the camera is turned off, the scene mode is changed or [REC] mode or [PLAYBACK] mode is selected. -
Page 47: Food]
Advanced (Recording pictures) • Noise may become visible when you take pictures in dark places. 1 [FOOD] This mode allows you to take pictures of food with a natural hue without being affected by the ambient light in restaurants etc. Note •... -
Page 48: Í [Pet]
Advanced (Recording pictures) • When the birthday or name is set, [AGE] or [NAME] is automatically set to [ON]. • If [ON] is selected when the birthday or name has not been registered, the setting screen appears automatically. Press [MENU/SET] to finish. ∫... -
Page 49: Ô [Hi-Speed Burst]
Advanced (Recording pictures) Note • [QUALITY] is automatically fixed to [›]. • You can take pictures suitable for 4qk6q/10k15 cm printing. • The focus range becomes the same as macro mode. [5 cm (0.17 feet) (Wide)/1 m (3.28 feet) (Tele) to ¶] ô... -
Page 50: Starry Sky]
Advanced (Recording pictures) • The focus range becomes the same as macro mode. [5 cm (0.17 feet) (Wide)/1 m (3.28 feet) (Tele) to ¶] • The focus, zoom, exposure, shutter speed, ISO sensitivity, and flash level are fixed to the settings for the first picture. -
Page 51: Snow]
Advanced (Recording pictures) Note • The initial setting for [AF MODE] is [š]. • Do not touch the camera with wet hands. • Sand or seawater will cause the camera to malfunction. Make sure that sand or seawater does not get into the lens or the terminals. 8 [SNOW] This allows you to take pictures that show the snow as white as possible at a ski resort or a snow-covered mountain. -
Page 52: [Film Grain]
Advanced (Recording pictures) [FILM GRAIN] Picture is taken with a grainy texture as though blasted with sand. ∫ Picture size and aspect ratio Press 3/4 to select the picture size and aspect ratio and then press [MENU/SET] to set. • 3M (4:3), 2.5M (3:2) or 2M (16:9) is selected as the picture size. -
Page 53: Motion Picture Mode
Advanced (Recording pictures) [REC] mode: Advanced (Recording pictures) Motion Picture Mode Slide the [REC]/[PLAYBACK] selector switch to [!]. Set the mode dial to [n]. Press the shutter button halfway to focus and then press it fully to start recording. A Audio recording •... - Page 54 Advanced (Recording pictures) Changing the settings for the picture quality • When you set the picture quality to [ ], [ ] or [ ], we recommend using a high-speed card with “10MB/s” or greater displayed on the package. Press [MENU/SET]. Press 3/4 to select [PICTURE MODE] and then press Press 3/4 to select the item and then press [MENU/SET].
-
Page 55: Useful Functions At Travel Destinations
Advanced (Recording pictures) ñ·¿n [REC] mode: Useful Functions at Travel Destinations Recording which Day of the Vacation You Take the Picture For details on the [SETUP] menu settings, refer to P18. If you set the departure date or the travel destination of the vacation in advance, the number of days that have passed since the departure date (which day of the vacation it is) is recorded when you take the picture. -
Page 56: Recording Dates/Times At Overseas Travel Destinations (World Time)
Advanced (Recording pictures) Press 4 to select [LOCATION] and then press 1. Press 4 to select [SET] and then press [MENU/ SET]. Enter the location. • For details on how to enter characters, read the [TITLE EDIT] section on P77. Press [MENU/SET] twice to close the menu. - Page 57 Advanced (Recording pictures) • Select [CLOCK SET] to set the current date and time in advance. (P16) Select [WORLD TIME] from the [SETUP] menu, and then press 1. • When first using the camera after purchasing it, the [PLEASE SET THE HOME AREA] message appears. Press [MENU/ SET], and set the home area on the screen in step Press 4 to select [HOME], and then press [MENU/SET].
-
Page 58: Using The [Rec] Mode Menu
Advanced (Recording pictures) Using the [REC] Mode Menu @ [PICTURE SIZE] For details on [REC] mode menu settings, refer to P18. Set the number of pixels. The higher the numbers of pixels, the finer the detail of the pictures will appear even when they are printed onto large sheets. ñ·¿... -
Page 59: A [Quality]
Advanced (Recording pictures) A [QUALITY] For details on [REC] mode menu settings, refer to P18. Set the compression rate at which the pictures are to be stored. ·¿ Applicable modes: [A]: Fine (when giving priority to the picture quality) [›]: Standard (when using the standard picture quality and increasing the number of pictures to be recorded without changing the number of pixels) Note... -
Page 60: [Sensitivity]
Advanced (Recording pictures) > [SENSITIVITY] For details on [REC] mode menu settings, refer to P18. This allows the sensitivity to light (ISO sensitivity) to be set. Setting to a higher figure enables pictures to be taken even in dark places without the resulting pictures coming out dark. - Page 61 Advanced (Recording pictures) ∫ Setting the white balance manually Select [Ó] and then press [MENU/SET]. Aim the camera at a sheet of white paper etc. so that the frame in the centre is filled by the white object only and then press [MENU/SET].
-
Page 62: Af [Af Mode]
Advanced (Recording pictures) [AF MODE] For details on [REC] mode menu settings, refer to P18. This allows the focusing method that suits the positions and number of the subjects to be selected. ·¿n Applicable modes: The camera automatically detects the person’s face. The focus [š]: Face detection and exposure can then be adjusted to fit that face no matter what portion of the picture it is in. -
Page 63: [Quick Af]
Advanced (Recording pictures) – When there is rapid movement – When the subject is other than a human being – When the camera is shaking – When digital zoom is used ∫ About [ƒ] • You can focus on the subject more quickly than in other AF modes. •... -
Page 64: [Burst]
Advanced (Recording pictures) ˜ [BURST] For details on [REC] mode menu settings, refer to P18. Pictures are taken continuously while the shutter button is pressed. Select the ones you really like from among the pictures you have taken. ñ·¿ Applicable modes: [OFF] ˜... -
Page 65: [Digital Zoom]
Advanced (Recording pictures) ) [DIGITAL ZOOM] For details on [REC] mode menu settings, refer to P18. This can enlarge subjects even more than the optical zoom or extra optical zoom. ·¿n Applicable modes: [OFF]/[ON] Note • Refer to P30 for details. •... -
Page 66: [Min. Shtr Speed]
Advanced (Recording pictures) – When there is a lot of jitter. – When the zoom magnification is high. – In digital zoom range. – When taking pictures while following a moving subject. – When the shutter speed becomes slower to take pictures indoors or in dark places. Be careful of camera jitter when you press the shutter button. -
Page 67: U [Clock Set]
Advanced (Recording pictures) [OFF]: The AF assist lamp does not turn on. [ON]: When taking pictures in dark places, the AF assist lamp lights while the shutter button is pressed halfway. (Larger AF areas are now displayed.) Note • The effective range of the AF assist lamp is 1.5 m (4.92 feet). •... -
Page 68: Taking And Viewing Clipboard Pictures (¨: Clipboard Mode)
Advanced (Recording pictures) ¨ Mode dial: Taking and viewing clipboard pictures : Clipboard mode) ¨ This setting is useful when taking pictures of timetables, route maps or other information instead of taking notes. Regardless of whether a card is present or not, the data is stored in the dedicated clipboard folder of the built-in memory so it can be differentiated from the regular taken pictures and made available for immediate viewing. -
Page 69: Viewing Clipboard Pictures
Advanced (Recording pictures) Press 3/4 to select the setting and then press [MENU/SET]. Press [MENU/SET] to close the menu. Viewing clipboard pictures Slide the [REC]/[PLAYBACK] selector switch to [(]. Set the mode dial to [¨]. Press 2/1 to move the picture. Play back the previous picture. - Page 70 Advanced (Recording pictures) Clipboard playback menu When [MENU/SET] is pressed during clipboard playback, the menu screen appears. (The steps taken are the same as for the “Clipboard recording menu” (P68).) Item Description of setting Used to release the zoom position. [CANCEL Press 2/1 to select a clipboard pictures with zoom mark [ MARK]...
-
Page 71: Advanced (Playback)
Advanced (Playback) ¸ [PLAYBACK] mode: Advanced (Playback) Playing Back Pictures in Sequence (Slide Show) You can play back the pictures you have taken in synchronisation with music, and you can do this in sequence while leaving a fixed interval between each of the pictures. Furthermore, you can play back the pictures grouped together by category or play back only those pictures you have set as favourites as a slide show. - Page 72 Advanced (Playback) Press 3 to select [START] and then press [MENU/ SET]. Press 4 to finish the slide show. • Normal playback resumes after the slide show finishes. slide show ∫ Operations performed during The cursor displayed during playback is the same as 3/4/2/1. •...
-
Page 73: Selecting Pictures And Playing Them Back ([Category Play]/ [Favorite Play])
Advanced (Playback) ¸ [PLAYBACK] mode: Selecting Pictures and Playing them Back ([CATEGORY PLAY]/[FAVORITE PLAY]) [CATEGORY PLAY] This mode allows you to search images by scene mode or other categories (such as [PORTRAIT], [SCENERY] or [NIGHT SCENERY]) and sort the pictures into each of the categories. -
Page 74: [Favorite Play]
Advanced (Playback) [FAVORITE PLAY] You can play back the pictures you have set as [FAVORITE] (P84) (Only when [FAVORITE] is set to [ON] and there are pictures which have been set to [FAVORITE]). Perform steps 1 and 2 on page 71. Press 3/4 to select [FAVORITE PLAY], and then press [MENU/SET]. -
Page 75: Pictures With Audio
Advanced (Playback) Pictures with audio Press 2/1 to select a picture with the audio icon [ and then press 3 to play back. A Audio icon • Refer to [AUDIO REC.] (P66) and [AUDIO DUB.] (P87) for information about how to create still pictures with audio. Note •... -
Page 76: Using The [Playback] Mode Menu
Advanced (Playback) Press the shutter button. Press 3 to select [YES] and then press [MENU/SET]. Picture size Item 1 picture 9 pictures 0.3 M 0.3 M • [QUALITY] is fixed to [›]. Note • You may not be able to save still pictures from a motion picture taken on other equipment. ¸... -
Page 77: [Title Edit]
Advanced (Playback) Press [MENU/SET] to display the pictures that were recorded on the selected date. • Press [‚] to return to the calendar screen. Press 3/4/2/1 to select a picture and then press [MENU/SET]. • The picture that was selected will appear. Note •... -
Page 78: [Text Stamp]
Advanced (Playback) Press 3/4/2/1 to select text and then press [MENU/SET] to register. • Press [DISPLAY] to switch text between [A] (capitals), [a] (small case) and [&/1] (special characters and numbers). • The cursor at the entry position can be moved to the left with [L], and to the right with [Z]. - Page 79 Advanced (Playback) Press 3/4 to select [SINGLE] or [MULTI] and then press [MENU/SET]. [SINGLE] [MULTI] Select the picture, and then press [MENU/SET] to set. • [‘] appears on screen if the picture is stamped with text. [MULTI] setting Press [DISPLAY] to set (repeat), and Press 2/1 to Press 3/4/2/1 to then press [MENU/SET] to set.
-
Page 80: Q [Resize]
Advanced (Playback) ¢ Press [‚] to return to the menu screen. ¢The menu screen is automatically restored when [MULTI] is selected. • Press [MENU/SET] to close the menu. Note • When you print pictures stamped with text, the date will be printed over the stamped text if you specify printing of the date at the photo shop or on the printer. -
Page 81: [Trimming]
Advanced (Playback) Note • You can set up to 50 pictures at one time in [MULTI]. • The picture quality of the resized picture will deteriorate. • It may not be possible to resize pictures recorded with other equipment. [TRIMMING] You can enlarge and then clip the important part of the recorded picture. -
Page 82: [Leveling]
Advanced (Playback) [LEVELING] Minute tilting of the image can be adjusted. Select [LEVELING] on the [PLAYBACK] mode menu. (P18) Press 2/1 to select the picture, and then press [MENU/SET]. Press 2/1 to adjust the tilting, and press [MENU/ SET]. 1: clockwise 2: counter-clockwise •... -
Page 83: N [Rotate]/M [Rotate Disp.]
Advanced (Playback) Press 2/1 to determine the horizontal position, and press [MENU/SET] to set. • Use 3/4 to set the frame position for pictures rotated vertically. Press 3 to select [YES] and then press [MENU/ SET]. Press [‚] to return to the menu screen. •... -
Page 84: Ü [Favorite]
Advanced (Playback) Rotate display (The picture is automatically rotated and displayed) Select [ROTATE DISP.] on the [PLAYBACK] mode menu. (P18) Press 4 to select [ON] and then press [MENU/SET]. • The pictures are displayed without being rotated when you select [OFF]. -
Page 85: O [Dpof Print]
Advanced (Playback) Note • You can set up to 999 pictures as favourites. • When printing pictures at a photo printing store, [ALL DELETE EXCEPTÜ] (P34) is useful so only the pictures you want to be printed remain on the card. •... -
Page 86: P [Protect]
Advanced (Playback) ∫ To print the date After setting the number of prints, set/cancel printing with the recording date by pressing [DISPLAY]. • When you go to a photo printing store for digital printing, be sure to order the printing of the date additionally if required. -
Page 87: B [Audio Dub.]
Advanced (Playback) Note • The protect setting may not be effective on other equipment. • Even if you protect pictures in the built-in memory or a card, they will be deleted if the built-in memory or the card is formatted. •... -
Page 88: S [Copy]
• Only pictures recorded with a Panasonic digital camera (LUMIX) will be copied. (Even if the pictures were recorded with a Panasonic digital camera, you may not be able to copy them if they were edited with a PC.) •... -
Page 89: Connecting To Other Equipment
Connecting to other equipment Connecting to other equipment Connecting to a PC You can acquire recorded pictures to a PC by connecting the camera and the PC. • You can easily print out or mail the pictures you have imported. Use of the “... - Page 90 Connecting to other equipment USB MODE Press 3/4 to select [PC], and then press [MENU/ PLEASE SELECT SET]. THE USB MODE PictBridge(PTP) • If [USB MODE] (P22) is set to [PC] in the [SETUP] menu in advance, the camera will be automatically connected to the PC without displaying the [USB MODE] selection screen.
- Page 91 Connecting to other equipment ∫ Viewing the contents of the built-in memory or card using the PC (folder composition) Folder number File number JPG: Pictures MOV: Motion pictures MISC: DPOF print Favourite PRIVATE1: Clipboard pictures (Built in memory only) A new folder is created when pictures are taken in the following situations. •...
-
Page 92: Printing The Pictures
Connecting to other equipment Printing the Pictures If you connect the camera to a printer supporting PictBridge, you can select the pictures to be printed out and instruct that printing be started on the camera’s LCD monitor. Preparations: Turn on the camera and the printer. Remove the card before printing the pictures in the built-in memory. -
Page 93: Selecting A Single Picture And Printing It
Connecting to other equipment • You cannot switch between the built-in memory and the card while the camera is connected to the printer. Disconnect the USB connection cable, insert (or remove) the card and then connect the USB connection cable to the printer again. •... -
Page 94: Print Settings
Connecting to other equipment Print Settings Select and set the items both on the screen in step of the MULTI SELECT “Selecting a single picture and printing it” and in step of the PRINT START “Selecting multiple pictures and printing them” procedures. PRINT WITH DATE NUM. - Page 95 Connecting to other equipment [PAGE LAYOUT] (Layouts for printing that can be set with this unit) Item Description of settings Settings on the printer are prioritised. 1 picture with no frame on 1 page á 1 picture with a frame on 1 page â...
-
Page 96: Playing Back Pictures On A Tv Screen
Connecting to other equipment ¸ [PLAYBACK] mode: Playing Back Pictures on a TV Screen Playing back pictures using the AV cable (supplied) Preparations: Set the [TV ASPECT]. (P23) Turn this unit and the TV off. 1 Yellow: to the video input socket 2 White: to the audio input socket A Align the marks, and insert. -
Page 97: Playing Back On The Tv With Component Socket
Depending on the [ASPECT RATIO], bands may be displayed on the top and bottom or the left and right of the pictures. • Do not use any other cables except a genuine Panasonic component cable (DMW-HDC2; optional). • Audio will be output as monaural. -
Page 98: Screen Display
Others Others Screen Display ∫ In recording Recording in normal picture mode [!] (Initial setting) Recording mode Flash mode (P37) AF area (P28) Focus (P28) Picture size (P58) Quality (P59) Battery indication (P13) Number of recordable pictures (P114) Built-in memory (P15) : Card (P15) (displayed only during recording) 10 Recording state... - Page 99 Others 34 Number of days that have passed since the travel date (P55) 35 Self-timer mode (P41) ¢ 1 This is displayed for about 5 seconds when this unit is turned on in [BABY1]/[BABY2] or [PET] in scene mode. ¢ 2 This is displayed for about 5 seconds when the camera is turned on, after setting the clock and after switching from playback mode to recording mode.
-
Page 100: Cautions For Use
Others Cautions for Use Optimal use of the camera Take care not to drop or knock the unit or put a lot of pressure on it. • Take care not to knock or drop the bag/case that you inserted the camera in as the shock may cause damage to the camera, lens or LCD monitor. - Page 101 Others • If the camera is cold when you turn it on, the picture on the LCD monitor will be slightly darker than usual at first. However, the picture will return to normal brightness when the internal temperature of the camera increases. Extremely high precision technology is employed to produce the LCD monitor screen.
- Page 102 About the picture data • Recorded data may be damaged or lost if the camera breaks down due to inappropriate handling. Panasonic will not be liable for any damage suffered due to loss of recorded data. About tripods • When you use a tripod, make sure the tripod is stable when this unit is attached to it.
-
Page 103: Message Display
Others Message Display Confirmation messages or error messages will be displayed on the screen in some cases. The major messages are described below as examples. [THIS MEMORY CARD IS LOCKED] > The Write-Protect switch on the SD Memory Card and the SDHC Memory Card are moved to [LOCK]. - Page 104 Others [MEMORY CARD ERROR FORMAT THIS CARD?] • This card has a format which is not recognised by the camera. > Format the card again with the camera after saving necessary data on a PC etc. (P23) [PLEASE TURN CAMERA OFF AND THEN ON AGAIN]/[SYSTEM ERROR] •...
-
Page 105: Functions That Cannot Be Set Or
Others Functions that cannot be set or will not work under some conditions Due to the camera’s specifications, it may not be possible to set some of the functions or some functions may not work in some of the conditions under which the camera is used. The table below lists these functions and the corresponding conditions. - Page 106 Others • [QUALITY] (P59) 9, ô , in [SCENE MODE] • $ mode • [ASPECT RATIO] (P59) in [SCENE MODE] 9, ô, [INTELLIGENT ISO] (P59) • [SCENE MODE] • $ mode • [SENSITIVITY] (P60) [SCENE MODE] • $ mode • When Intelligent ISO is set [WHITE BALANCE] (P60) •...
-
Page 107: Troubleshooting
Others • [ASPECT CONV.] (P82) Pictures taken with Y or X • Motion pictures • Still pictures with audio • Pictures stamped with [TEXT STAMP] • [ROTATE] (P83) Motion pictures • Protected pictures [ROTATE DISP.] (P83) • Multi playback • [CALENDAR] •... - Page 108 Others Recording The picture cannot be recorded. • Is the [REC]/[PLAYBACK] selector switch at the [!] setting? (P24) • Is the mode dial correctly set? • Is there any memory remaining on the built-in memory or the card? > Delete the pictures which are not necessary to increase the available memory. (P33) The recorded picture is whitish.
- Page 109 Others > Set [COLOR MODE] to [NATURAL]. (P65) > Take pictures in bright places. • Has [HIGH SENS.] or [HI-SPEED BURST] in the scene mode been set? If so, the resolution of the recorded picture decreases slightly because of high sensitivity processing, but this is not a malfunction.
- Page 110 Others The LCD monitor becomes darker or brighter for a moment. • This phenomenon appears when you press the shutter button halfway to set the aperture value and does not affect the recorded pictures. • This phenomenon also appears when the brightness changes when the camera is zoomed or when the camera is moved.
- Page 111 Others The picture is not played back. • Is the [REC]/[PLAYBACK] selector switch set to [(]? (P31) • Is there a picture on the built-in memory or the card? > The pictures on the built-in memory appear when a card is not inserted. The picture data on the card appears when a card is inserted.
- Page 112 Others TV, PC and printer The picture does not appear on the television. • Is the camera connected to the TV correctly? > Set the TV input to external input mode. • Output from the [COMPONENT OUT] socket is not possible when it is connected to the PC or the printer.
- Page 113 Others A red lamp sometimes turns on when the shutter button is pressed halfway. • In dark places, the AF assist lamp (P66) lights red to make it easier to focus on a subject. The AF assist lamp does not turn on. •...
-
Page 114: Available Recording Time
Others Others Number of Recordable Pictures and Available Recording Time • The number of recordable pictures and the available recording time are an approximation. (These vary depending on the recording conditions and the type of card.) • The number of recordable pictures and the available recording time varies depending on the subjects. - Page 115 Others Aspect ratio (9M): (4.5M (2.5M Picture size (3648k2432) (3072k2048) (2560k1712) (2048k1360) Quality › › › › Built-in Memory (Approx. 50 MB) 32 MB 64 MB 128 MB 256 MB 512 MB 1 GB Card 1310 2 GB 1220 1700 1360 2560 4 GB...
- Page 116 Others ∫ Available recording time (when recording motion pictures) Picture quality setting Built-in Memory 1 min 38 s 4 min 20 s (Approx. 50 MB) 32 MB 14 s 17 s 56 s 2 min 35 s 64 MB 12 s 33 s 39 s 1 min 58 s...
-
Page 117: Specifications
Others Specifications Digital Camera: Information for your safety Power Source: DC 5.1 V Power Consumption: 1.4 W (When recording) 0.6 W (When playing back) Camera effective pixels: 10,100,000 pixels Image sensor: 1/2.33q CCD, total pixel number 10,700,000 pixels, Primary colour filter Lens: Optical 5kzoom, fl4.4 mm to 22 mm (35 mm film camera equivalent: 25 mm to 125 mm)/F2.8 to F5.9... - Page 118 Others ISO sensitivity: AUTO/100/200/400/800/1600 [HIGH SENS.] mode: 1600 to 6400 Shutter speed: 8 seconds to 1/2000th of a second [STARRY SKY] mode: 15 seconds, 30 seconds, 60 seconds White balance: Auto white balance/Daylight/Cloudy/Shade/Incandescent lights/ White set Exposure (AE): Programme AE Exposure compensation (1/3 EV Step, j2 EV to i2 EV) Metering mode: Multiple...
- Page 119 10% to 80% Battery Charger (Panasonic DE-A40A): Information for your safety Input: 110 V to 240 V 50/60 Hz, 0.2 A Output: CHARGE 4.2 V 0.8 A Battery Pack (lithium-ion) (Panasonic DMW-BCE10E): Information for your safety Voltage: 3.6 V VQT1R99...
- Page 120 Apple Inc., used under license therefrom. VQT1R99 Matsushita Electric Industrial Co., Ltd. F0708MG0 ( 5000 Web Site: http://panasonic.net Pursuant to at the directive 2004/108/EC, article 9(2) Panasonic Testing Centre Panasonic Marketing Europe GmbH Winsbergring 15, 22525 Hamburg, Germany...
Need help?
Do you have a question about the LUMIX DMC-FX37 and is the answer not in the manual?
Questions and answers
What does System error Zoom mean?