Samsung SCH-u450 Series User Manual
Portable dual mode telephone
Hide thumbs
Also See for SCH-u450 Series:
- Manual del usuario (168 pages) ,
- User manual (142 pages) ,
- Manual del usuario (141 pages)

Related Manuals for Samsung SCH-u450 Series


Summary of Contents for Samsung SCH-u450 Series
- Page 1 SCH-u450 Series P O R T A B L E D U A L M O D E T E L E P H O N E User Guide Please read this manual before operating your phone, and keep it for future reference.
-
Page 2: Intellectual Property
Bluetooth or otherwise) of such content may be an infringement of privacy or copyright law. Neither Samsung Electronics Canada Inc. nor any of its affiliates shall be liable or responsible for any data or content disclosed, reproduced, downloaded or distributed by the user of this equipment. - Page 3 EXCEPT AS SET FORTH IN THE EXPRESS WARRANTY CONTAINED ON THE WARRANTY PAGE ENCLOSED WITH THE PRODUCT, THE PURCHASER TAKES THE PRODUCT "AS IS", AND SAMSUNG MAKES NO EXPRESS OR IMPLIED WARRANTY OF ANY KIND WHATSOEVER WITH RESPECT TO THE PRODUCT, INCLUDING BUT NOT LIMITED TO THE MERCHANTABILITY OF THE PRODUCT OR ITS FITNESS FOR ANY PARTICULAR PURPOSE OR USE;...
-
Page 4: Table Of Contents
Table of Contents Important Safety Precautions ............1 Road Safety at All Times ........1 Switching Off When Refueling . - Page 5 Making Three-Way Calls........20 Mute/UnMute .
- Page 6 Drafts ........... . 38 Saved .
- Page 7 Mass Storage ..........62 Connect to PC.
- Page 8 More............82 Accessibility .
-
Page 9: Important Safety Precautions
Important Safety Precautions Please read these guidelines before using your wireless phone. Failure to comply with them may be dangerous or illegal. Road Safety at All Times Do not use a hand-held phone while driving; park the vehicle first. Switching Off When Refueling Do not use the phone at a refueling point (service station) or near fuels or chemicals. -
Page 10: Accessories And Batteries
Accessories and Batteries Use only Samsung-approved accessories and batteries. Use of any unauthorized accessories could damage your phone and may be dangerous. Important: Although the phone can be used while the battery is charging, the battery must be fully charged before first use, otherwise you could damage the battery. -
Page 11: Getting Started
Getting Started Installing and Charging the Battery Your phone is equipped with a Lithium Ion (Li-ion) battery. It allows you to recharge your battery before it is fully drained. When the battery is weak and only a few minutes of talk time remain, a warning tone sounds and a message repeats at regular intervals on the display. - Page 12 Use your finger to lift the battery (top end first) up and away from the phone. Charging the Battery with the Travel Adapter Your phone is powered by a rechargeable standard Li-ion battery. Use Samsung- approved charging devices and batteries. The icon indicates that the battery is full.
-
Page 13: Turning Your Phone On And Off
Warning! Using the wrong battery charger could cause damage to your phone and void the warranty. Make sure the power is off so that you don’t lose any stored numbers or messages. Plug the large end of the travel adapter into a standard 120/220V AC wall outlet. -
Page 14: Your Phone
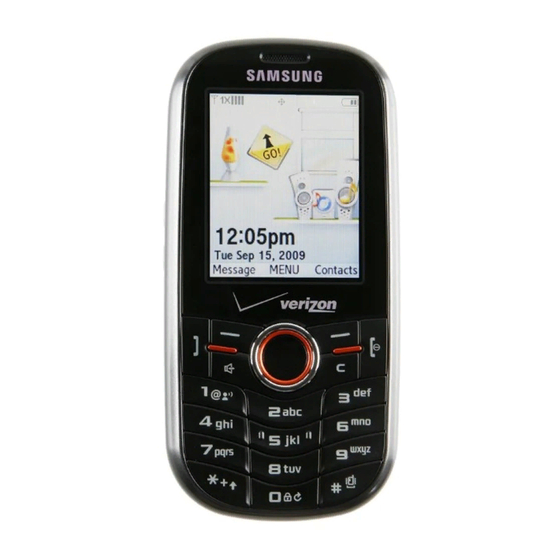
Your Phone Congratulations on the purchase of your Samsung SCH-u450 phone. This phone is lightweight, easy-to-use, reliable, and offers many exciting features and service options: • Mobile Browser provides access to the wireless Internet. See "Launch Web" on page 45. -
Page 15: Front Open View Of Your Phone
Front Open View of Your Phone 1. Earpiece 2. Earphone Jack 18. Voice Services Key 3. Display Screen 4. Volume Key 5. Navigation Keys 17. Right Soft Key 6. Left Soft Key 16. END/Power 7. Send Key 8. Speakerphone 15. Back Key 14. - Page 16 Earpiece: The earpiece allows you to hear the other caller. Ringtones and sounds are also played through the earpiece, as are speakerphone conversations. Earphone Jack: Allows you to plug in an optional earphone for safe, convenient hands-free conversations. Display Screen: This screen displays all the information you need to operate your phone.
- Page 17 Special Function Keys: • Shift/Asterisk: • Enters the asterisk [*] character for calling features. • In text entry mode, press the key to switch between letter cases when using the input type Alpha (ABC, Abc, abc) or T9 (T9word, T9Word, T9WORD). •...
-
Page 18: Understanding The Display Screen
• When the phone is off, press and hold this key for a few seconds to turn your phone on. When your phone is in Idle mode, press and hold this key for a few seconds to turn your phone off. Right Soft Key: •... - Page 19 Indicates that your 1X connection is dormant. Indicates that your phone is receiving 1X digital service. Indicates that your phone is receiving digital (non-3G) service. Indicates that position location is active. Indicates that position location is inactive. Indicates that your phone is in web security mode. Indicates that your phone is roaming.
- Page 20 Indicates that your phone is set to ringer plus vibrate mode. Indicates that the ringer is set at a level between 1-8 or that 1-Beep is selected. Indicates that the ringer is turned Off. Indicates that an alarm is set on your phone. Tells you a call is in progress.
-
Page 21: Memory Card
Indicates that a voice memo is being recorded. Indicates that a voice memo is being stopped. Indicates that a voice memo has been paused. Indicates that a voice memo is being played. Indicates that media has been uploaded to an online album or folder. Indicates that there is a voice caption attached to an image. -
Page 22: Inserting The Micro Sd Memory Card
Inserting the Micro SD Memory Card To insert the Micro SD memory card into your phone: Remove the back cover of the phone. Notice the memory card opening on the lower right side of the phone. Position the Micro SD memory card in line with the opening and gently slide it into place until it is fully inserted and locked. -
Page 23: Using A Micro Sd Adapter
Using a Micro SD Adapter You can also purchase a Micro SD memory adapter, which allows Micro SD memory cards to be used in SD-compatible devices. Before using with a reader, you will need to insert the Micro SD memory card into the Micro SD memory adapter. -
Page 24: Phone Basics
Phone Basics Displaying Your Phone Number In case you forget your phone number, your phone can remind you. To display your phone number: • In Idle mode, press right soft key twice, followed by . Your My Name Card is displayed with your phone number. Making Calls Making Regular Calls From the Idle screen, enter the phone number and press the... -
Page 25: Dialing And Saving Phone Numbers With Pauses
Dialing and Saving Phone Numbers with Pauses You can dial or save phone numbers with pauses for use with automated systems, such as Voice Mail or credit card billing numbers. There are two types of pauses available on your phone: •... -
Page 26: Using One-Touch/Two-Touch Speed Dialing
Tip: If the desired entry contains more than one phone number, scroll up or down to display the number you wish to call and press to make the call. Using One-Touch/Two-Touch Speed Dialing You can store up to 98 numbers in your phone’s speed dial memory to make contacting friends and family as easy as pressing a few buttons. -
Page 27: Answering Calls
Answering Calls Press the key to answer the incoming call. • When the Any Key option in the Call Answer menu is activated, you can answer a call by pressing any key (Menu To end the call, press the key. The following options are also available to handle an incoming call: •... -
Page 28: Making Three-Way Calls
• Voice Memo: allows you to record the other person’s conversation during a call. For more information, see "Voice Memo" on page 64. • Tools: accesses the Tools menu options. See "Tools" on page 56. • Phone Info: displays your phone’s hardware and software versions. See "Phone Info"... -
Page 29: End-Of-Call Options
End-of-Call Options After receiving a call from or making a call, the phone number and the duration of the call are displayed. The call details are automatically moved to the recent calls. If the phone number is not in your Contacts, press the right soft key Options and select Save to save the number to your Contacts. -
Page 30: Entering Characters Using T9 Text Input
• Text Options to configure these options: Auto Capital, Used Word Dic., Display Cand., Prediction Start, Dual Language, and Auto- Space. Entering Characters Using T9 Text Input T9 Text Input analyzes the letters you enter using an intuitive word database and creates a suitable word. -
Page 31: Using Caller Id
To enter symbols: • Select the Symbol mode. (See “Selecting a Character Input Mode” on page 21.) To enter a symbol, press the appropriate key displayed above the desired symbol character. Using Caller ID Caller ID allows people to identify a caller before answering the phone by displaying the number of the Received call. -
Page 32: Using The Speakerphone
Using the Speakerphone The speakerphone allows you to hear audio through the speaker and talk without holding your phone. During a call, press the right soft key for Options and then select Speaker On to activate the speakerphone or press . -
Page 33: History
History With the History menu, you can: • view recent calls, grouped by day, that you missed, received, or dialed Note: You can also access the most recent numbers in the three types of call records by pressing the key while in Idle mode. Viewing Your Recent Calls To view an entry in your recent calls: Press... -
Page 34: Contacts
Contacts Use the Contacts menu to store your phone numbers and other contact information. You can specify the following information for each contact you add to your Contacts list: Mobile, Home, Work, Pager, E-mail, URL, Memo, Ringer, Fax, and Others. You can store up to 600 entries. Adding New Entries Adding New Entries in Idle Mode Enter a new phone number and press the right soft key... -
Page 35: Selecting Ringer Types To Identify Entries
A list of your Contacts is displayed. You can find a specific contact in one of the following ways: • Scroll through the list using the Up and Down navigation keys. • Enter the first few letters to locate the desired Contact. If more than one Contact appears, scroll through the list using the Up and Down navigation keys. -
Page 36: Groups
• New Picture: Use the camera to take a new picture. See "Camera" on page 50. • My Pictures: Select an image from your Photo Gallery, MMS, or Transferred Images. See "Image Album" on page 51. • My Content: Select an image from your downloaded images. When you find the image, highlight it and press the left soft key Assign. -
Page 37: Group Options
Create the text message to send. See "Text & Multimedia Messages" on page 33. Group Options To add members, rename, or delete groups: Press for Menu. Press for Contacts. Select the desired group to display the group details. Press the right soft key for Options. -
Page 38: Editing Speed Dial Entries
Editing Speed Dial Entries To replace the number assigned to a speed dial location: Press for Menu. Press for Contacts. Press the right soft key for Options. Press for Settings. Press for Speed Dial. Using the navigation keys, select the speed dial number you want to edit. -
Page 39: Messaging
Messaging You can send and receive a range of different message types from your phone. Press for Menu, followed by for Messaging. This menu has the following messaging options: • Voicemail: allows you to access your voice mailbox and check for voice messages. -
Page 40: New Voice Mail Message Alerts
New Voice Mail Message Alerts When you receive a new voice message, your phone alerts you and prompts you to call to check your voice mail. To call your voice mail immediately after receiving a message: Press the key to listen to the message. Press the key to return to the Idle screen. -
Page 41: Clearing The Message Icon
Clearing the Message Icon Your phone may temporarily continue to display the message icon after you have checked your voice messages. To clear the icon from the display screen: Press for Menu. Press for Messaging. Press for Voicemail. Press for Clear Icon. Press the navigation key up to select Yes and press Text &... - Page 42 Specify a Subject and create your message using the keypad as follows. • To add a Subject line to your message, highlight the Subject box using the navigation keys. Enter the subject text. When you are finished press the left soft key for Done.
- Page 43 Changing sending options for messages From the message composition screen, highlight More using the navigation keys and press the right soft key for Options Highlight Sending Options and press Select the option you wish to change. The options available to you depend on the type of message you created.
-
Page 44: Inbox
• Press for Save to Drafts. The message is stored in the Drafts folder. When the message is sent, the draft is deleted. • Press for Save Text. The text of your message is now stored as a Quick Text message. •... - Page 45 Press for Messaging. Press for Text and Multimedia. Press for Outbox/Sent. Your messages appear in a list. Highlight the desired message and select one of the following options: • If the message was successfully sent previously: • To forward the message to a different recipient, press the left soft for Forward, and specify the new recipient.
-
Page 46: Templates
Templates This folder contains predefined messages for common occasions, as well as multimedia messages you have saved as templates. To compose a multimedia message using a template: Press for Menu. Press for Messaging. Press for Text and Multimedia. Press for Templates. Your templates appear in a list. Select Create New or highlight the desired template and press Compose your message. -
Page 47: Erase Messages
Highlight the desired saved message and press Erase Messages You can erase messages at anytime from the Inbox, Outbox/Send, Draft or Saved message folders. To erase the messages from the desired folder: Press for Menu. Press for Messaging. Press for Text and Multimedia. Press for Erase Messages. - Page 48 • Delivery Report: allows you to turn Delivery Receipt Off or On. When On, you will be notified when your message is received by the message’s recipient. • Priority: allows you to change the priority of the message between High, Normal, and Low.
-
Page 49: Memory Info
Quick Text: Quick Text messages are used to enter common responses to questions. A Quick Text can be selected and automatically entered into the message. Quick Text can also be customized to whatever you want by editing the 9 pre-set messages already stored in your phone. •... -
Page 50: E-Mail
E-Mail Your phone is capable of accessing online e-mails using the preloaded My Email application. For more details, please visit http://www.telusmobility.com/email. To access the online e-mail service (if available): Press for Menu. Press for Messaging. Press for E-Mail. Select Get New E-Mail, Online E-Mail, or My Email 2.0 and follow the on-screen instructions. - Page 51 To create a short code template: Press for Menu. Press for Messaging. Press for Short Codes. Press for Create Template. Use the keypad to enter the code. Press the down navigation key to enter a title. Press the left soft key for Done after you enter the title.
-
Page 52: Music
Music Music (Menu ) provides a menu for accessing music. To access the Music menu: Press for Menu. Press for Music. Follow the on-screen instructions. Music 44... -
Page 53: Wireless Web
Wireless Web Your phone comes equipped with Wireless Web access (Menu ) through your browser. You can view specially designed versions of popular sites including sports, weather, news, and stock quotes. When you launch the browser, the phone automatically connects to the Internet. Note: Rates and pricing vary according to your service plan. -
Page 54: Bookmarks
• Select on-screen items by using the navigation key to highlight the desired item, then press the desired soft key button (or press The left soft key is used primarily for selecting items. • If the items on a page are numbered, you can use your keypad (number keys) to select an item. -
Page 55: Search & Find
Search & Find With your new Web-enabled phone, you can search for downloadable ringtones, wallpapers, games, and other applications. With GPS Services options you can download new applications that use your phone’s GPS features To access the Search menu: Press for Menu. -
Page 56: My Files
My Files The My Files menu (Menu ) lets you download new ringtones, images, and applications from your service provider. Ringtones To download ringtones: Press Menu to access the My Files menu. Select Ringtones using the navigation keys and press Select Get New Ringtones and press . -
Page 57: Games
Games You can download and play games already stored on your phone. Press for Menu. Press for Games. Select one of the following options: • Highlight Get New Games and press . The browser will launch and take you to the download menu. •... -
Page 58: Camera
Camera Camera Using the Camera (Menu ) in your phone, you can take photos of people or events while on the move. You can send photos to other people in a multimedia message or set one as a wallpaper. Taking Pictures Taking pictures with your phone’s built-in Digital Camera is as simple as choosing a subject, pointing the lens, and pressing a button. -
Page 59: Camera Options
• If you wish to discard the current picture, press the right soft key for Options and then select Erase. You can continue to take pictures. Camera Options There are several settings associated with the full-color digital camera. These settings allow you to customize how the camera operates when taking pictures. If the subject image is in reverse on the display, you can invert it using the volume keys on the left side of the phone to display the image correctly. - Page 60 To access your saved pictures: Press Menu for Camera. Press for Image Album. Select an album: • Photo Gallery: displays pictures you have taken. • MMS: displays pictures for multimedia messages. • Transferred Images: displays pictures you have transferred from the memory card. Using the navigation keys, scroll through your stored photos and highlight the desired photograph.
-
Page 61: Settings
Settings The Camera Settings menu (Menu ) allows you to change the default options for common camera settings. • Save To: Select either Phone or Memory Card as the default save location. PictBridge Print PictBridge is an industry standard established by the Camera & Imaging Products Association (CIPA) that enables a range of digital photo solutions including direct photo printing from a digital camera to a printer without the need for a PC. - Page 62 Press the navigation key down to select Type. Press the navigation key left or right to select one of the following: • Standard: prints the standard image. • Index: prints the index information. Note: These options may vary and are dependent on the printer’s capabilities. Press the navigation key down to select Size.
-
Page 63: My Albums
My Albums The My Albums menu (Menu ) lets you quickly view the multimedia contents of your phone: • Sound Album: see "Voice Memo" on page 64. • Image Album: see "Image Album" on page 51. • External Memory: allows you to select one of the following: •... -
Page 64: Tools
Tools Tools (Menu ) provides helpful software applications to help you perform common functions, such as: • setting an alarm so that the phone rings at a specific time, to remind you of an appointment, for example • viewing a calendar and organizing your schedule •... -
Page 65: Adding New Devices
Unlike infrared, you don't need to line up the devices to beam information with Bluetooth ® . If the devices are within a range of one another, you can exchange information between them, even if they are located in different rooms. Adding New Devices Press for Menu. -
Page 66: Calculator
• Edit name: shows the name given to your phone for Bluetooth ® purposes. You can edit the name if needed. • Erase: lets you delete the highlighted trusted device. • Erase all: lets you delete all the trusted devices. •... -
Page 67: Using Today Entries
To add an event to today’s schedule: Press for Menu. Press for Tools. Press for Calendar. Select a Planner type: • Today: displays today’s events. • Scheduler: displays a calendar from which you can select a day. • Task List: displays a to-do list. •... -
Page 68: Using The Task List
To view Scheduler options: You can select the following options in the Scheduler (Menu ) by pressing the right soft key for Options: • Add New: allows you to create a new Scheduler event. • View Type: allows you to switch the Scheduler view to Monthly or Weekly. •... -
Page 69: Using Countdown
• To edit the task, press to display the task details and then press the left soft key for Edit. • To delete task, press the right soft key for Options and select Erase. Note: To delete all the tasks, from the Task List menu, press the right soft key for Options and select Erase All. -
Page 70: Mass Storage
Mass Storage You can connect your phone to your personal computer using a USB data cable, using your phone as a portable disk drive. Connect to PC You must insert a memory card into the phone in order to connect the phone to a computer. -
Page 71: Memory Info
Tip: If you can’t recall your lock code, try using the last four digits of your Mobile Directory Number or try 1234. If none of these work, call Customer Service at 1- 800-Samsung. Press left soft key for Format or press right soft key Cancel. -
Page 72: Viewing And Editing Memos
Viewing and Editing Memos Display the Memo Pad menu (Menu Use the navigation keys to highlight a memo. Press to display the memo details and then select one of the following options: • To edit the memo, press the left soft key for Edit. -
Page 73: Recording Phone Call Conversations
Wait for the beep and then start speaking. (As it is recording, the phone displays a countdown timer that shows how many seconds are left for recording.) Press the left soft key to Pause the memo. (When a memo is paused, press the left soft key again to Resume recording.) Press the right soft key... -
Page 74: Voice Service
Voice Service Activating Voice Recognition Voice recognition allows you to say commands to perform common functions supported by your phone. There is no voice training required to use the voice recognition feature. You simply say the pre-designated command displayed on your screen in a normal tone of voice to perform the desired function. -
Page 75: Send Text
Say Call. (The phone prompts you to say the number.) Say either a name stored in your Contacts or a valid 7, 10 or 11 digit North American phone number naturally and clearly. • If the phone asks you, “Did You Say,” followed by the correct number, say Yes. -
Page 76: Lookup
The Send To page opens. If the correct contact is displayed, press the Next soft key, and create your message. For more information on creating messages, see "Text & Multimedia Messages" on page 33. Lookup Lookup lets you retrieve contact information for any person in your Contacts by saying the full name of the person. -
Page 77: Configuring Confirmation
Configuring Confirmation You can configure your phone’s confirmation setting for voice-based commands. To configure confirmation: Press for Menu. Press for Tools. Press for Voice Service. Press the right soft key for Settings. Press for Confirmation. Highlight one of the following options: Automatic, Always Confirm, or Never Confirm. -
Page 78: Displaying Voice Recognition Software Version
Press for Tools. Press for Voice Service. Press the right soft key for Settings. Press for Audio Modes. Highlight one of the following: • Expert Mode: Audio guidance is provided by beeps only. • Prompt Mode: Prompts for the required information. •... -
Page 79: Settings
Settings With the Settings (Menu ), you can customize your phone’s display, sound and other settings to your suit your preference. Display Changing the Main Screen Your phone offers options for what you see on the display screen when in standby mode and when there are incoming calls. -
Page 80: Changing The Display Brightness Settings
• Custom: Enter text to define your Custom greeting. Press the left soft for Done to save and exit. Incoming Calls The Incoming Call option (Menu ) lets you specify the image to be displayed for two call types: callers With Caller ID and those with No Caller ID. The respective images are displayed depending on the type of call received. -
Page 81: Changing The Backlight Settings
Changing the Backlight Settings The Backlight setting lets you specify how long you want the display screen to remain illuminated after you open the handset or press a key. To modify the Backlight setting: Press for Menu. Press for Settings. Press for Display. -
Page 82: Changing The Keypad Light Settings
Changing the Keypad Light Settings The Keypad Light setting lets you specify how long the keypad remains illuminated after you open the handset or press a key. To modify the Keypad Light settings: Press for Menu. Press for Settings. Press for Display. -
Page 83: Ringer Type
Select a volume setting. Tip: You can adjust the ringer volume in Idle mode (or the earpiece volume during calls) using the volume key on the side of your phone. Ringer Type Different ringer types help you identify incoming calls and messages. With the Ringer Type options (Menu ), you can assign ringer types to individual Contacts entries, types of calls, schedules, types of alarms, and types of... - Page 84 Roam Ringer You can set your phone to provide a normal or a distinctive ringer type when roaming. To select a ringer type for incoming roam calls: Press for Menu. Press for Settings. Press for Sounds. Press for Ringer Type. Press for Voice Calls.
-
Page 85: Alerts
Press for Ringer Type. Press for Schedule. Press the navigation button up or down to select Ring Tones, Melodies, or My Content. Press the navigation key up or down to select desired ringer. Press to save and exit. Meeting / Silent Mode You can disable the ringer during meetings or in movie theaters. -
Page 86: Key Tone
Press for Alerts. Select an option: • for Minute Beep • for Out of Service • for Connect • for Signal Fade/Call Drop • for Power On • for Power Off Select On or Off using the navigation key. Press to save and exit. -
Page 87: Games & Apps
Press for Sounds. Press for Key Tone. Press for Tone Length. Select Short or Long. Press to save and exit. Key Tone Level The Key Tone Level allows you to set the tone volume that accompanies a key press. To select a key tone level: Press for Menu. -
Page 88: Notification
Notification The Notification option allows you to set whether your phone prompts you of incoming messages while playing games or using tools. To enable or disable Notification: Press for Menu. Press for Settings. Press for Games & Apps. Press for Notification. Select an option to change: •... -
Page 89: Nav. Key Shortcuts
• Display Candidate: when activated and you are in T9 Mode, displays possible word choices on the screen. Highlight Display On or Display Off and press • Prediction Start: sets the number of letters required to activate the Display Candidate feature. Highlight the numbers of letters you wish to start Display Candidate and press •... -
Page 90: Phone Info
Phone Info The Phone Info screen displays information about your handset’s current hardware and software. The Icon Glossary option can help you identify a display icon whose function you have forgotten. To access Phone Information: Press for Menu. Press for Settings. Press for Phone Info. -
Page 91: Airplane Mode
Press for Accessibility. Press for TTY. Press the left soft key for OK. Press the navigation key up or down to select TTY Full, TTY + Hear, TTY + Talk, or TTY Off. Press to save and exit. Voice Service You can customize your Voice Service settings. -
Page 92: Call Setup
To clear your browser settings: Press for Menu. Press for Settings. Press for More..Press for Browser. Select an option: • Clear Web History: select Yes or No. • Clear Web Cache: select Yes or No. • Clear Web Cookies: select Yes or No. Press to save and exit. - Page 93 Press for More..Press for Call Setup. Press for Abbreviated Dialing. Select On or Off and press If you selected On, input the five or six digit prefix (for example, area code and prefix) and press To make an Abbreviated Dial call: Enter the last four or five digits of the prefix phone number.
- Page 94 Select On or Off and press Making a call using Contacts Match: Dial the last few digits of the desired number and press . A list of Contacts entries appear whose last few digits match the sequence you dialed. Use the up or down navigation key to select the Contact you want to call and press Auto Prepend When enabled, Auto Prepend prefixes any number you dial with the prefix (Auto...
-
Page 95: Data Setup
Press for Plus Dialing. Press for Plus Code. Select Enable and press to save. To configure an International Dial Prefix: Press for Menu. Press for Settings. Press for More..Press for Call Setup. Press for Plus Dialing. Press for Int’l Dial Prefix. Enter the international dialing prefix number and press to save. -
Page 96: Headset Mode
Press for Settings. Press for More..Press for Data Setup. Using the navigation keys, highlight the desired option. • Data: Configure the type of connection options. Use the navigation keys to select one of the following. • Date/Fax Off: Allows normal voice call use. •... -
Page 97: Restrict And Lock
network to detect your position. Turning Location off will hide your location from everyone except 911. Note: Even if the Location feature is enabled, no service may use your location information without your expressed permission. To enable your phone’s Location feature: Press for Menu. -
Page 98: Roaming
• Lock: select Lock or Unlock. Press to save and exit. To modify the lock settings of your camera: Press for Menu. Press for Settings. Press for More... Press for Restrict and Lock. Press for Camera/Pictures. Enter your User Lock. The factory settings are the last four digits of your telephone number. -
Page 99: Security
Select an option: • Set Mode: controls which networks you can access. Select Automatic to have the phone search for an alternate system when your Home system is not available, or select Home Only to prevent your phone from roaming on other networks. •... -
Page 100: Keypad Lock
Keypad Lock The Keypad Lock feature helps to prevent accidental key presses when the handset is in your pocket or purse. When the Keypad Lock is on, the buttons are disabled until the handset is unlocked. To change the Keypad Lock settings: Press for Menu. -
Page 101: Landscape Mode
Landscape Mode Landscape View of Your Phone Display screen Left landscape softkey Right landscape softkey QWERTY keypad Opening Your Phone to a Landscape View Change the phone from portrait to landscape mode by turning the phone on its side so that the display screen is on the left. Carefully press the display screen of the phone and slide it up. -
Page 102: Creating And Sending Messages - Landscape Mode
Creating and Sending Messages - Landscape Mode Slide open your phone to Landscape mode. At the Idle screen, press the left landscape softkey for Send Msg. Enter the phone number or e-mail address manually, or, to send the message to a saved contact, press the Down navigation key, highlight Contact List and press Highlight the desired contact and press key. -
Page 103: Safety
Safety Getting the Most Out of Your Reception Keeping Tabs on Signal Strength The quality of each call you make or receive depends on the signal strength in your area. Your phone informs you of the current signal strength by displaying a number of bars next to the signal strength icon. -
Page 104: Ul Certified Travel Adapter
• Speak directly into the mouthpiece. • Avoid exposing your phone and accessories to rain or liquid spills. If your phone does get wet, immediately turn the power off and remove the battery. If it’s inoperable, return it to a dealer store or call Customer Support for service. - Page 105 When using your phone in the car: • Get to know your phone and its features, such as speed dial and re-dial. • When available, use a hands-free device. • Position your phone within easy reach. • Let the person you are speaking to know you are driving; if necessary, suspend the call in heavy traffic or hazardous weather conditions.
- Page 106 Note: Always turn off the phone in health care facilities and request permission before using the phone near medical equipment. Turning Off Your Phone Before Flying Turn off your phone before boarding any aircraft. To prevent possible interference with aircraft systems, the U.S. Federal Aviation Administration (FAA) regulations require you to have permission from a crew member to use your phone while the plane is on the ground.
-
Page 107: Caring For The Battery
The guidelines listed below help you get the most out of your battery’s performance. • Use only Samsung approved batteries and travel adapters. These chargers are designed to maximize battery life. Using other batteries or chargers voids your warranty and may cause damage. -
Page 108: Acknowledging Special Precautions And Industry Canada Notice
Note: For safety, do not handle a damaged or leaking LiIon battery. Acknowledging Special Precautions and Industry Canada Notice Only use approved batteries, antennas, and chargers. The use of any unauthorized accessories may be dangerous and will invalidate the phone warranty if said accessories cause damage or a defect to the phone. -
Page 109: Owner's Record
Specific Absorption Rates (SAR) for Wireless Phones The SAR is a value that corresponds to the relative amount of RF energy absorbed in the head of a user of a wireless handset. The SAR value of a phone is the result of an extensive testing, measuring and calculation process. - Page 110 T9 Text Input is licensed by Tegic Communications and is covered by U.S. Pat. 5,818,437, U.S. Pat. 5,953,541, U.S. Pat. 6,011,554 and other patents pending. Safety 102...
-
Page 111: Warranty
Limited Warranty does not cover any battery if: (i) the battery has been charged by a battery charger not specified or approved by SAMSUNG for charging the battery; (I) any of the seals on the battery are broken or show evidence of tampering; or (IA) the battery has been used in equipment other than the SAMSUNG phone for which it is specified. - Page 112 SAMSUNG determines that any Product is not covered by this Limited Warranty, Purchaser must pay all parts, shipping, and labor charges for the repair or return of such Product. What Are the Limits On SAMSUNG's Liability? EXCEPT AS SET FORTH IN THE EXPRESS WARRANTY CONTAINED HEREIN, PURCHASER TAKES THE PRODUCT "AS IS,"...
- Page 113 This Limited Warranty allocates risk of Product failure between Purchaser and SAMSUNG, and SAMSUNG's Product pricing reflects this allocation of risk and the limitations of liability contained in this Limited Warranty. The agents, employees, distributors, and dealers of SAMSUNG are not authorized to make modifications to this Limited Warranty, or make additional warranties binding on SAMSUNG.
-
Page 114: Index
Index E-Mail 42 Emergency Numbers 16 Entering Text ABC Mode Accessibility Selecting a Character Input Mode TTY (Text Telephone) Accessing the Menus in Symbols and Numbers Landscape Mode 94 T9 Text Input Airplane Mode 83 Alert Notification 77 Application Settings 79 Auto-Answer 84 Game Settings 79 Games 49... - Page 115 Mass Storage 62 Meeting / Silent Mode 77 Security Settings 91 Memo Pad 63 Sent Messages 36 memory card 13 Settings 71 Messaging 31 Short Codes 42 Default Text Entry Mode Silent Mode 77 Erasing Text Messages Speakerphone 24 Forwarding Messages Speed Dialing 18 Message Setup Options Speed Dials...
- Page 116 Launch Web Navigating World Time 64 Index 108...
Need help?
Do you have a question about the SCH-u450 Series and is the answer not in the manual?
Questions and answers