Table of Contents
Advertisement
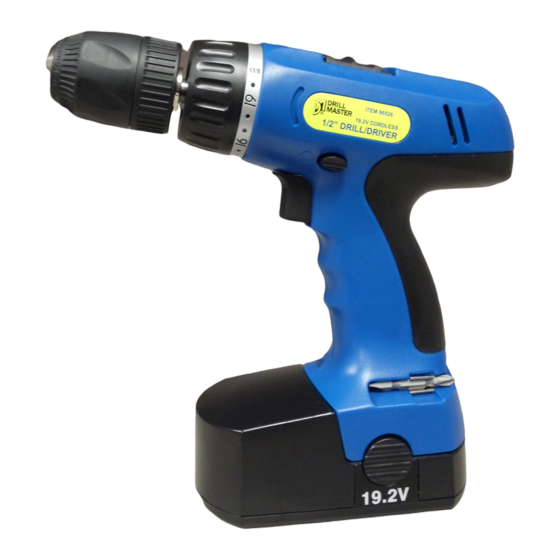
19.2V 1/2"CORDLESS
SEt-up AnD OpERAtIng InStRuCtIOnS
Diagrams within this manual may not be drawn proportionally.
Due to continuing improvements, actual product may differ slightly from the product described herein.
Distributed exclusively by Harbor Freight tools
Visit our website at: http://www.harborfreight.com
Read this material before using this product.
Failure to do so can result in serious injury.
SAVE tHIS MAnuAL.
©
Copyright
2007 by Harbor Freight Tools
manual or any artwork contained herein may be reproduced in any shape or form
without the express written consent of Harbor Freight Tools.
For technical questions or replacement parts, please call 1-800-444-3353.
DRILL/DRIVER
Model
3491 Mission Oaks Blvd., Camarillo, CA 93011
96526
®
. All rights reserved. No portion of this
®
.
Advertisement
Table of Contents

Related Manuals for Drill Master DRILL MASTER 96526


Summary of Contents for Drill Master DRILL MASTER 96526
- Page 1 Copyright 2007 by Harbor Freight Tools manual or any artwork contained herein may be reproduced in any shape or form without the express written consent of Harbor Freight Tools. For technical questions or replacement parts, please call 1-800-444-3353. Model 96526 ®...
-
Page 2: Important Safety Information
Keep this manual for the safety warnings and precautions, assembly, operating, inspection, maintenance and cleaning procedures. Write the product’s serial number in the back of the manual near the assembly diagram (or month and year of purchase if product has no number). Keep this manual and the receipt in a safe and dry place for future reference. -
Page 3: General Safety Rules
gEnERAL SAFEtY RuLES WARnIng! Read all instructions Failure to follow all instructions listed below may result in electric shock, fire, and/or serious injury. The term “power tool” in all of the warnings listed below refers to your line-operated (corded) power tool or battery-operated (cordless) power tool. - Page 4 Avoid accidental starting. ensure the switch is in the off-position before plugging in. Carrying power tools with your finger on the switch or plugging in power tools that have the switch on invites accidents. Remove any adjusting key or wrench before turning the power tool on. A wrench or a key left attached to a rotating part of the power tool may result in personal injury.
-
Page 5: Specific Safety Rules
SpECIFIC SAFEtY RuLES Maintain labels and nameplates on the tool. These carry important safety information. if unreadable or missing, contact Harbor Freight Tools for a replacement. Avoid unintentional starting. Prepare to begin work before turning on the tool. Do not lay the tool down until it has come to a complete stop. Moving parts can grab the surface and pull the tool out of your control. -
Page 6: Grounding
To reduce the risk of personal injury where the drill bit may contact hidden wiring, hold the tool by its plastic insulated gripping surfaces. Contact with a “live” wire will make exposed metal parts of the Cordless Drill/Driver “live” and will shock the operator. -
Page 7: Extension Cords
the tool should electrically malfunction or break down, grounding provides a low resistance path to carry electricity away from the user, reducing the risk of electric shock. (See 3-prong plug and Outlet.) The grounding prong in the plug is connected through the green wire inside the cord to the grounding system in the tool. - Page 8 When using more than one extension cord to make up the total length, make sure each cord contains at least the minimum wire size required. (See table A.) if you are using one extension cord for more than one tool, add the nameplate amperes and use the sum to determine the required minimum cord size.
-
Page 9: Specifications
Net Weight When unpacking, check to make sure that the item is intact and undamaged. if any parts are missing or broken, please call Harbor Freight Tools at the number shown on the cover of this manual as soon as possible. -
Page 10: To Attach The Charged Battery
insert the Battery (29) into the Charger Stand (23). (See Figure A.) The Battery (29) will charge in approximately 3 to 5 hours. Do not charge the Battery for longer than 5 hours. Subsequent charges will also take between 3 and 5 hours. -
Page 11: To Operate Forward/Reverse Switch
OpERAtIng InStRuCtIOnS Read the EntIRE IMpORtAnt SAFEtY InFORMAtIOn section at the beginning of this manual including all text under subheadings therein before set up or use of this product. to Operate the Forward/Reverse Switch The three-position Forward/Reverse Switch (7) is located on top of the Power Switch (10). -
Page 12: To Operate The Torque Selector
Hold the Keyless Chuck (1) firmly while turning the forward section of the Chuck counterclockwise. This opens the Chuck to accept the drill or screw driver bit. (See Figure D.) Continue turning the Keyless Chuck (1) counterclockwise until the drill bit or screw driver slips into the Chuck Jaws. -
Page 13: Drill Bit Selection
A higher setting equals more torque; therefore, position #1 (low torque) is appropriate for driving screws into wood without stripping the screw, but would not provide enough torque for drilling or driving into harder materials. (See Figure E.) Position #20 is indicated by a drill bit icon and should be used for drilling only. (See Figure E.) Always use sharp drill bits. -
Page 14: Inspection, Maintenance, And Cleaning
The Drill/Driver has a variable speed for drilling. To vary the speed of the drilling action, vary the pressure on the Power Switch (10). Drill only as deep as is necessary. Do not drill deeper than necessary into walls or other areas where you cannot identify any possible hazards behind the drilling surface. -
Page 15: Troubleshooting
Battery (29) has charged from 3 to 5 hours but will not power the Drill/ Driver, the Battery may need replacement. Purchase replacement batteries only from Harbor Freight Tools. Do not attempt to repair the Battery. • Contact local hazardous waste disposal authorities for proper Battery disposal. -
Page 16: Parts List
pLEASE READ tHE FOLLOWIng CAREFuLLY THe MANUFACTUReR AND/OR DiSTRiBUTOR HAS PROViDeD THe PARTS LiST AND ASSeMBLY DiAGRAM iN THiS MANUAL AS A ReFeReNCe TOOL ONLY. NeiTHeR THe MANUFACTUReR OR DiSTRiBUTOR MAKeS ANY RePReSeNTATiON OR WARRANTY OF ANY KiND TO THe BUYeR THAT He OR SHe iS QUALiFieD TO MAKe ANY RePAiRS TO THe PRODUCT, OR THAT He OR SHe iS QUALiFieD TO RePLACe ANY PARTS OF THe PRODUCT. -
Page 17: Assembly Diagram
ASSEMBLY DIAgRAM SKU 96526 For technical questions, please call 1-800-444-3353. Page 17... -
Page 18: Limited 90-Day Warranty
LIMItED 90 DAY WARRAntY Harbor Freight Tools Co. makes every effort to assure that its products meet high quality and durability standards, and warrants to the original purchaser that this product is free from defects in materials and workmanship for the period of 90 days from the date of purchase.
Need help?
Do you have a question about the DRILL MASTER 96526 and is the answer not in the manual?
Questions and answers
The battery is not charging any longer
The Drill Master 96526 battery may not be charging due to the following possible causes:
1. Battery not connected properly – Ensure the battery is correctly connected.
2. Low Battery – Recharge the battery for 3 to 5 hours.
3. Defective Battery – If the battery does not charge after the recommended time, it may need replacement.
If the battery still does not charge, consider replacing it with a new one from Harbor Freight Tools.
This answer is automatically generated