Sign In
Upload
Download
Table of Contents
Contents
Add to my manuals
Delete from my manuals
Share
URL of this page:
HTML Link:
Bookmark this page
Add
Manual will be automatically added to "My Manuals"
Print this page
×
Bookmark added
×
Added to my manuals
Manuals
Brands
Pioneer Manuals
Receiver
XR-A4800
Operating instruction
Pioneer XR-A4800 Operating Instruction
Stereo cd cassette deck receiver; speaker system
Hide thumbs
Also See for XR-A4800
:
Service manual
(74 pages)
1
2
Table Of Contents
3
4
5
6
7
8
9
10
11
12
13
14
15
16
17
18
19
20
21
22
23
24
25
26
27
28
29
30
31
32
33
34
35
36
37
38
39
40
41
42
43
44
45
46
47
48
49
50
51
52
page
of
52
Go
/
52
Contents
Table of Contents
Troubleshooting
Bookmarks
Table of Contents
English
Table of Contents
Before You Start
Checking What's in the Box
Using this Manual
Putting the Batteries in the Remote
Using the Remote Control
Finding a Suitable Location
Avoiding Condensation Problems
Moving the System Unit
Discs Compatible with this System
Connecting up the Rear Panel
Connecting the Speakers
Connecting the Front Speakers
Connecting the Rear Speakers
Placing the Speakers
Connecting the Radio Antennas
Connecting External Antennas
Connecting Auxiliary Components
Connecting the Power
Switching the Demo Mode On/Off
Controls & Displays Front Panel
Display
Remote Control
Getting Started
Switching on and Setting the Clock
Playing Cds
Summary of Playback Controls for Cds
Changing Discs
Tuning in Stations
Improving Poor FM Reception
Playing Cassette Tapes
Resetting the Tape Counter
Relay Play
More CD Features
Programming a Playlist
Using Repeat Play
Using Random Play
More Tuner Features
Saving Stations for Quick Recall
Listening to Station Presets
Changing the Frequency Step
Using RDS
Displaying RDS Information
Searching for RDS Program Types
Recording Cassette Tapes
Making Tape Recordings
Automatically Recording Cds
Copying Tapes
Improving am Tape Recordings
Singing Karaoke
Using Sound Effects
Using the Sound Morph
Using Preset Effects
Audio Preset Mode
Surround Preset Mode
Changing Sound Presets Using the Remote
Using Individual Sound Effects
Equalizer Mode
Zoom Surround Mode
P.bass Mode
Changing Sound Effects Using the Remote
Saving Your Own Settings
Changing the Sound Display
Muting the Sound
Using the Timer
Setting the Wake-Up Timer
Setting the Sleep Timer
Setting the Record Timer
Canceling the Timer
1 Additional Information
Taking Care of Your System
Disc Lens Cleaner
Taking Care of Your Discs
Storing Discs
Discs to Avoid
Using Cassette Tapes
Tapes You Should Avoid
Protecting Your Recordings
Troubleshooting
Specifications
French
Avant de Commencer
Faire L'inventaire de la Boîte
Utilisation de Ce Manuel
Placer Les Piles Dans la Télécommande
Utilisation de la Télécommande
Rechercher un Endroit Adapté
Comment Éviter Les Problèmes de Condensation
Déplacer L'appareil
Disques Compatibles Avec Cette Chaîne
Raccordement
Le Panneau Arrière
Raccorder Les Enceintes
Raccorder Les Enceintes Avant
Raccorder Les Enceintes Arrière
Choisir L'emplacement des Enceintes
Raccorder Les Antennes Radio
Raccoder des Antennes Extérieures
Raccoder Les Composants Auxiliaires
Mettre Sous Tension
Activation/Désactivation du Mode de Démonstration
Commandes Et Affichages Panneau Frontal
Affichage
Télécommande
Mise en Service
Mise en Marche Et Réglage de L'horloge
Lecture de CD
Sommaire des Commandes de Lecture Pour CD
Changer Les Disques
Capter Les Stations
Améliorer Une Mauvaise Réception FM
Lecture Et Enregistrement de Cassettes
Remise À Zéro du Compteur de Défilement de Bande
Lecture Enchaînée
Informations Supplémentaires Sur Les CD
Programmation des Répertoires
Utilisation de la Lecture Répétée
Utilisation de la Lecture Aléatoire
Fonctions Supplémentaires du Tuner
Mémorisation de Station Pour un Rappel Rapide
Écoute de Préréglages de Station
Changement du Pas de la Fréquence
Utilisation du RDS
Affichage de L'information RDS
Recherche D'un Type de Programme RDS
Enregistrement Sur Cassettes
Cassette
Comment Effectuer des Enregistrements Sur Cassette
Enregistrement Automatique de CD
Copies de Cassettes
Amélioration des Enregistrements am Sur Cassette
Chanter Avec Le Karaoke
Manipuler Le Son
Utilisation de la Transformation du Son
Utilisation des Effets Préréglés
Mode Audio PréDéfini
Mode Surround Préréglé
Changement des Préréglages du Son en Utilisant la Télécommande
Utilisation des Effets Sonores Individuels
Mode Equalizer
Mode Zoom Surround
Mode P .Bass
Changement des Effets Sonores en Utilisant la Télécommande
Sauvegarder Vos Mises Au Point
Modifier L'affichage du Son
Mettre Le Son en Sourdine
Utilisation de la Minuterie
Configuration de la Minuterie de Réveil
S'endormir Au Son de la Radio
Réglage du Programmateur D'enregistrement
Annuler Le Programmateur
1 Informations Supplémentaires
Comment Entretenir Le Système
Produits Nettoyants Pour la Lentille de Disque
Comment Entretenir Vos Disques
Rangement des Disques
Disques À Éviter
Utilisation des Cassettes
Les Cassettes À Éviter
Protéger Vos Enregistrements
Guide de Dépannage
Spécifications
Advertisement
Quick Links
1
Table of Contents
2
Specifications
Download this manual
See also:
Service Manual
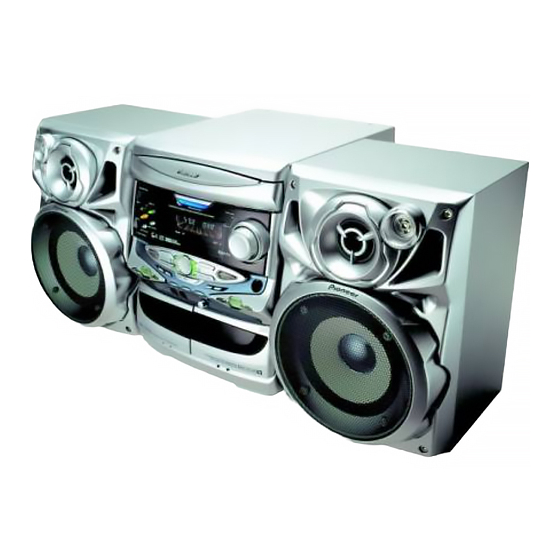
STEREO CD CASSETTE DECK RECEIVER
AMPLI-TUNER/LECTEUR CD/DOUBLE PLATINE A CASSETTE
XR-A6800
XR-A4800
SPEAKER SYSTEM
ENCEINTES ACOUSTIQUES
S-A6800
S-A4800
Operating Instructions
Mode d'emploi
Table of
Contents
Previous
Page
Next
Page
1
2
3
4
5
Advertisement
Table of Contents
Need help?
Do you have a question about the XR-A4800 and is the answer not in the manual?
Ask a question
Questions and answers
Related Manuals for Pioneer XR-A4800
Stereo System Pioneer XR-A6800 Service Manual
(74 pages)
Cassette Player Pioneer XR-A6800 Service Manual
(73 pages)
Receiver Pioneer VSX-818V Operating Instructions Manual
Audio/video multi-channel receiver (76 pages)
Receiver PIONEER XR-A9800D Operating Instruction
Stereo dvd cassette deck receiver, speaker system (116 pages)
Receiver PIONEER XR-A4900 Operating Instruction
Stereo cd cassette deck receiver; speaker system (52 pages)
Receiver PIONEER XR-A9700DV Operating Instruction
Stereo dvd cassette deck receiver; speaker system (116 pages)
Receiver Pioneer XR-MR7 Service Manual
Stereo cd/cd-r receiver (108 pages)
Receiver Pioneer XR-MT3 Service Manual
Stereo cd receievr (61 pages)
Receiver Pioneer XR-P560F Service Manual
Stereo file-type cd cassette deck receiver (14 pages)
Receiver Pioneer XR-P560F Operating Instructions Manual
Stereo file-type cd cassette deck receiver (30 pages)
Receiver Pioneer XR-VS200 Service Manual
Stereo cd/vcd cassette deck receiver (89 pages)
Receiver Pioneer XR-P260F Service Manual
Stereo file-type cd cassette deck receiver (54 pages)
Receiver Pioneer XR-A780 Operating Instructions Manual
Stereo cd cassette deck receiver, speaker system (52 pages)
Receiver Pioneer XR-Q150 Service Manual
Stereo cd deck receiver (63 pages)
Receiver Pioneer XR-P310 Operating Instructions Manual
Stereo cd cassette deck receiver / speaker system (36 pages)
Receiver Pioneer XR-2000 Service Manual
Stereo file-type cd cassette deck receiver (110 pages)
This manual is also suitable for:
Xr-a6800
S-a4800
S-a6800
Table of Contents
Save PDF
Print
Rename the bookmark
Delete bookmark?
Delete from my manuals?
Login
Sign In
OR
Sign in with Facebook
Sign in with Google
Upload manual
Upload from disk
Upload from URL


Need help?
Do you have a question about the XR-A4800 and is the answer not in the manual?
Questions and answers