Table of Contents
Advertisement
Quick Links
Advertisement
Table of Contents

Related Manuals for Sony StorStation AITi1040


Summary of Contents for Sony StorStation AITi1040
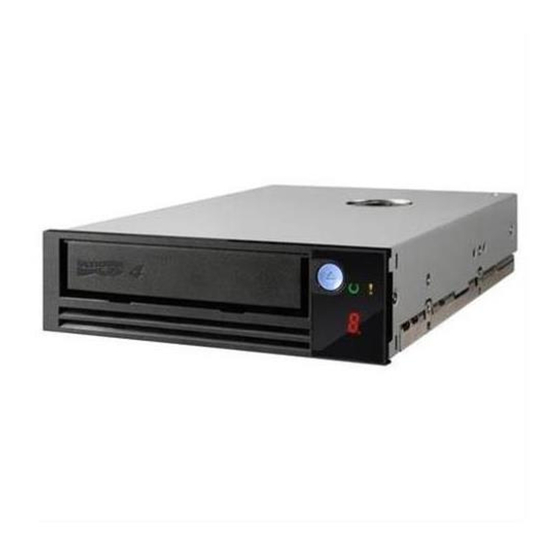
- Page 1 4-681-444-19(1) AIT Drive User’s Guide AIT-5 TAPE DRIVE AITi1040/AITi1040V AIT-4 TAPE DRIVE AITi520/AITi520V AIT-3 Ex TAPE DRIVE AITi390/AITi390V AIT-3 TAPE DRIVE AITi260/AITi260V AIT-2 TAPE DRIVE AITi130/AITi130V AIT-1 TAPE DRIVE AITi90/AITi90V 2003 Sony Corporation...
-
Page 2: Safety Regulations
OF ANY KIND WITH REGARD TO electric shock, do not expose THIS DOCUMENT. this apparatus to rain or Sony shall not be liable for errors moisture. contained herein, indirect, special, To avoid electrical shock, do not incidental or consequential damages in open the cabinet. -
Page 3: Important Safeguards
Im Sinne der EU Richtlinien bezüglich safety instructions completely before Produktsicherheit, EMV und R&TTE operating the appliance, and keep this ist Sony Corporation, 1-7-1 Konan manual for future reference. Minato-ku Tokyo, 108-0075 Japan der Hersteller dieses Produktes. Carefully observe all warnings, Bevollmächtigter ist Sony... - Page 4 INSTALLATION SERVICE Water and Moisture – Do not use Damage Requiring Service – Unplug power-line operated units near water - the unit from the wall outlet and refer for example, near a bathtub, servicing to qualified service washbowl, kitchen sink, or laundry personnel under the following tub, in a wet basement, or near a conditions:...
-
Page 5: Table Of Contents
Product Specifications ..................37 Sony Contacts ......................39 • Sony cannot accept liability for data written to cartridges lost as a result of using this product. • Sony bears no responsibility for any financial damages, lost profits, or claims made by third... -
Page 6: Overview
The AITi260, AITi260V, AITi130, AITi130V, AITi90, and AITi90V drives achieve high data reliability through third-level Error Correction Code (second-level Error Correction Code for the AITi1040, AITi1040V, AITi520, AITi520V, AITi390, and AITi390V drives). The AITi1040, AITi1040V, AITi520, AITi520V, AITi390, AITi390V,... -
Page 7: Introduction
Introduction About AIT Drives The AITi1040/AITi1040V AIT-5 Tape Drives are internal AIT drive units that use data cartridges conforming to the AIT-5 format. The AITi520/AITi520V AIT-4 Tape Drives are internal AIT drive units that use data cartridges conforming to the AIT-4 format. - Page 8 Features The AITi1040/AITi1040V drives have the following features: • Supports reading and writing to data cartridges conforming to the AIT-5, AIT-4, AIT-3 Ex, and AIT-3 formats. • The second-level error correction code guarantees high data reliability writing to data cartridges conforming to the AIT-5, AIT-4, and AIT-3 Ex formats.
- Page 9 The AITi390/AITi390V drives have the following features: • Supports reading and writing to data cartridges conforming to the AIT-3 Ex, AIT-3, and AIT-2 Turbo formats. • Supports reading from data cartridges conforming to the AIT-2, AIT-1 Turbo, AIT-1, and AIT-E Turbo formats. •...
- Page 10 The AITi130/AITi130V drives have the following features: • Supports reading and writing to data cartridges conforming to the AIT-2 and AIT-1 formats. • The third-level error correction code guarantees high data reliability. • Data compression provides 130 gigabytes of storage on SDX2-50C data cartridges.
-
Page 11: Precautions
Precautions Installation Avoid placing the drive in a location subject to: – high humidity – high temperature – mechanical shock and vibration – direct sunlight For details, see “Specifications” on page 37. Operation • Do not move the drives while they are operating. It may cause malfunctions. -
Page 12: Compatible Data Cartridges
Compatible Data Cartridges The AITi1040/AITi1040V drives can be used with data cartridges marked with the AIT-5, AIT-4, AIT-3 Ex, or AIT-3 logo. The AITi520/AITi520V drives can be used with data cartridges marked with the AIT-4 or AIT-3 Ex logo. The AITi390/AITi390V drives can be used with data cartridges marked with the AIT-3 Ex, AIT-3, AIT-2 Turbo, AIT-2 (read only), AIT-1 Turbo (read only), AIT-1 (read only), or AIT-E Turbo (read only) logo. -
Page 13: Scsi Termination
SCSI Termination The AITi1040, AITi1040V, AITi520, AITi520V, AITi390, AITi390V, AITi260, AITi260V, AITi130, AITi130V, AITi90, and AITi90V drives conform to the Microsoft PC97 standard, which requires the internal (naked) drive to be terminated with an external terminator. Microsoft PC97 SCSI requirements SCSI peripherals must not terminate the bus. -
Page 14: Installation
Installation SCSI Connection/Setting the SCSI ID Rear view figures are examples of the AITi1040/AITi1040V drives. SCSI ID SCSI ID SCSI 68pin Connector Power Connector Jumpers GND GND 12 V Parity Disable Enable Note : = CLOSED/Jumper OPEN/Jumper not installed Don’t care Parity Disable Jumper Parity check function can be disabled by Jumper. -
Page 15: Option Switches (Dip Switch)
Option Switches (DIP Switch) DIP Switch DIP Switch Positions (for the AITi1040, AITi1040V, AITi520, AITi520V, AITi390, and AITi390V Drives) Default DR (Disaster Recovery) Mode (OFF) Emulation Mode (OFF) AIT Library Interface Mode (ON) Reserved (OFF) Terminator Power (ON) Periodic Cleaning Req... - Page 16 Emulation Mode To enable Emulation Mode, set DIP switch 2 [Emulation Mode] to ON. Emulation Mode for the AITi1040/AITi1040V drives return the following as the Product Identification field of the Inquiry command. SDX-900V Emulation Mode for the AITi520/AITi520V drives return the following as the Product Identification field of the Inquiry command.
- Page 17 Periodic Cleaning Request Mode To enable Periodic Cleaning Request Mode, set DIP switch 6 [Periodic Cleaning Req] to ON. The “CLEANING REQUEST” LED on the front panel lights after every 100 hours of operation. When this LED lights, clean the drive with a cleaning cartridge. Note To maintain the drive in optimum condition in environments affected by dust and other contaminants, we recommend keeping cleaning requests enabled.
- Page 18 DIP Switch Positions (for the AITi260, AITi260V, AITi130, AITi130V, AITi90, and AITi90V Drives) Default Drive Mode (OFF) Drive Mode (OFF) Drive Mode (OFF) Drive Mode (OFF) Terminator Power (ON) Periodic Cleaning Req (OFF) DC Control (1) (ON) DC Control (2) (OFF) Emulation Mode To enable Emulation Mode, set DIP switches 1 to 4 [Drive Mode] to ON.
- Page 19 Periodic Cleaning Request Mode To enable Periodic Cleaning Request Mode, set DIP switch 6 [Periodic Cleaning Req] to ON. The “CLEANING REQUEST” LED on the front panel lights after every 100 hours of operation. When this LED lights, clean the drive with a cleaning cartridge. Note To maintain the drive in optimum condition in environments affected by dust and other contaminants, we recommend keeping cleaning requests enabled.
-
Page 20: Mounting Holes
Mounting Holes The following figures apply to the AITi390/AITi390V drives. However, the locations of the mounting holes for the other models are the same. For 3.5" Standard Height 60.0 0.3mm 8.4 0.5mm [2.36" 0.01"] [0.33" 0.02"] 21.0 0.3mm [0.83" 0.01"] 90.0 0.3mm [3.54"... - Page 21 For 5.25" Half Height 7.0 0.5mm [0.28" 0.02"] 79.2 0.3mm [3.12" 0.01"] 8.4 0.5mm [0.33" 0.02"] 47.5 0.3mm [1.87" 0.01"] 79.2 0.3mm [3.12" 0.01"] 7.6 0.5mm 7.4 0.6mm 155.0 0.5mm [6.10" 0.02"] [0.30" 0.02"] [0.29" 0.02"] 9.8 0.6mm (Connecter [0.39" 0.02"] 70.0 0.3mm [2.76"...
-
Page 22: Reconfiguring From 5.25" Model To 3.5" Model
Reconfiguring From 5.25" Model to 3.5" Model You can reconfigure the 5.25" model to the 3.5" model yourself. Remove the 2 screws for each side rail. Take the side rail off. Side Rail (L) Side Rail (R) -
Page 23: Orientation
Orientation 10 10 10 10... -
Page 24: Attaching And Removing The Dust Cover
Attaching and Removing the Dust Cover Attaching the Dust Cover Align the dust cover’s hinge clips (one on each side) with the pins of the drive bezel. • The dust cover should be positioned so that the magnets on the cover’s back face the drive bezel. This magnet does not affect the tape of the cartridge. - Page 25 Press down at an angle on each side in turn until you hear the hinge clips click into place. Caution Do not press the dust cover in horizontally from the front. Doing so could cause the dust cover to break. Close the dust cover.
-
Page 26: Removing The Dust Cover
Removing the Dust Cover Open the dust cover. Holding the dust cover at both corners, carefully raise the dust cover. The dust cover hinge clips and drive bezel pins uncouple. Note We recommend that you use the drive with the dust cover. -
Page 27: Operation
Operation Location of 3 LEDs There are three LED indicators (TAPE MOTION LED, CLEANING REQUEST LED, REPLACE TAPE LED) and an EJECT button on the front panel of the unit. Front Panel (for 3.5" Standard Height) Advanced Intelligent Tape TAPE CLEANING REPLACE MOTION... -
Page 28: Drive Operation
Drive Operation Loading a Cartridge Note While setting the data cartridge, do not turn off the host computer. This may cause a malfunction or damage data. Turn on the host computer. Check that the drive’s TAPE MOTION LED, CLEANING REQUEST LED and REPLACE TAPE LED go off. -
Page 29: Unloading A Cartridge
Unloading a Cartridge The cartridge can be removed from the AITi1040, AITi1040V, AITi520, AITi520V, AITi390, AITi390V, AITi260, AITi260V, AITi130, AITi130V, AITi90, and AITi90V drives either in response to a SCSI Unload Command, or by pressing the EJECT bottom. By pressing EJECT button, the tape is rewound and the cartridge ejected from the slot. -
Page 30: Using A Cleaning Cartridge
AITi390V , and the cartridge is automatically ejected when finished. * The cleaning time varies depending on the condition of the drive (AITi1040, AITi1040V, AITi520, AITi520V, AITi390, AITi390V). Caution Do not rewind the cleaning cartridge and reuse it. When you reach the end of the cartridge, dispose it and buy a new cleaning cartridge with the AIT logo. -
Page 31: Emergency Tape Removal Procedure
Storage Precautions • Keep cartridges in their cases when not in the drives. • Avoid storing cartridges in dusty locations, in direct sunlight, near heaters or air conditioners, or in humid locations. • Do not place cartridges on dashboards or in car storage trays. Emergency Tape Removal Procedure Remove the drive from the chassis or enclosure to allow access to the bottom of the drive. - Page 32 After the tape slack has been removed, continue to turn the Loading motor shaft located on the bottom of the drive clockwise with a precision screwdriver until the tape cartridge is lifted out of the drive mechanism and is ejected. Return the drive to Sony for repair.
-
Page 33: Worm Function
“WORM” is an acronym for “Write Once Read Many”, a function that allows data to be written to the same place on a tape only once, but permits that data to be read from the tape for any number of times. The AITi1040, AITi1040V, AITi520, AITi520V, AITi260, AITi260V, AITi130, and AITi130V drives support WORM cartridges. - Page 34 Notes • Sony cannot accept liability for data written onto a WORM cartridge that is lost as a result of using this unit. • Sony accepts no responsibility for any financial damages, lost profits, or...
-
Page 35: Interface Implementation
Initiator Defected Error Disconnect Message Parity Error Extended Message Message Reject – Synchronous Data Transfer No Operation Request Restore Pointers – Wide Data Transfer Request Save Data Pointer – Parallel Protocol Request (AITi1040, AITi1040V, AITi520, AITi520V, AITi390, AITi390V, AITi260, AITi260V) -
Page 36: Supported Scsi Commands
Supported SCSI Commands Report Density Support Erase Report Device Identifier Inquiry (AITi1040, AITi1040V, AITi520, Load/Unload AITi520V, AITi390, AITi390V, Locate AITi260, AITi260V) Log Sense Report Luns Log Select Request Sense Mode Select (6) Reserve (6) Mode Select (10) Reserve (10) (AITi1040, AITi1040V,... -
Page 37: Specifications
60 dB (A) Note The sound-meter on (A) scale is located 1 m (3.3 ft.) in front of the center of the drive front panel. Mass AITi1040, AITi1040V AITi520, AITi520V, AITi390, AITi390V 3.5" 0.8 kg (28.2 oz.) 780 g (27.5 oz.) 5.25"... -
Page 38: Power Requirements
20 to 80% RH ( RH<30%/h) Air-cooling Requirement Surrounding temperature < 40 ˚C (104 ˚F) Clean air flow is recommended to minimize the possibility of data loss. Power Requirements AITi1040, AITi1040V Current Voltage Max Ripple Typical Maximum 5 V +/– 5% 100 mVp-p 1.7 A... -
Page 39: Sony Contacts
FAX: (416) 499-8541 Sony Business Europe URL: http://www.sonyisstorage.com/ Electronics Devices Marketing (Singapore) (A division company of Sony Electronics (S) Pte. Ltd.) Enterprise Storage Solutions Dept. 2 International Business Park, #01-10 Tower One, The Strategy, Singapore 609930 TEL: 65-6544-8000 FAX: 65-6544-7390 Sony Corporation of Hong Kong Ltd. - Page 40 Optical Devices Storage Dept. Data Storage Section 5F, 145 Changchun Road, Taipei 104, Taiwan TEL: 886-2-2522-7920 FAX: 886-2-2522-2153 Sony Korea Corporation EDMK CP Sales & Marketing Team 34F, ASEM Tower, World Trade Center, 159-1, Samsung-Dong, Kangnam-Ku, Seoul, 135-798, Korea TEL: 82-2-6001-4249 FAX: 82-2-6001-4115 URL: http://www.sony.co.kr/cp/...
Need help?
Do you have a question about the StorStation AITi1040 and is the answer not in the manual?
Questions and answers