Table of Contents
Advertisement
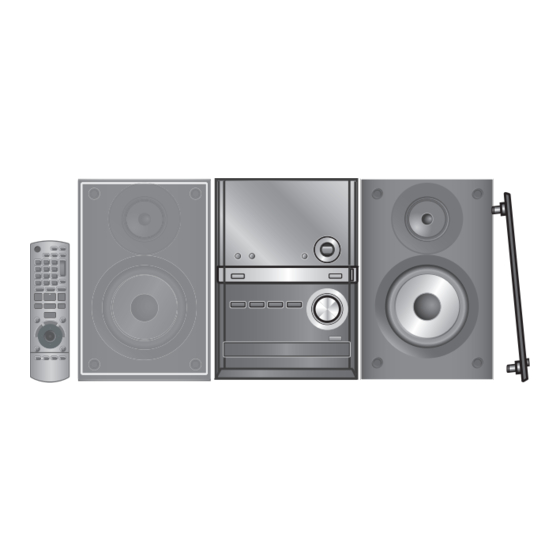
SUPPLIED ACCESSORIES
Please check and identify the supplied
accessories.
Use numbers indicated in parentheses when asking
for replacement parts. (Product numbers correct as of
February 2009. These may be subject to change.)
1 x Remote control
(N2QAYB000389)
2 x Remote control batteries
1 x AC mains lead
(K2CZ3YY00005)
1 x FM indoor antenna
or
(RSA0007-M)
1 x DAB "T" antenna
(N1EADY000001)
1 x Antenna plug adaptor
(K1YZ02000013)
Note
"EB" on the packaging indicates the United Kingdom.
EB
(RSAX0002)
Operating Instructions
CD Stereo System
Model No.
Dear customer
Thank you for purchasing this product.
Before connecting, operating or adjusting this product,
please read the instructions completely.
Please keep this manual for future reference.
These operating instructions are applicable to the
following system.
System
Main unit
Speakers
Operations in these instructions are described using
remote control, but you can do the operations with the
main unit if the controls are the same.
Your unit may not look exactly as illustrated.
Table of contents
Caution for AC mains lead .......................................... 2
Placement of speakers ................................................ 3
Simple setup ................................................................ 4
Preparing the remote control ..................................... 5
DEMO function ............................................................. 5
Overview of controls ................................................... 6
Discs ............................................................................. 7
Using the FM radio ...................................................... 9
DAB ............................................................................... 9
Using the timer .......................................................... 13
Using sound effects .................................................. 14
Using other equipment ............................................. 15
Troubleshooting guide .............................................. 17
Specifications ............................................................ 19
Maintenance ............................................................... 19
Safety precautions ..................................... Back cover
SC-PM38DB
SC-PM38DB
SA-PM38DB
SB-PM48
EU
RQTX0190-1B
Advertisement
Table of Contents

Related Manuals for Panasonic SC-PM38DB


Summary of Contents for Panasonic SC-PM38DB
-
Page 1: Table Of Contents
Operating Instructions CD Stereo System SC-PM38DB Model No. SUPPLIED ACCESSORIES Dear customer Thank you for purchasing this product. Before connecting, operating or adjusting this product, please read the instructions completely. Please check and identify the supplied Please keep this manual for future reference. -
Page 2: Caution For Ac Mains Lead
• Most major credit and debit cards accepted. COLOURED GREEN OR GREEN/YELLOW. • All enquiries transactions and distribution facilities are provided directly by Panasonic UK Ltd. THIS PLUG IS NOT WATERPROOF–KEEP DRY. • It couldn’t be simpler! Before use •... -
Page 3: Placement Of Speakers
Information for Users on Collection and Disposal of Old Equipment and used Batteries These symbols on the products, packaging, and/or accompanying documents mean that used electrical and electronic products and batteries should not be mixed with general household Back of product waste. -
Page 4: Simple Setup
Simple setup Making the connections Connect the AC mains lead only after all the other connections have been made. Connect the speaker cables. Connect the FM indoor antenna. Adhesive tape FM indoor antenna Insert fully Tape the antenna to a wall or column, in a position with the least amount of interference. -
Page 5: Preparing The Remote Control
Simple setup (continued) Optional antenna connections FM outdoor antenna DAB outdoor antenna FM outdoor antenna (not included) DAB outdoor antenna (not included) 75 Ω coaxial cable (not included) Be sure to fully Use the antenna tighten the screw. plug adaptor (included). -
Page 6: Overview Of Controls
Overview of controls Main unit Refer to the numbers in parentheses for page reference. Top of unit Headphone jack ( Reduce the volume level and connect the headphones. Avoid listening for prolonged periods of iPod dock time to prevent hearing damage. Excessive sound pressure from earphones and headphones can cause hearing loss. -
Page 7: Discs
Overview of controls (continued) Remote control Remote control Buttons such as function the same as the controls on the main unit. Play timer (13) Power on/off (7, 13) Clock/Timer (13) PLAY Auto off Dimmer Numeric (7, 8, 9, 11, 16) Sleep timer (13) To select a 2-digit number Volume control... -
Page 8: Advanced Play
Discs (continued) Action Display function cancel program Press [PROGRAM] in the stop This function allows you to display the information of the mode mode. current track. replay the program Press [PROGRAM] then [CD q/h]. Press [DISPLAY] repeatedly during play or pause mode. -
Page 9: Using The Fm Radio
Using the FM radio TUNE Manual tuning Memory preset MODE DAB/FM DAB/FM 1 Press [DAB/FM] to select “FM”. Up to 30 stations can be set in the FM band. 2 Press [TUNE MODE] to select “MANUAL”. 3 Press [u/t] or [y/i] to select the Preparation frequency of the required station. -
Page 10: Dab Operation
(continued) DAB reception method on this unit DAB operation DAB/FM PLAY MODE 1 Press [DAB/FM] to enter DAB mode. Depending on the region there is a difference between The unit comes on. broadcast frequency and stations broadcast along If you are selecting DAB the same frequency. - Page 11 (continued) Turning automatic clock Presetting MENU adjustment function on Presetting channel To adjust the time information during DAB broadcasting and automatic time adjustment. Up to 20 channels can be set. 1 Press [DAB MENU] to enter menu mode. 1 Press [u/t] or [y/i] to select a station. 2 Within 10 seconds, press [e,r] to select 2 Press [PROGRAM].
- Page 12 (continued) ALL BAND III Frequency Changing the Auto scan MENU frequency range Frequency Frequency Frequency Frequency block (MHz) block (MHz) Only the frequencies currently used in the UK as of 174.928 210.096 February 2009 on BAND III are Auto scanned (“United Kingdom”, factory setting).
-
Page 13: Using The Timer
Using the timer To activate the timer Setting the clock 5 Press [z, PLAY] turn on play timer. No display (off) zPLAY This is a 24-hour clock. 1 Press [CLOCK/TIMER] to select “CLOCK”. Each time you press the button: 6 Press [^] to turn off the unit. CLOCK zPLAY Action... -
Page 14: Using Sound Effects
Using sound effects Selecting sound effects Enjoying surround sound You can change the sound effect by selecting Preset EQ Enables you to add natural width and depth to the stereo or adjusting the bass or treble effect. sound. To activate Preset EQ Press [SURROUND] to display “... -
Page 15: Using Other Equipment
Using other equipment iPod Charging the iPod 1 Open the lid of the Built-in Dock for iPod. • iPod will start recharging regardless of whether this 2 Insert the suitable dock adapter for your iPod. unit is in On or Standby condition. 3 Insert your iPod into the dock. -
Page 16: Changing The Remote Control Code
Using other equipment (continued) USB mass storage class device Compatible devices Devices which are defined as USB mass storage The USB connectivity enables you to connect and play class: MP3 tracks from USB mass storage class. Typically, • USB devices that support bulk only transfer. USB memory devices. -
Page 17: Troubleshooting Guide
Troubleshooting guide Before requesting service, make the following checks. If you are in doubt about some of the check points, or if the remedies indicated in the chart do not solve the problem, consult your dealer for instructions. Common problems No sound. - Page 18 Troubleshooting guide (continued) iPod iPod does not turn on. • Verify that the iPod battery is not depleted before connecting it to the unit. • Before inserting your iPod into the dock, turn off both the unit and iPod. Power on the unit and select the appropriate source.
-
Page 19: Specifications
Specifications AMPLIFIER SECTION CD SECTION GENERAL RMS Output Power Stereo Mode Disc played [8 cm or 12 cm] Power supply Front Ch (both channel driven) (1) CD-Audio (CD-DA) AC 220 to 240 V, 50 Hz 20 W per channel (4 Ω), (2) CD-R/RW (CD-DA, MP3) Power consumption 73 W... -
Page 20: Safety Precautions
To completely disconnect this apparatus from the AC Mains, disconnect the power supply cord plug from AC receptacle. Panasonic Corporation Web Site: http://panasonic.net Pursuant to at the directive 2004/108/EC, article 9(2) Panasonic Testing Centre Panasonic Marketing Europe GmbH RQTX0190-1B Winsbergring 15, 22525 Hamburg, Germany H0209CL1029...
Need help?
Do you have a question about the SC-PM38DB and is the answer not in the manual?
Questions and answers