Advertisement
Quick Links
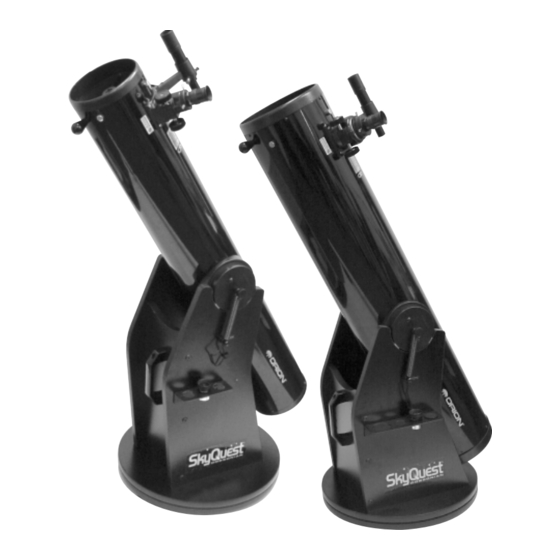
INSTRUCTION MANUAL
Orion
®
SkyQuest XT6 & XT8
#9806 and #9808
Dobsonian Reflecting Telescopes
Customer Support (800) 676-1343
E-mail: support@telescope.com
Corporate Offices (831) 763-7000
P.O. Box 1815, Santa Cruz, CA 95061
Providing Exceptional Consumer Optical Products Since 1975
IN 165 Rev. B 09/03
Advertisement

Related Manuals for ORION TELESCOPES & BINOCULARS SkyQuest XT6 9806


Summary of Contents for ORION TELESCOPES & BINOCULARS SkyQuest XT6 9806
- Page 1 INSTRUCTION MANUAL Orion ® SkyQuest XT6 & XT8 #9806 and #9808 Dobsonian Reflecting Telescopes Customer Support (800) 676-1343 E-mail: support@telescope.com Corporate Offices (831) 763-7000 P.O. Box 1815, Santa Cruz, CA 95061 Providing Exceptional Consumer Optical Products Since 1975 IN 165 Rev. B 09/03...
- Page 2 Secondary mirror with 4-vane spider (not shown) Finder scope Finder scope bracket Navigation knob Eyepiece Focus knob Optical tube Right side panel Altitude side bearing CorrecTension Friction Front brace Optimization System Handle Pull loop Eyepiece rack Top baseplate Left side panel Ground baseplate Figure 1.
-
Page 3: Table Of Contents
Finder scope bracket with O-ring elcome to an exciting new world of adventure! Your Collimation cap SkyQuest Dobsonian is a high-quality optical instrument designed to bring you dazzling views of the outer reaches Eyepiece rack of our universe. Easy enough for kids to use, and portable Eyepiece rack mounting wood screws (length 3/4") enough for anyone to carry, the SkyQuest will provide fun Spring coils... -
Page 4: Assembly
2. Assembly index mark is facing inwards. Do not completely tighten the screws yet. Now that you have unpacked the boxes and familiarized your- 3. Attach the two sides (C) with the front brace attached to self with all the parts in front of you, it’s time to begin the top baseplate (D) with the remaining six base assem- assembly. - Page 5 Figure 3. Press firmly so the adhesive holds the bumper To place the finder scope in the finder scope bracket, first securely in place. unthread the two black nylon screws until the screw ends are flush with the inside diameter of the bracket. Place the O-ring that comes on the base of the bracket over the body of the finder scope until it seats into the groove on the middle of the finder scope.
- Page 6 place. The tips of the tensioner and nylon screws should seat the hole. Use a Phillips screwdriver to tighten the screw. into the wide groove on the rear of the finder scope’s body. Repeat this procedure on the opposite side panel. Slide the base of the finder scope bracket into the dovetail 2.
-
Page 7: Using Your Telescope
Focusing the Telescope The CorrecTension system is now installed and engaged. If you wish to remove the telescope from the base, you will first Insert the low-power 25mm eyepiece into the focuser and need to disconnect the springs from the “posts” on the secure with the thumbscrew(s). - Page 8 in the general direction of an object at least 1/4-mile away - er scope is an invaluable tool for locating objects in the night the top of a telephone pole, a chimney, etc. Position that sky; its usage for this purpose will be discussed later, in detail. object in the center of the telescope’s eyepiece.
- Page 9 1200mm Figure 11. Picking up and = 48x carrying the SkyQuest as a 25mm single unit (with tube held captive on the base) requires The magnification provided by the 10mm eyepiece is some caution. (a) First, 1200mm position the tube vertically. = 120x 10mm Then, grasp the handle on the...
-
Page 10: Collimation (Aligning The Mirrors)
If you wish to carry the optical tube and base separately, sim- ondary mirror (and your eye) centered in the reflection of the pri- ply disengage the CorrecTension springs by unhooking them mary mirror, as in Figure 12a. If anything is off-center, as in from the posts on the base, using the pull loops. - Page 11 Aligning the Secondary Mirror With the collimation cap in place, look through the hole in the cap at the secondary (diagonal) mirror. Ignore the reflections for the time being. The secondary mirror itself should be cen- tered in the focuser drawtube, in the direction parallel to the length of the telescope.
-
Page 12: Astronomical Observing
When you have the dot centered as much as possible in the ring, your primary mirror is collimated. The view through the collimation cap should resemble Figure 12e. Retighten the locking thumbscrews. A simple star test will tell you whether the optics are accurately collimated. - Page 13 during the day has radiated off into space. Typically, seeing view in your telescope. So give yourself at least a little while to conditions will be better at sites that have an altitude over get used to the dark before you begin observing. about 3000 feet.
- Page 14 Once you’ve centered the object in the eyepiece, you can Important Note: Do not look at the Sun with any optical switch to higher magnification (shorter focal length eyepiece), instrument without a professionally made solar filter, or if you wish. This is especially recommended for small and permanent eye damage could result.
- Page 15 E. Deep-Sky Objects (Figure 19). Look in the telescope’s eyepiece, and the object should be somewhere within the field of view. If it’s not, sweep Under dark skies, you can observe a wealth of fascinating the telescope carefully around the immediate vicinity until the deep-sky objects;...
-
Page 16: Care And Maintenance
6. Care and Maintenance Handle the mirror and its holder carefully. You do not need to remove the secondary mirror from its holder for cleaning. To If you give your telescope reasonable care, it will last a lifetime. clean the secondary mirror, follow the procedure described Store it in a clean, dry, dust free place, safe from rapid below for cleaning the primary mirror. -
Page 17: Specifications
7. Specifications SkyQuest XT 8" Primary mirror focal Length: 1200mm SkyQuest XT 6" Primary mirror diameter: 203mm Primary mirror focal length: 1200mm Focal Ratio: f/5.9 Primary mirror diameter: 150mm Focuser: Rack and pinion. Accepts 2" eyepieces and 1.25" Focal Ratio: f/8.0 eyepieces with adapter. - Page 18 One-Year Limited Warranty This Orion SkyQuest XT telescope is warranted against defects in materials or workmanship for a period of one year from the date of purchase. This warranty is for the benefit of the original retail purchaser only. During this warranty period Orion Telescopes & Binoculars will repair or replace, at Orion’s option, any warranted instrument that proves to be defective, provided it is returned postage paid to: Orion Warranty Repair, 89 Hangar Way, Watsonville, CA 95076.
Need help?
Do you have a question about the SkyQuest XT6 9806 and is the answer not in the manual?
Questions and answers